Masterclass Painting Guide: Ultramarines Indomitus Terminator
1. Executive Overview & Studio Philosophy
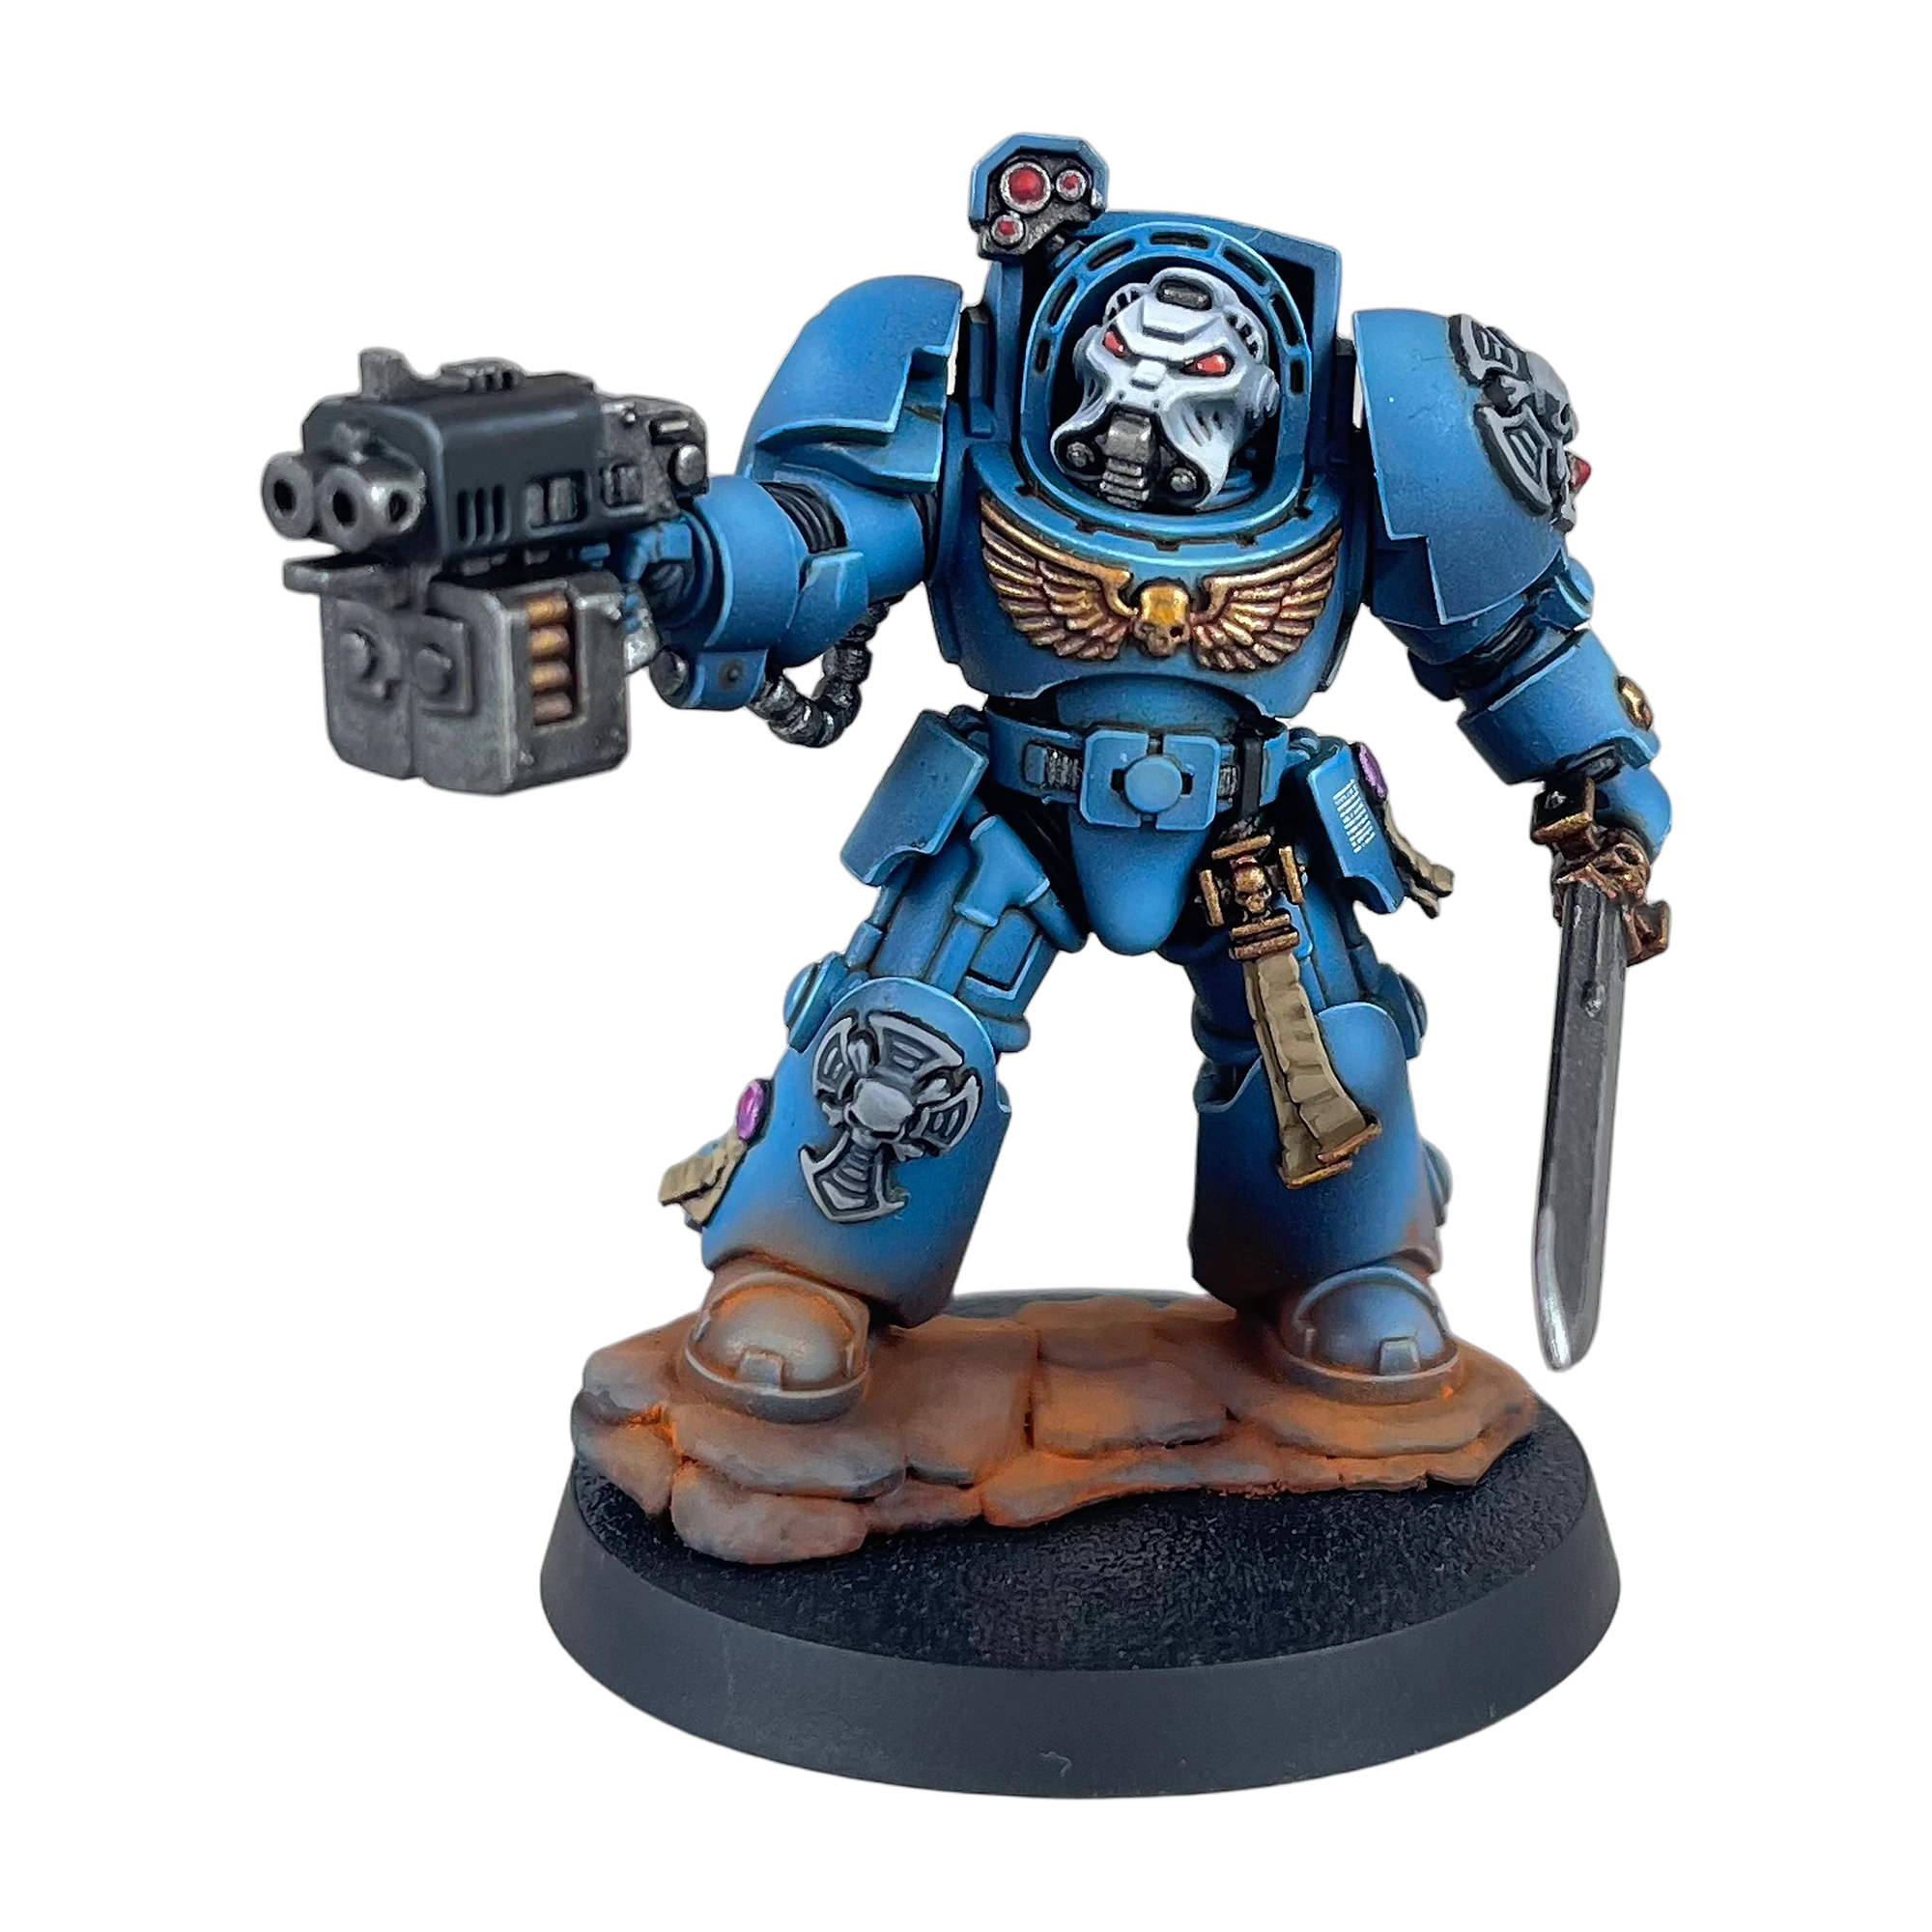
Painting a First Company Veteran in Tactical Dreadnought Armour demands a deliberate balance between atmospheric grit and parade-ground clarity. The iconic cobalt blue of the Ultramarines is easily flattened by heavy-handed washes or dulled by uncalibrated drybrushing.
In this workshop tutorial, Grimrod Studio reveals the complete, uncompromised process used to produce high-contrast, display-level miniatures for gaming collections:
- Volumetric Layering: Building zenithal light directly with thin acrylic glazes rather than coarse drybrushing.
- Capillary Oil Shading (The Gloss Barrier): Harnessing the surface tension of gloss varnish to let low-viscosity oil pin-washes flow into recesses automatically, leaving armor plates immaculate.
- Chalk-Free White Formulation: Building pure white veteran helmets without texture buildup by walking a 5-tier transition through cold, neutral greys.
- Sub-Assembly Logic: Preserving brush access to chest aquilas, collar cowls, and optic housings.
2. The Studio Armoury: Materials & Paint Recipe
Before picking up a brush, ensure your wet palette is hydrated and your workstation is equipped with the following calibrated inventory.
1. Acrylic Colors (Vallejo Game / Model Color)
- Surface Primer Black (70.602) — Ultra-matte polyurethane tooth.
- Heavy Blue (72.143) — Saturated deep navy; the foundational shadow base.
- Electric Blue (72.023) — High-chroma cyan-blue midtone.
- Verdigris (72.084) — Pale icy cyan-green; the ultimate sharp reflection point.
- Dark Grey (70.994) — Neutral deep graphite for casings and helmet foundations.
- Cold Grey (72.050) — Intermediate cool grey for volume transitions.
- Stonewall Grey (72.049) — Light architectural grey for tertiary edge highlights.
- Wolf Grey (72.047) — Subtle cool off-white; bridges grey to pure white.
- Dead White (72.001) — Pure titanium white for specular micro-dots and script edges.
- Earth (72.062) — Warm khaki-brown for parchment undertones.
- Khaki (72.061) — Pale leather tone for liturgical scrolls.
- Purple (72.015) — Deep royal violet for purity seal wax bases.
- Warlord Purple (72.014) — Vibrant magenta midtone for wax volume.
2. Acrylic Colors & Washes (Citadel / Games Workshop)
- Iron Warriors — Heavy, rich gunmetal; superior opacity for mechanical joints.
- Leadbelcher — True industrial medium steel.
- Runefang Steel — High-reflective silver for apex micro-highlights.
- Balthasar Gold — Rich, copper-undertoned base gold.
- Retributor Armour — Warm, burnished ceremonial Imperial gold.
- Nuln Oil — Acrylic black shadow wash for machinery and gun barrels.
- Agrax Earthshade — Sepia-toned organic wash for gold filigree.
- Fulgrim Pink — Pastel pink for the sharpest purity seal wax catchlights.
- Mephiston Red — Dense scarlet for optical sensor basecoats.
- Evil Sunz Scarlet — High-energy bright orange-red for lens glow.
- Jokaero Orange — Chromatic amber highlight for optic centers.
3. Specialty Enamels, Oils & Chemistry
- Winsor & Newton Artist’s Oil Colour (Burnt Umber / Raw Umber) — Pure pigment for capillary pin-washing.
- Odourless Mineral Spirit / White Spirit — Solvent for oil dilution and clean-up.
- Vallejo Decal Fix (73.213) — Pre-transfer adhesive bed.
- Vallejo Decal Softener / Medium (73.212) — Micro-conforming fluid to dissolve carrier film over curves.
- Vallejo Gloss Varnish (70.510) — Frictionless surface sealant for oil washes and decal beds.
- Vallejo Satin Varnish (70.522) — Protective uniform finish with genuine artisanal luster.
4. Brushes & Precision Hardware
- Round Sable Brushes (Sizes #1, #0, #00) — High snap and resilient fine points (Kolinsky sable recommended).
- Synthetic Flat Brush (Size #2) — For broad varnish coats and base blocking.
- Pointed Cotton Swabs / Micro-Applicators — For non-destructive mineral spirit capillary clean-up.
- Wet Palette — Essential for maintaining 1:1 and 1:2 glaze dilutions without premature drying.
3. Phase 1: Tactical Preparation, De-Greasing & Sub-Assembly
A masterclass paint job cannot compensate for rushed preparation. Every seam and flash line will act as a dam for washes and an imperfection for edge highlights.
[✓] Flash & Mould Line Scraping: Clean power cables, leg seams, and storm bolter barrels with a hobby blade held at 90°.
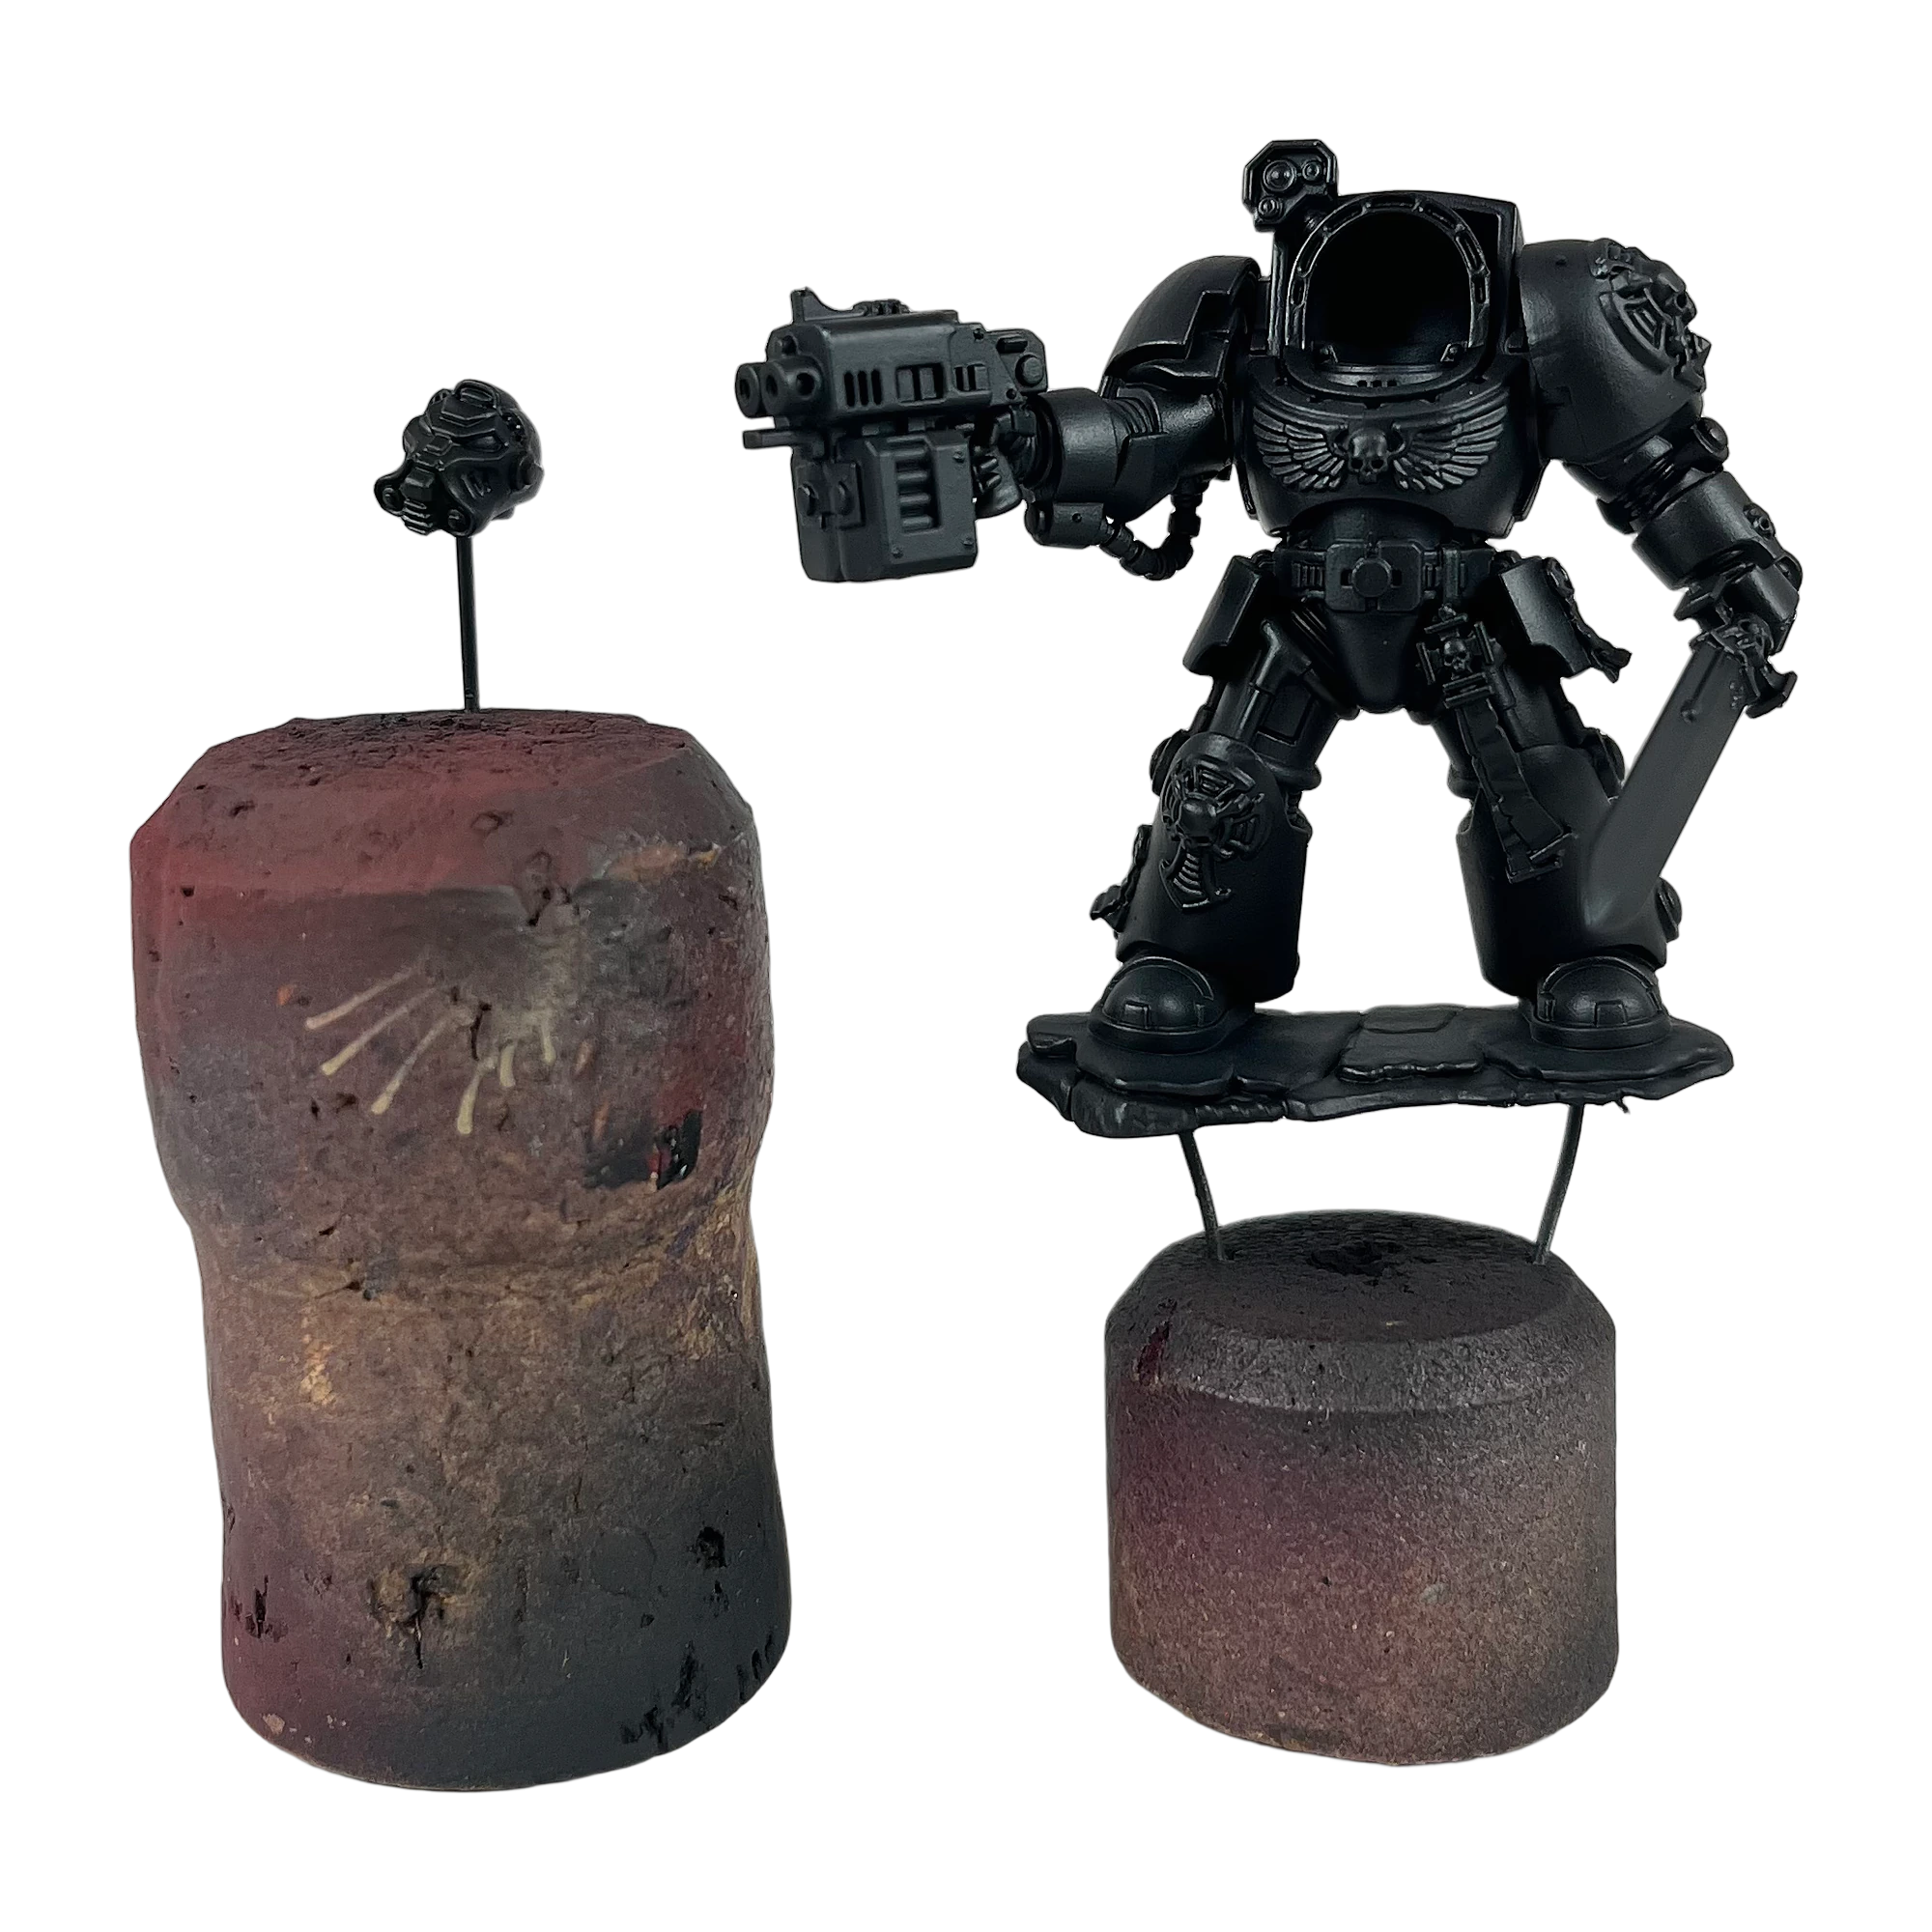
[✓] Sub-Assembly Decision: Keep the Veteran Helmet on a pin/paperclip. The Indomitus cowl severely restricts brush clearance to the chest aquila and collar rim.
[✓] Chemical De-Greasing: Wash resin/plastic components in warm water with mild detergent to remove release agents.
[✓] Temporary Pinning: Mount the main chassis to a wooden cork with brass wire or secure to a temporary painting base.
Step 1: Laying the Monolithic Tooth (Vallejo Surface Primer Black)
Apply a smooth, uniform coat of Vallejo Black Surface Primer across the entire chassis. A deep, ultra-matte black provides maximum shadow depth in mechanical recesses and creates optimal chemical tooth for subsequent acrylic layers.
4. Phase 2: Sculpting the Cobalt — Volumetric Armor Layering
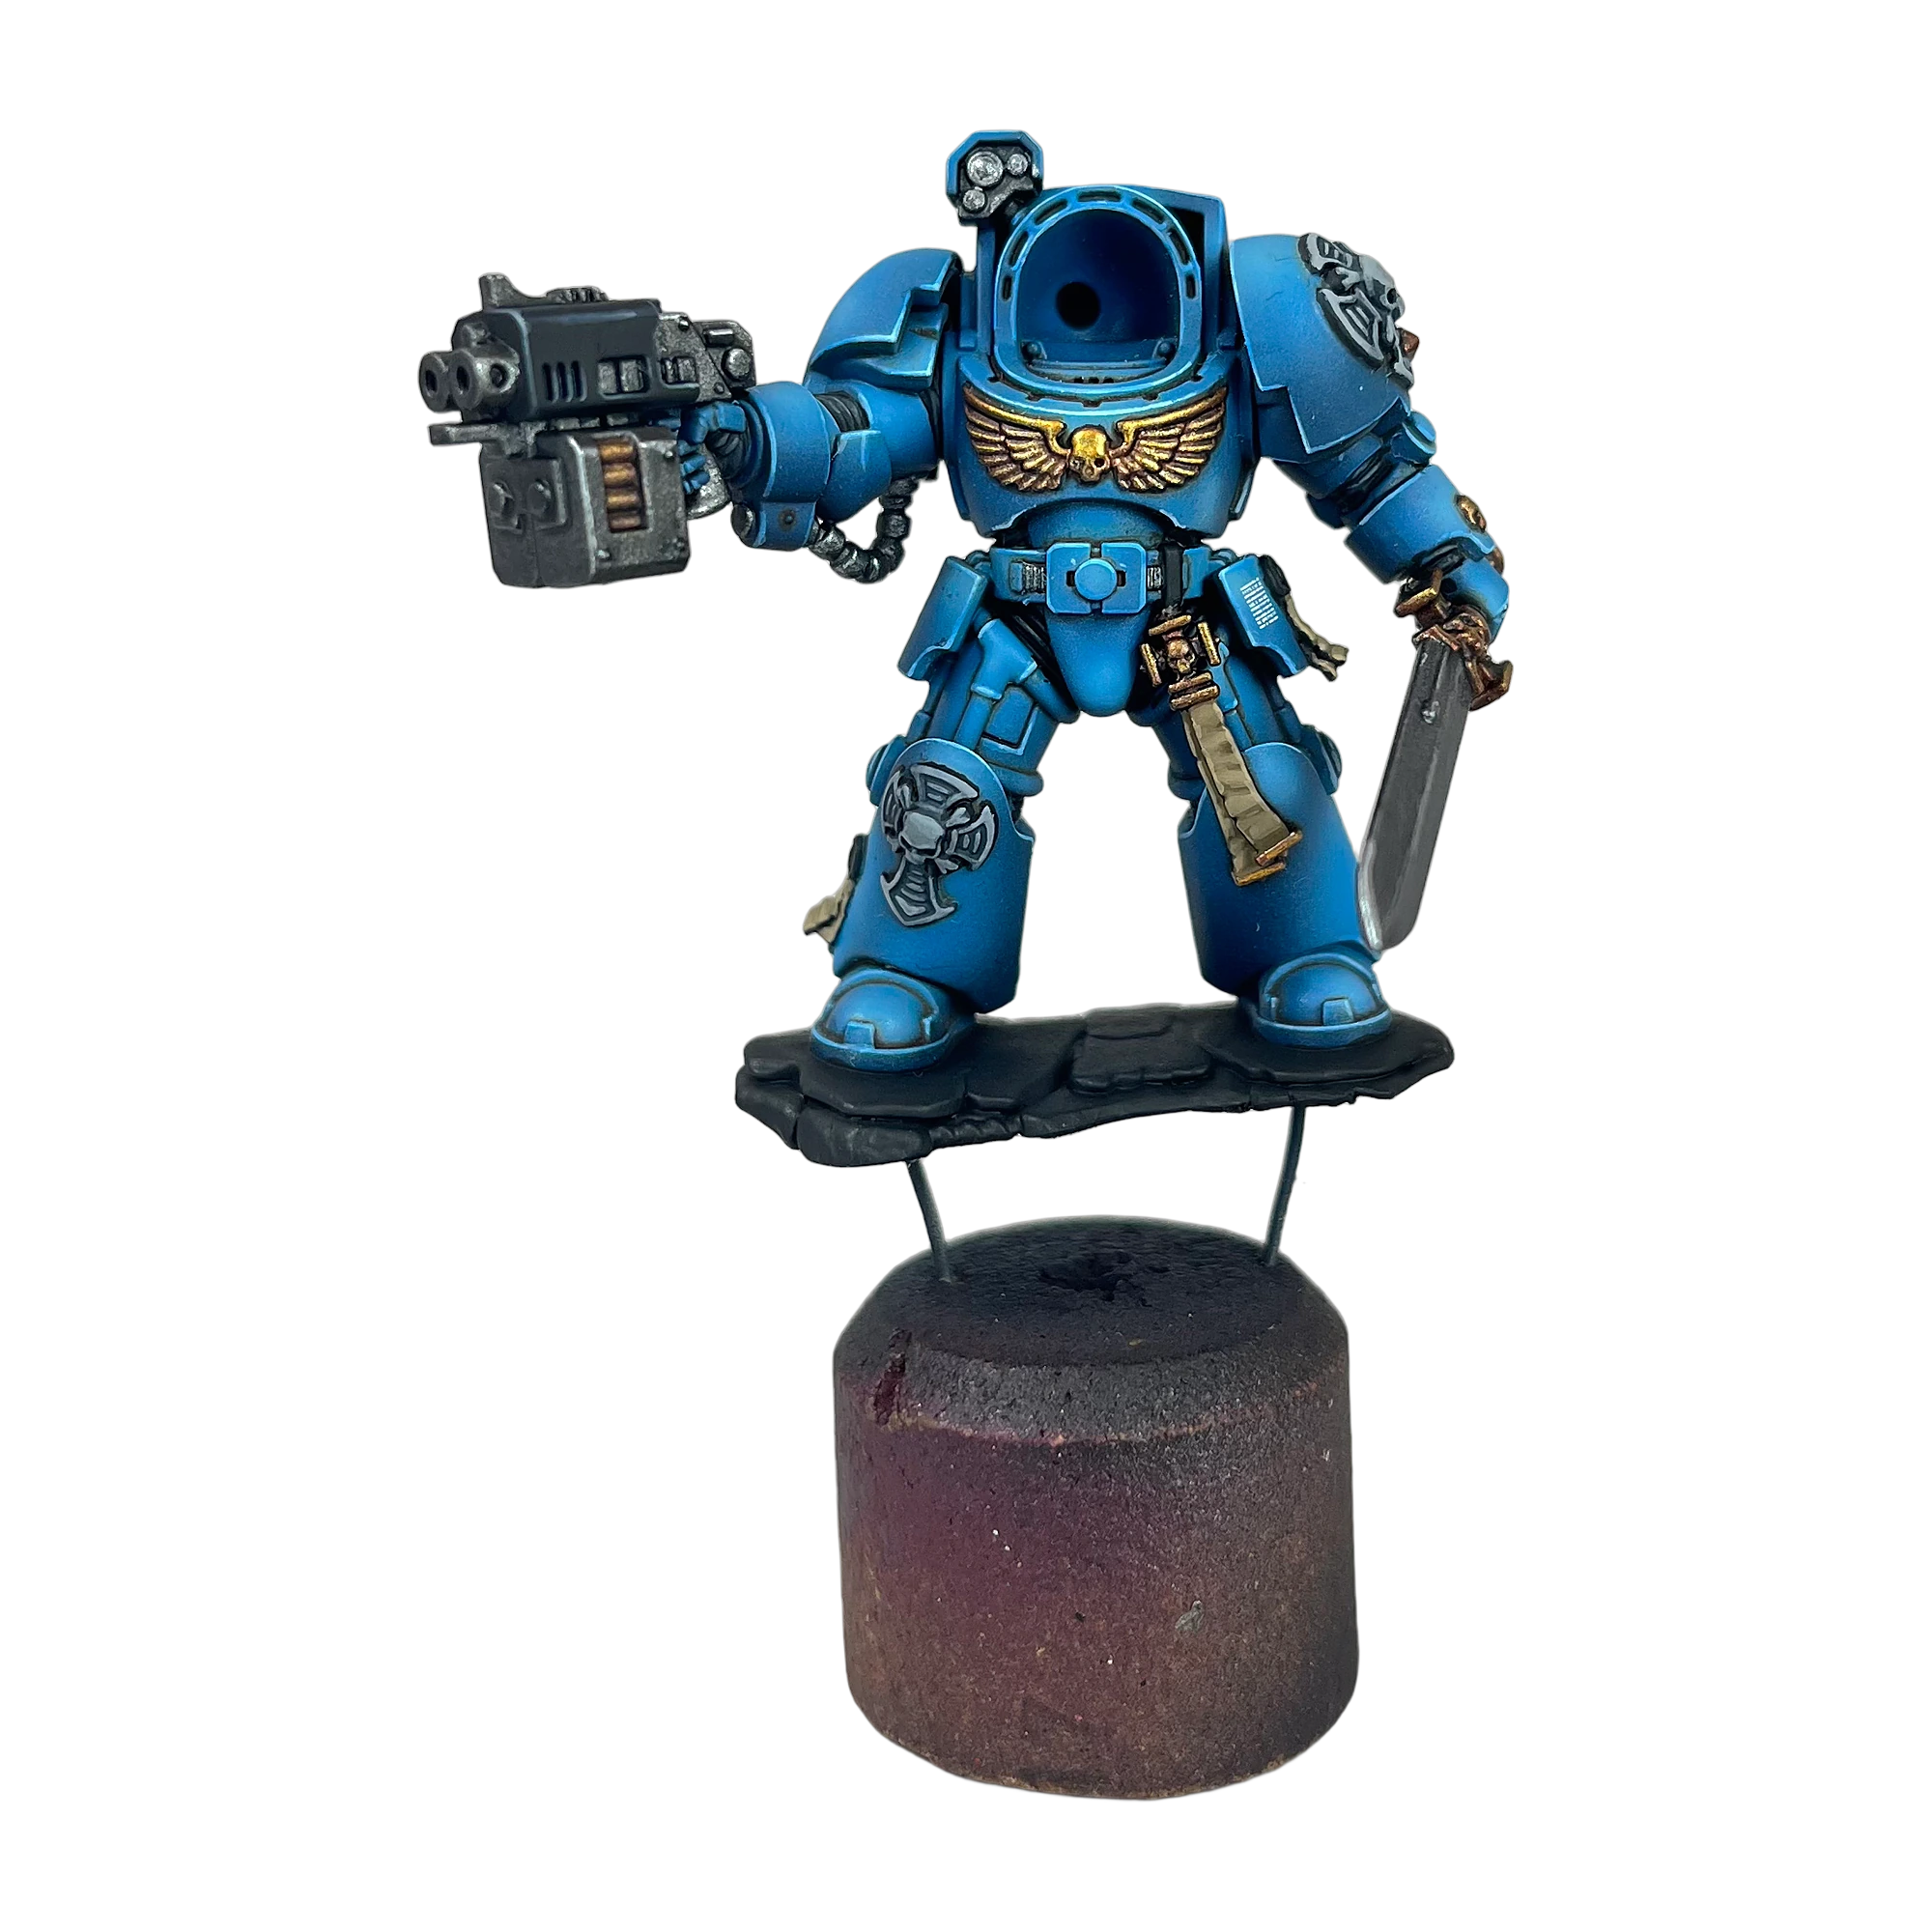
Rather than flooding the model with dark ink, we construct the iconic Ultramarines blue through three graduated layers of thin, translucent glazes, keeping the black primer visible only in the deepest structural joints.
Step 2: The Foundation Coat (Vallejo Heavy Blue)
Cover the entire power armour with two thin coats of Vallejo Heavy Blue, diluted 2:1 with water on the wet palette. Heavy Blue acts as our chromatic anchor. Do not attempt full opacity in a single thick application; two thin coats preserve crisp panel lines and avoid texture.
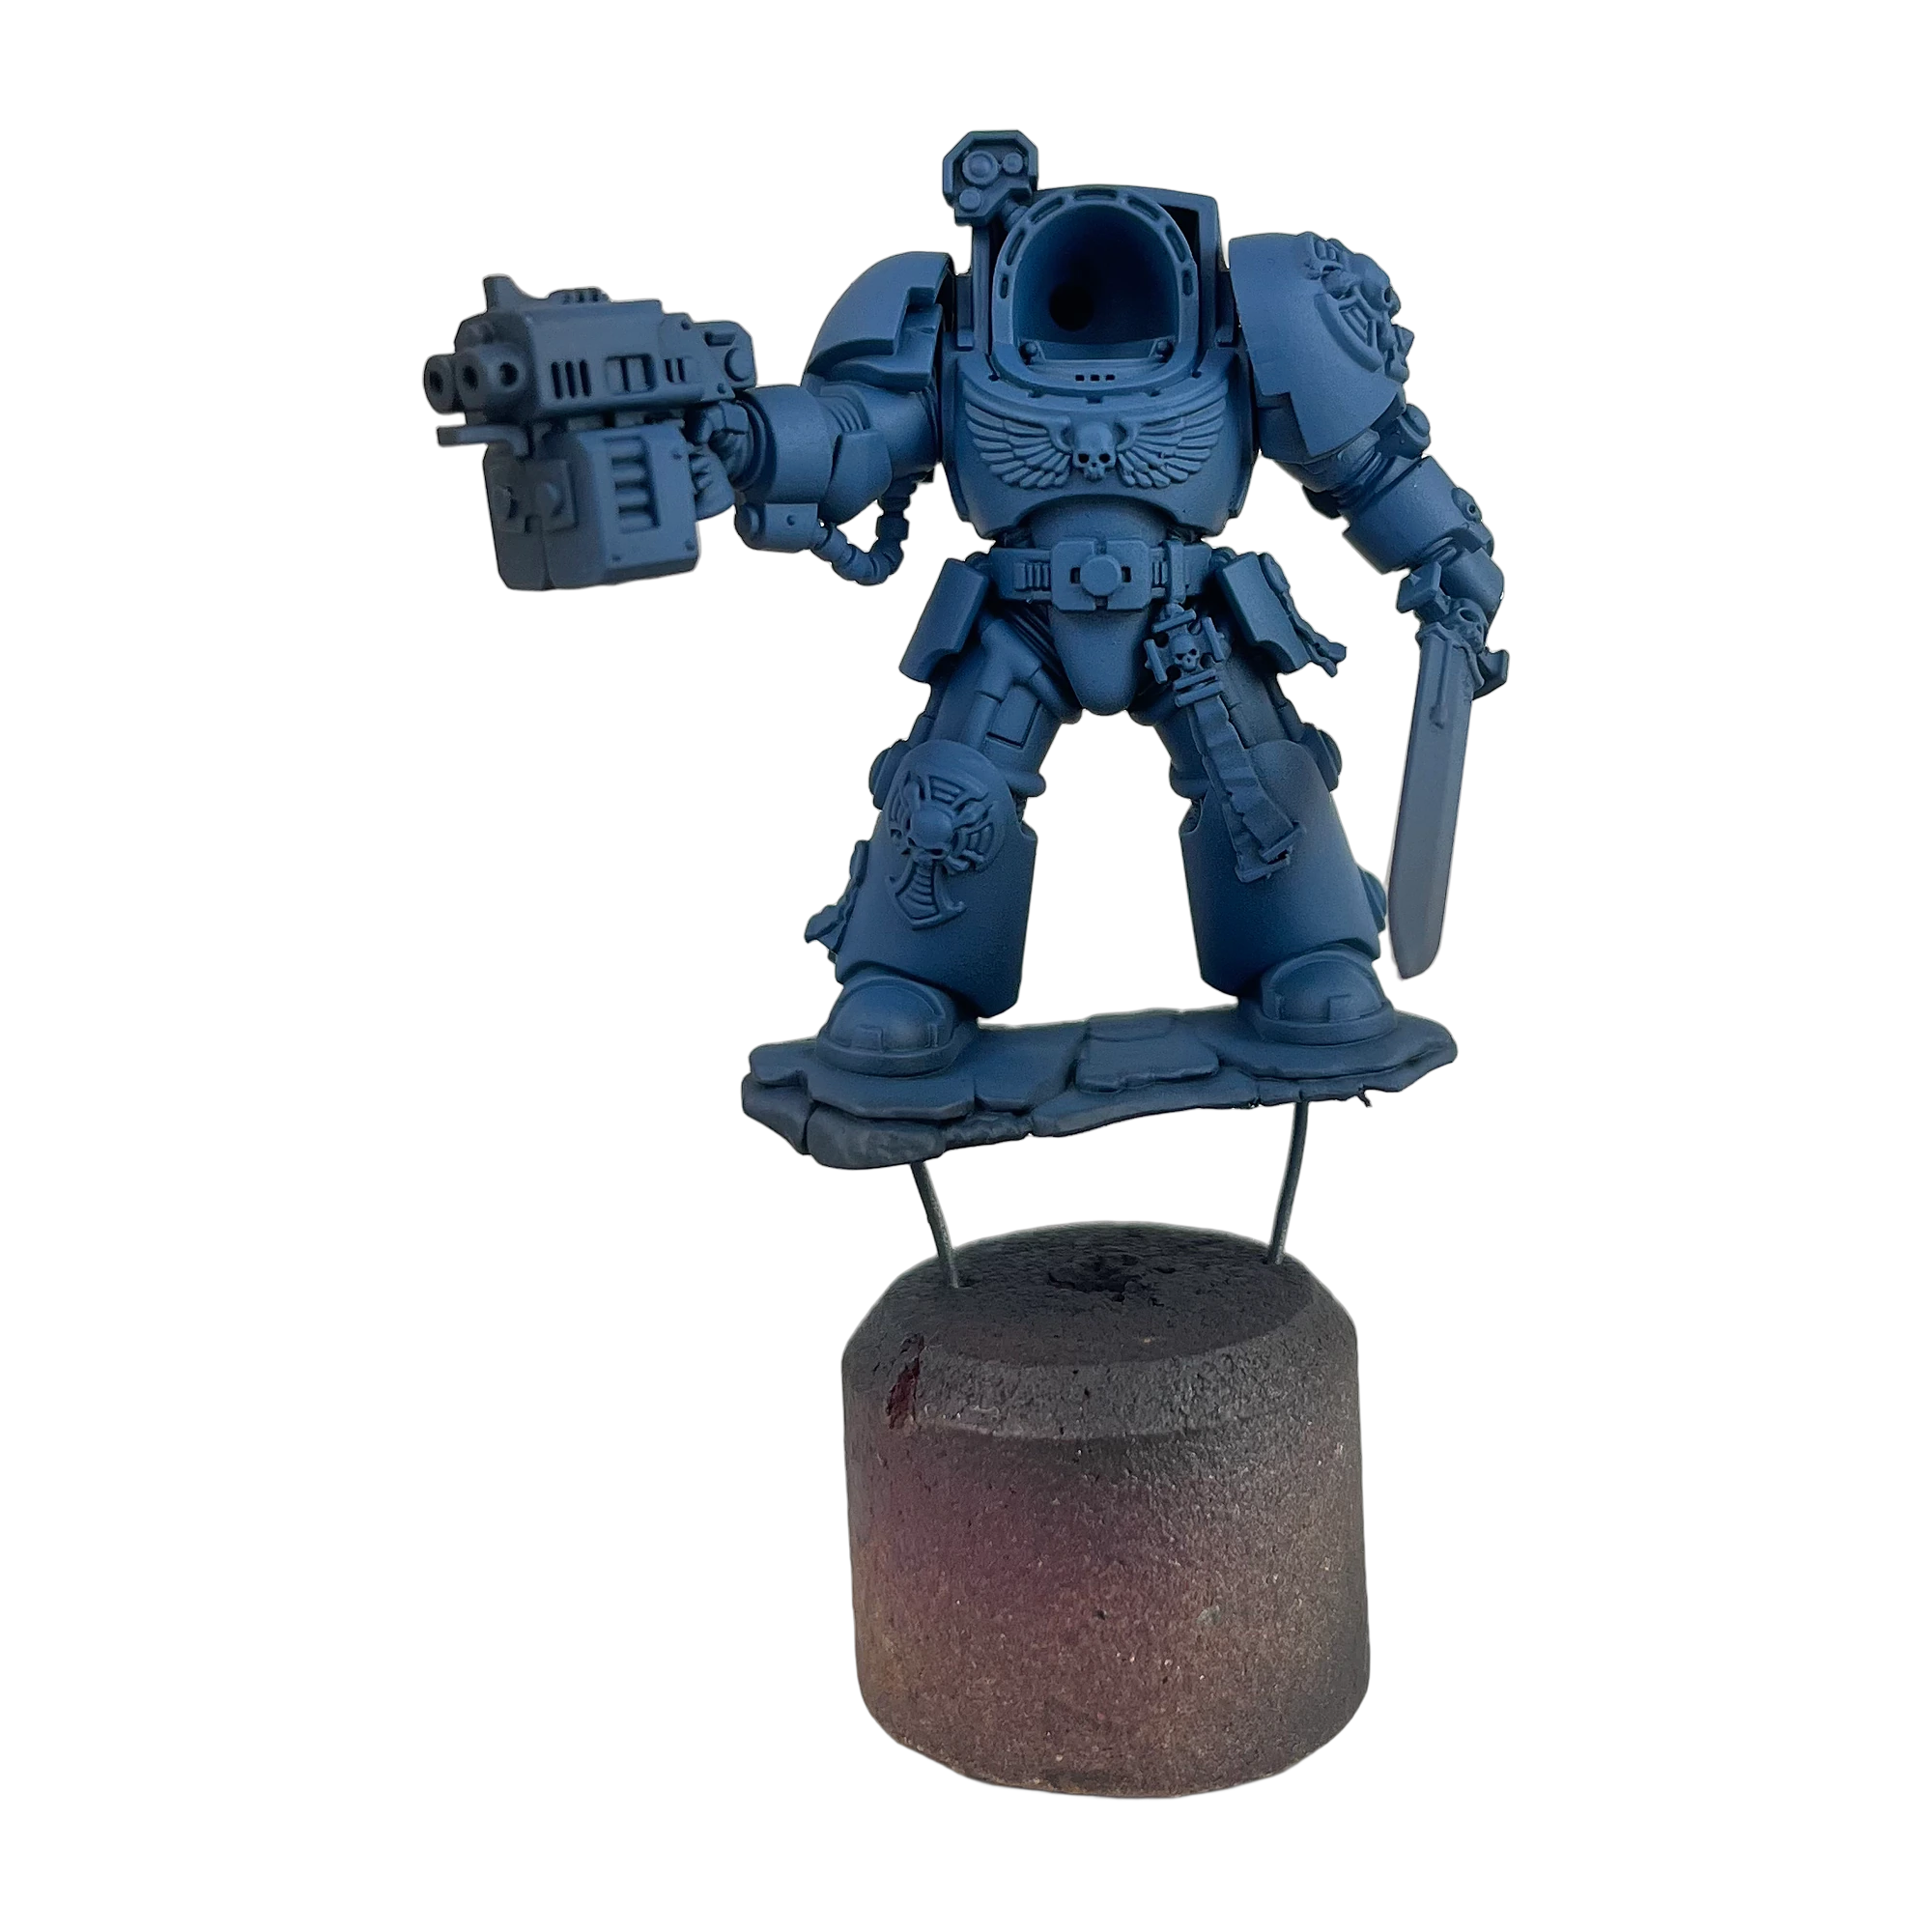
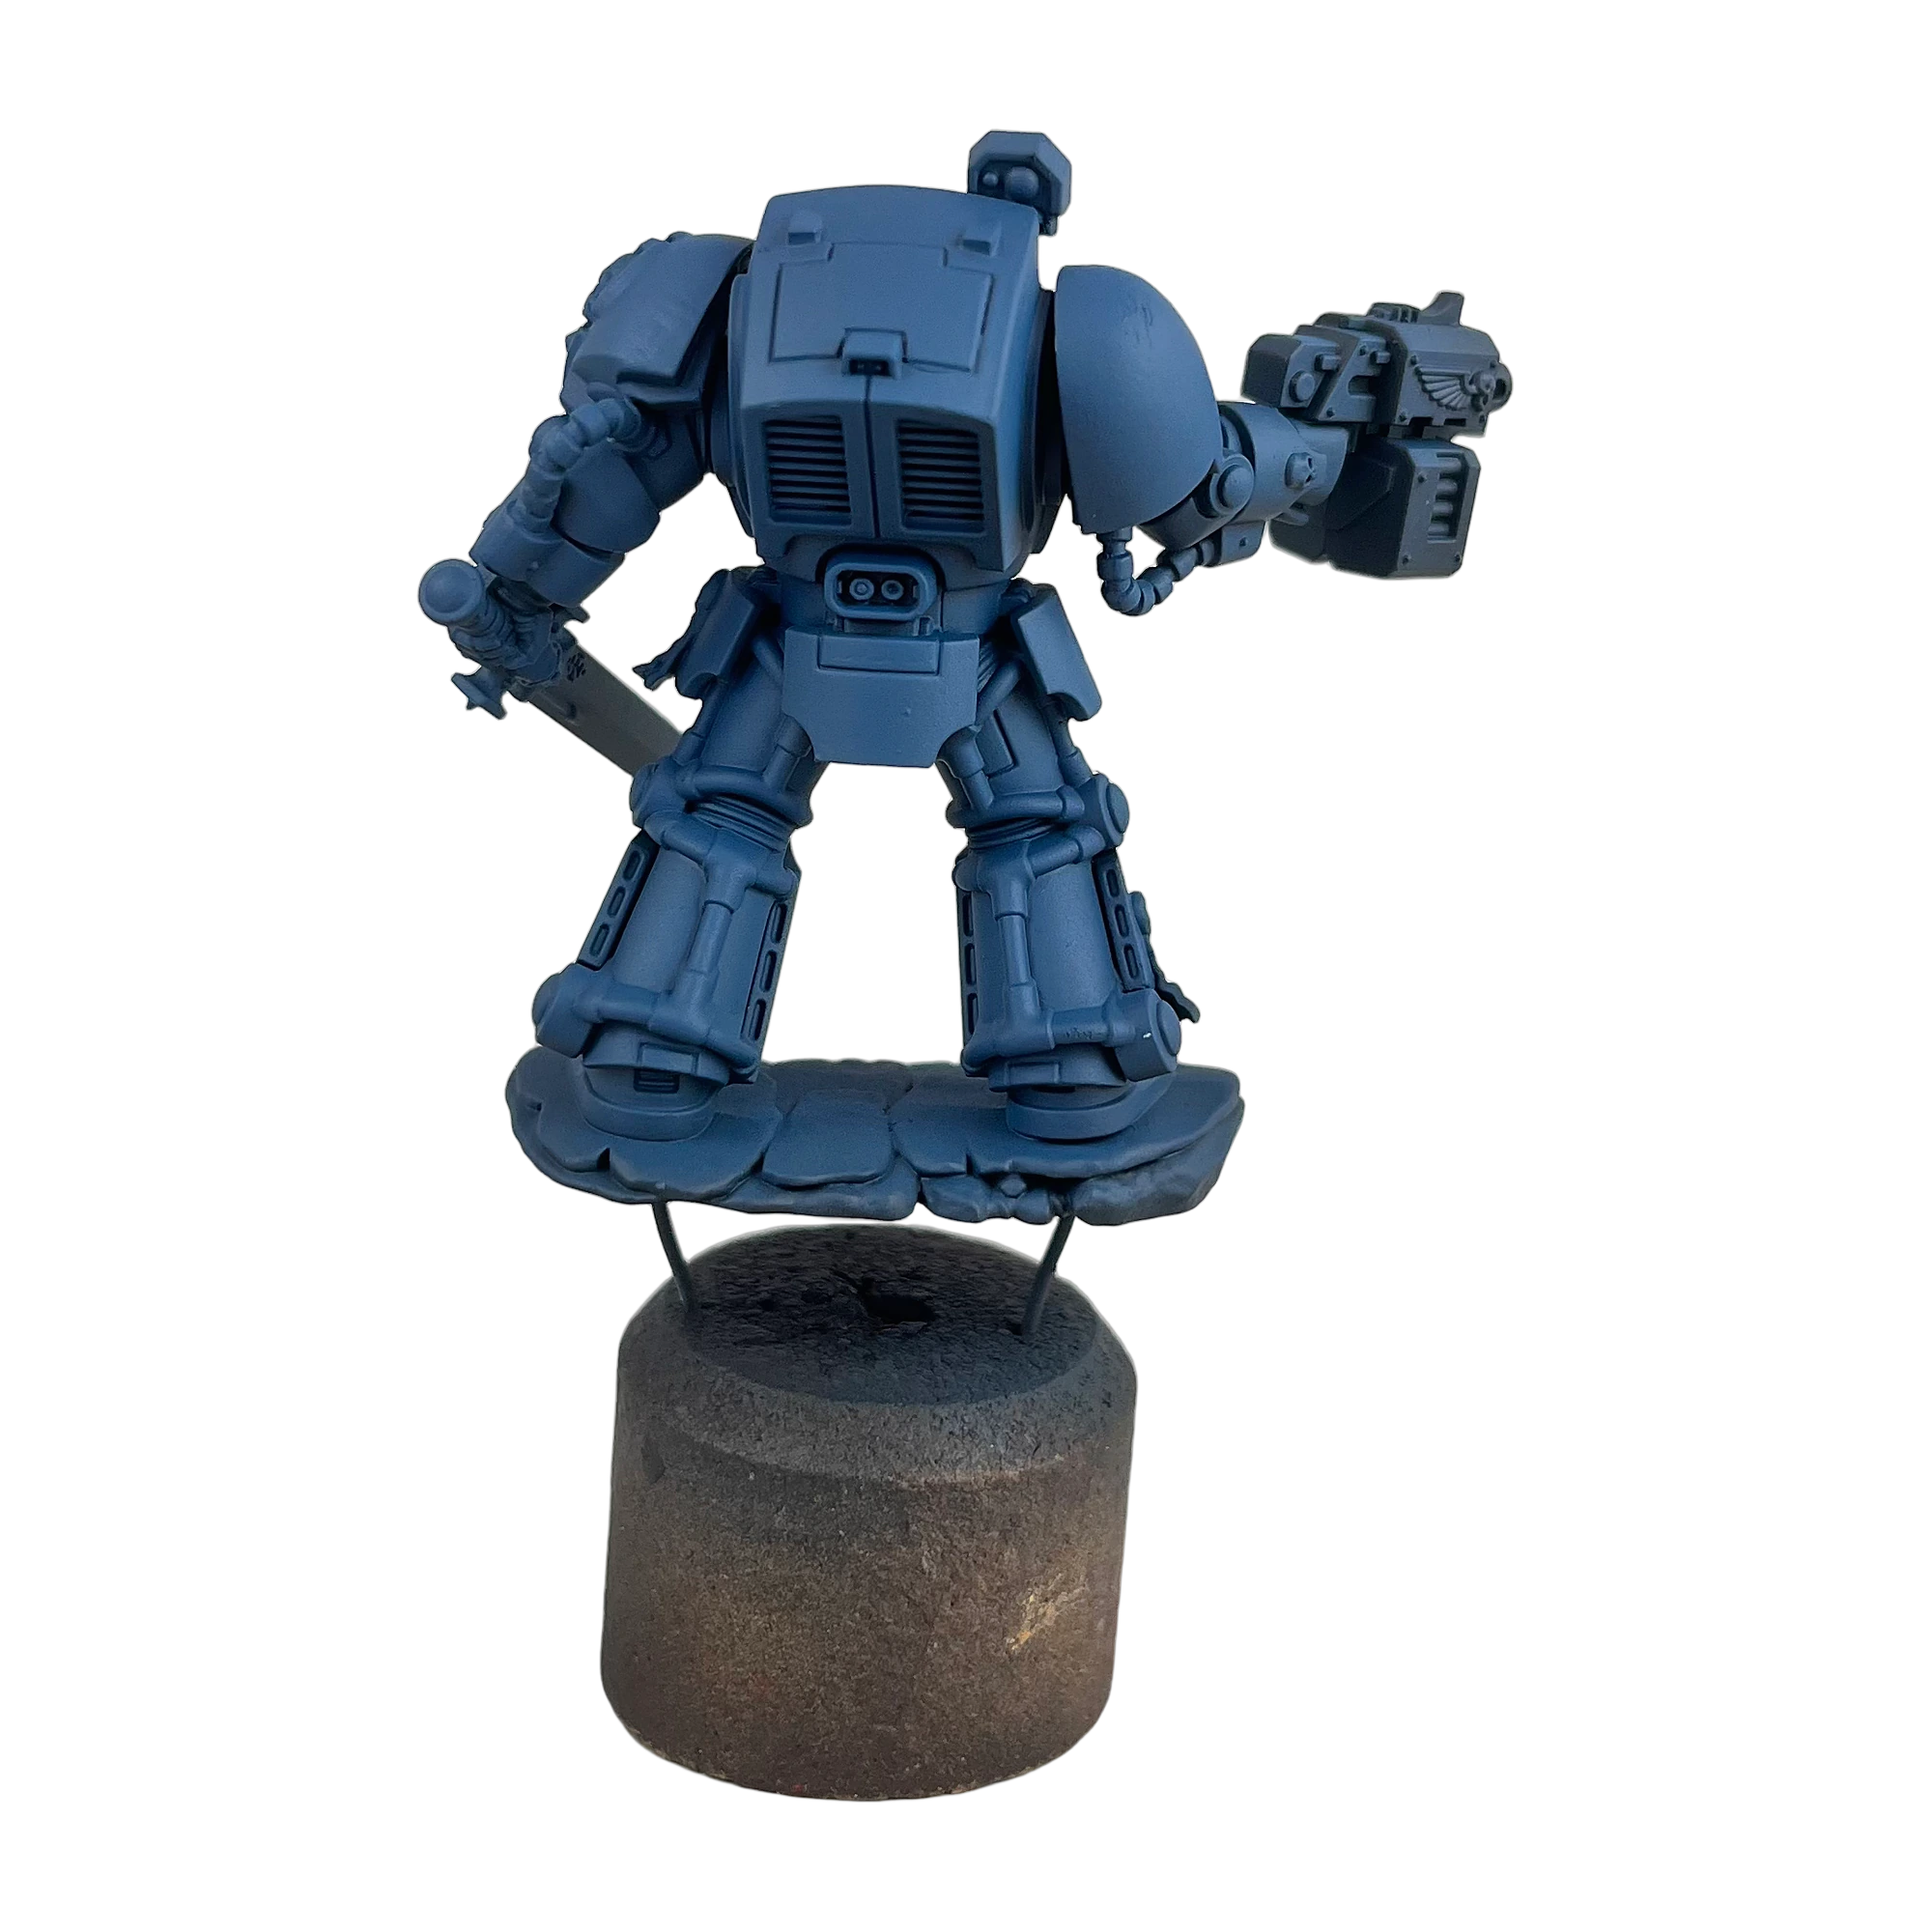
Step 3: Primary Volumetric Glaze (Vallejo Heavy Blue + Electric Blue 1:1)
Mix equal parts Vallejo Heavy Blue and Vallejo Electric Blue, diluted 1:1 with clean water. Load your brush, dab excess moisture onto a paper towel, and pull the brush upward toward the upper surfaces of the pauldrons, greaves, and chest plates.
- Cover roughly 60% to 70% of each armor panel’s upper surface.
- Leave pure Heavy Blue untouched in the lower 30% and along natural shadow recesses.
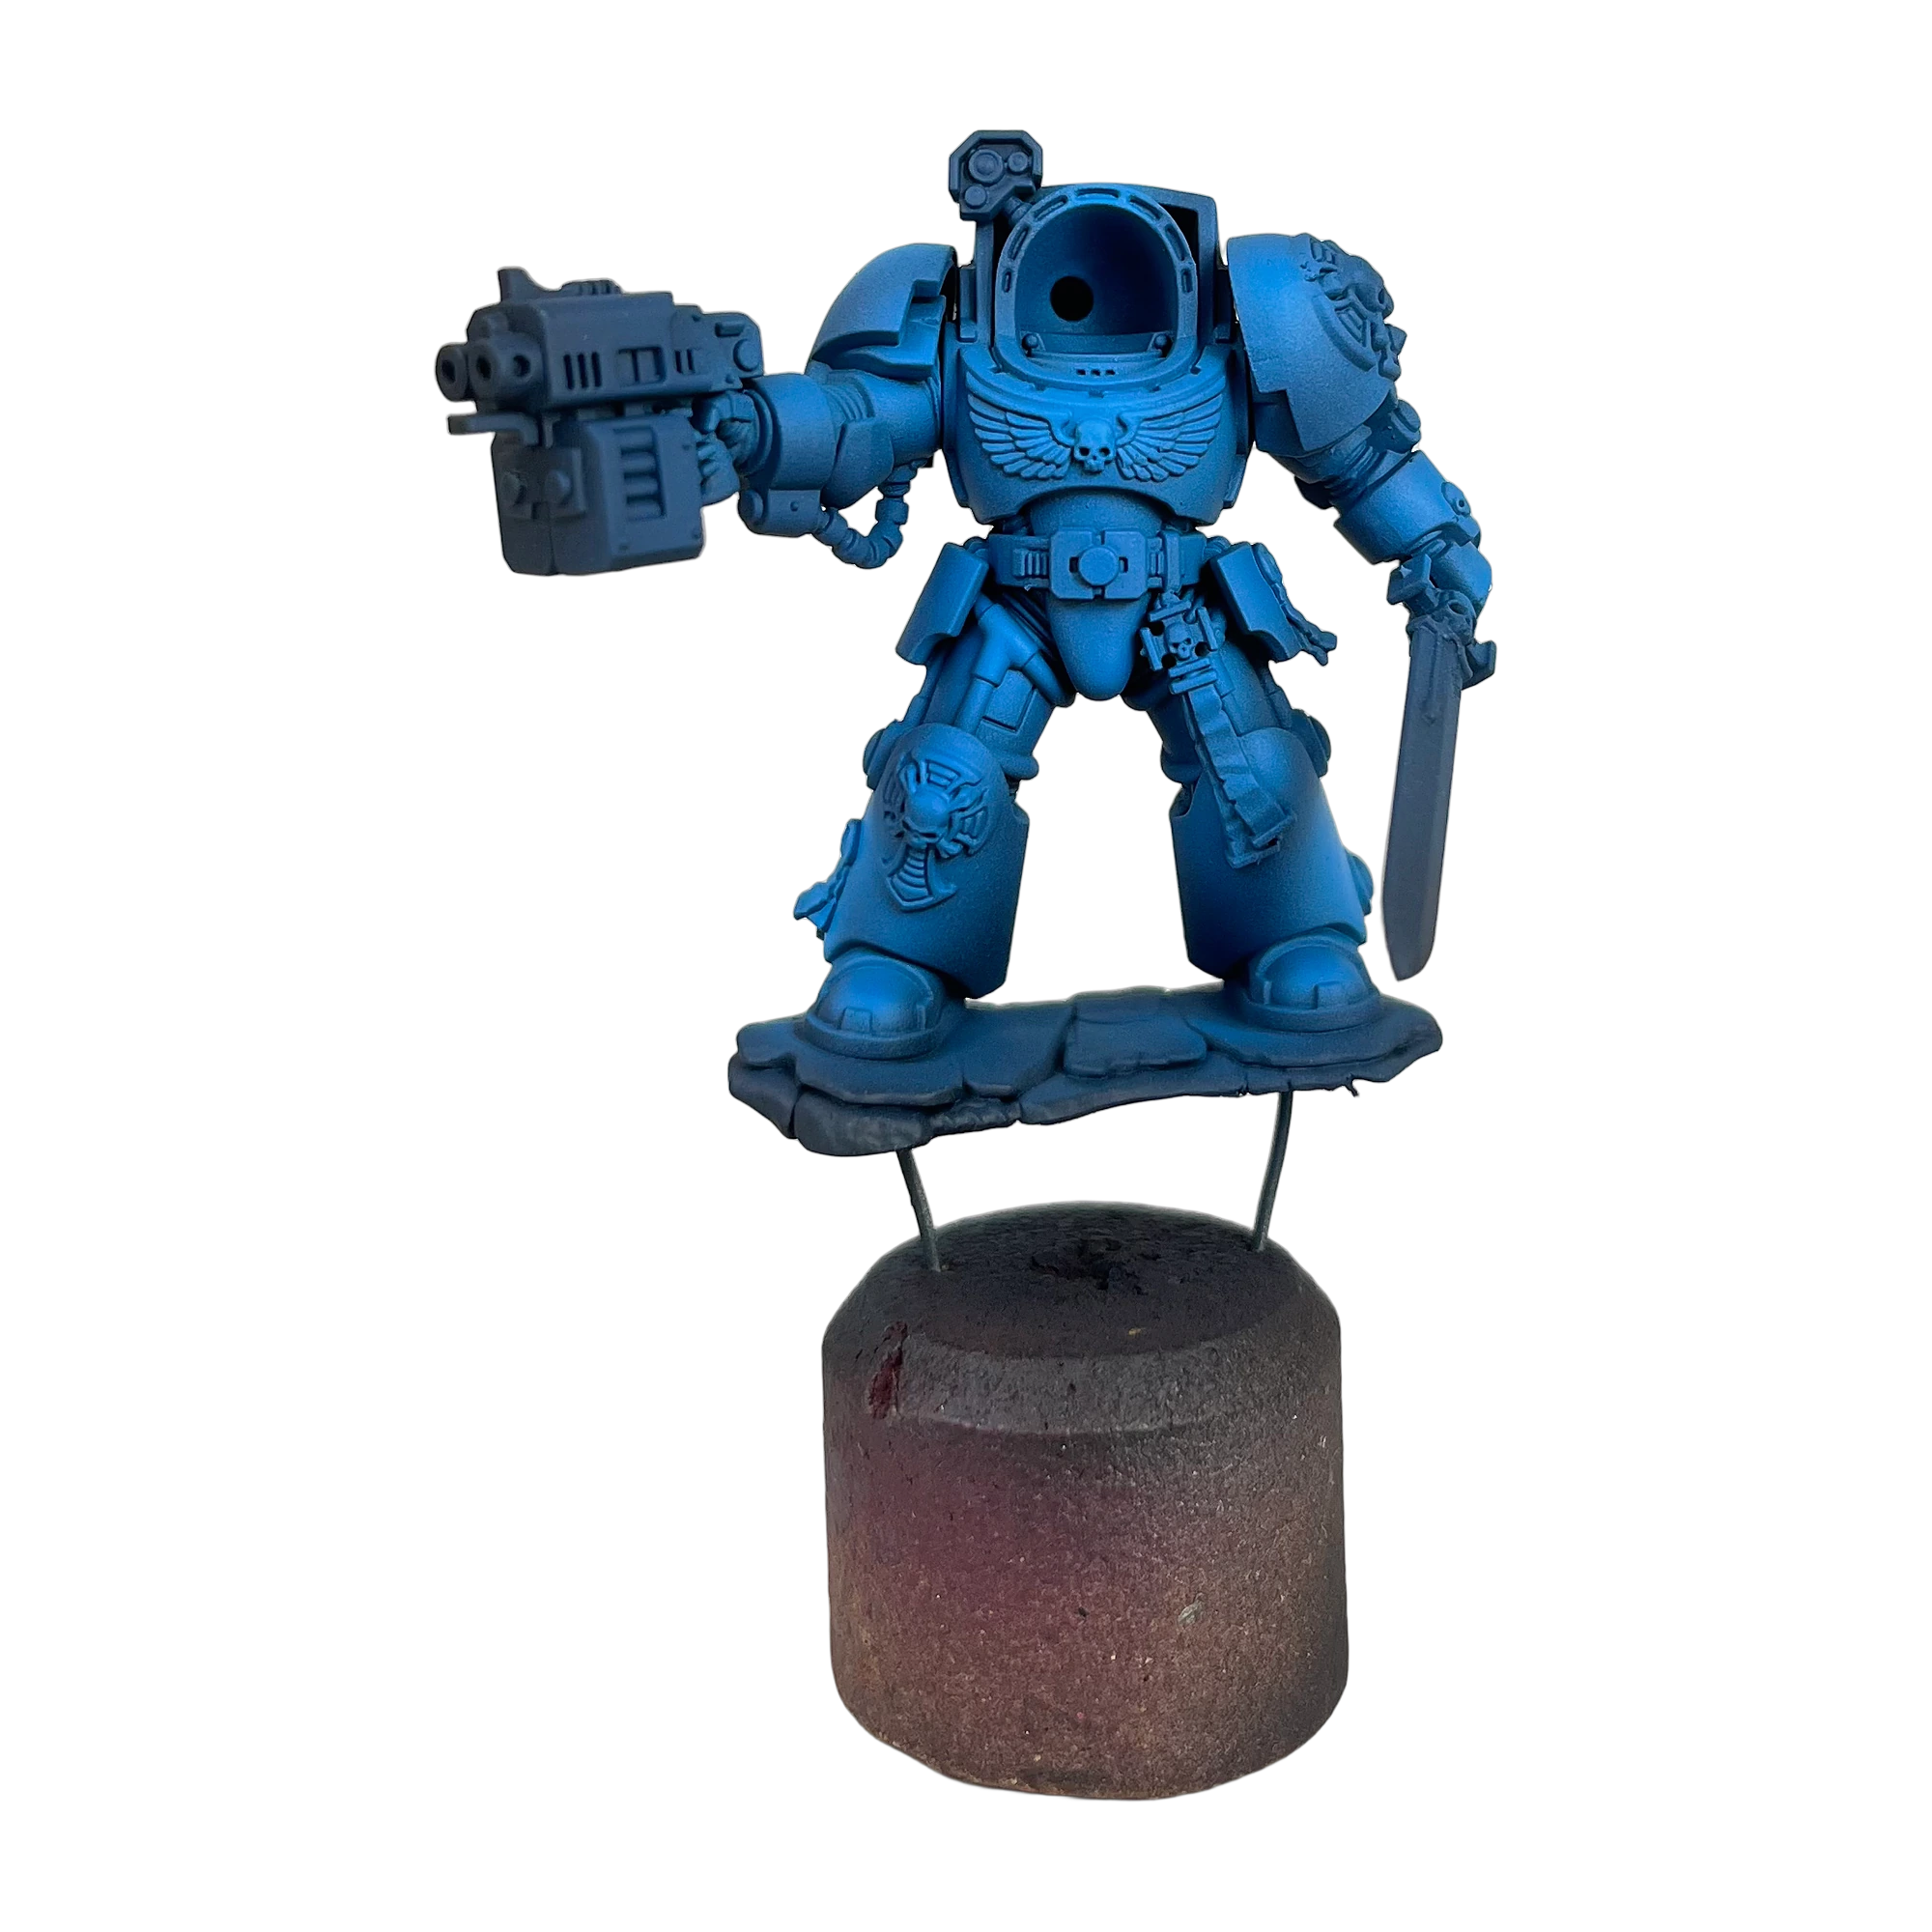
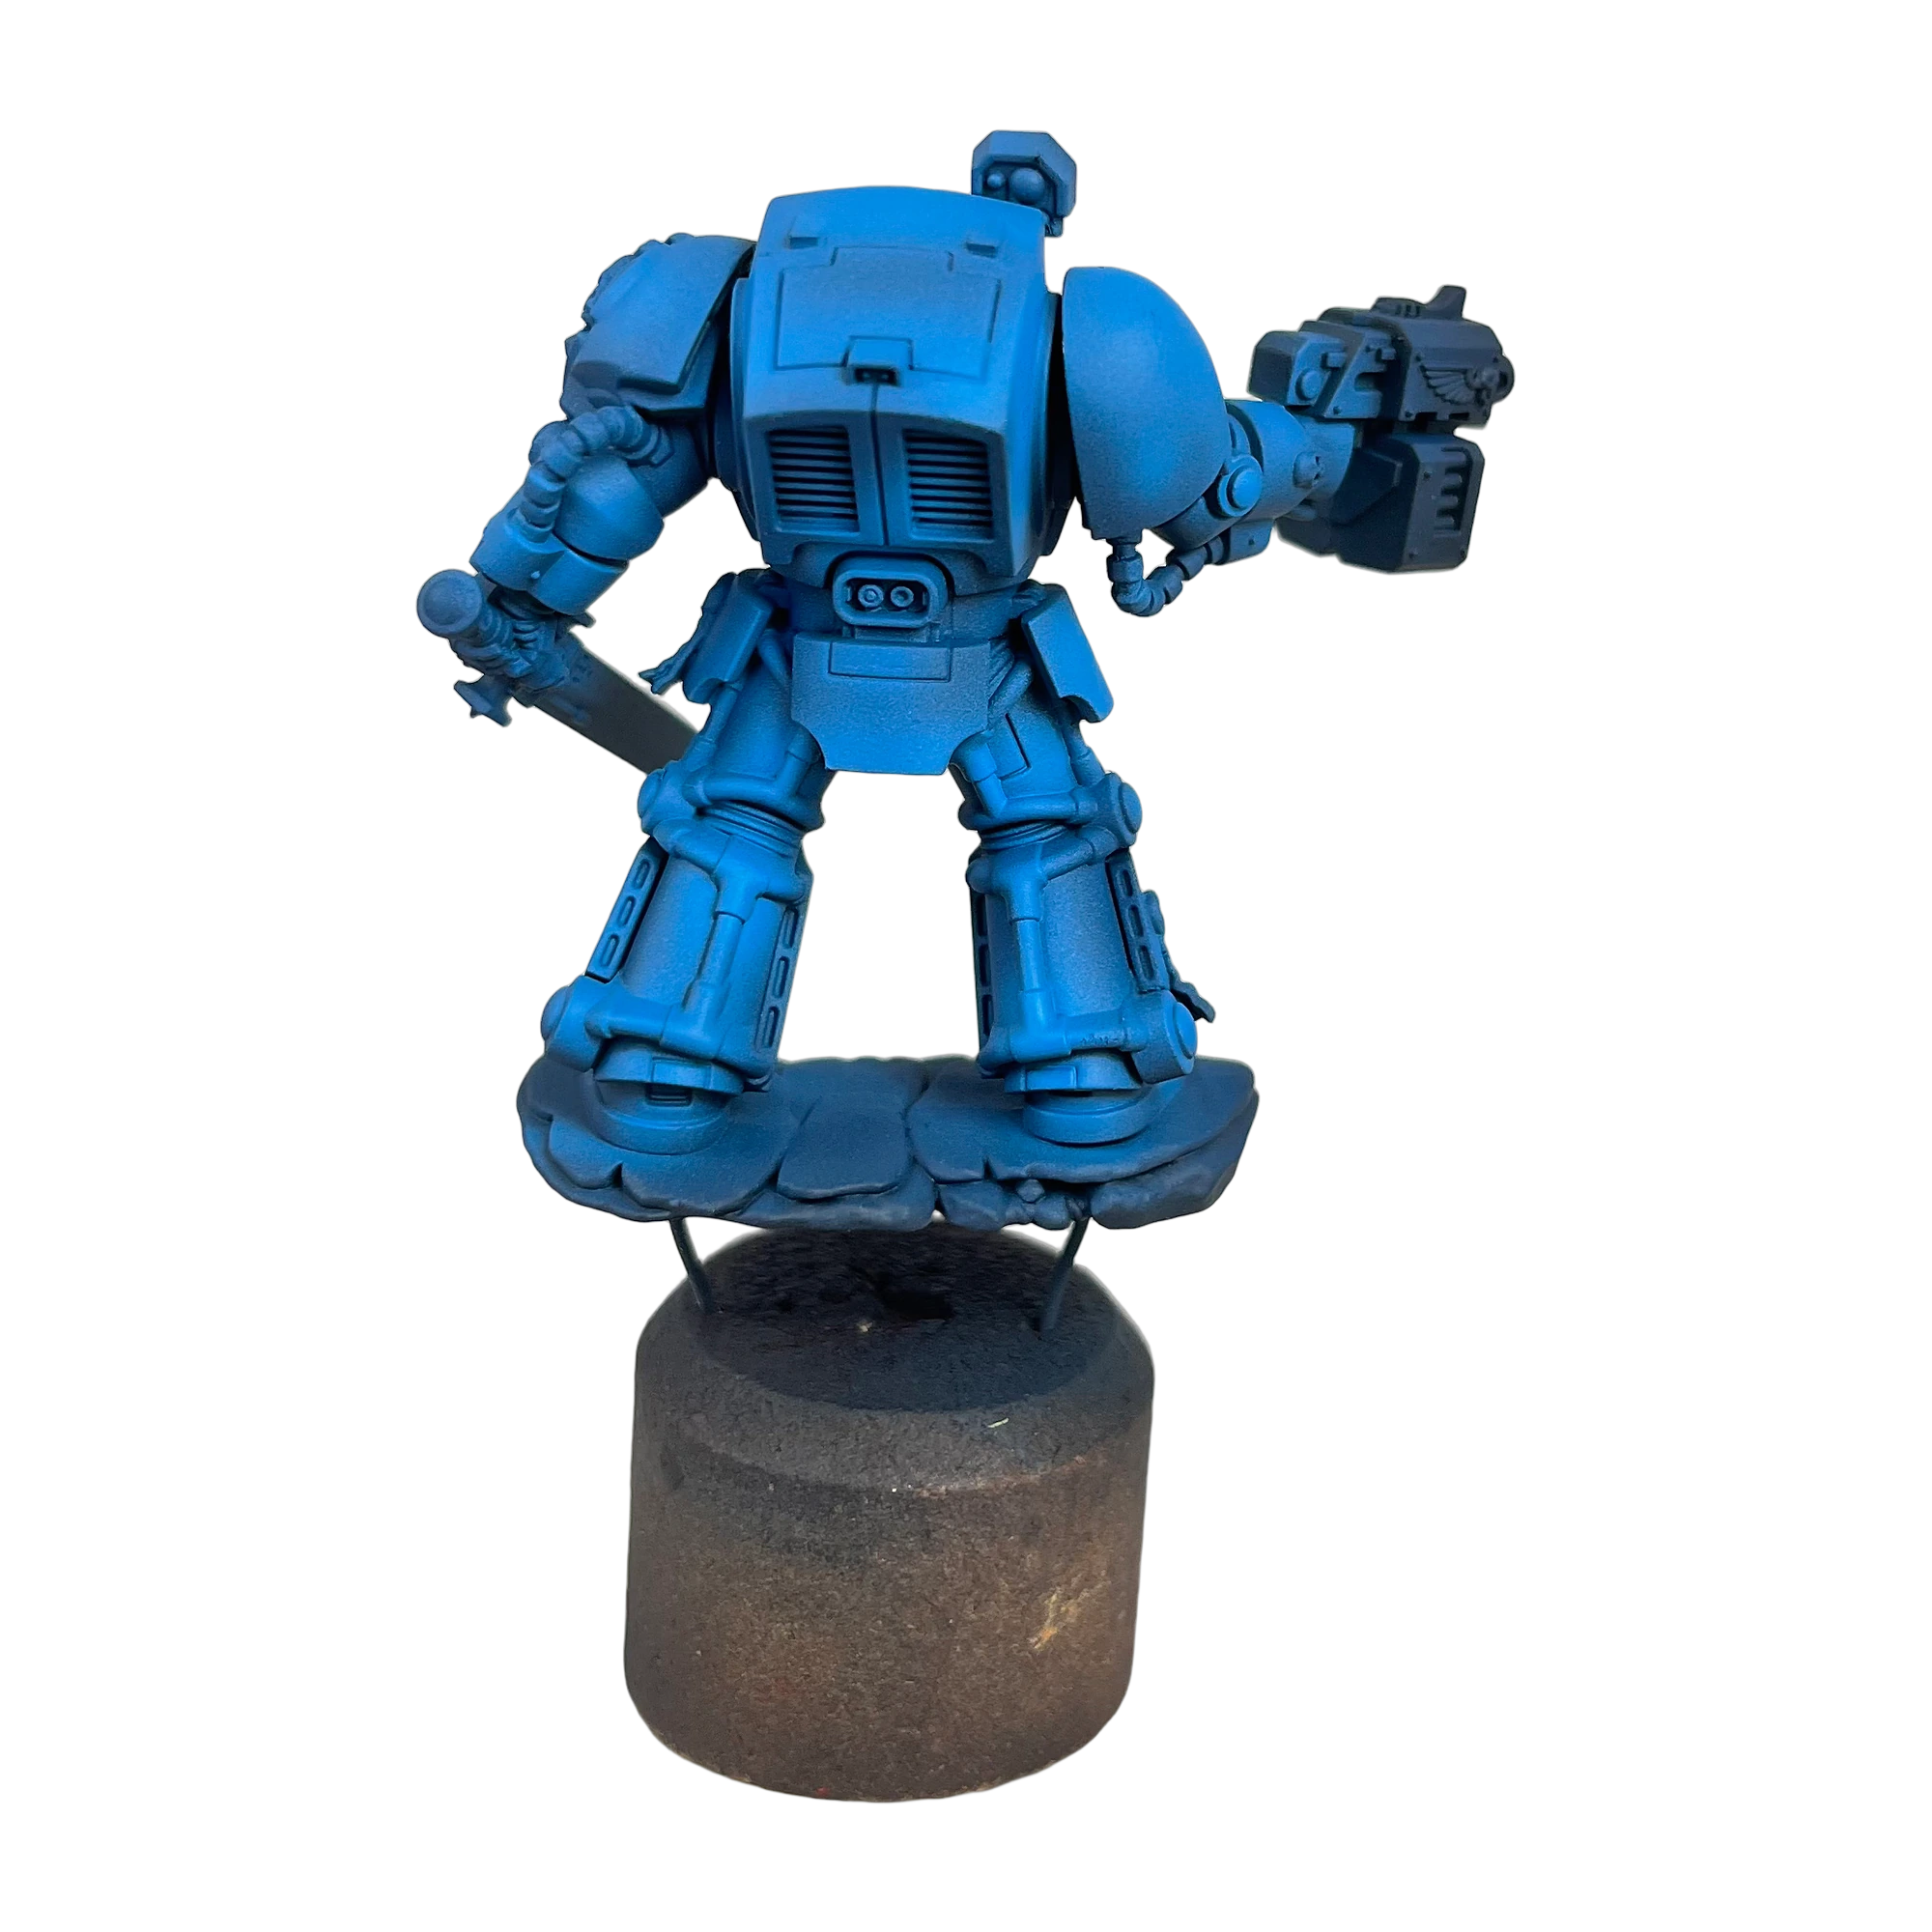
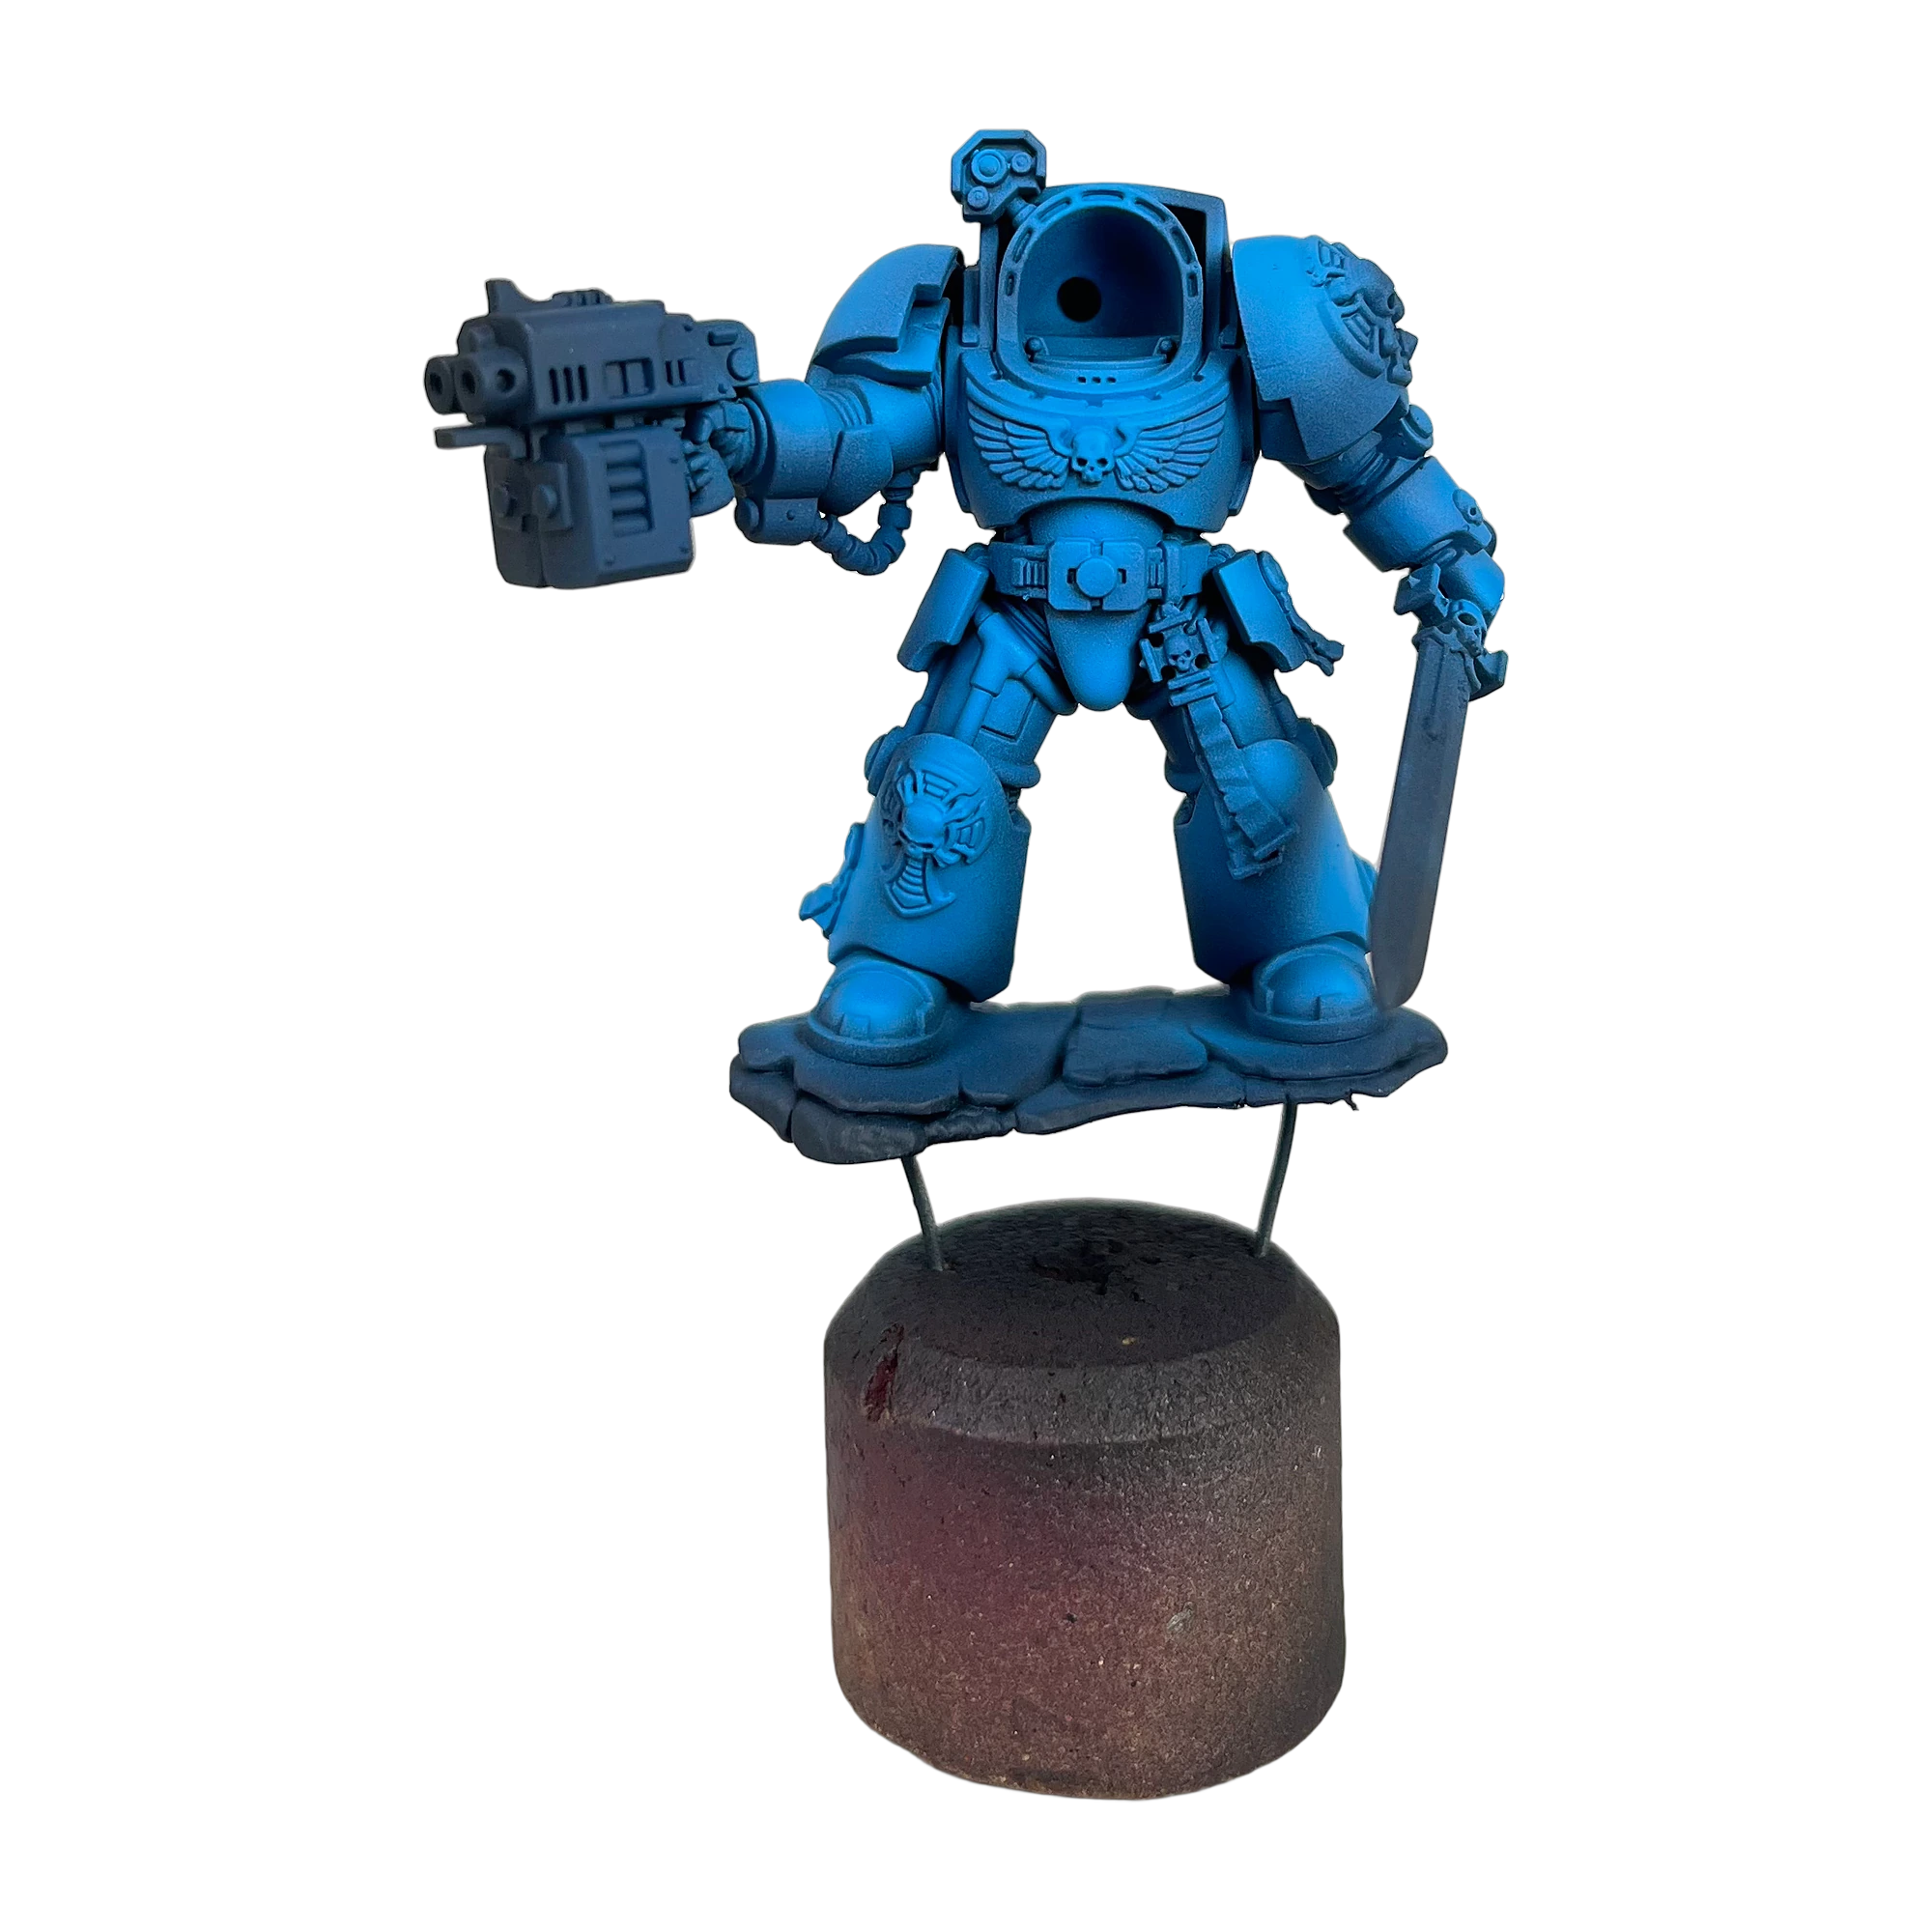
Step 4: Focused Zenithal Light (Vallejo Electric Blue)
Using pure Vallejo Electric Blue diluted 1:1 with water, establish the primary light focal points. Focus strictly on the upper 40% of the curved surfaces established in Step 3.
- Feather the edge of the stroke where it meets the midtone.
- At this stage, three distinct tones should be readable: deep base shadow, midtone transition, and vibrant Electric Blue highlights.
Step 5: Apex Specular Glints (Vallejo Verdigris)
Mix Vallejo Verdigris 1:1 with water. This pale, ice-blue green introduces immense visual temperature contrast. With the tip of a #00 brush, apply ultra-thin micro-glazes strictly to the apex of the shoulder curves, the upper collar flange, and the upper knee plates.
- Apply with a feather-light touch; over-applying this high-value pigment will bleach out the blue saturation.
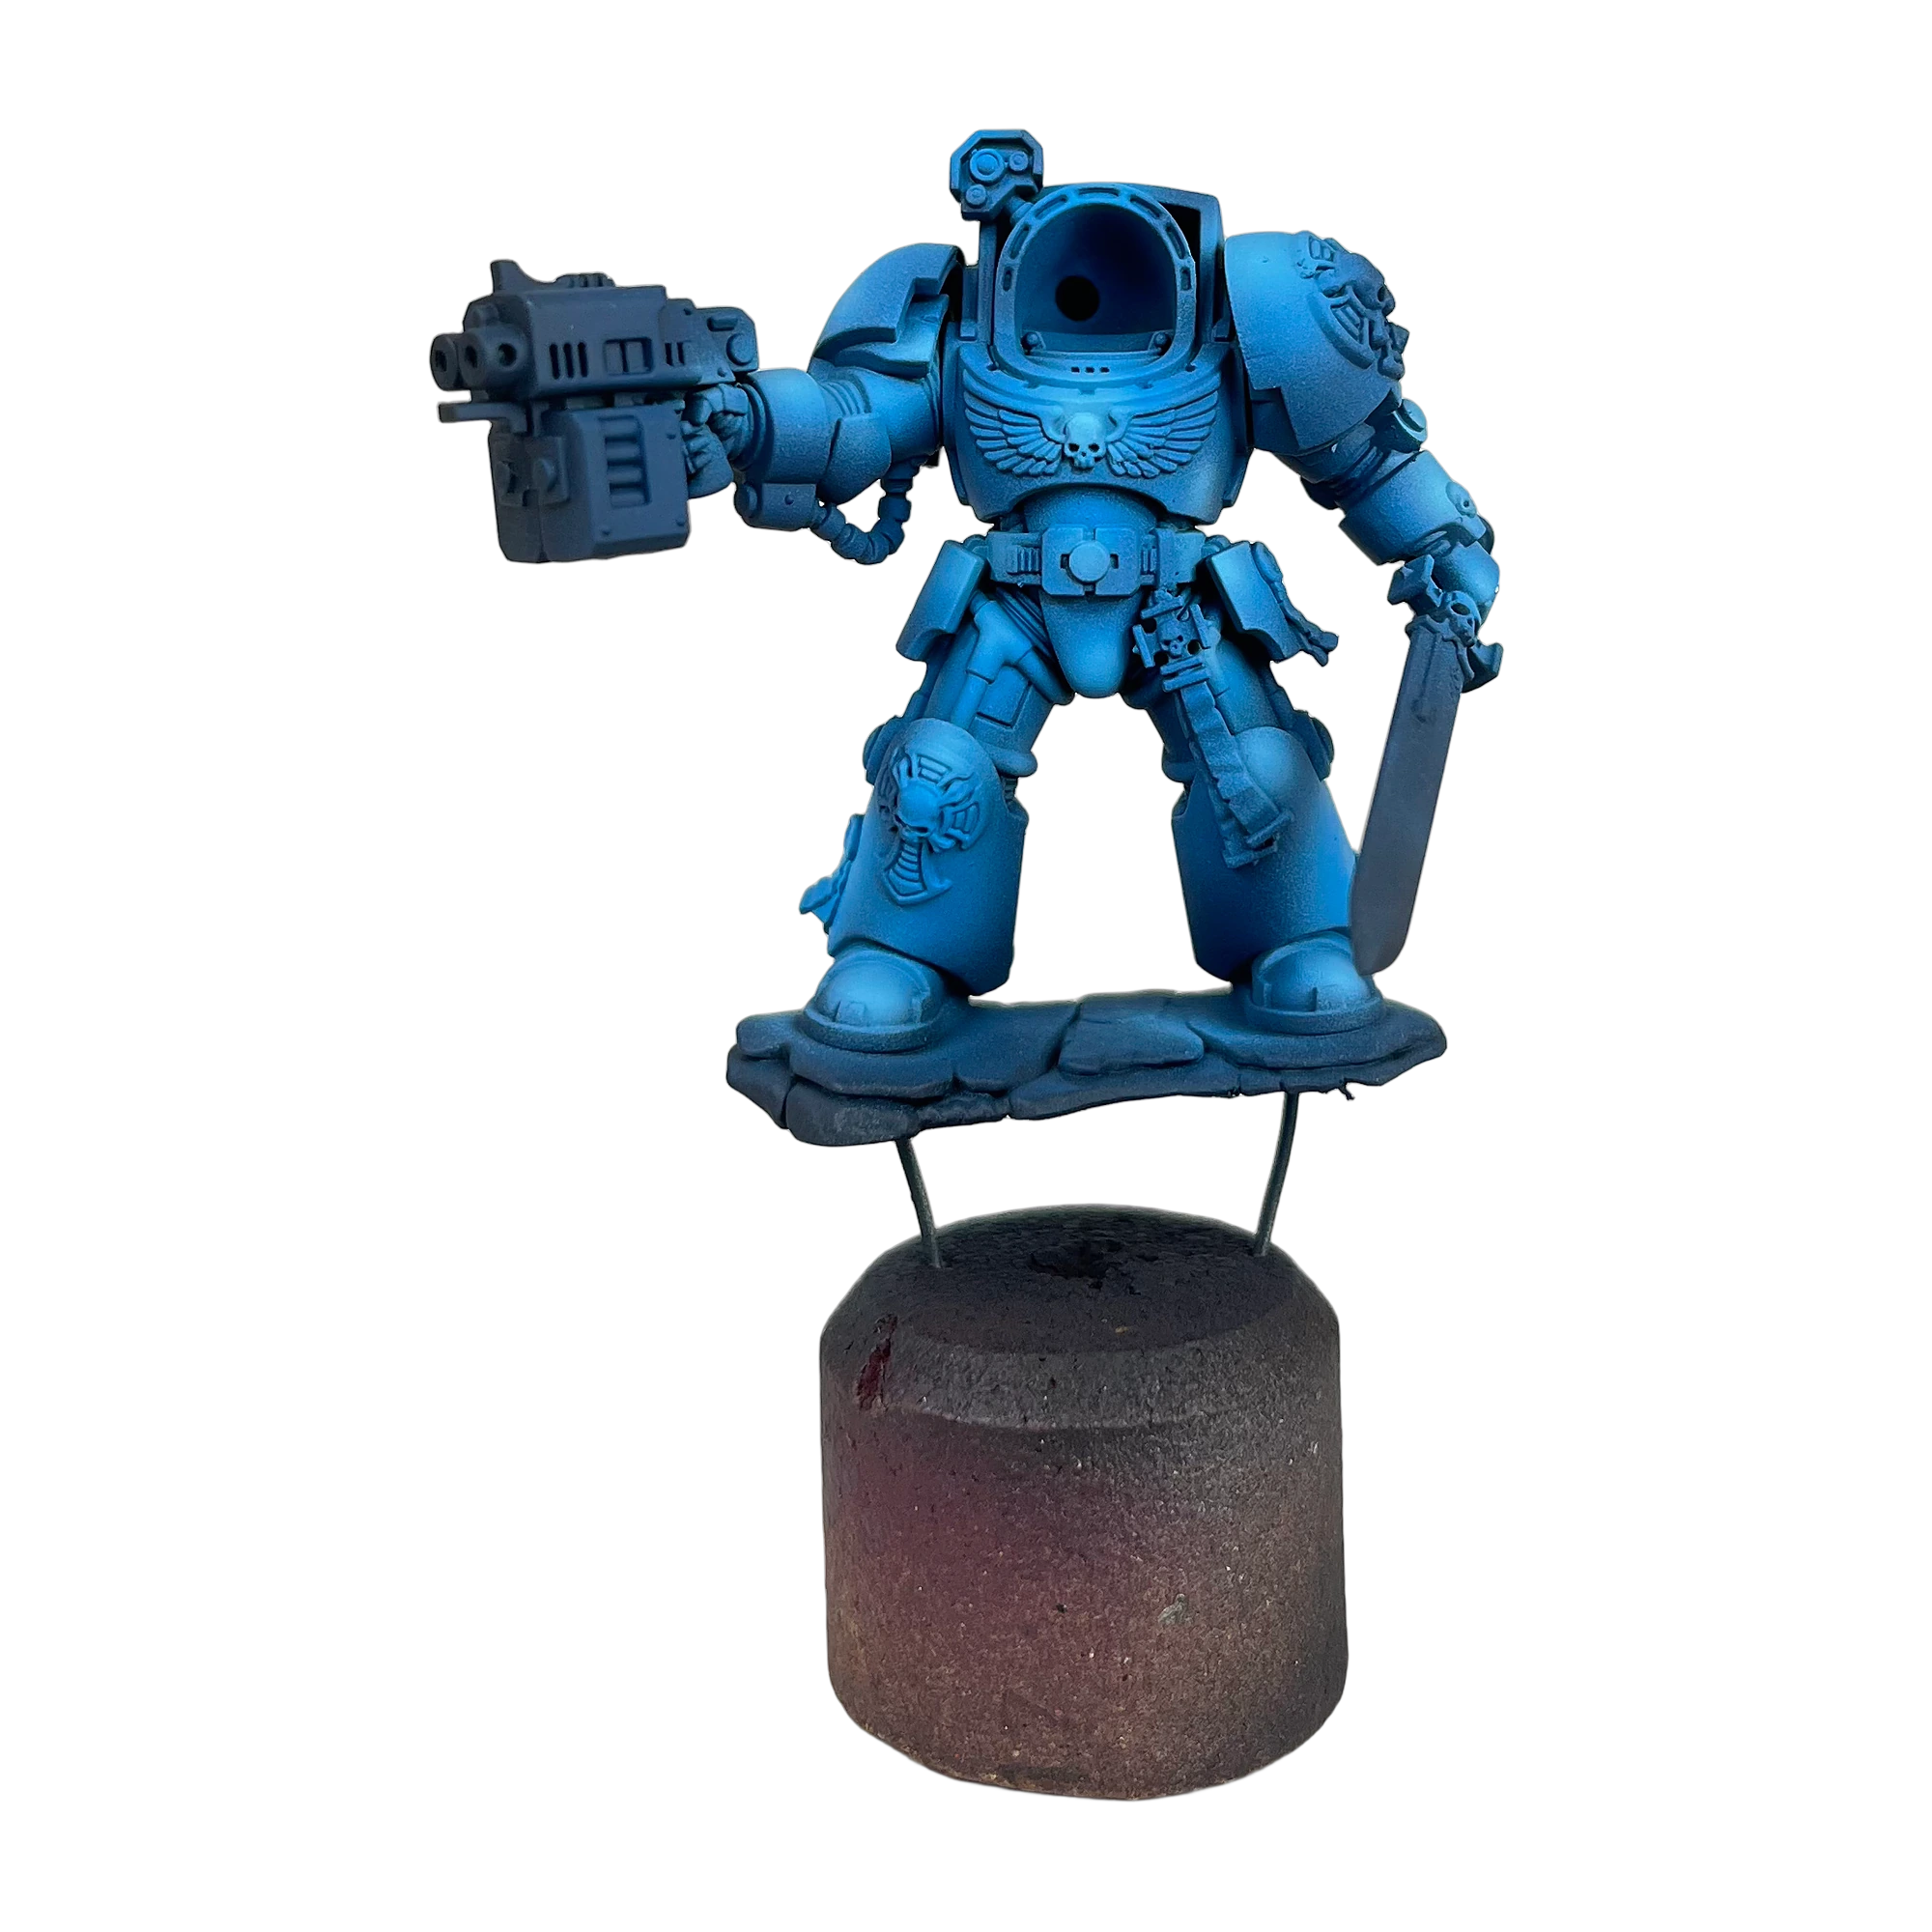
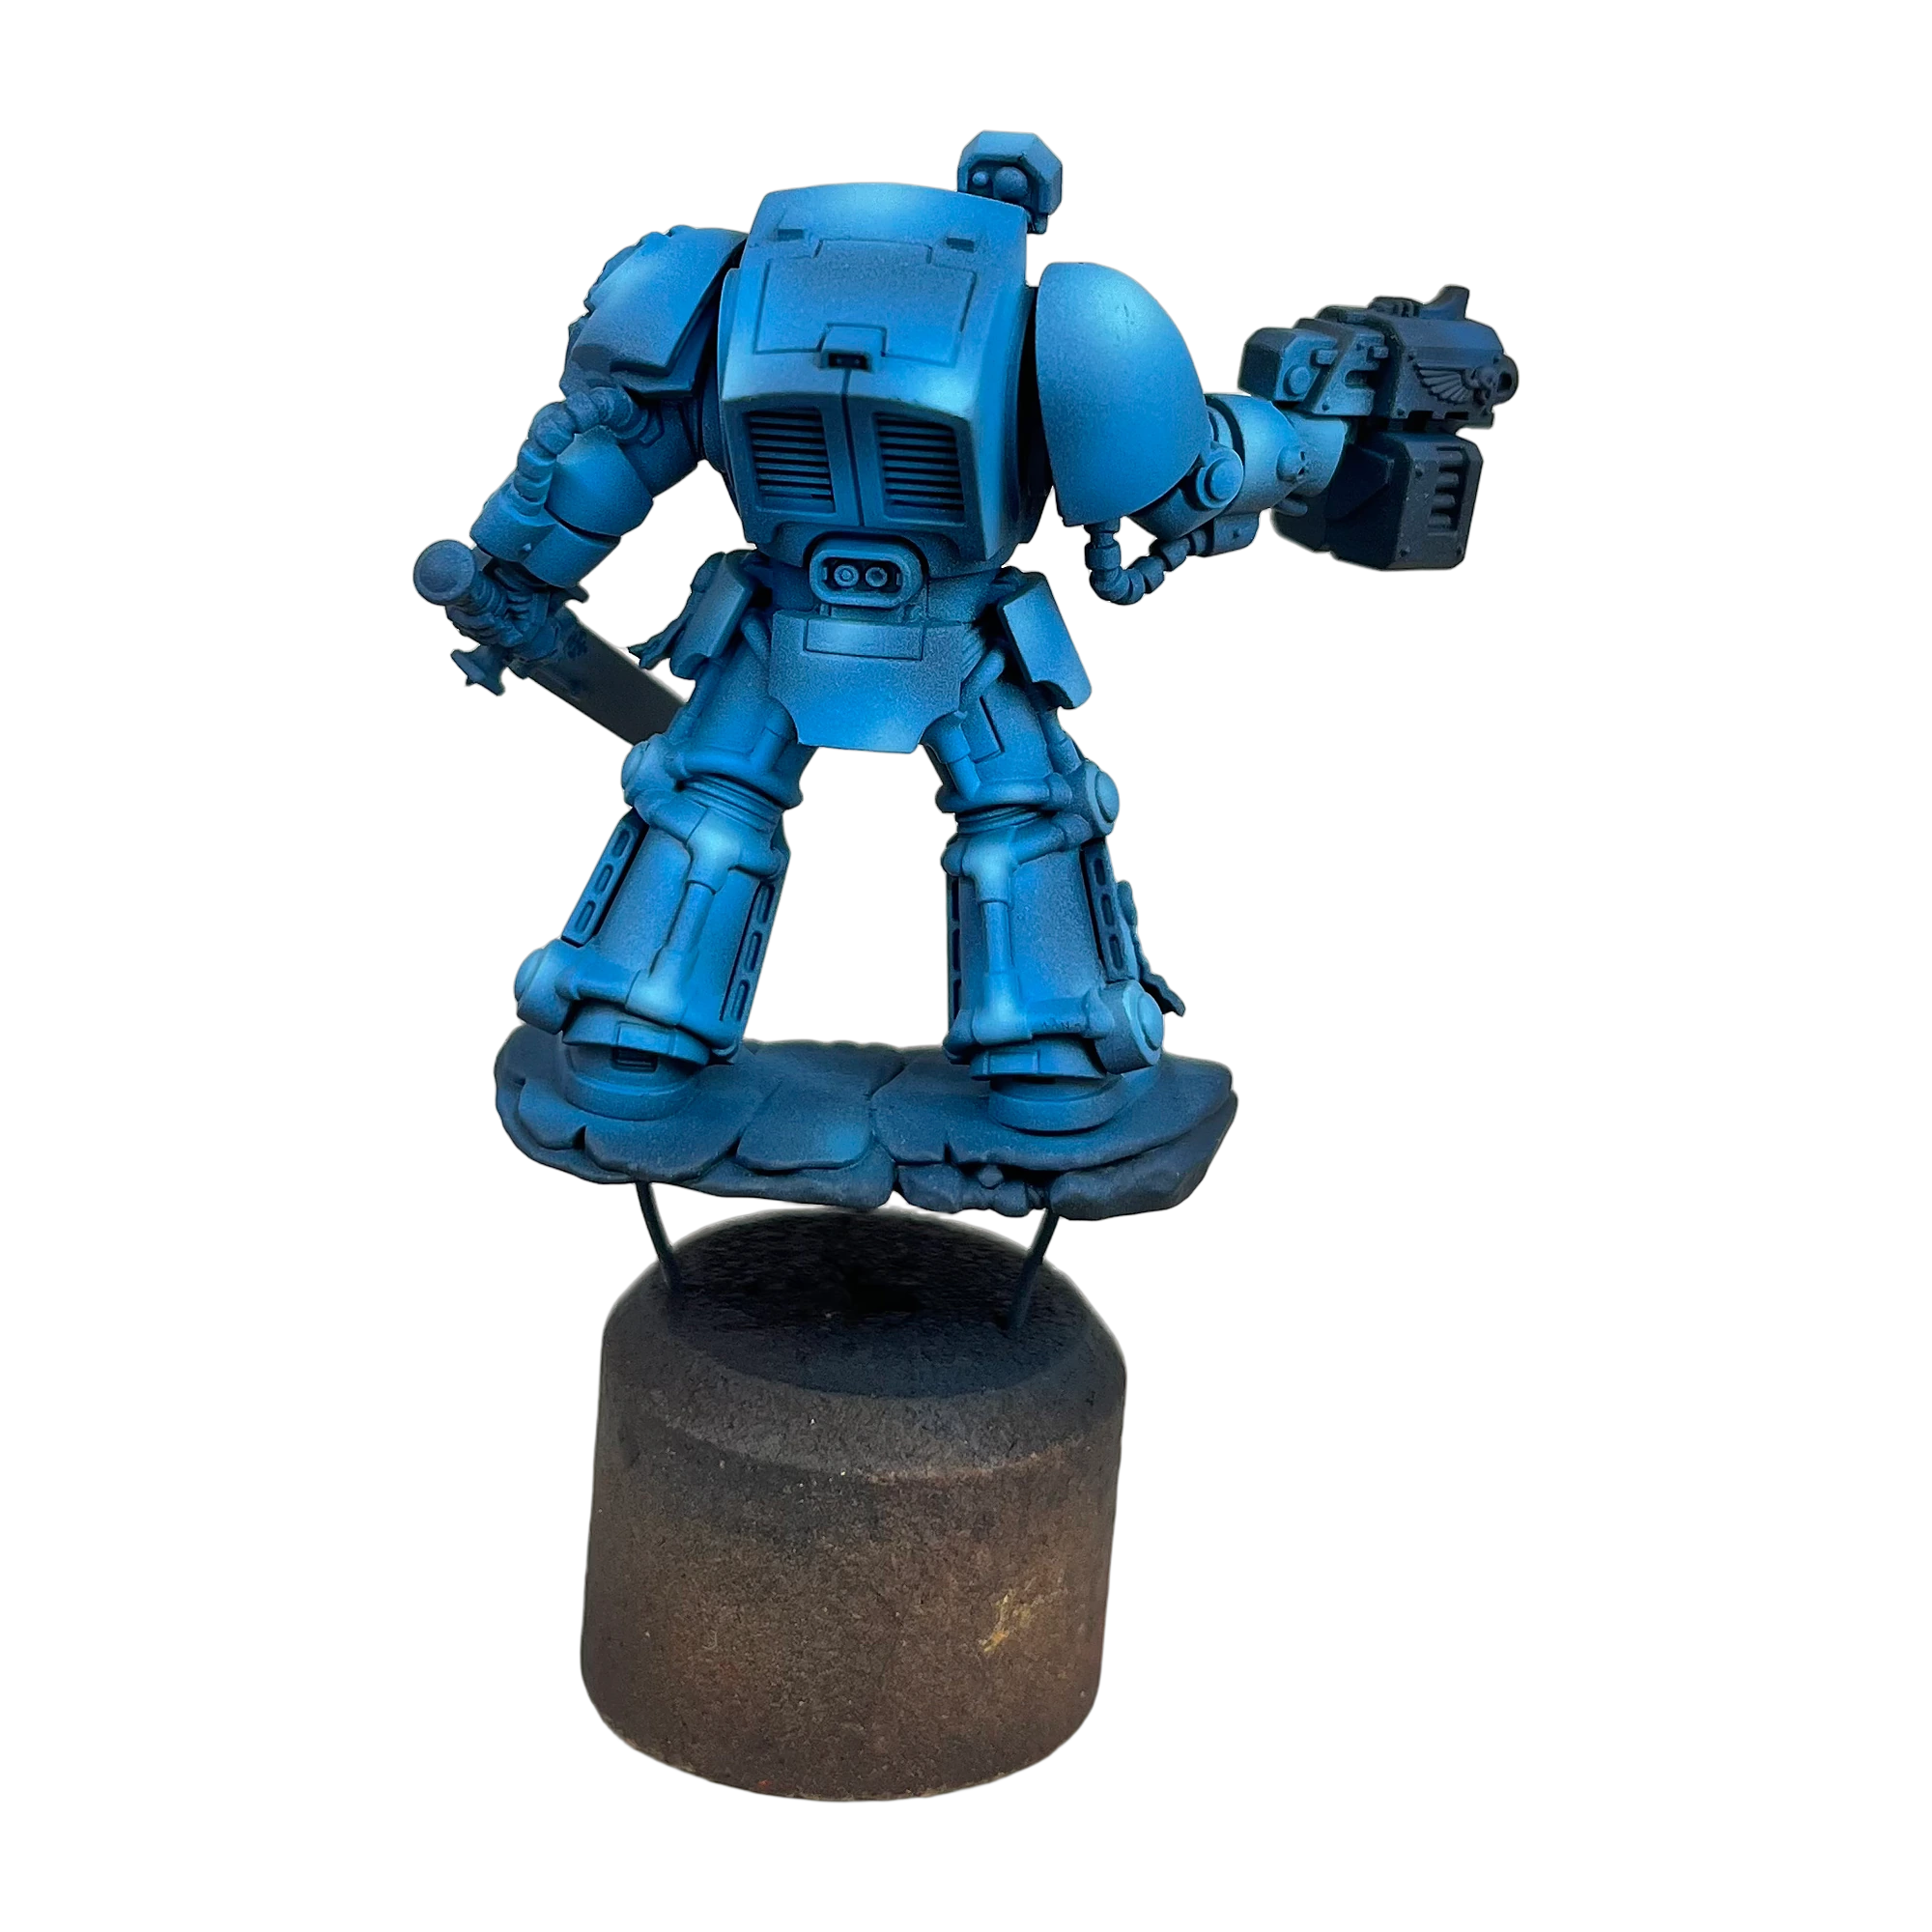
When feathering acrylic glazes on large armor plates like Terminator pauldrons, always pull your brush stroke *towards* the point of highest brightness. Acrylic pigment deposits in greater volume at the end of the stroke where the brush leaves the surface.
5. Phase 3: The Gloss Shield, Decal Micro-Setting & Capillary Oil Washes
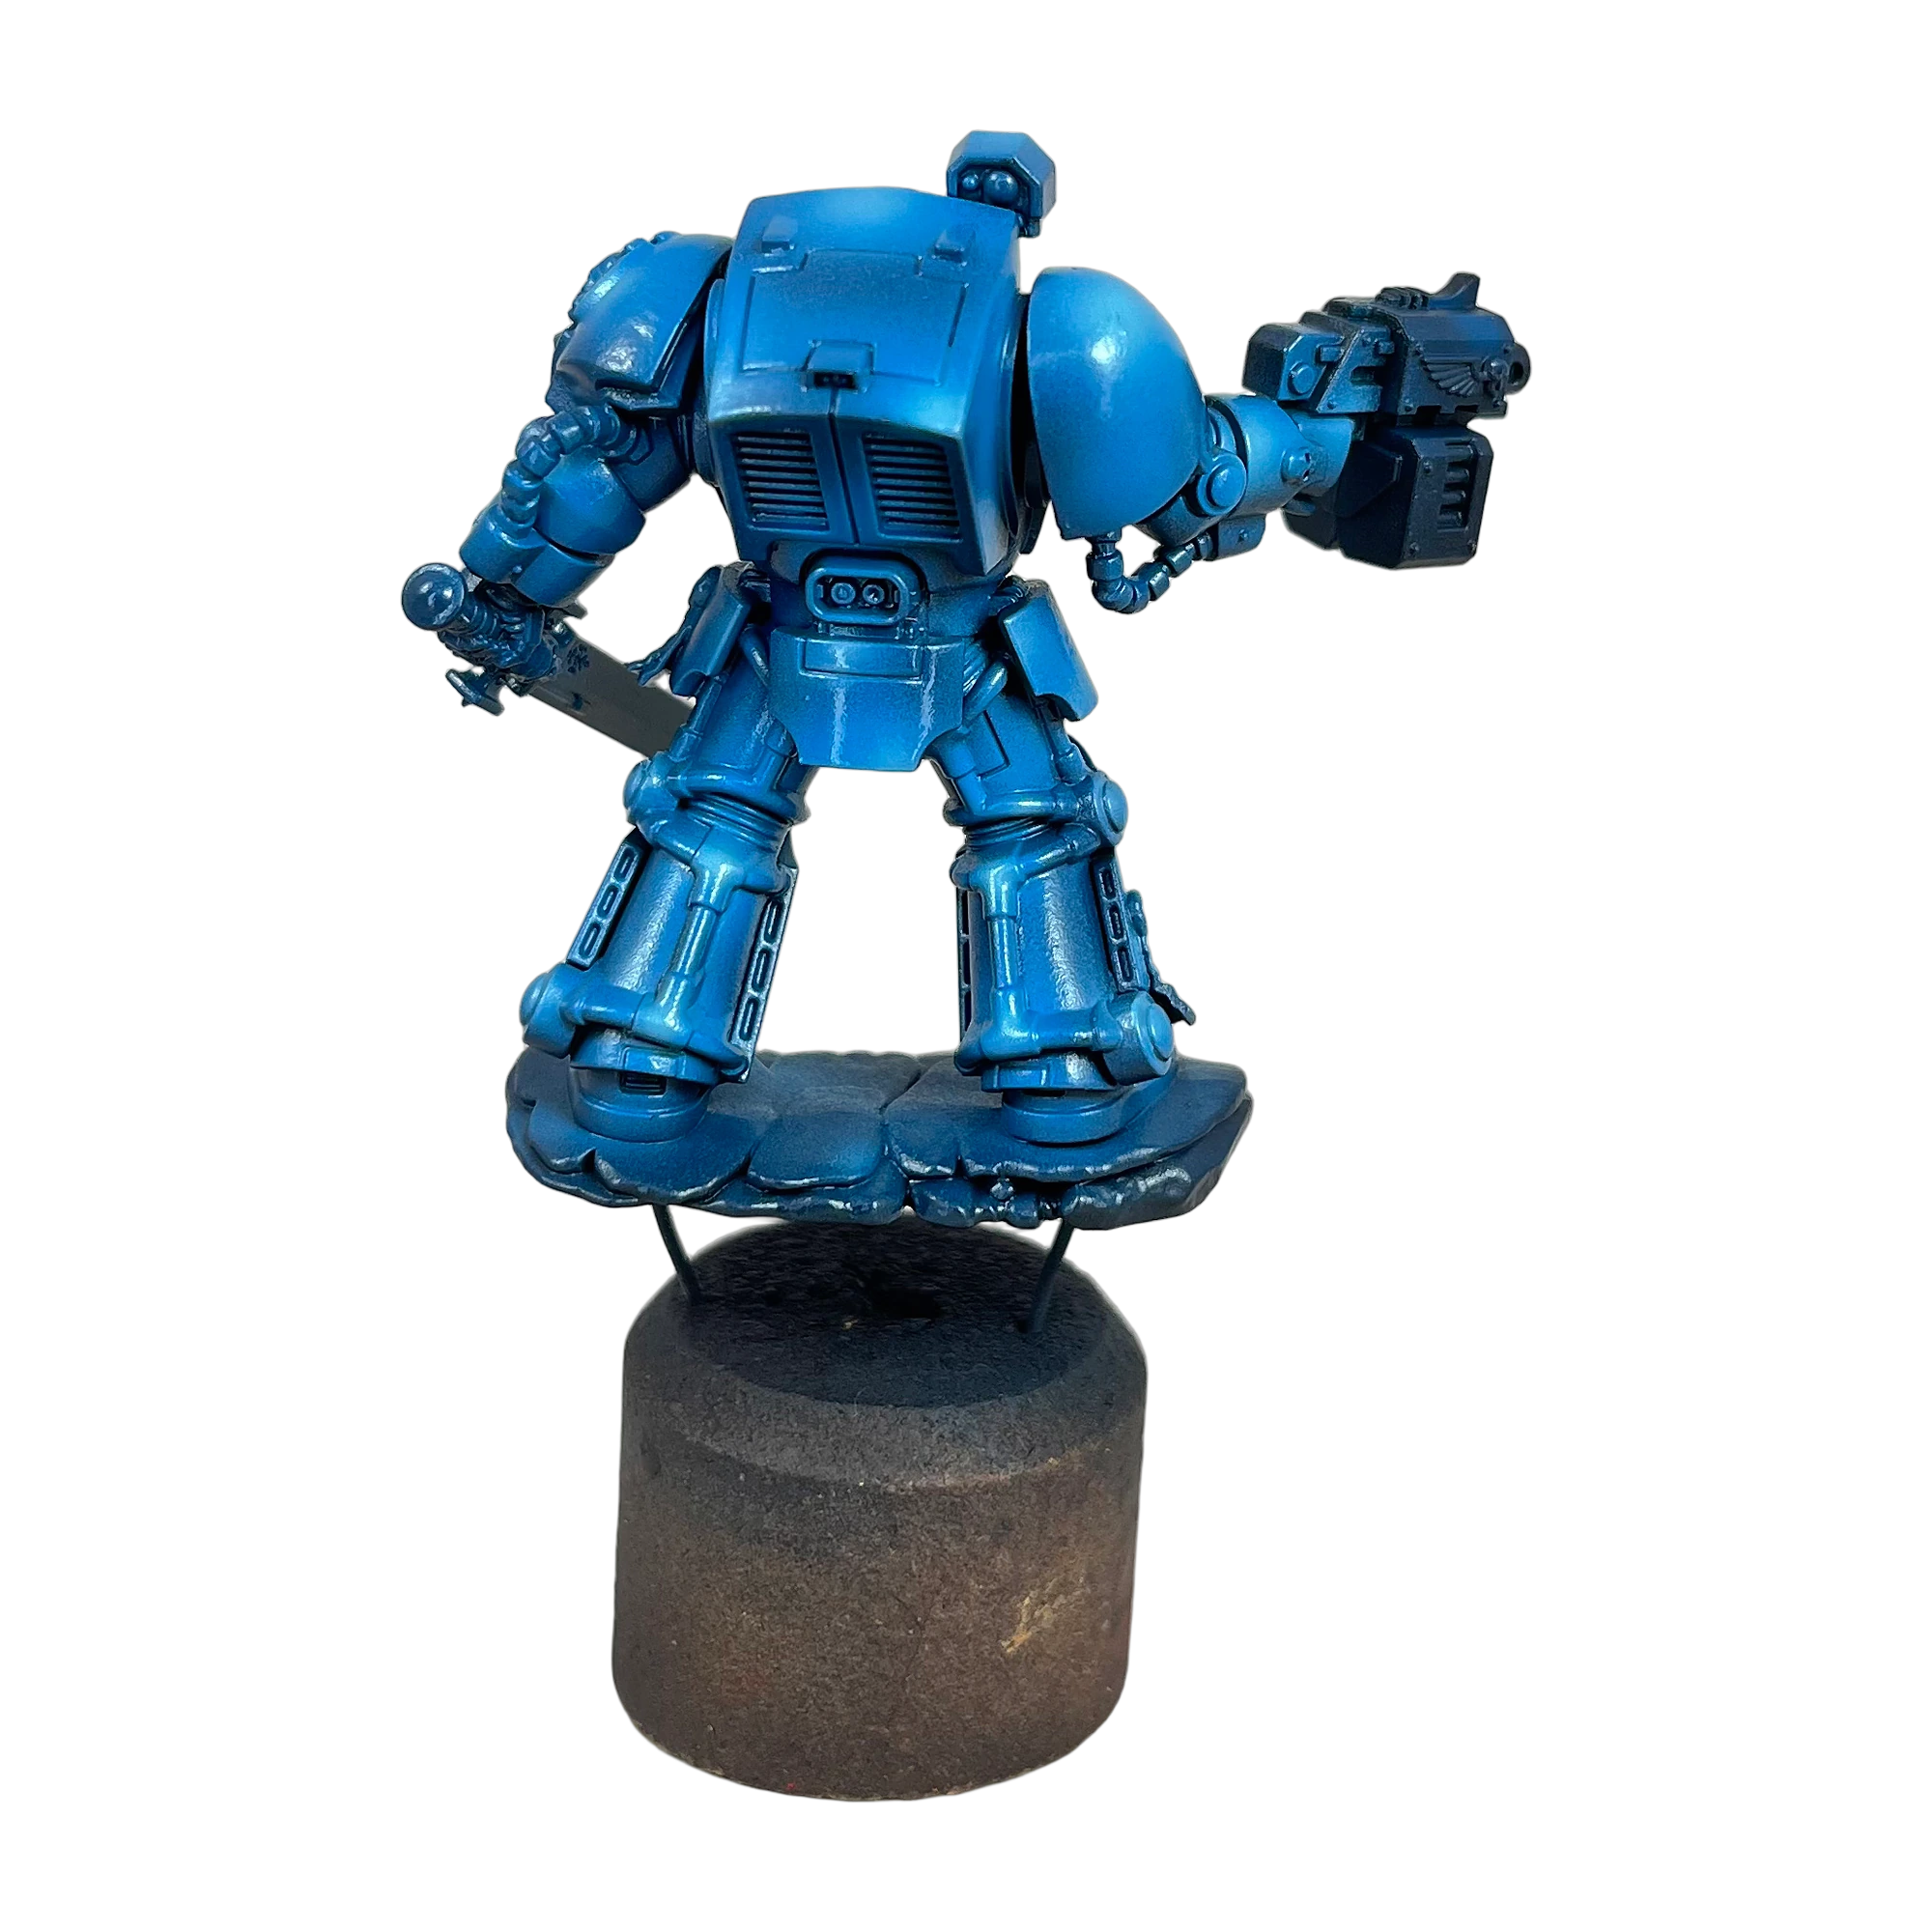
This phase is where professional studio work diverges from standard tabletop painting. Traditional acrylic washes suffer from high surface tension, leaving unsightly “coffee-staining” rings across flat armor plates. We solve this permanently using the Capillary Enamel / Oil Technique.
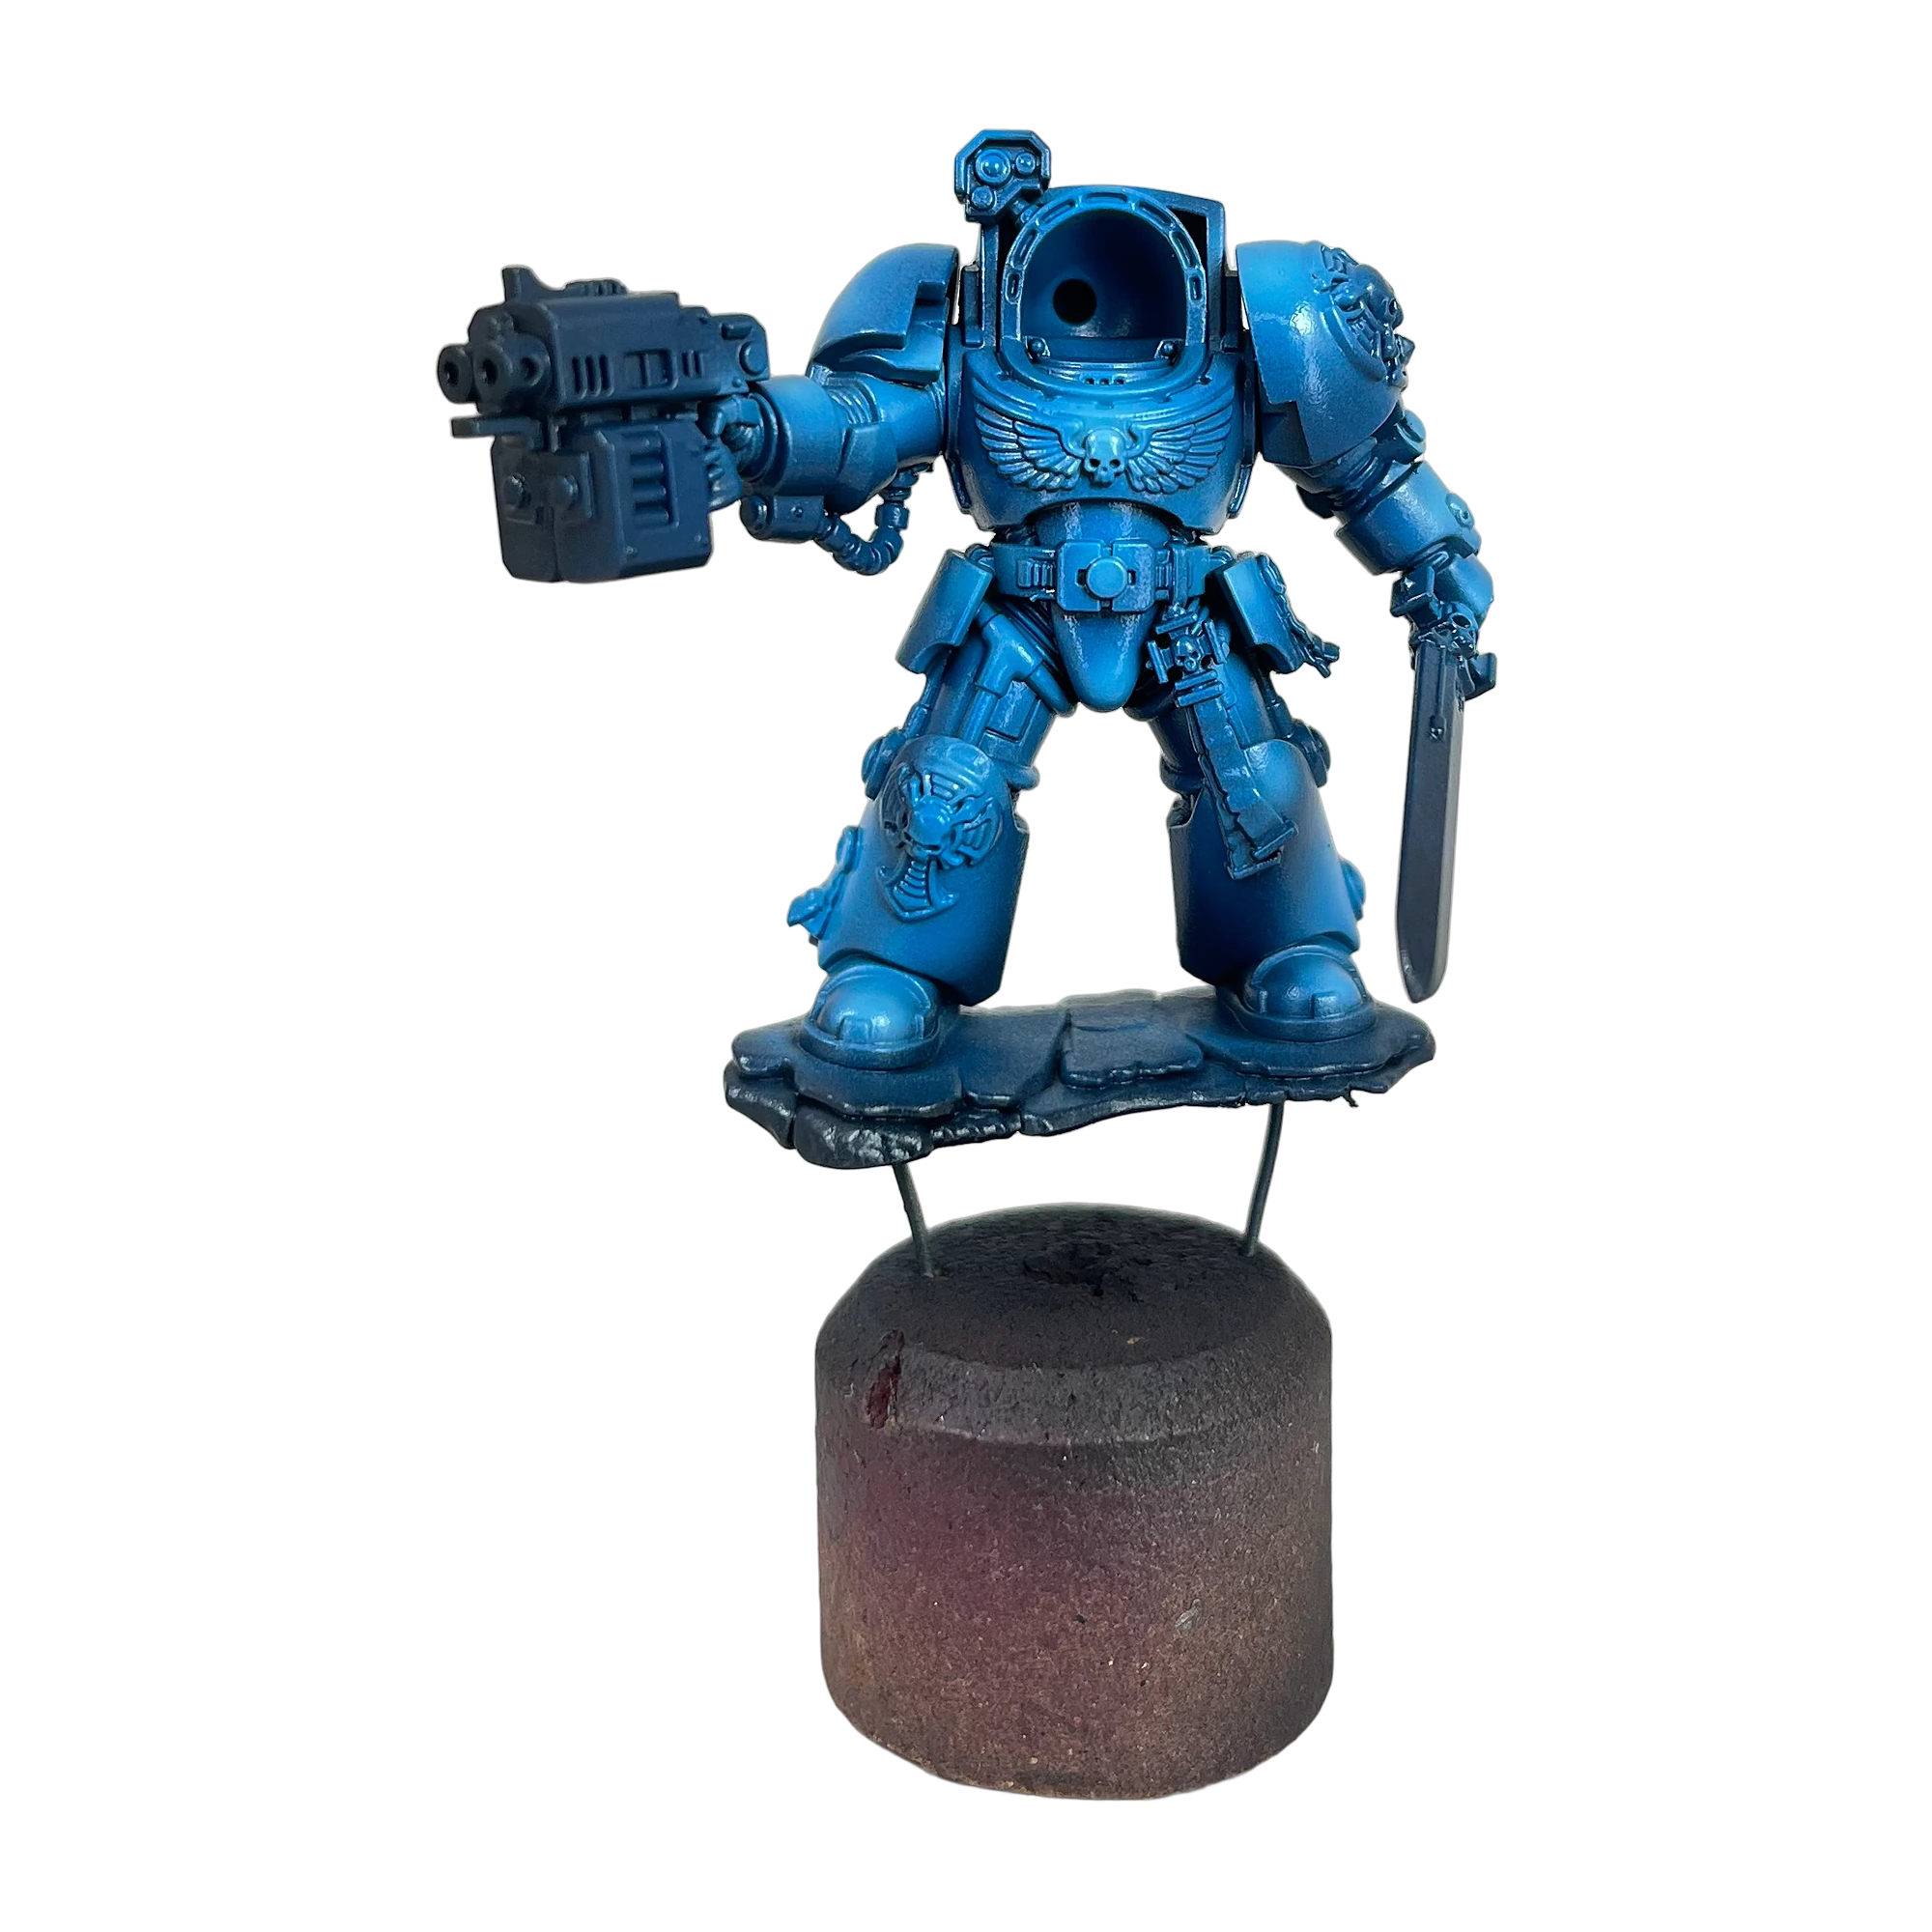
Step 6: The Frictionless Shield (Vallejo Gloss Varnish)
Apply a smooth, comprehensive coat of Vallejo Gloss Varnish across the entire miniature. The gloss finish performs two vital roles:
- It eliminates microscopic surface roughness, allowing decals to adhere without microscopic air bubbles (“silvering”).
- It reduces surface friction to near-zero, enabling low-viscosity oil washes to flow through capillaries like liquid mercury.
Step 7: Decal Application & Micro-Softening
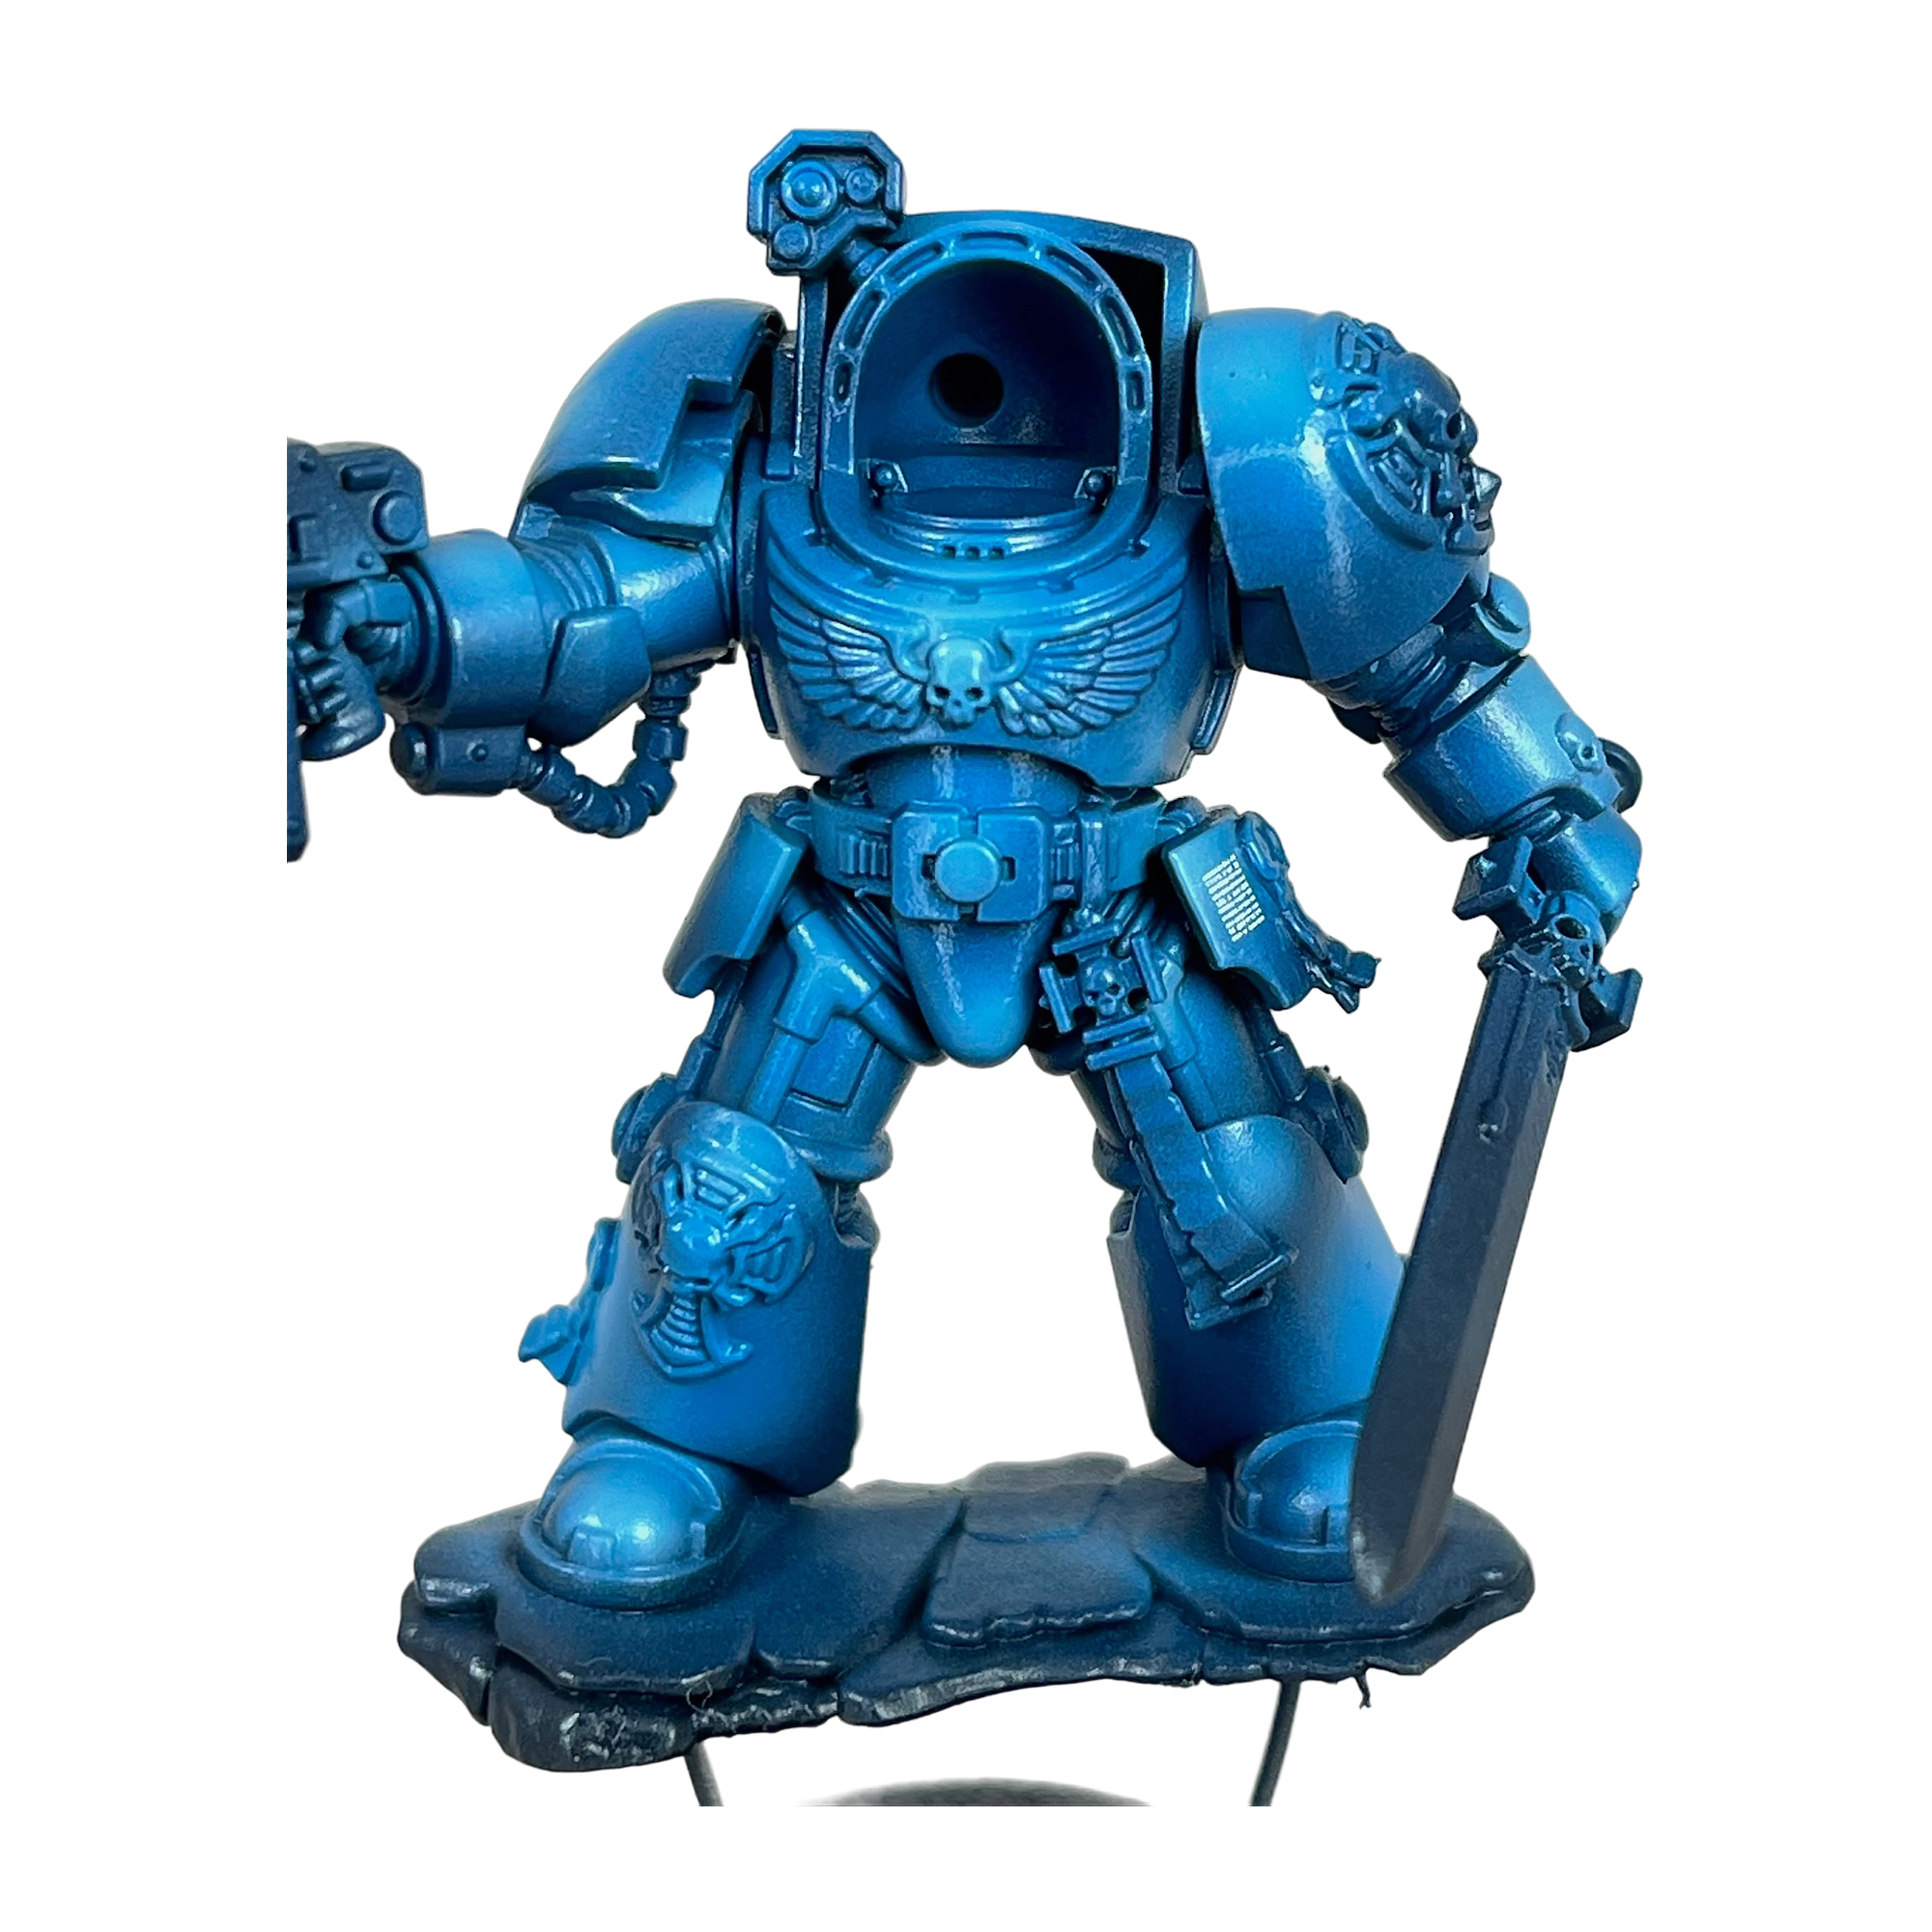
Properly applied transfers should look indistinguishable from painted heraldry.
- Paint the target shoulder pad area with a thin coat of Vallejo Decal Fix.
- Submerge the waterslide transfer in lukewarm water for 15 seconds, then slide it onto the prepared surface using a damp #1 brush.
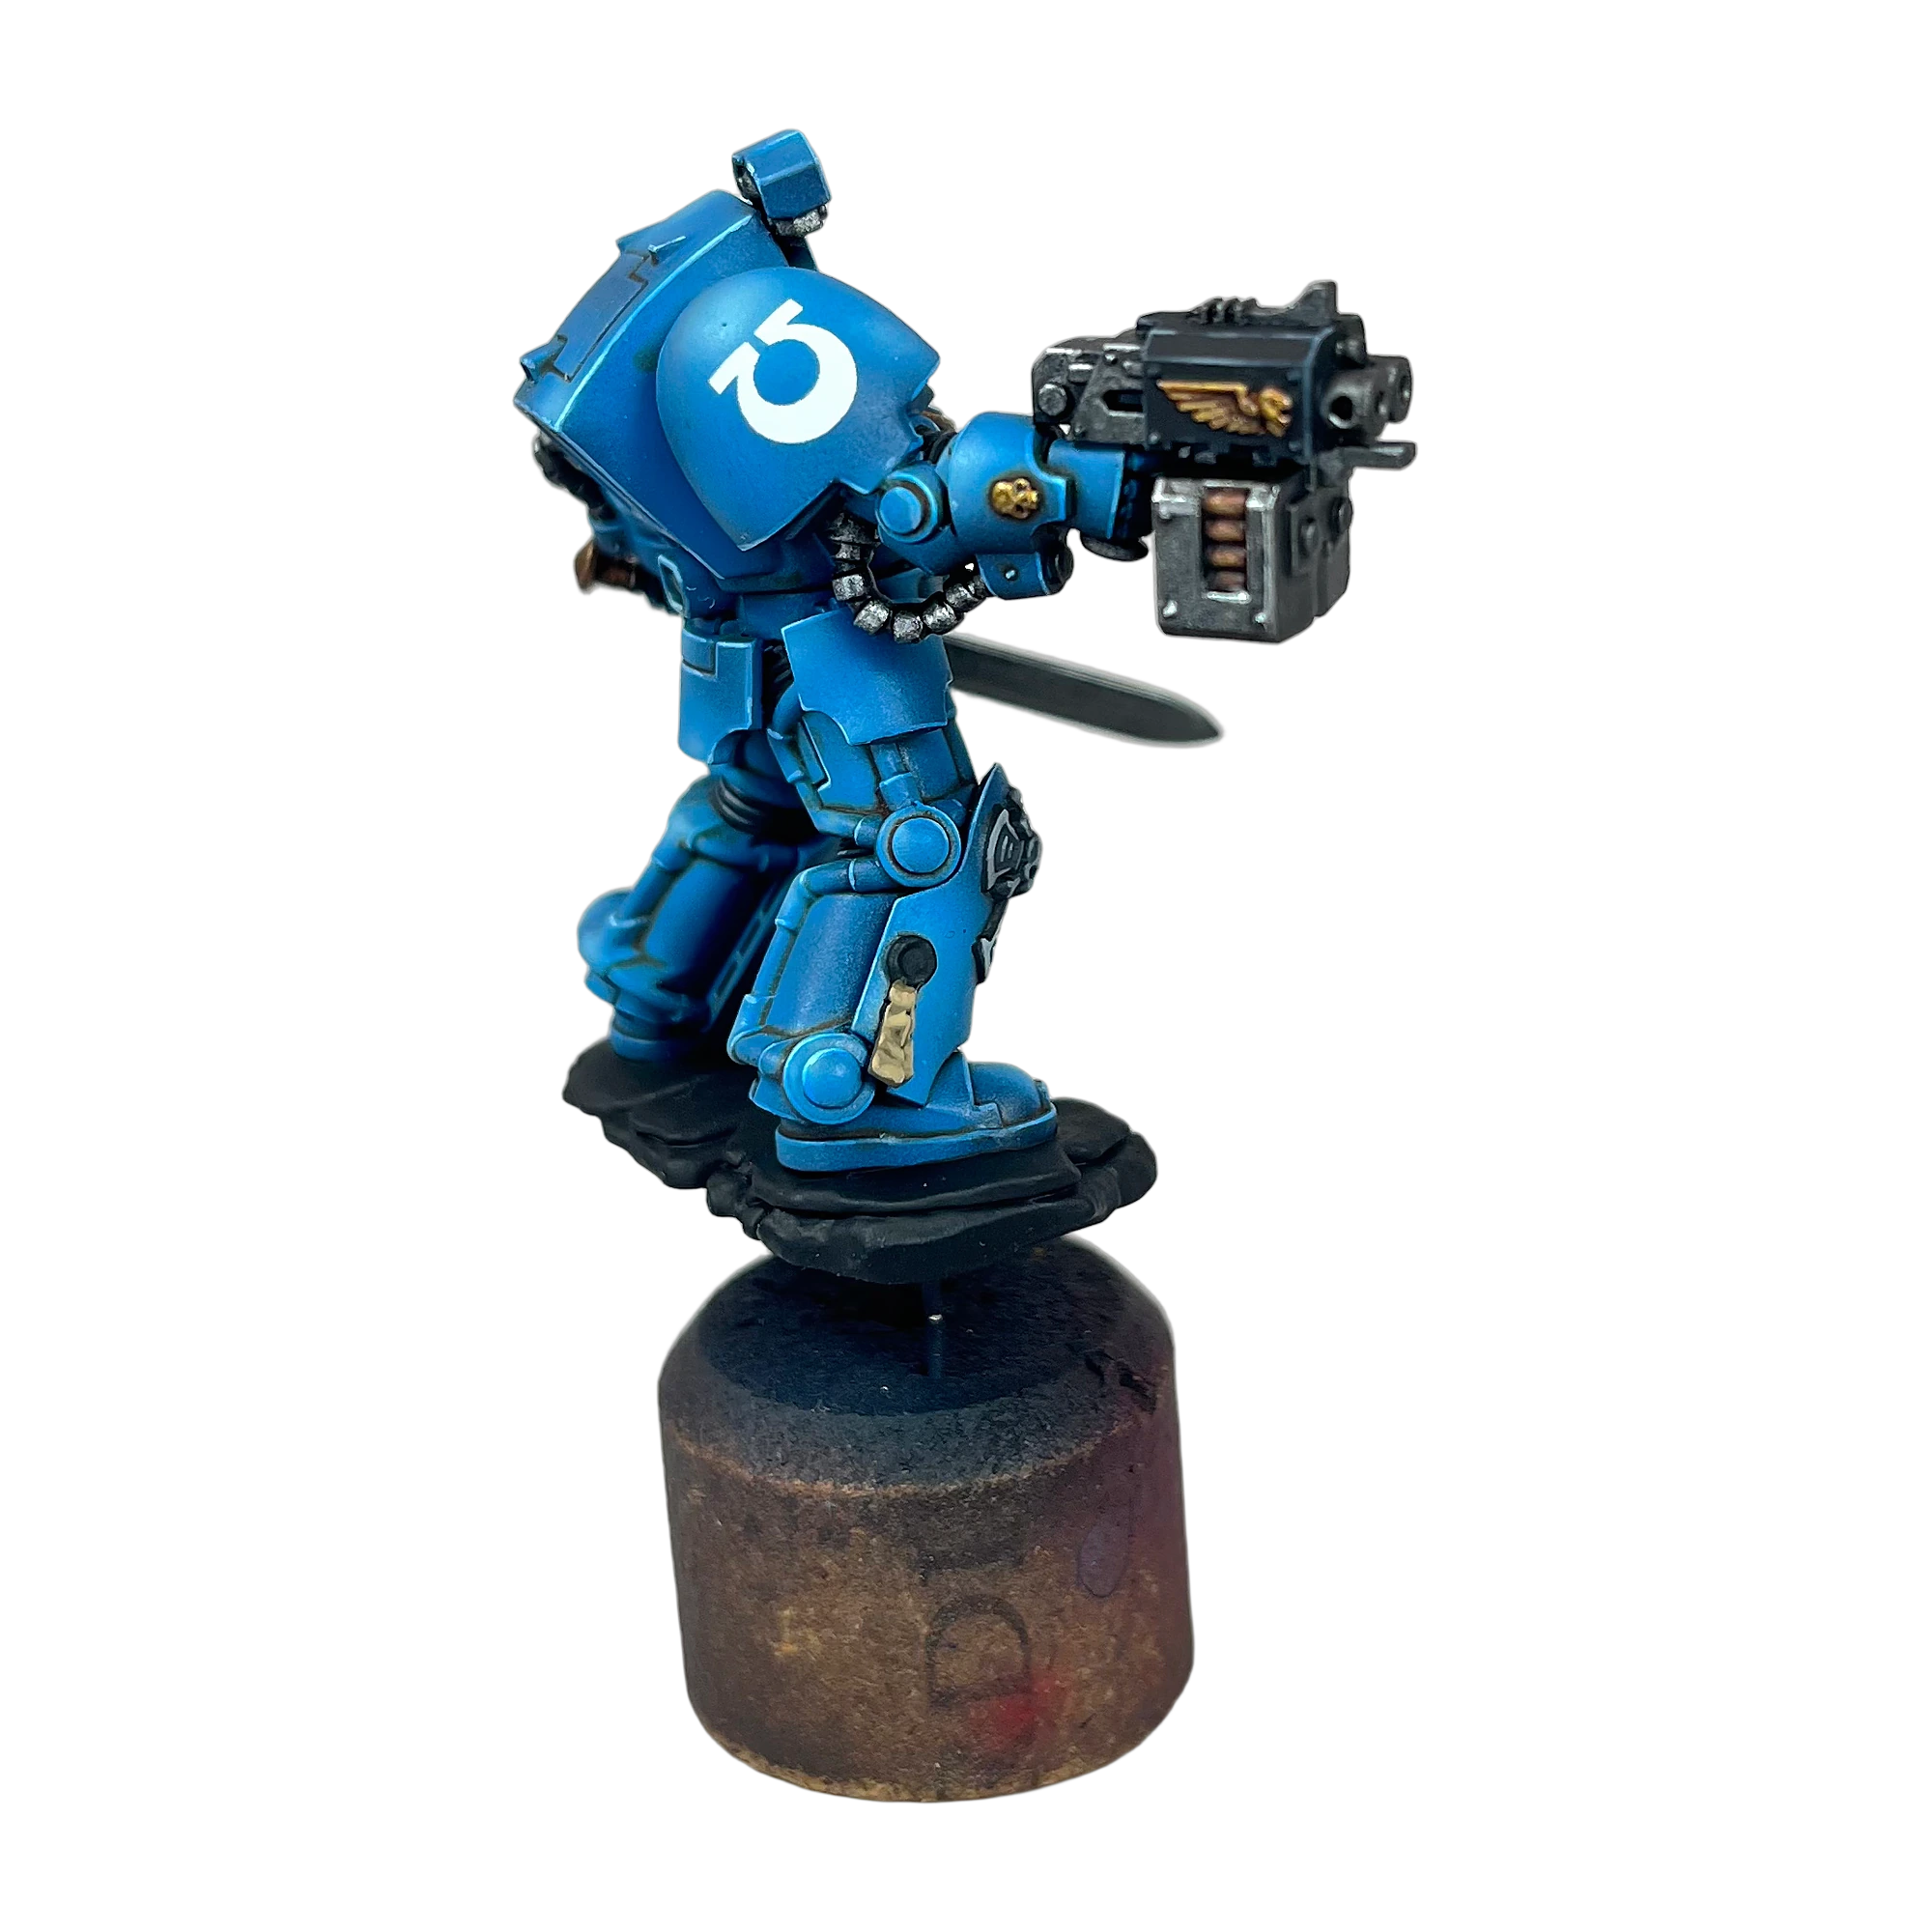
- Once positioned, brush a liberal layer of Vallejo Decal Softener / Medium over the transfer. This chemical softens the carrier film, allowing it to stretch and shrink into the curved contour of the pauldron.
- After 2 minutes, gently press a damp cotton swab against the transfer to expel trapped fluid and flatten the decal edges flush with the paint.
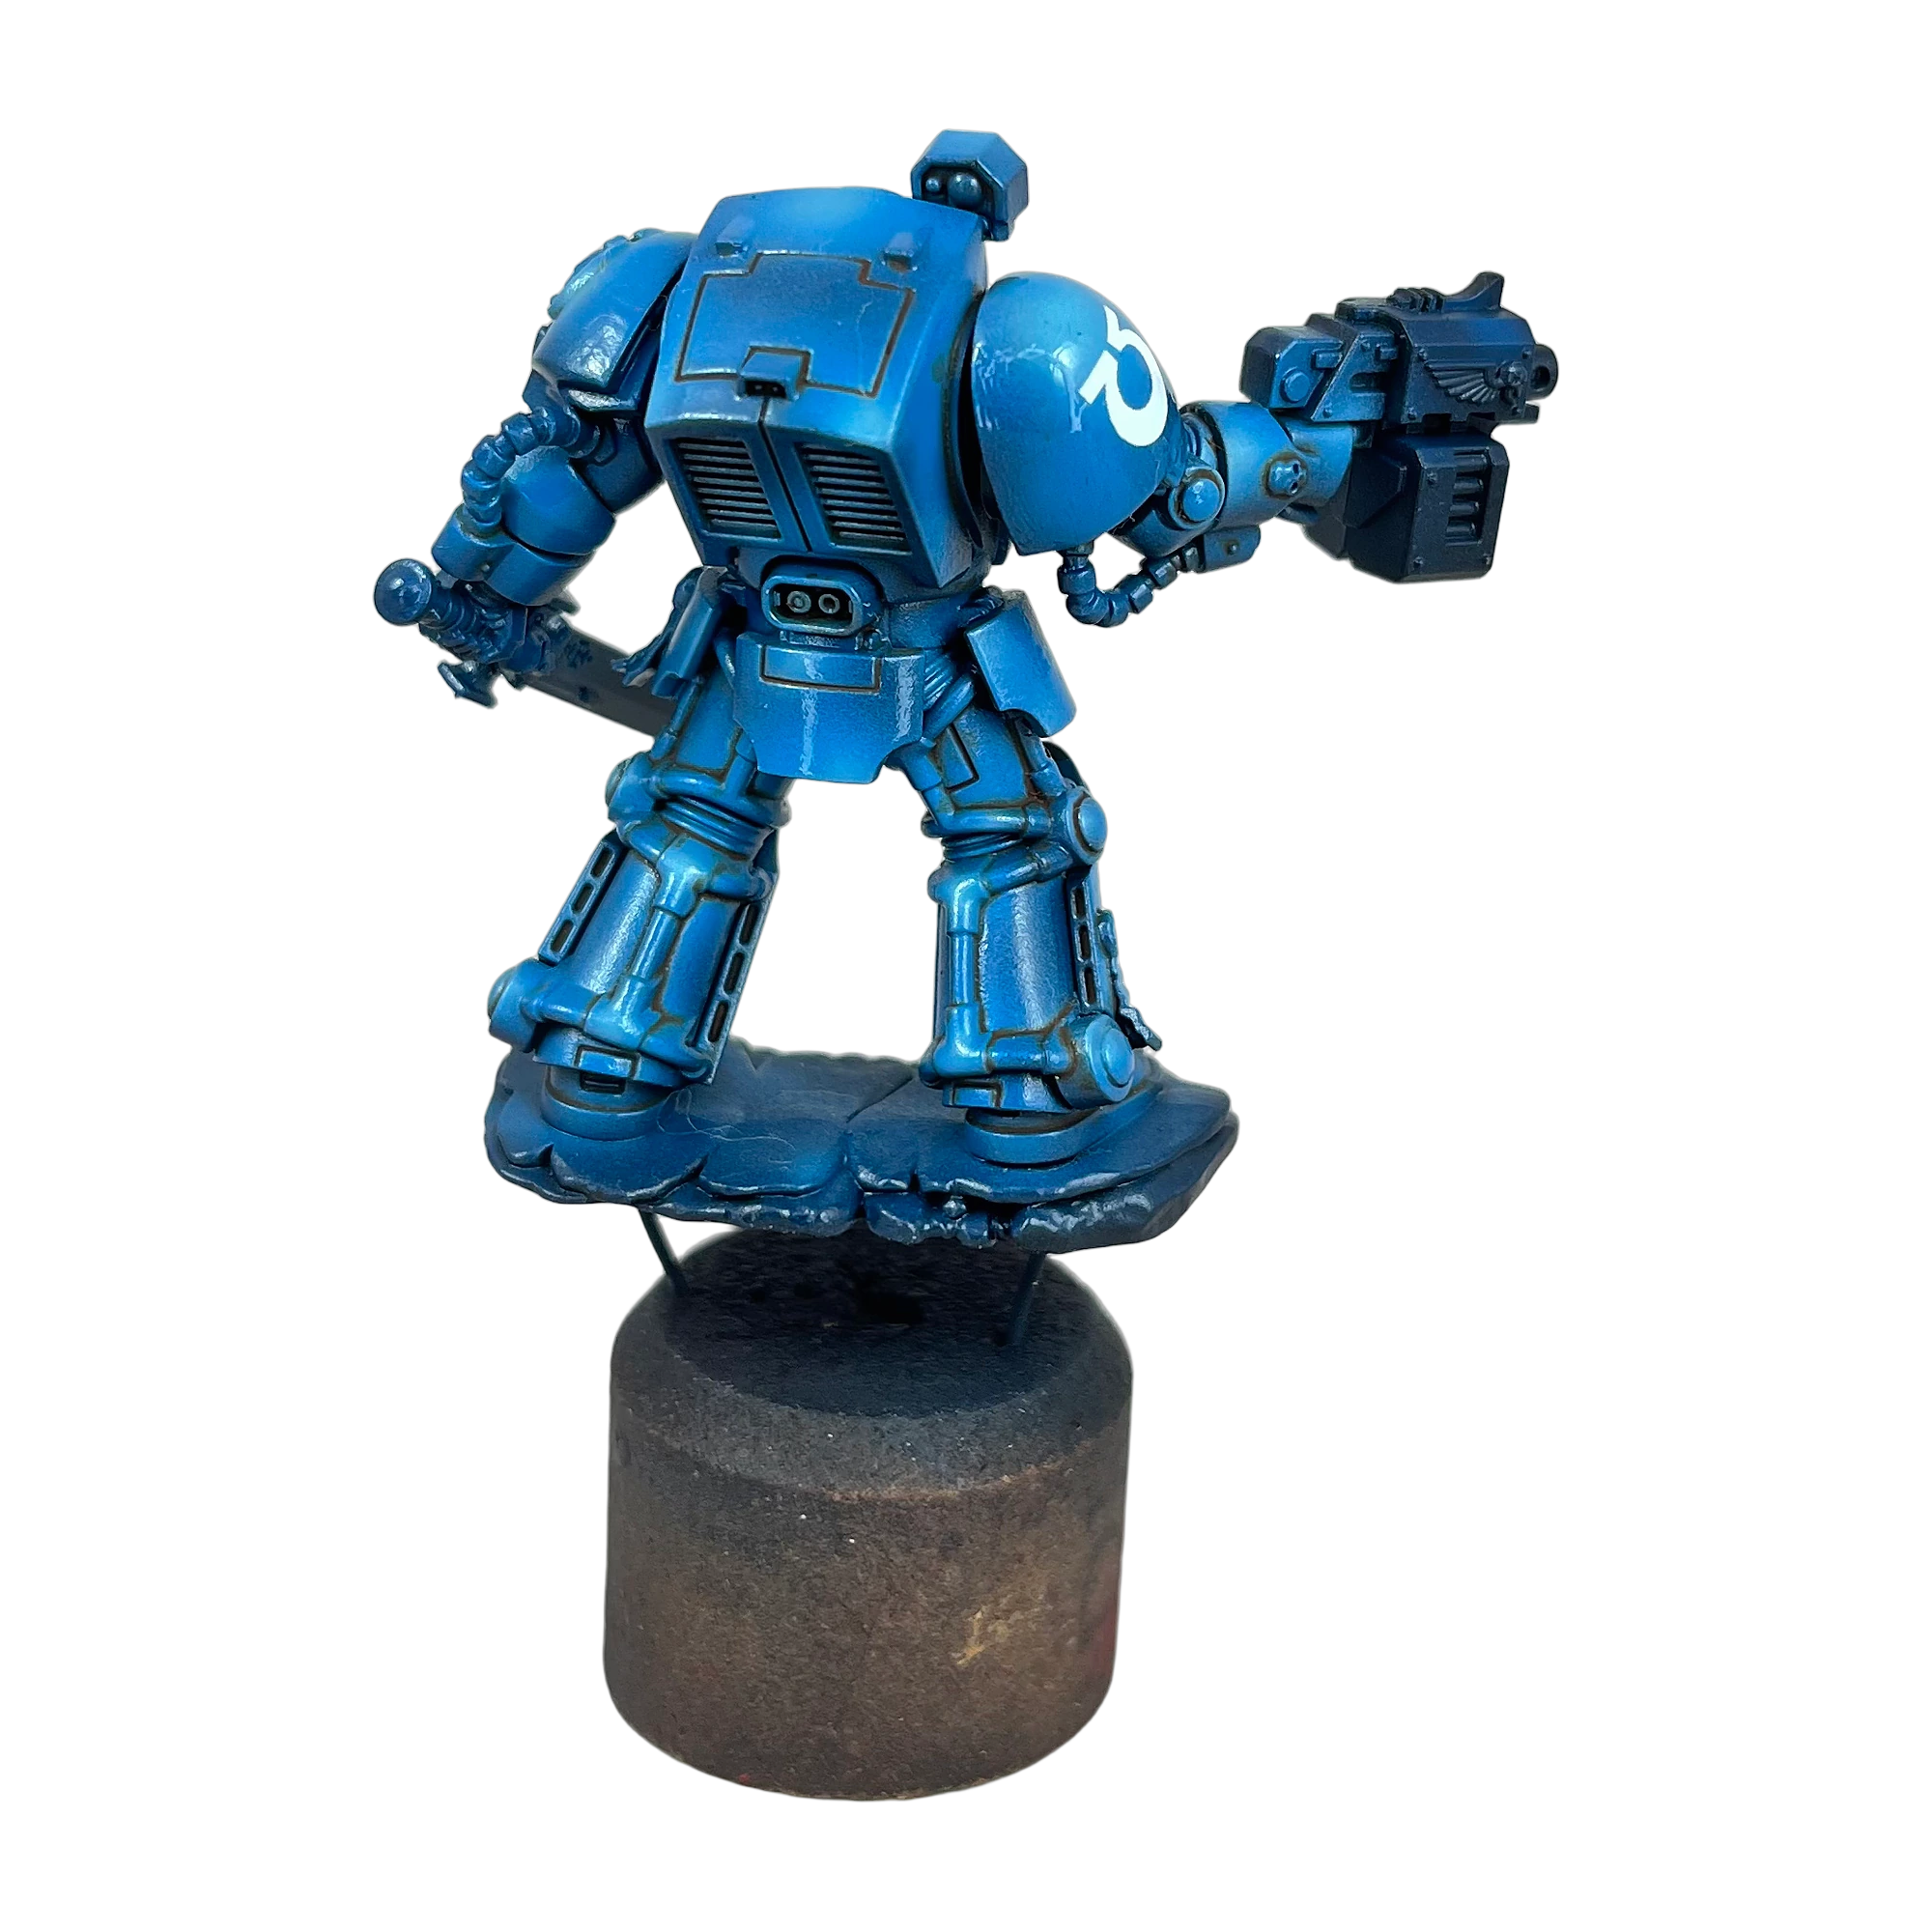
Step 8: The Capillary Oil Pin-Wash (Winsor & Newton Burnt Umber)
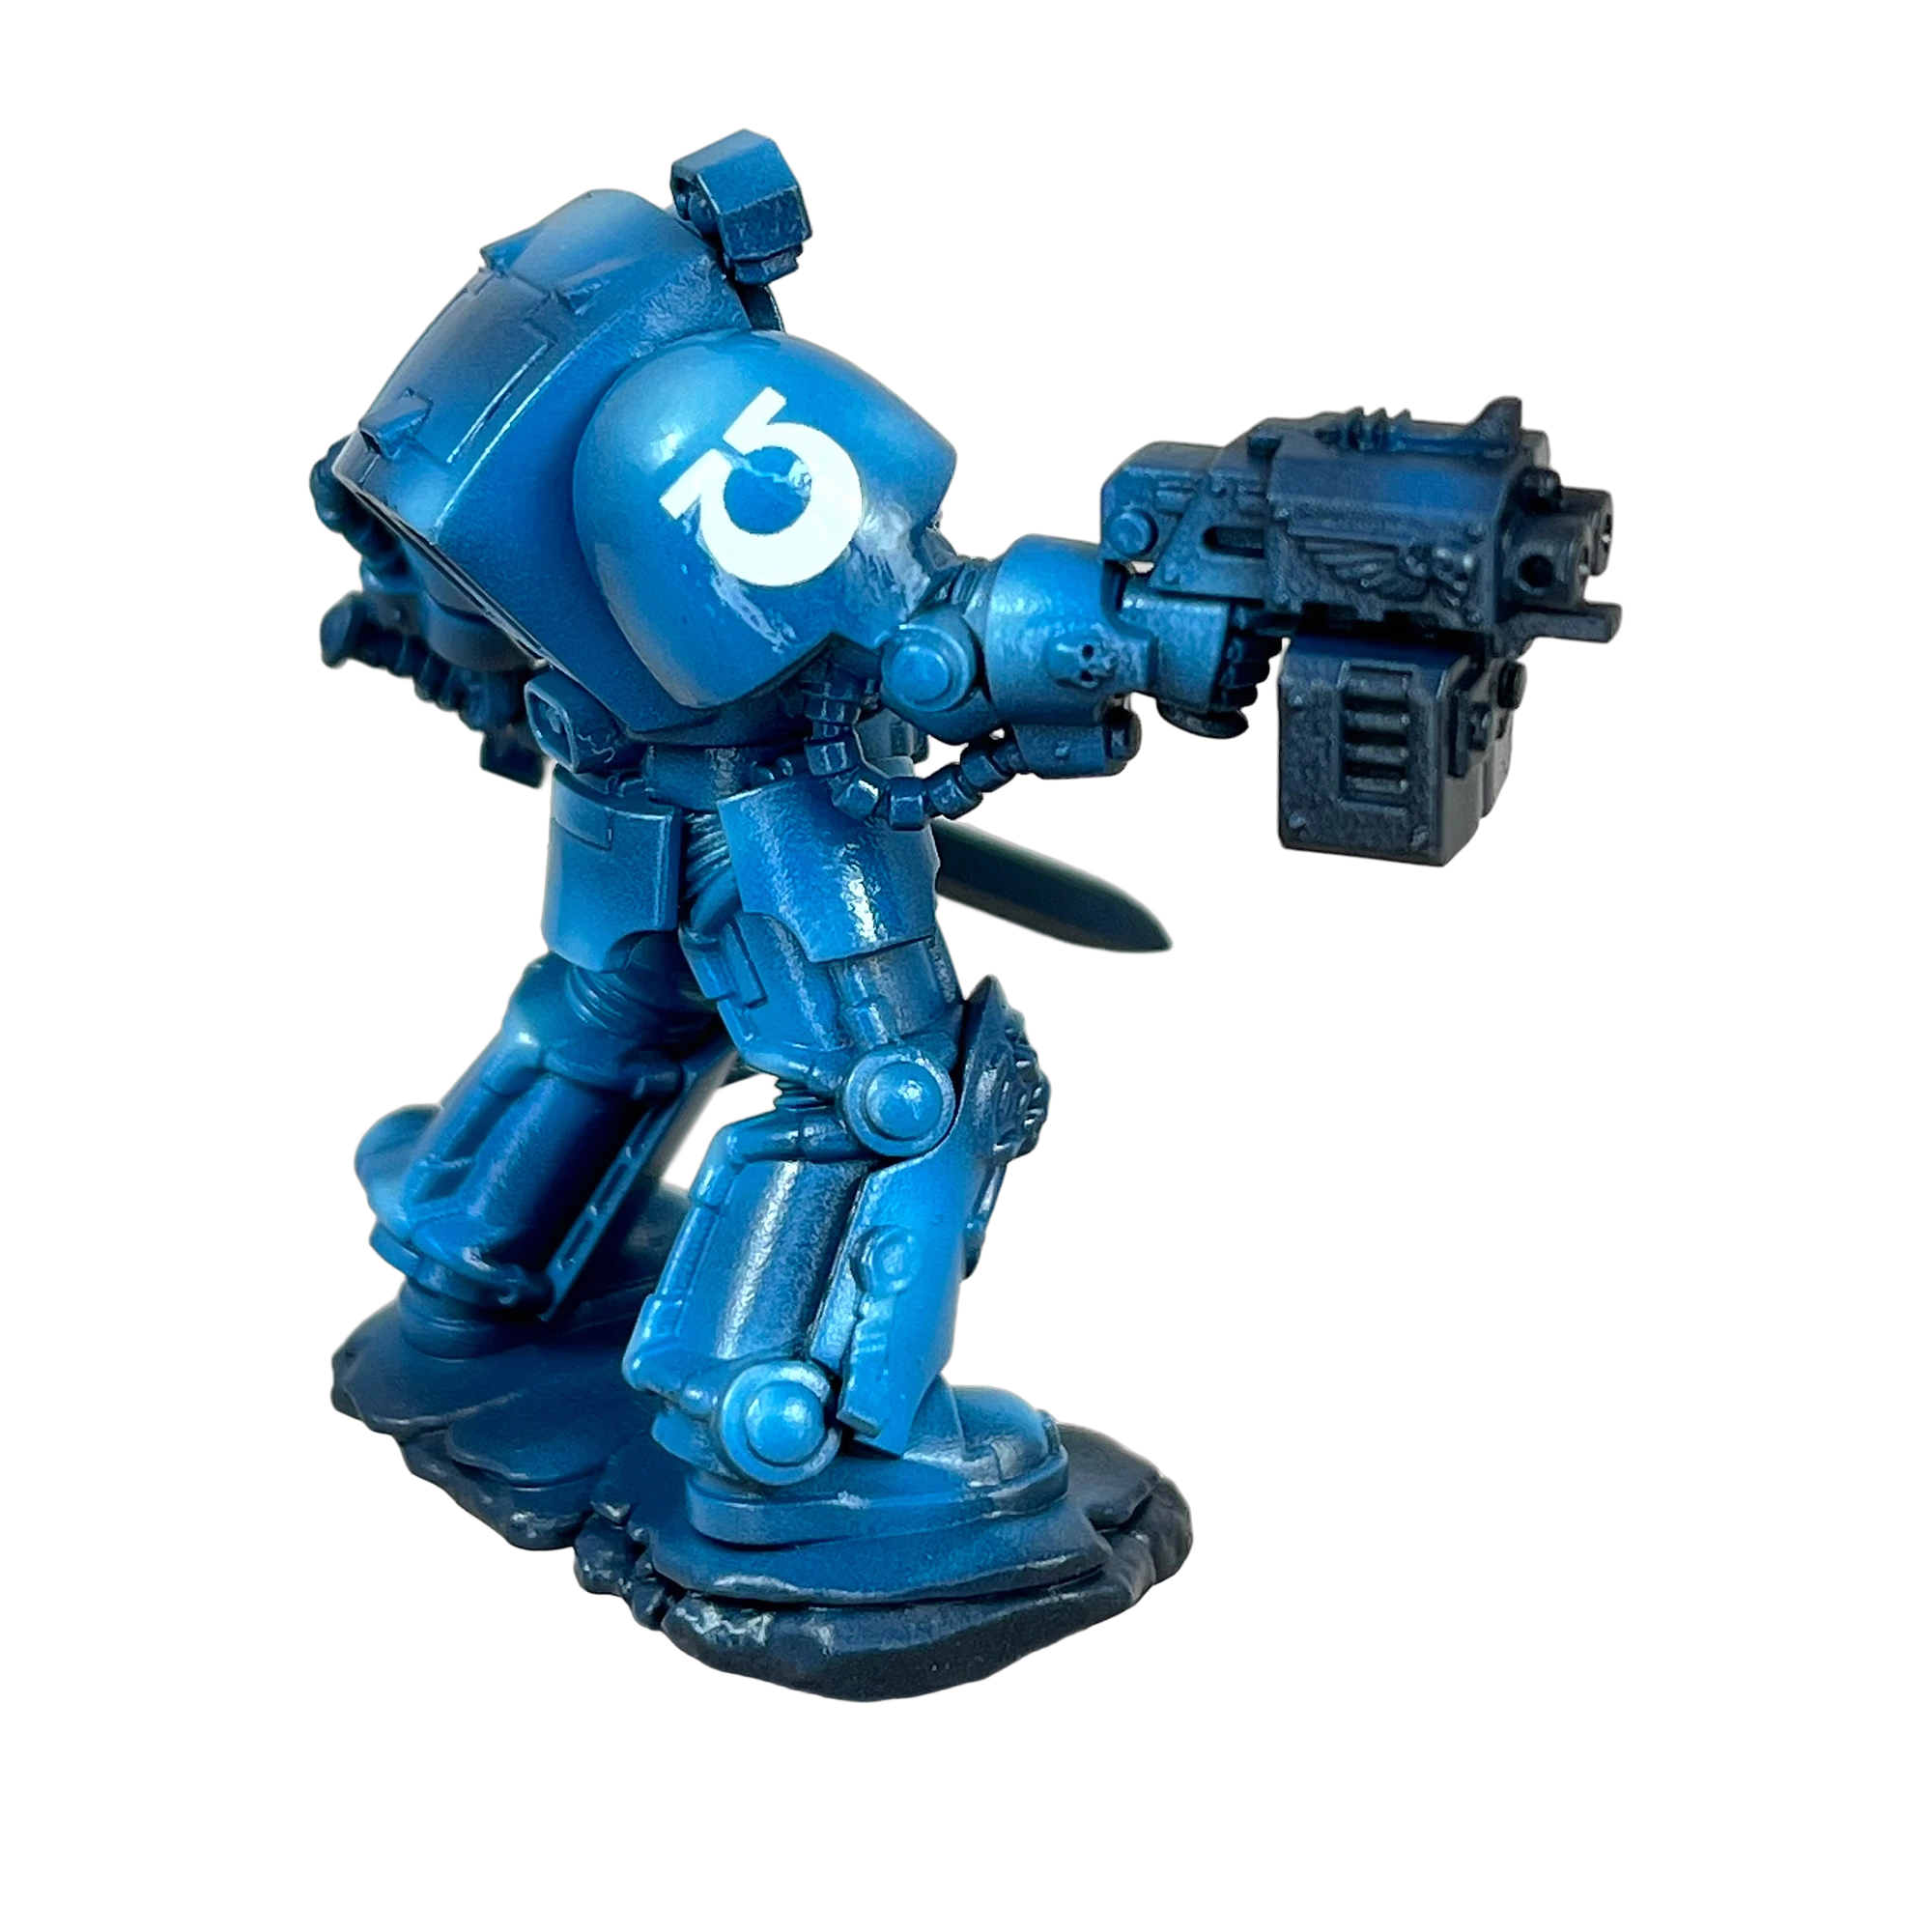
Mix a pea-sized amount of Winsor & Newton Burnt Umber Oil Paint with Odourless Mineral Spirit until it reaches the consistency of skim milk.
- Touch the tip of a #00 brush to any armor crevice, rivet, or panel recess.
- Watch as capillary action instantly draws the dark oil wash through the recessed groove without staining the surrounding gloss armor plates.
- Allow 20 minutes for the solvent to flash off. If any wash overflowed, lightly dampen a pointed cotton swab in pure mineral spirit and effortlessly wipe away the stray oil. The underlying acrylic paint and gloss varnish remain completely unaffected.
Step 9: Passivating the Luster (Vallejo Satin Varnish)
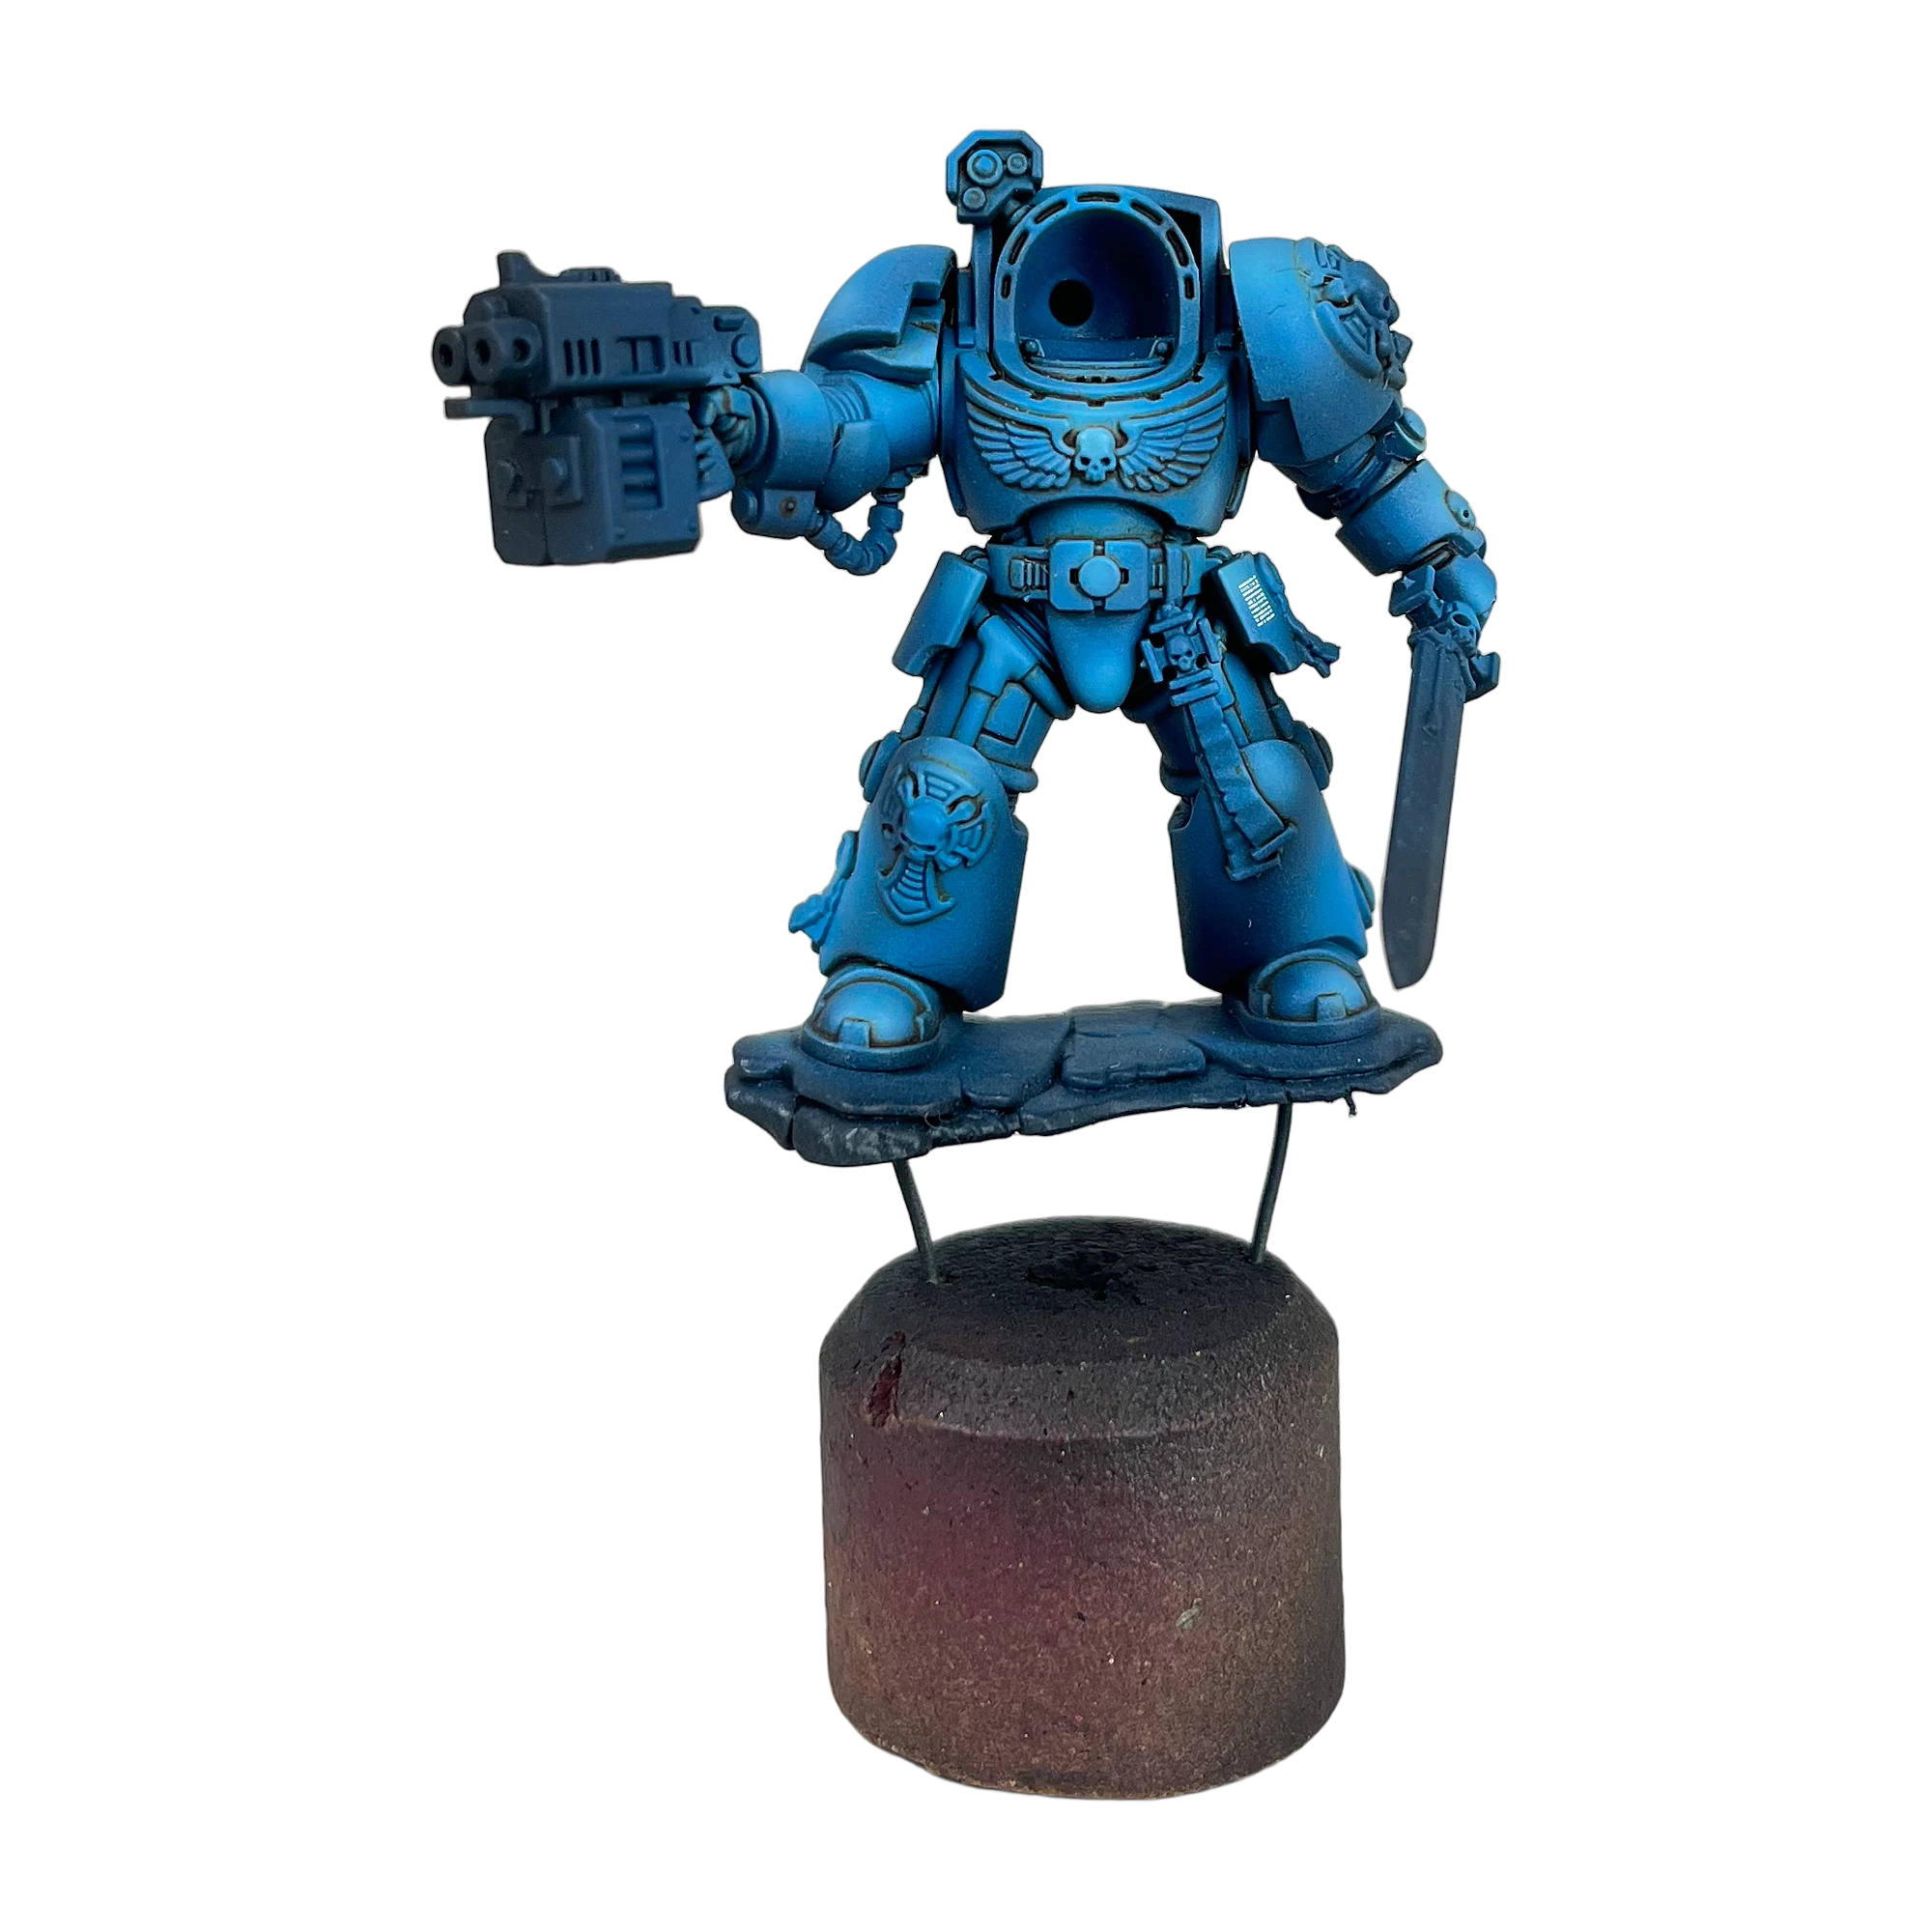
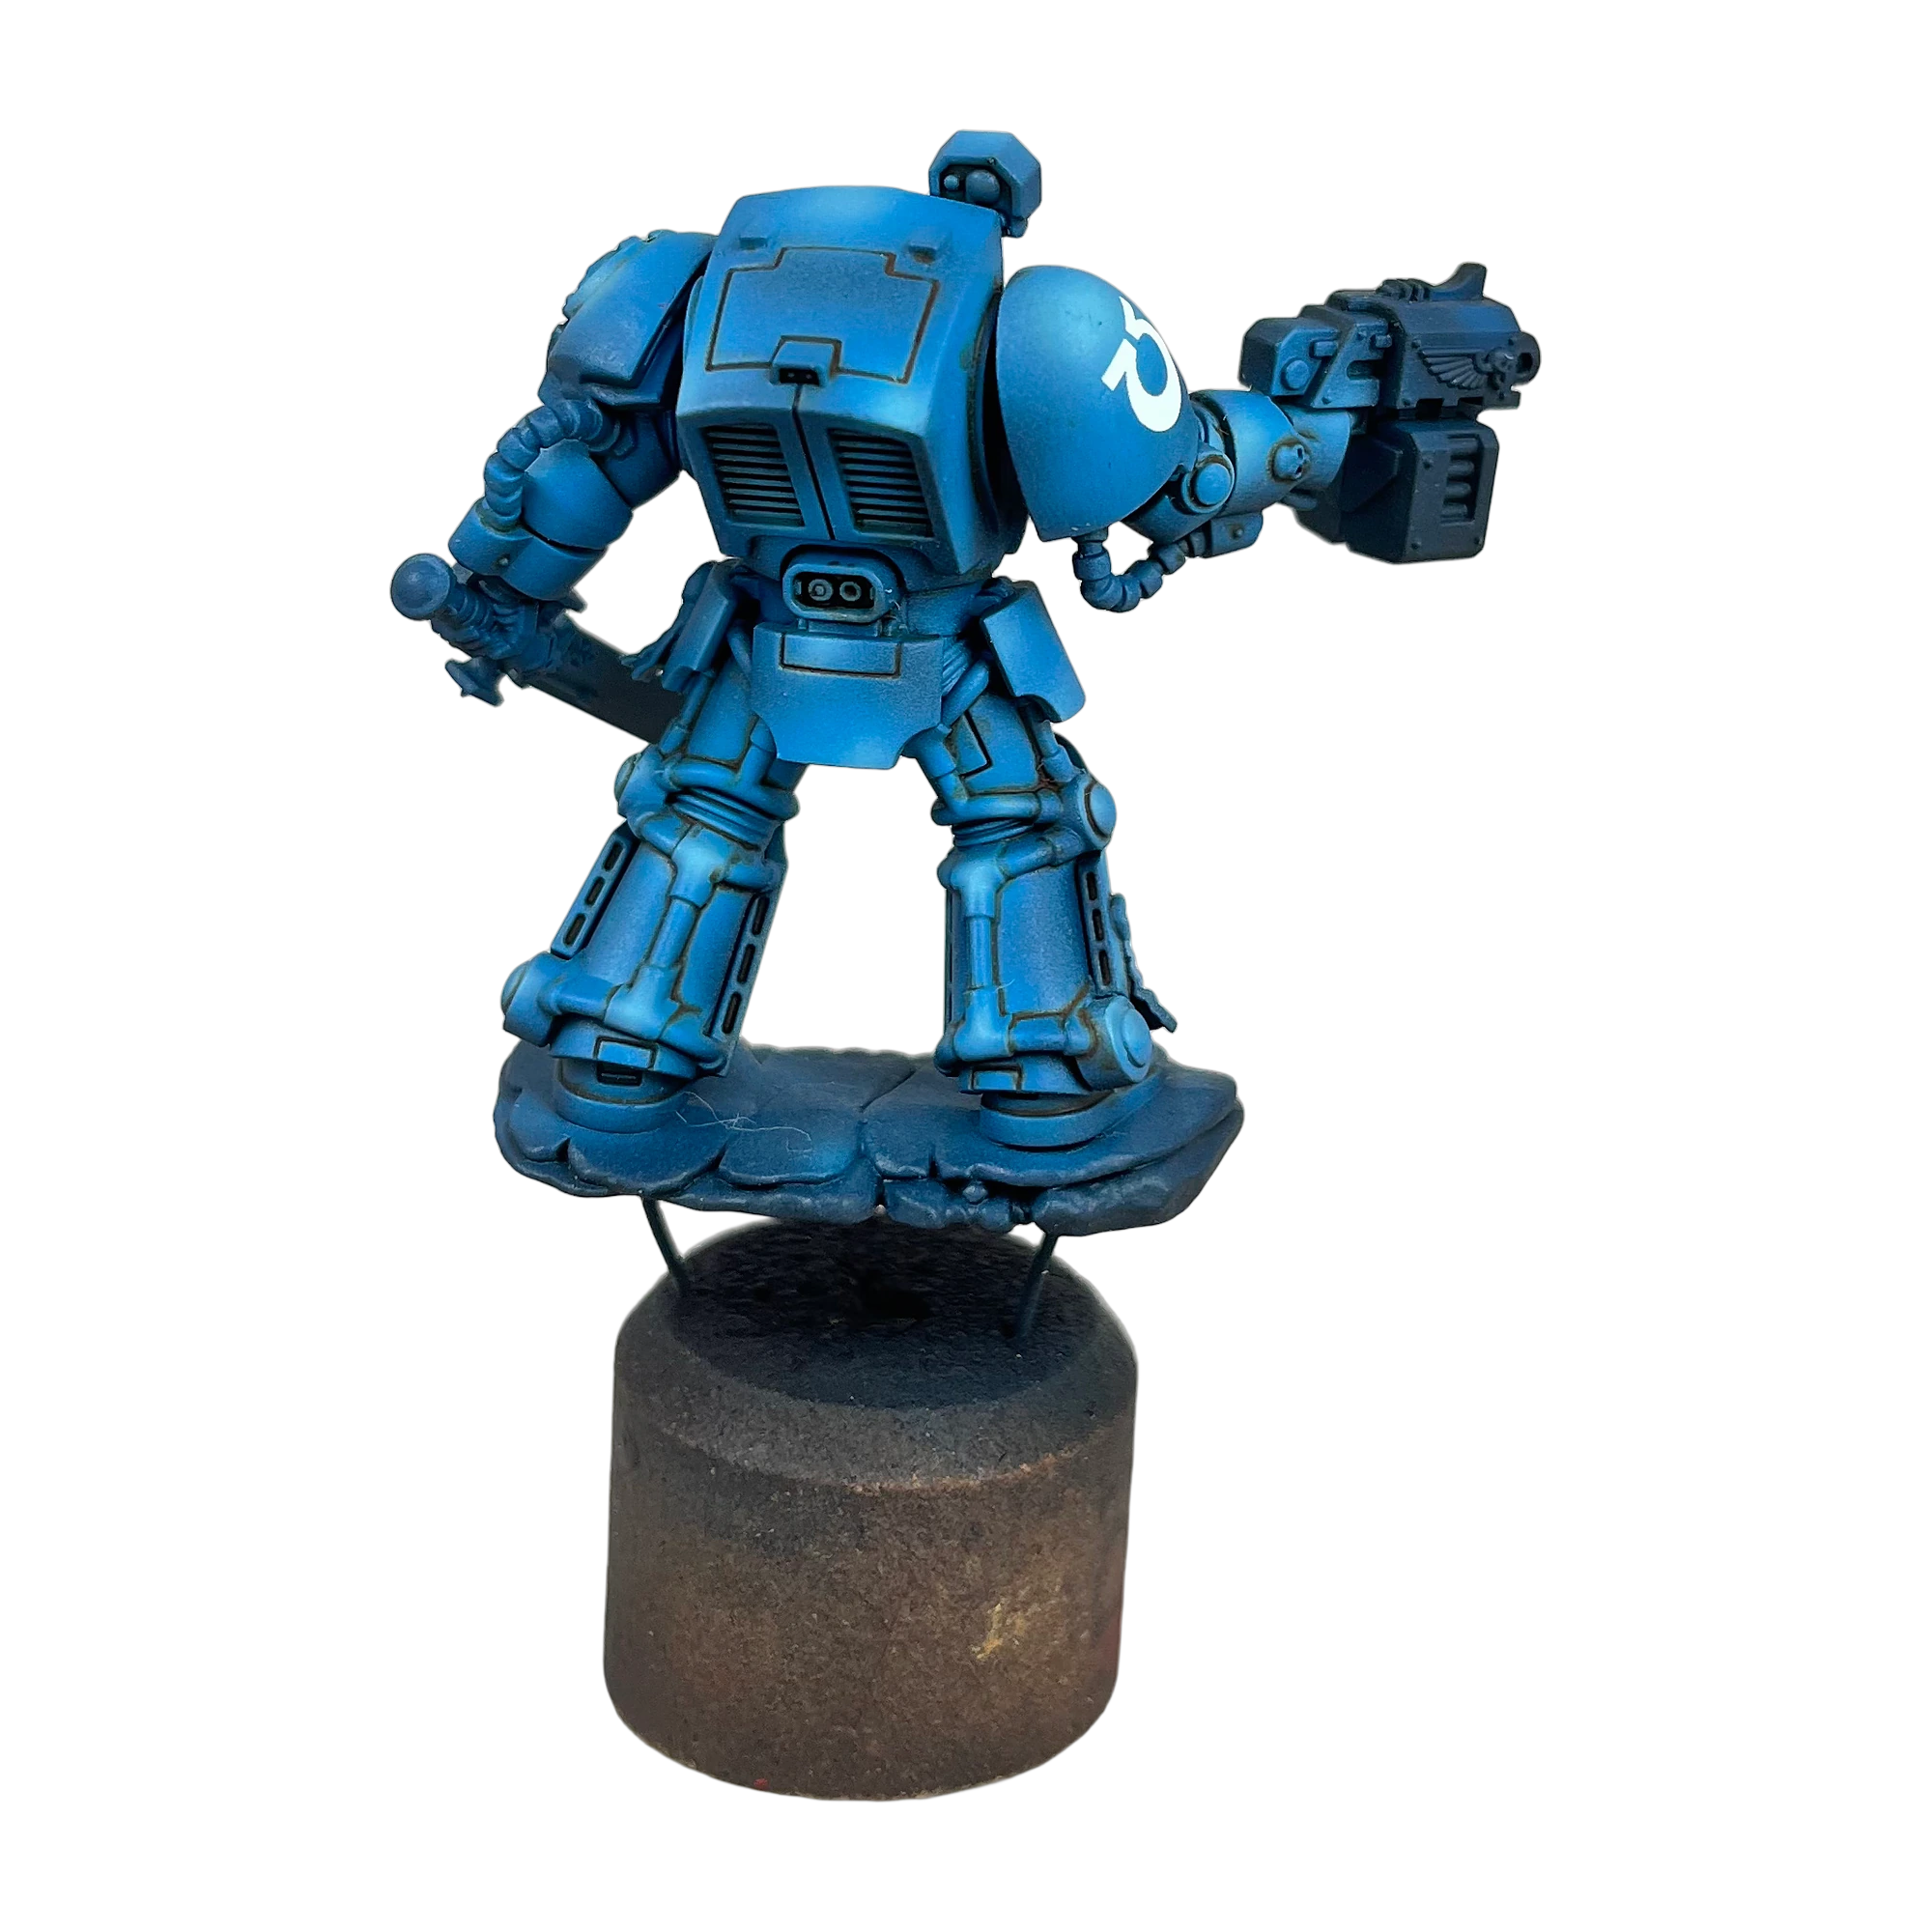
Allow the oil wash to dry completely (minimum 12–24 hours). Once cured, spray or brush a uniform coat of Vallejo Satin Varnish over the entire miniature.
- This protects the delicate oil paint from rub-off.
- It kills the toy-like gloss sheen, restoring a rich, museum-grade satin luster that preserves deep contrast without unwanted glare.
6. Phase 4: Tactical Armor Definition — Dual-Tier Edge Highlighting
With volumes established and panel lines defined, edge highlighting provides the graphic punch that defines Warhammer 40K miniatures on the tabletop.
Step 10: Dual-Tier Edge Definition
We employ a two-stage edge highlighting system to emulate hard specular reflections along the ceramite plates:
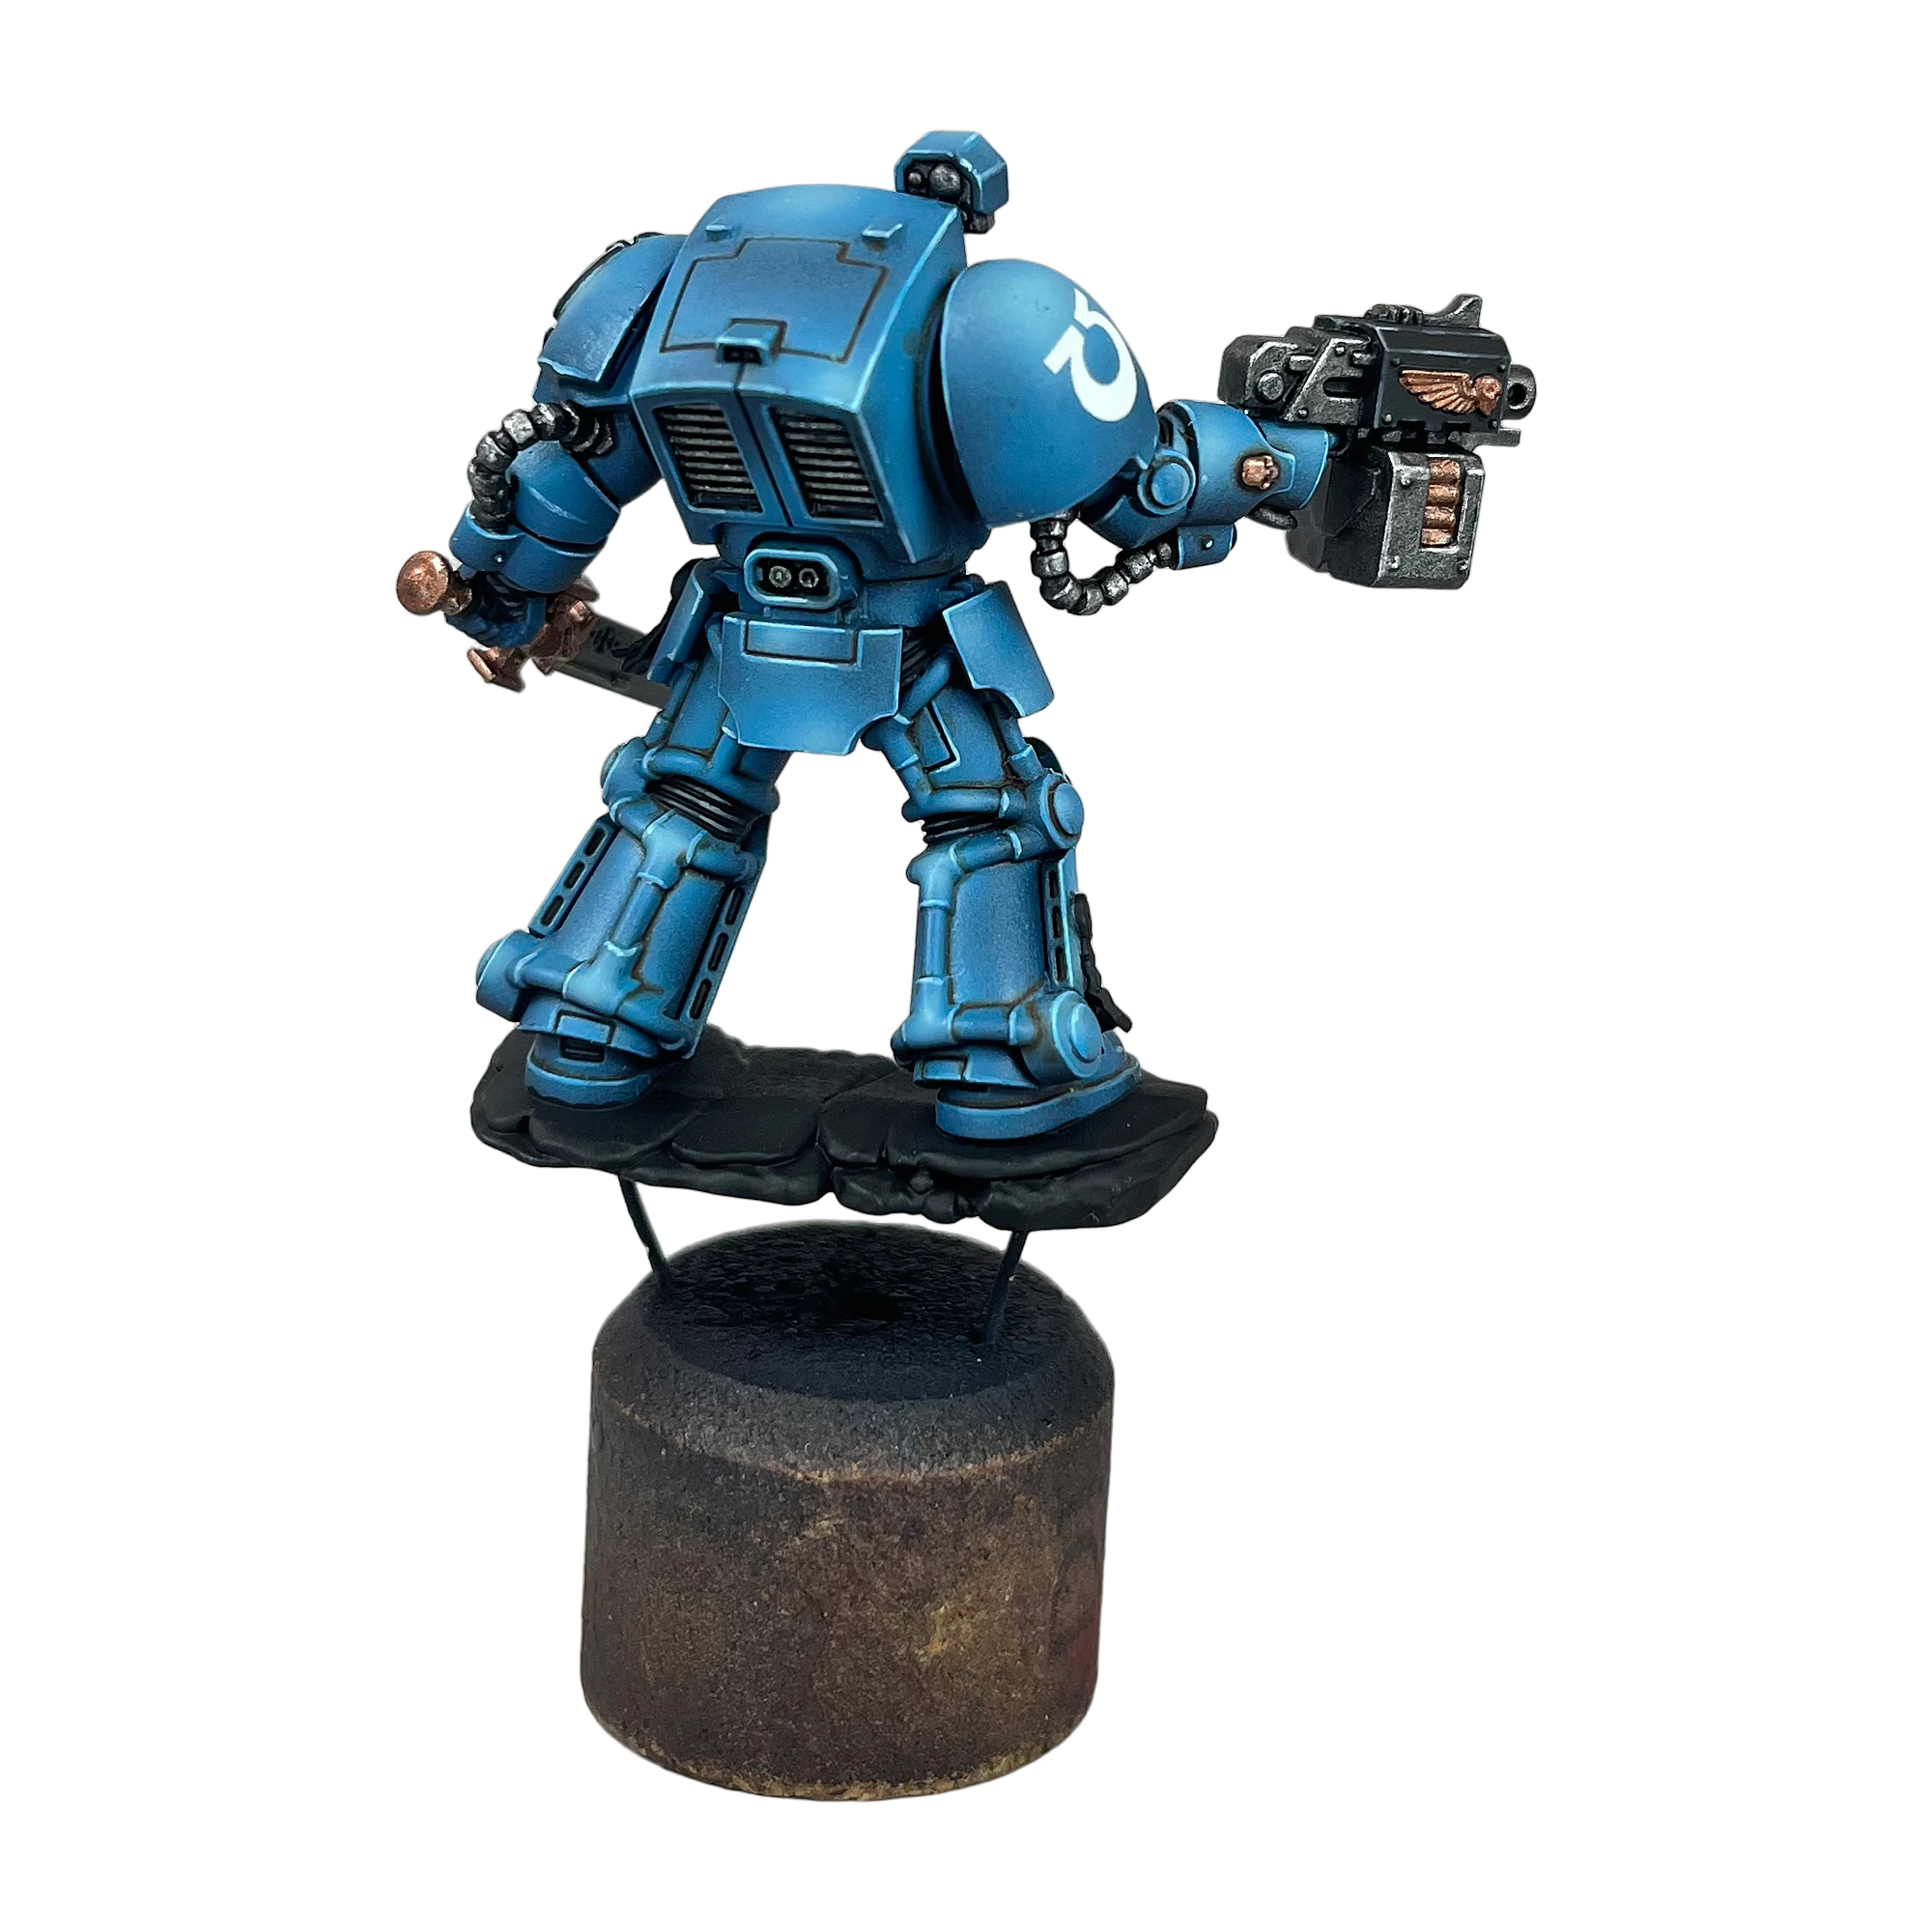
- Tier 1 (Broad Edge Highlight): Using Vallejo Electric Blue diluted 1:1 with water, run the side of your brush along every exposed edge of the armor (pauldrons, greave edges, chest plates, and power fist fingers). The dilution ensures the paint flows effortlessly from the brush belly without skipping.
- Tier 2 (Point Specular Highlight): Using Vallejo Verdigris, place micro-dots strictly at corners, vertex intersections, and the highest upward-facing surfaces where light naturally catches.
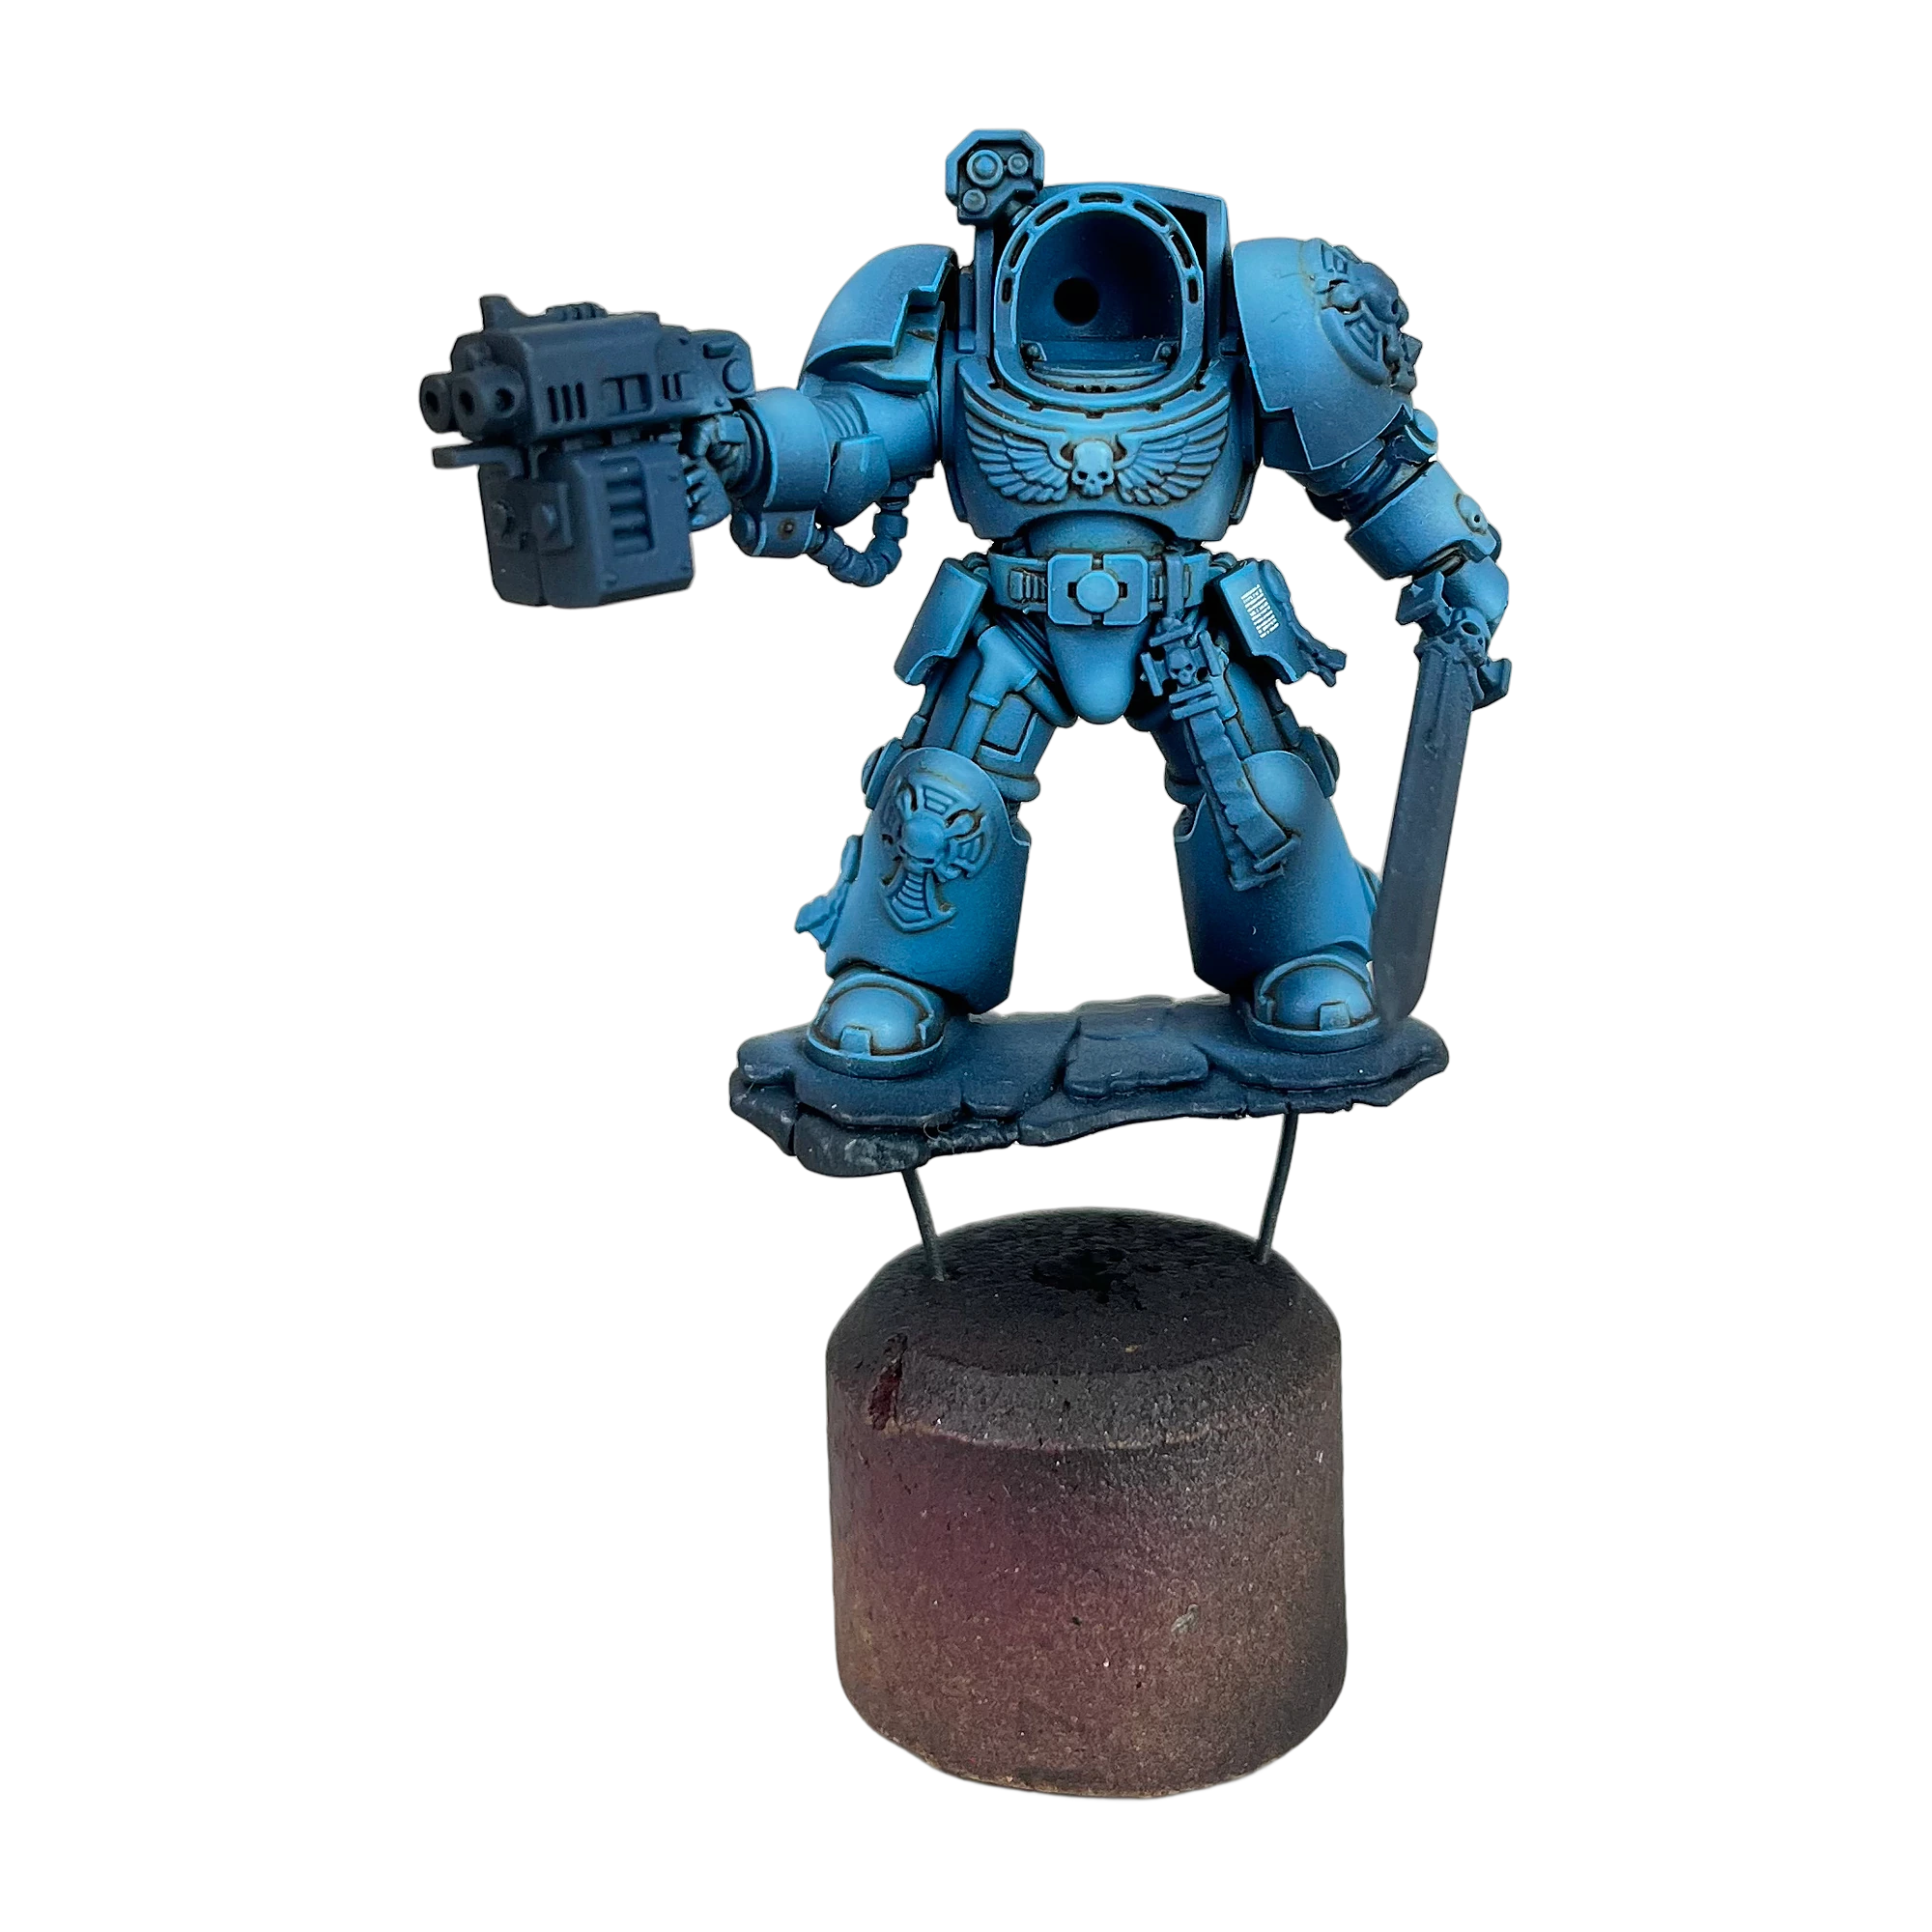
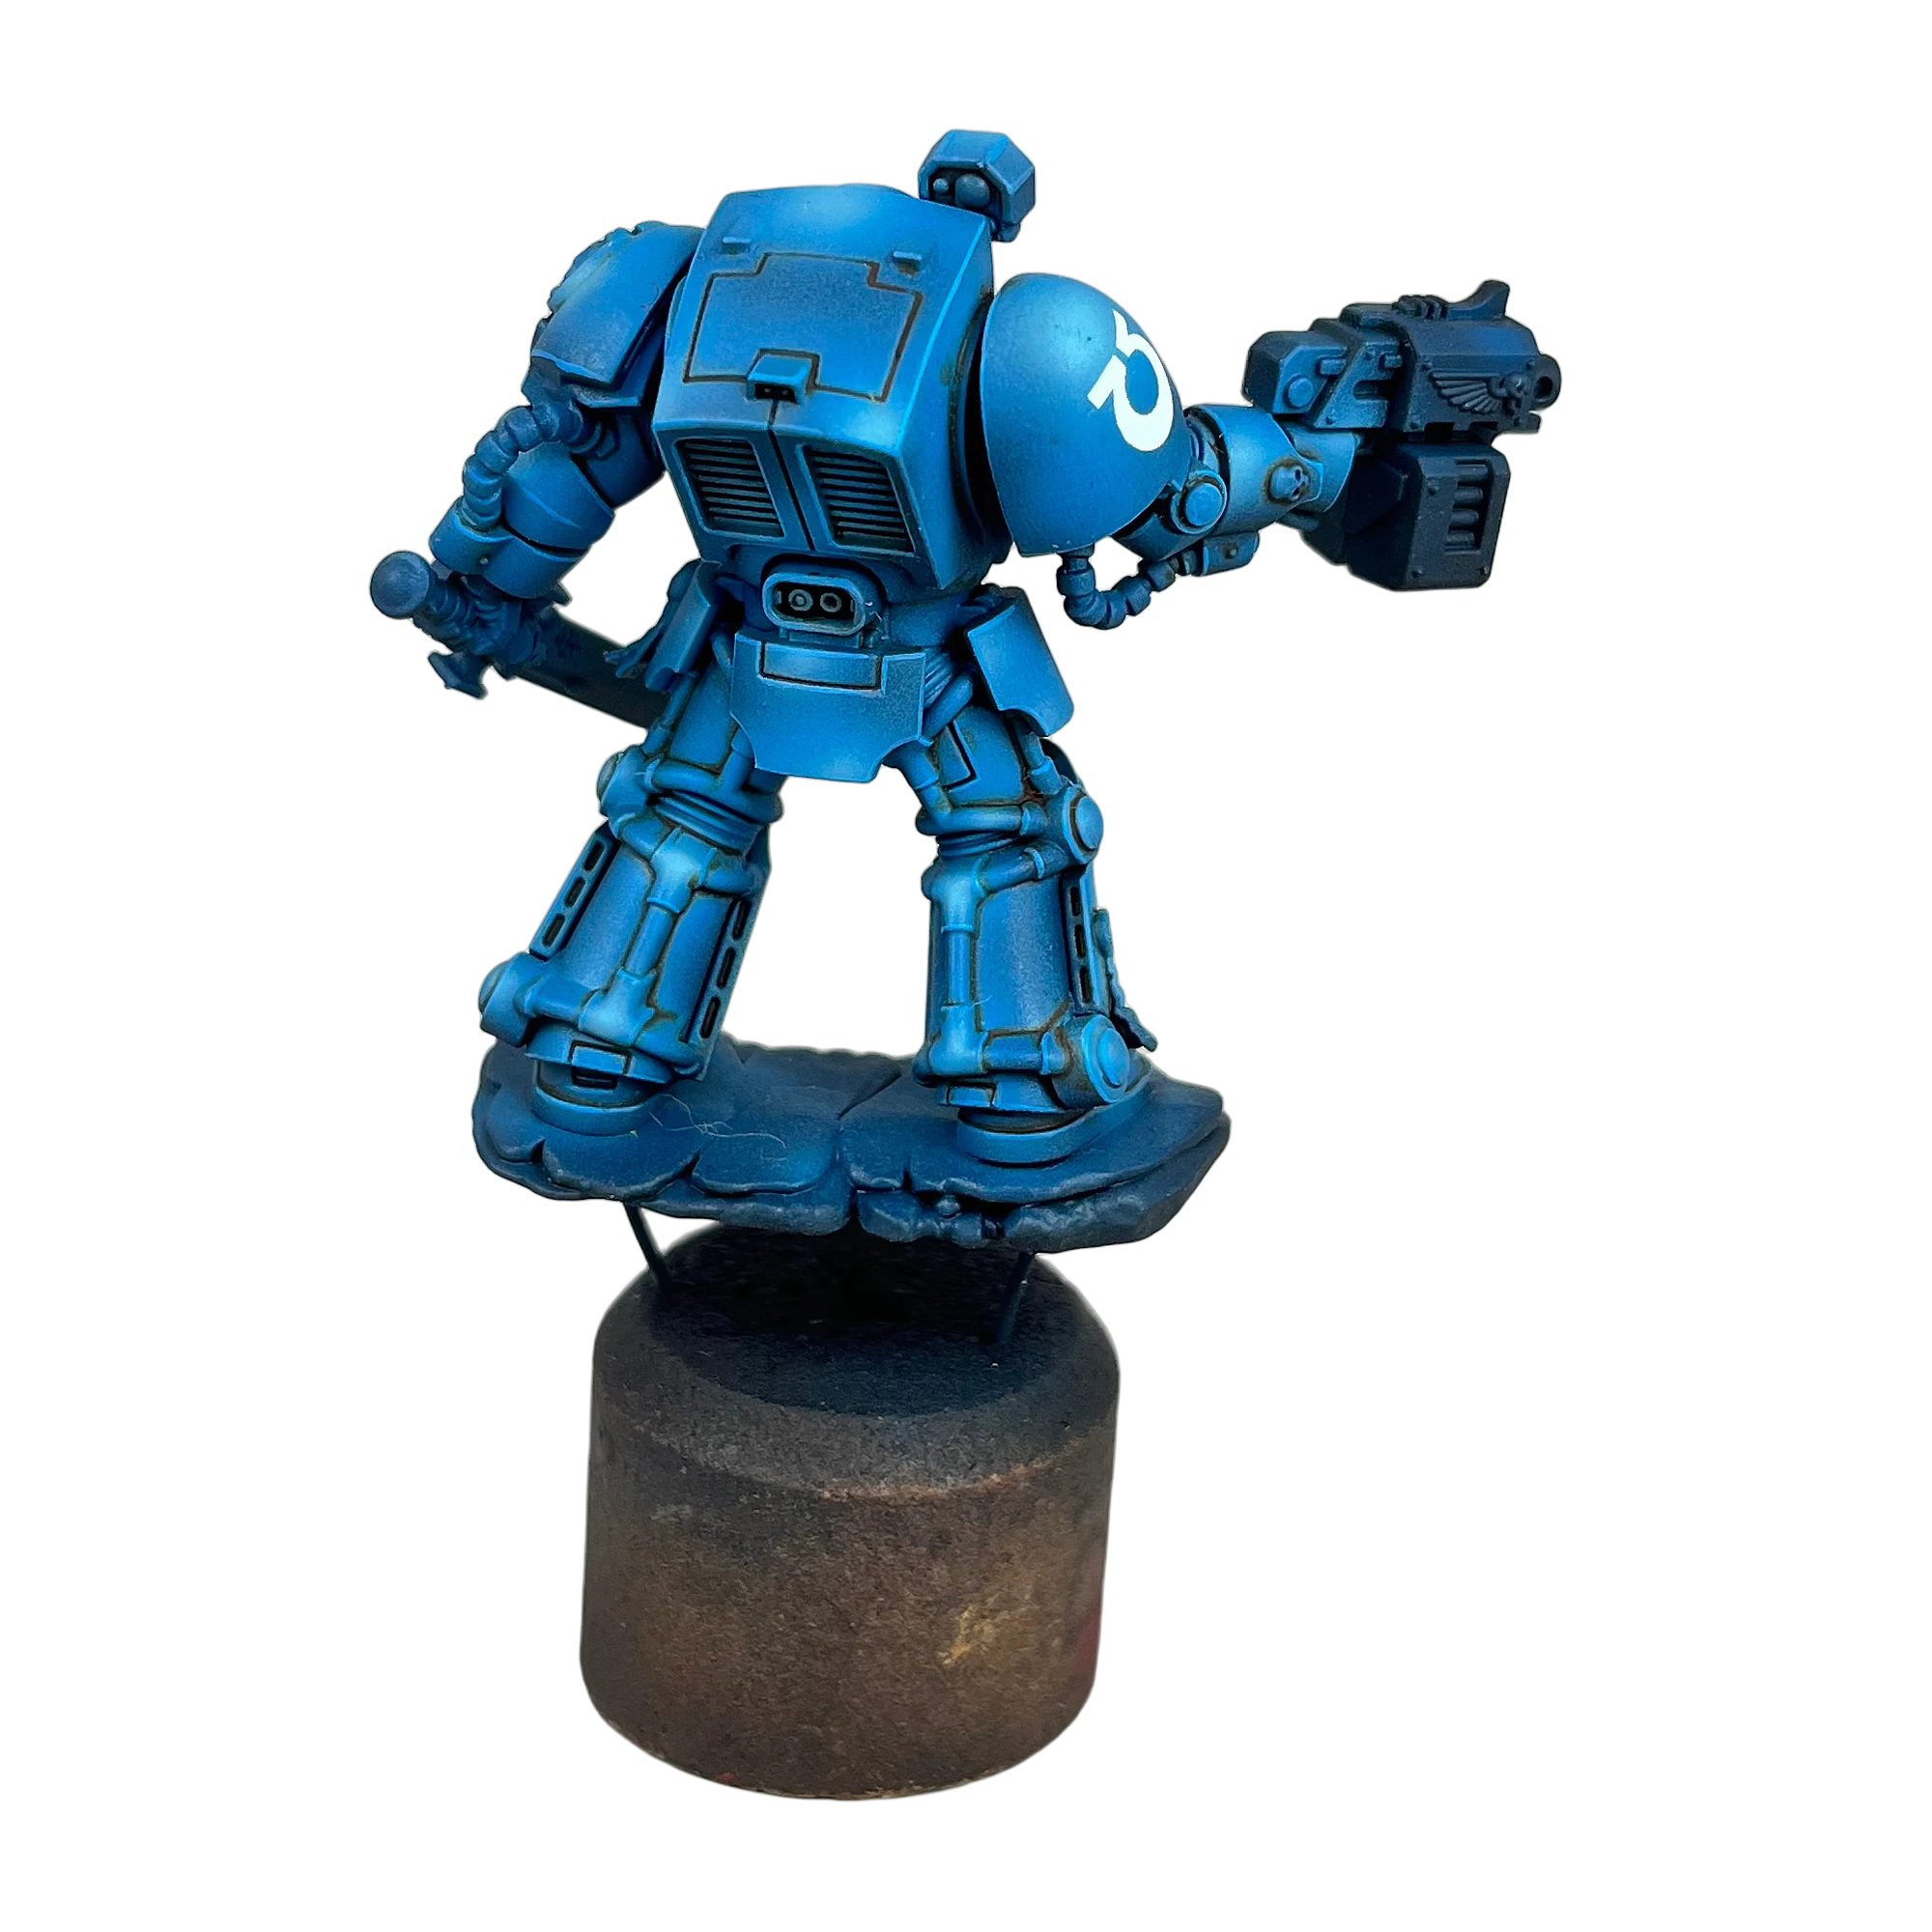
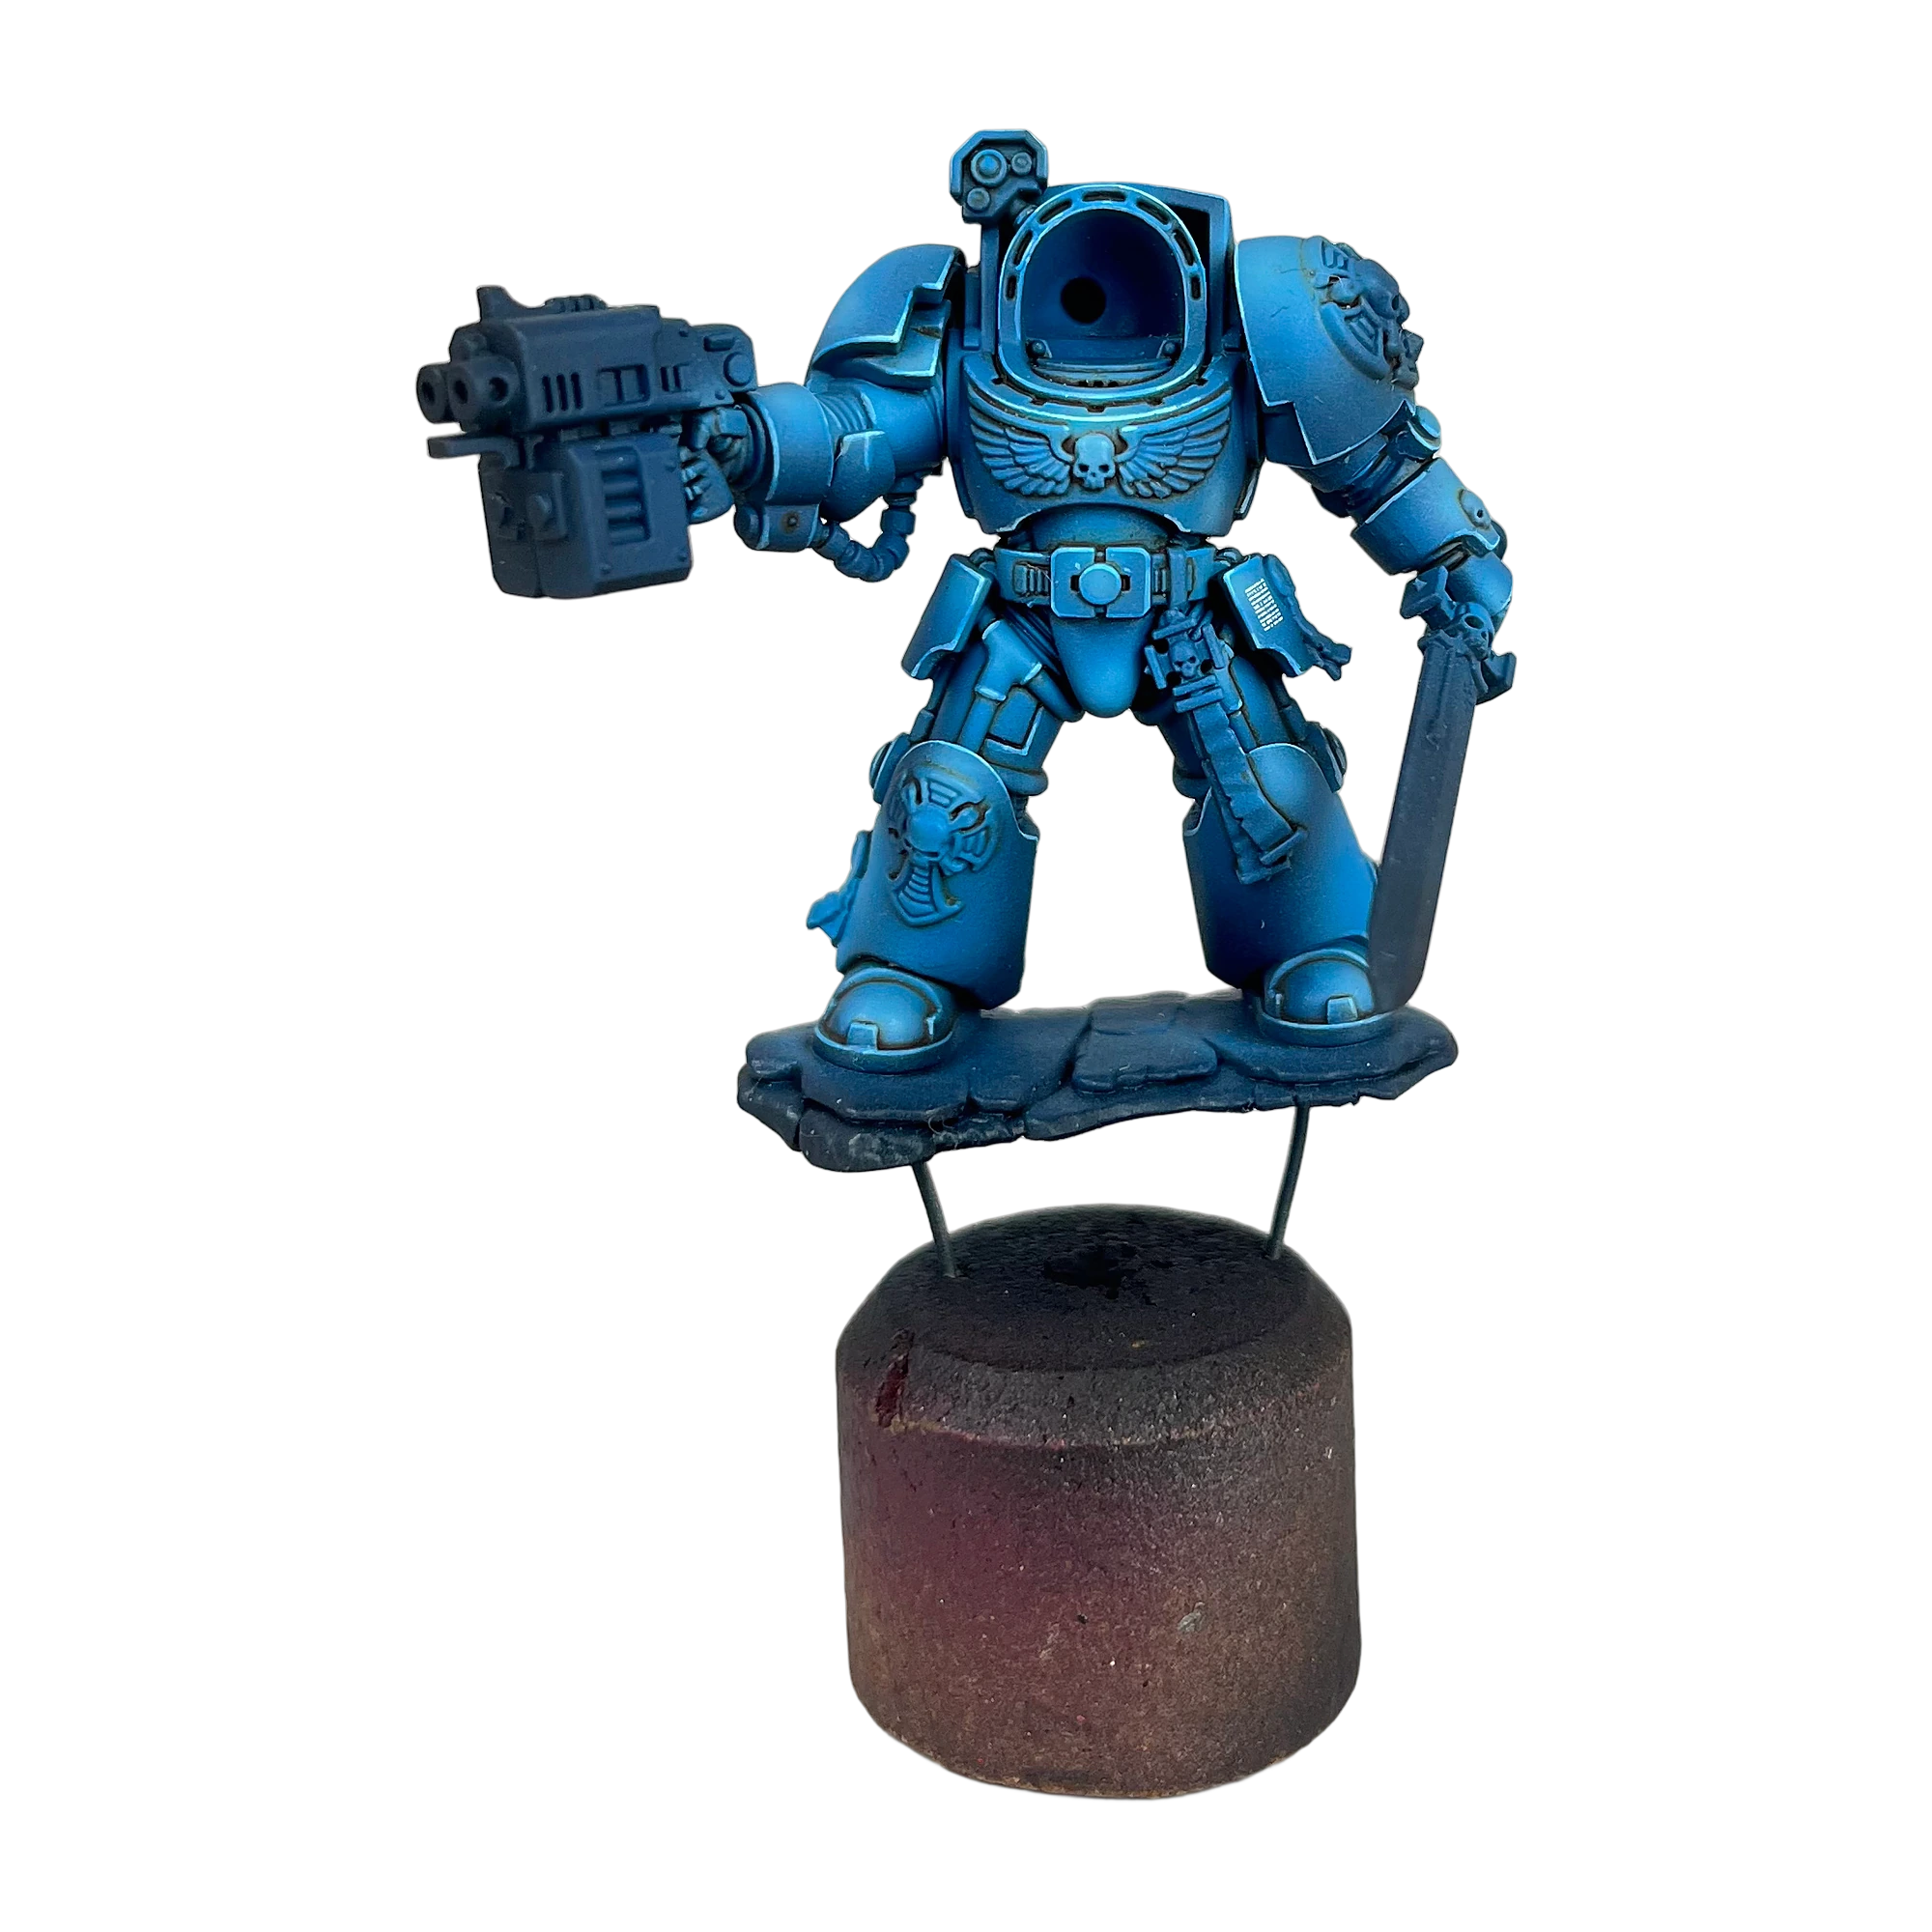
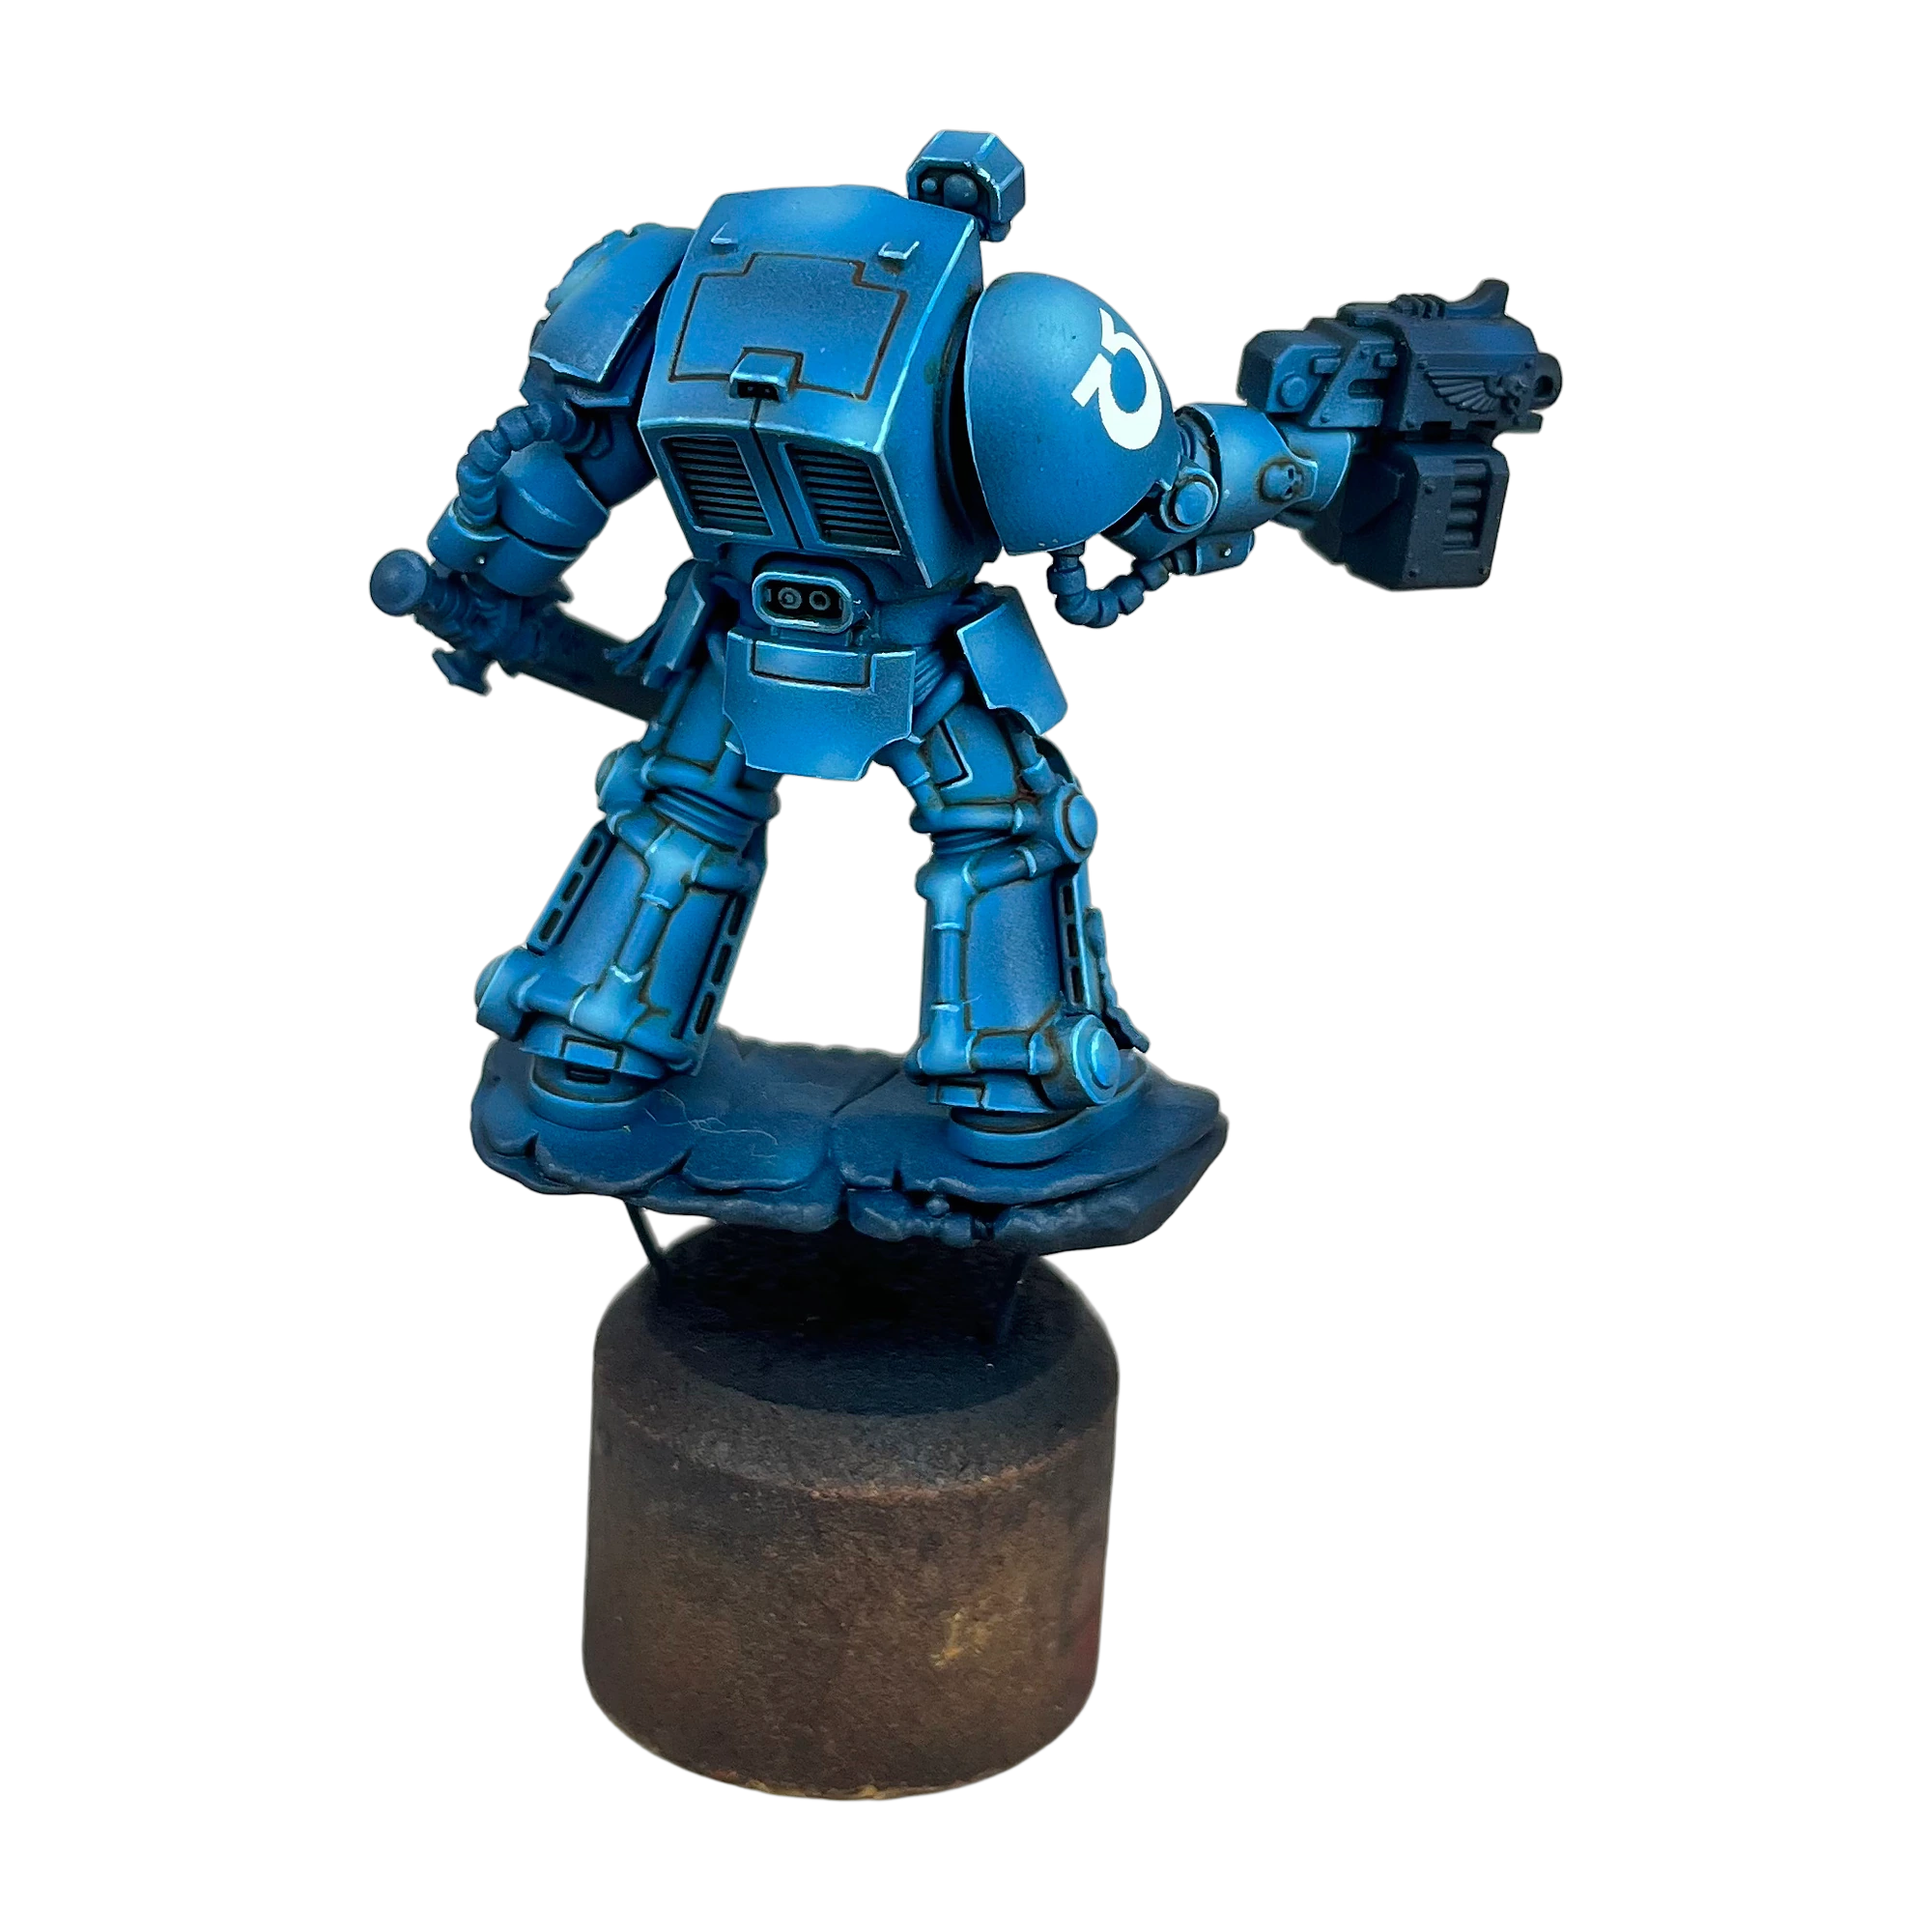
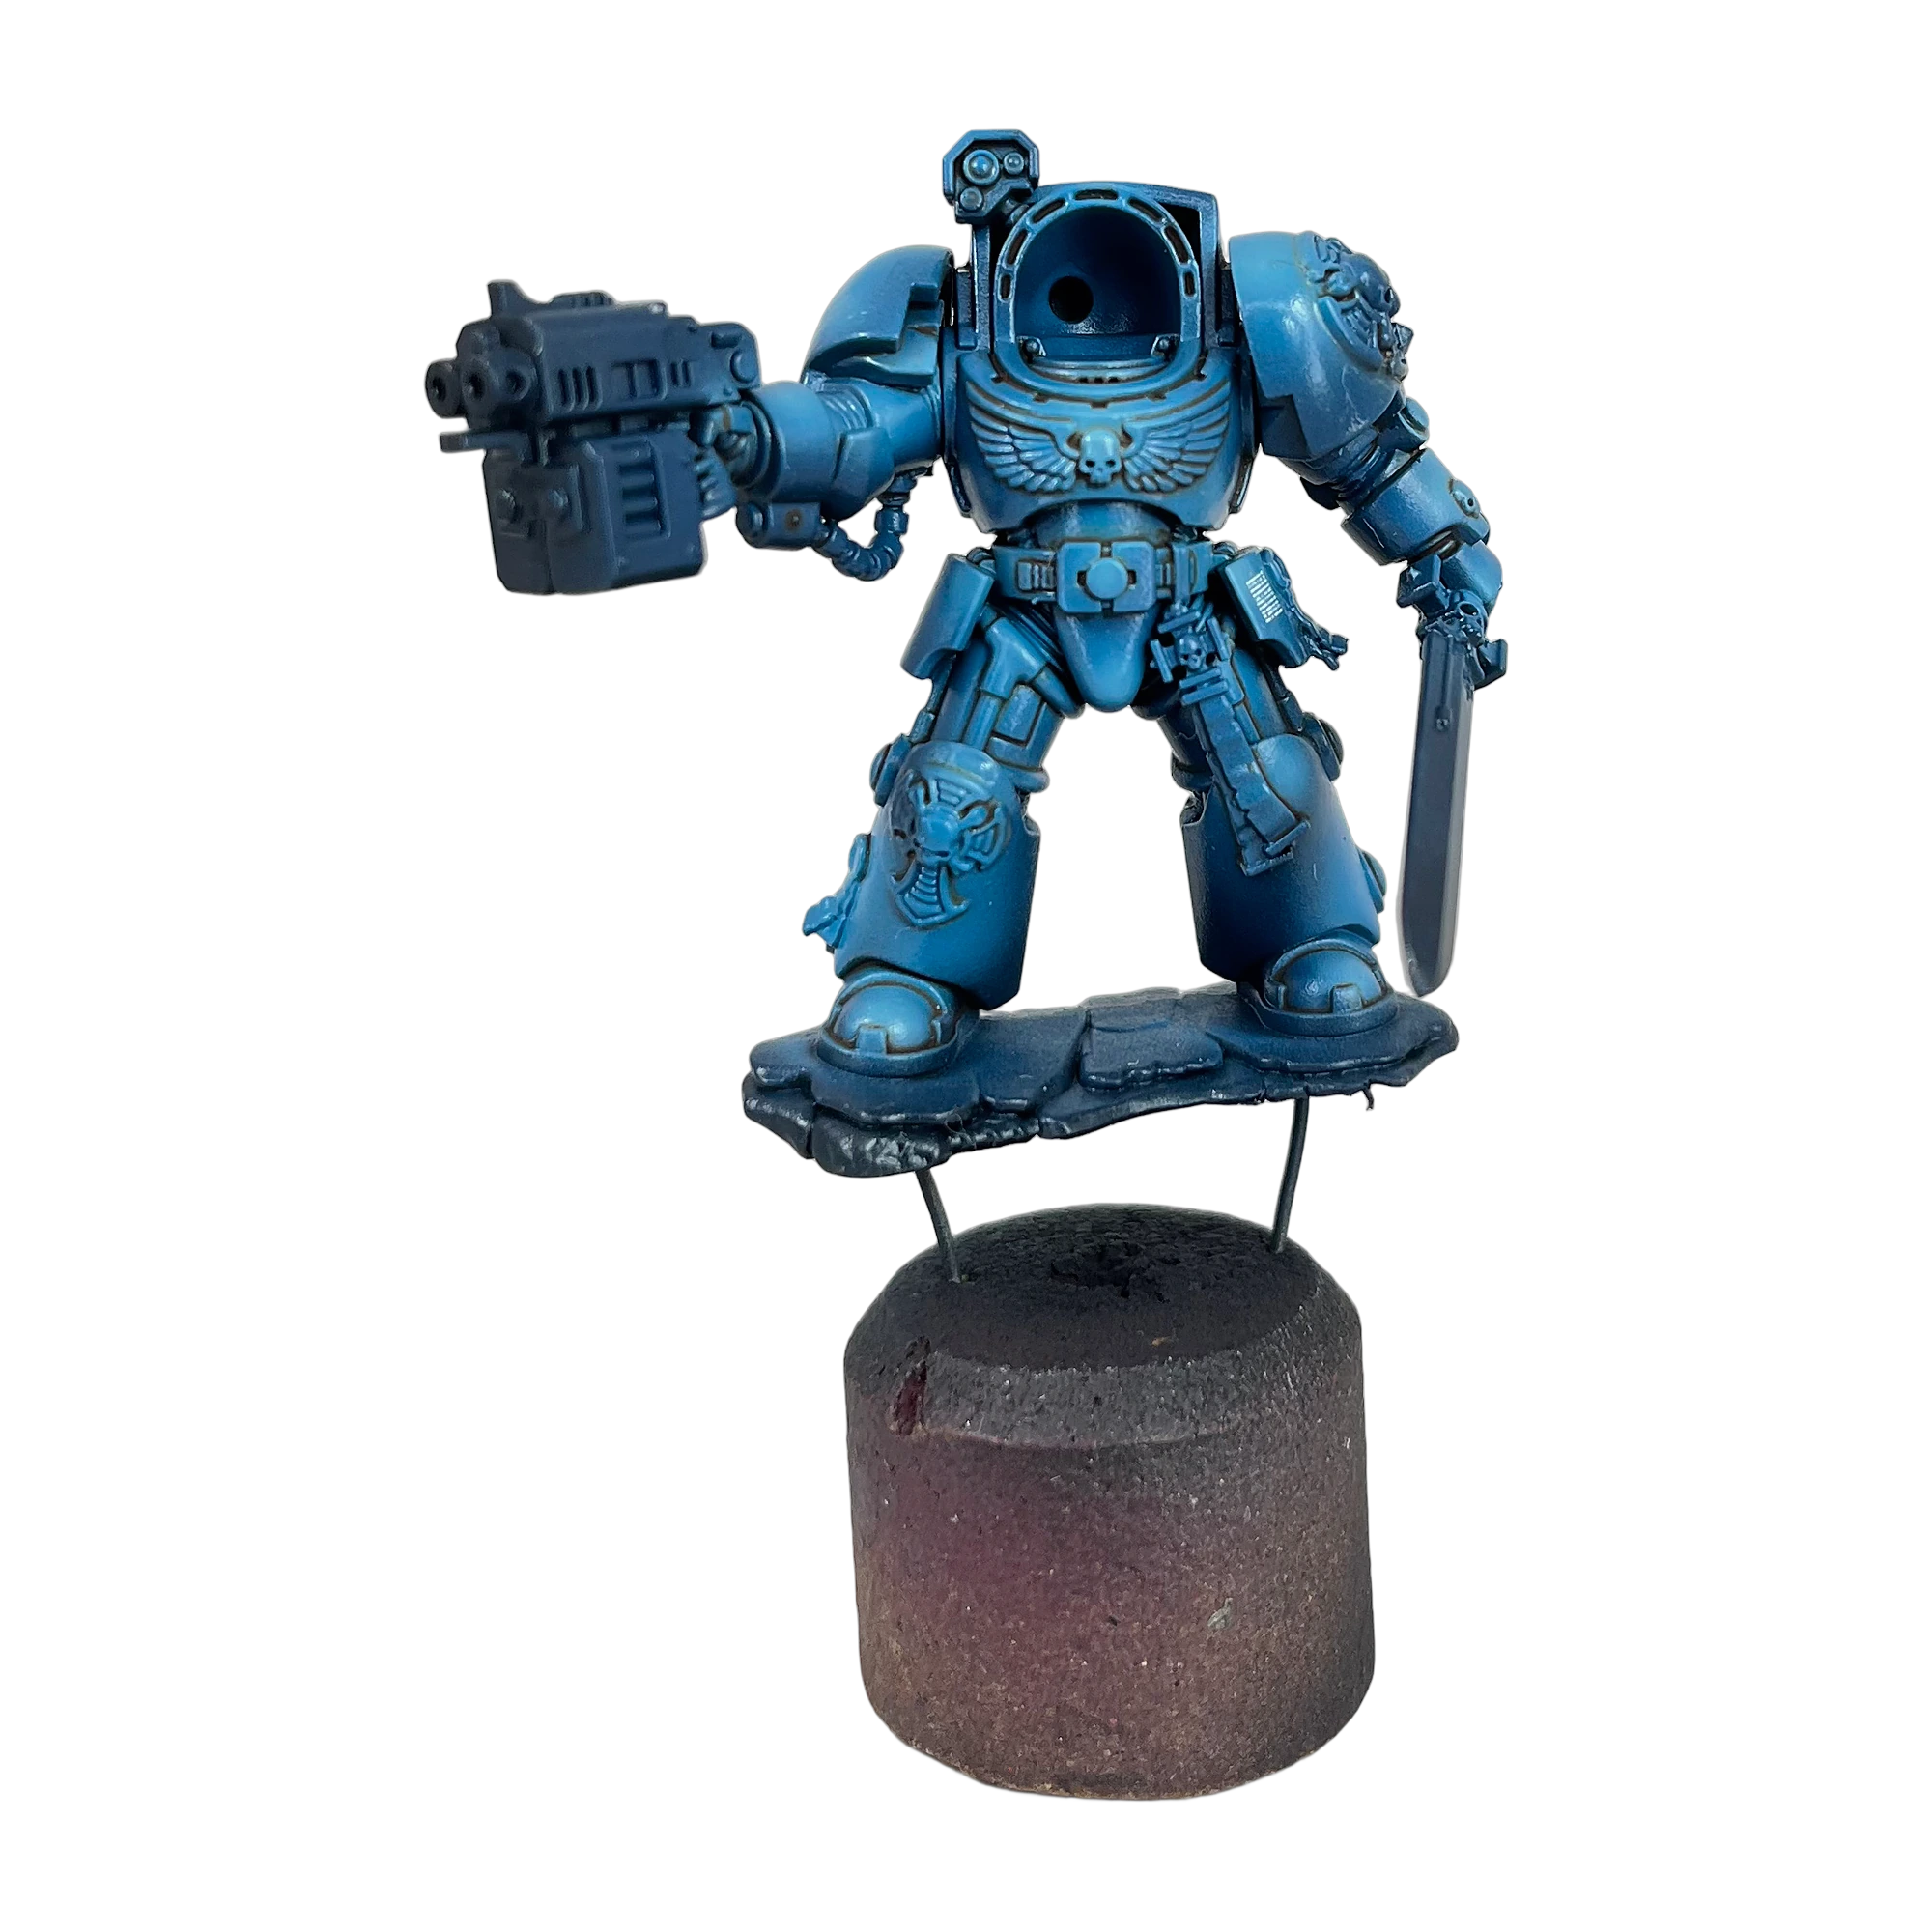
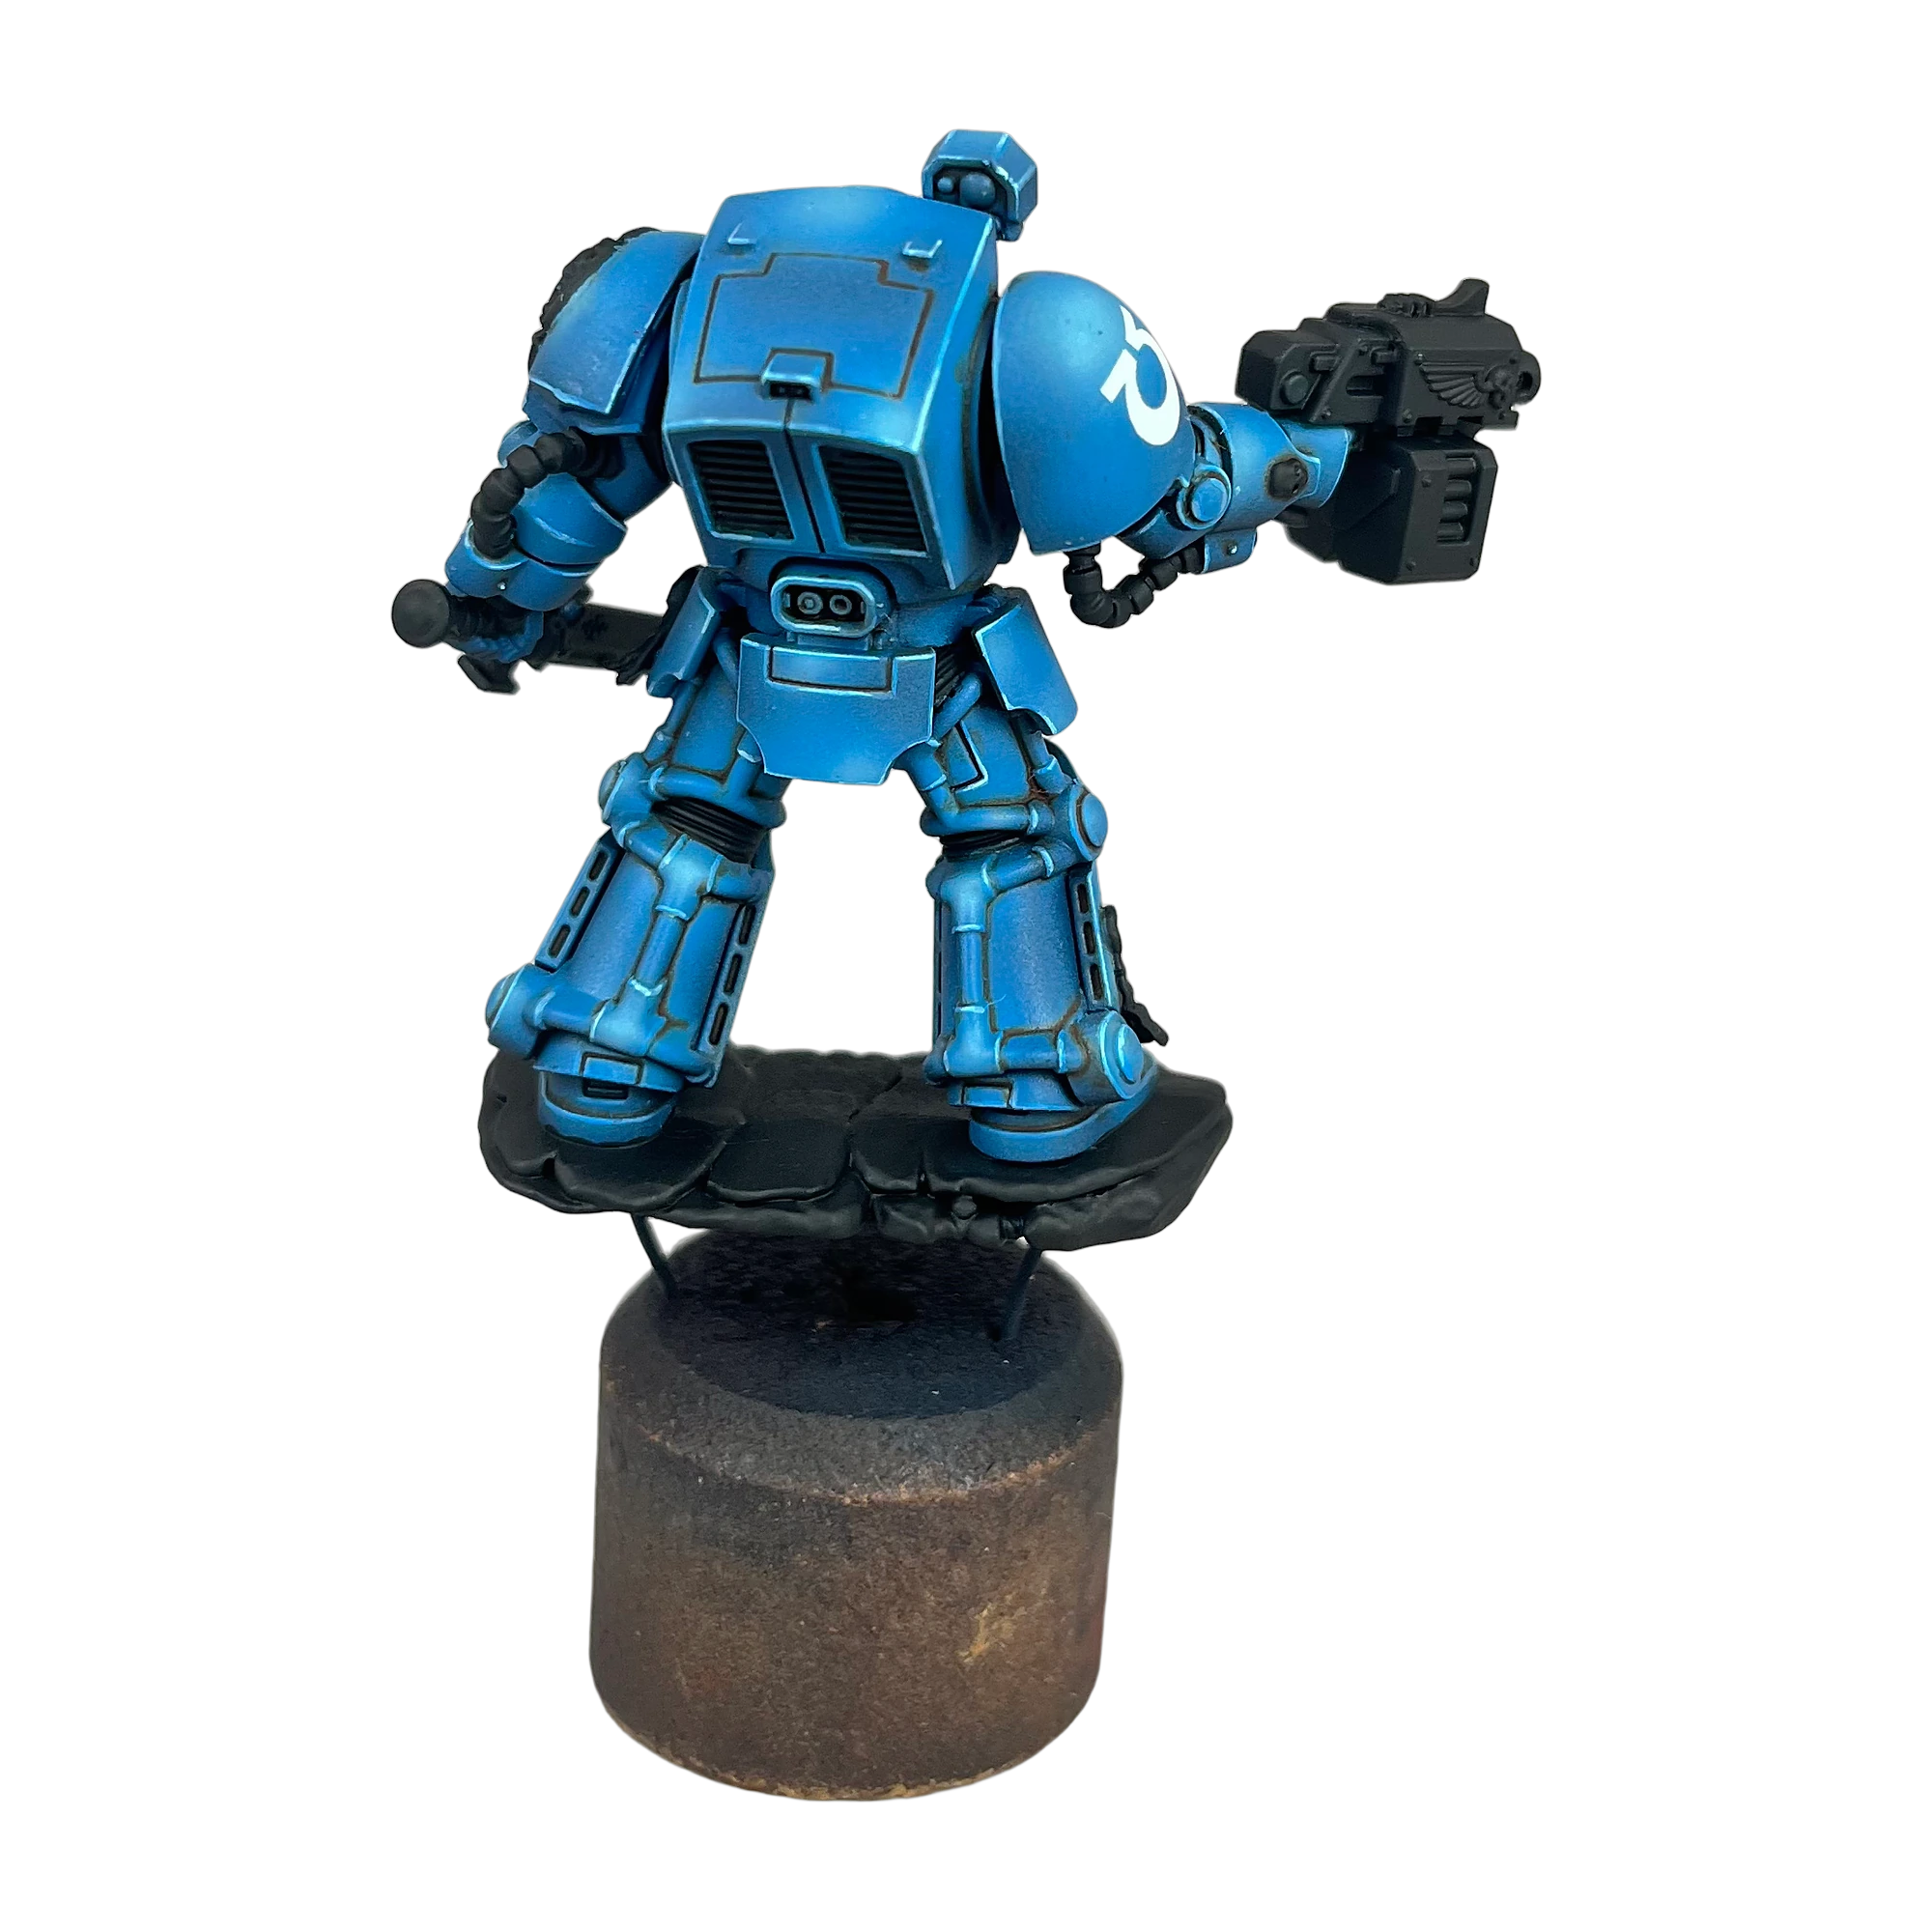
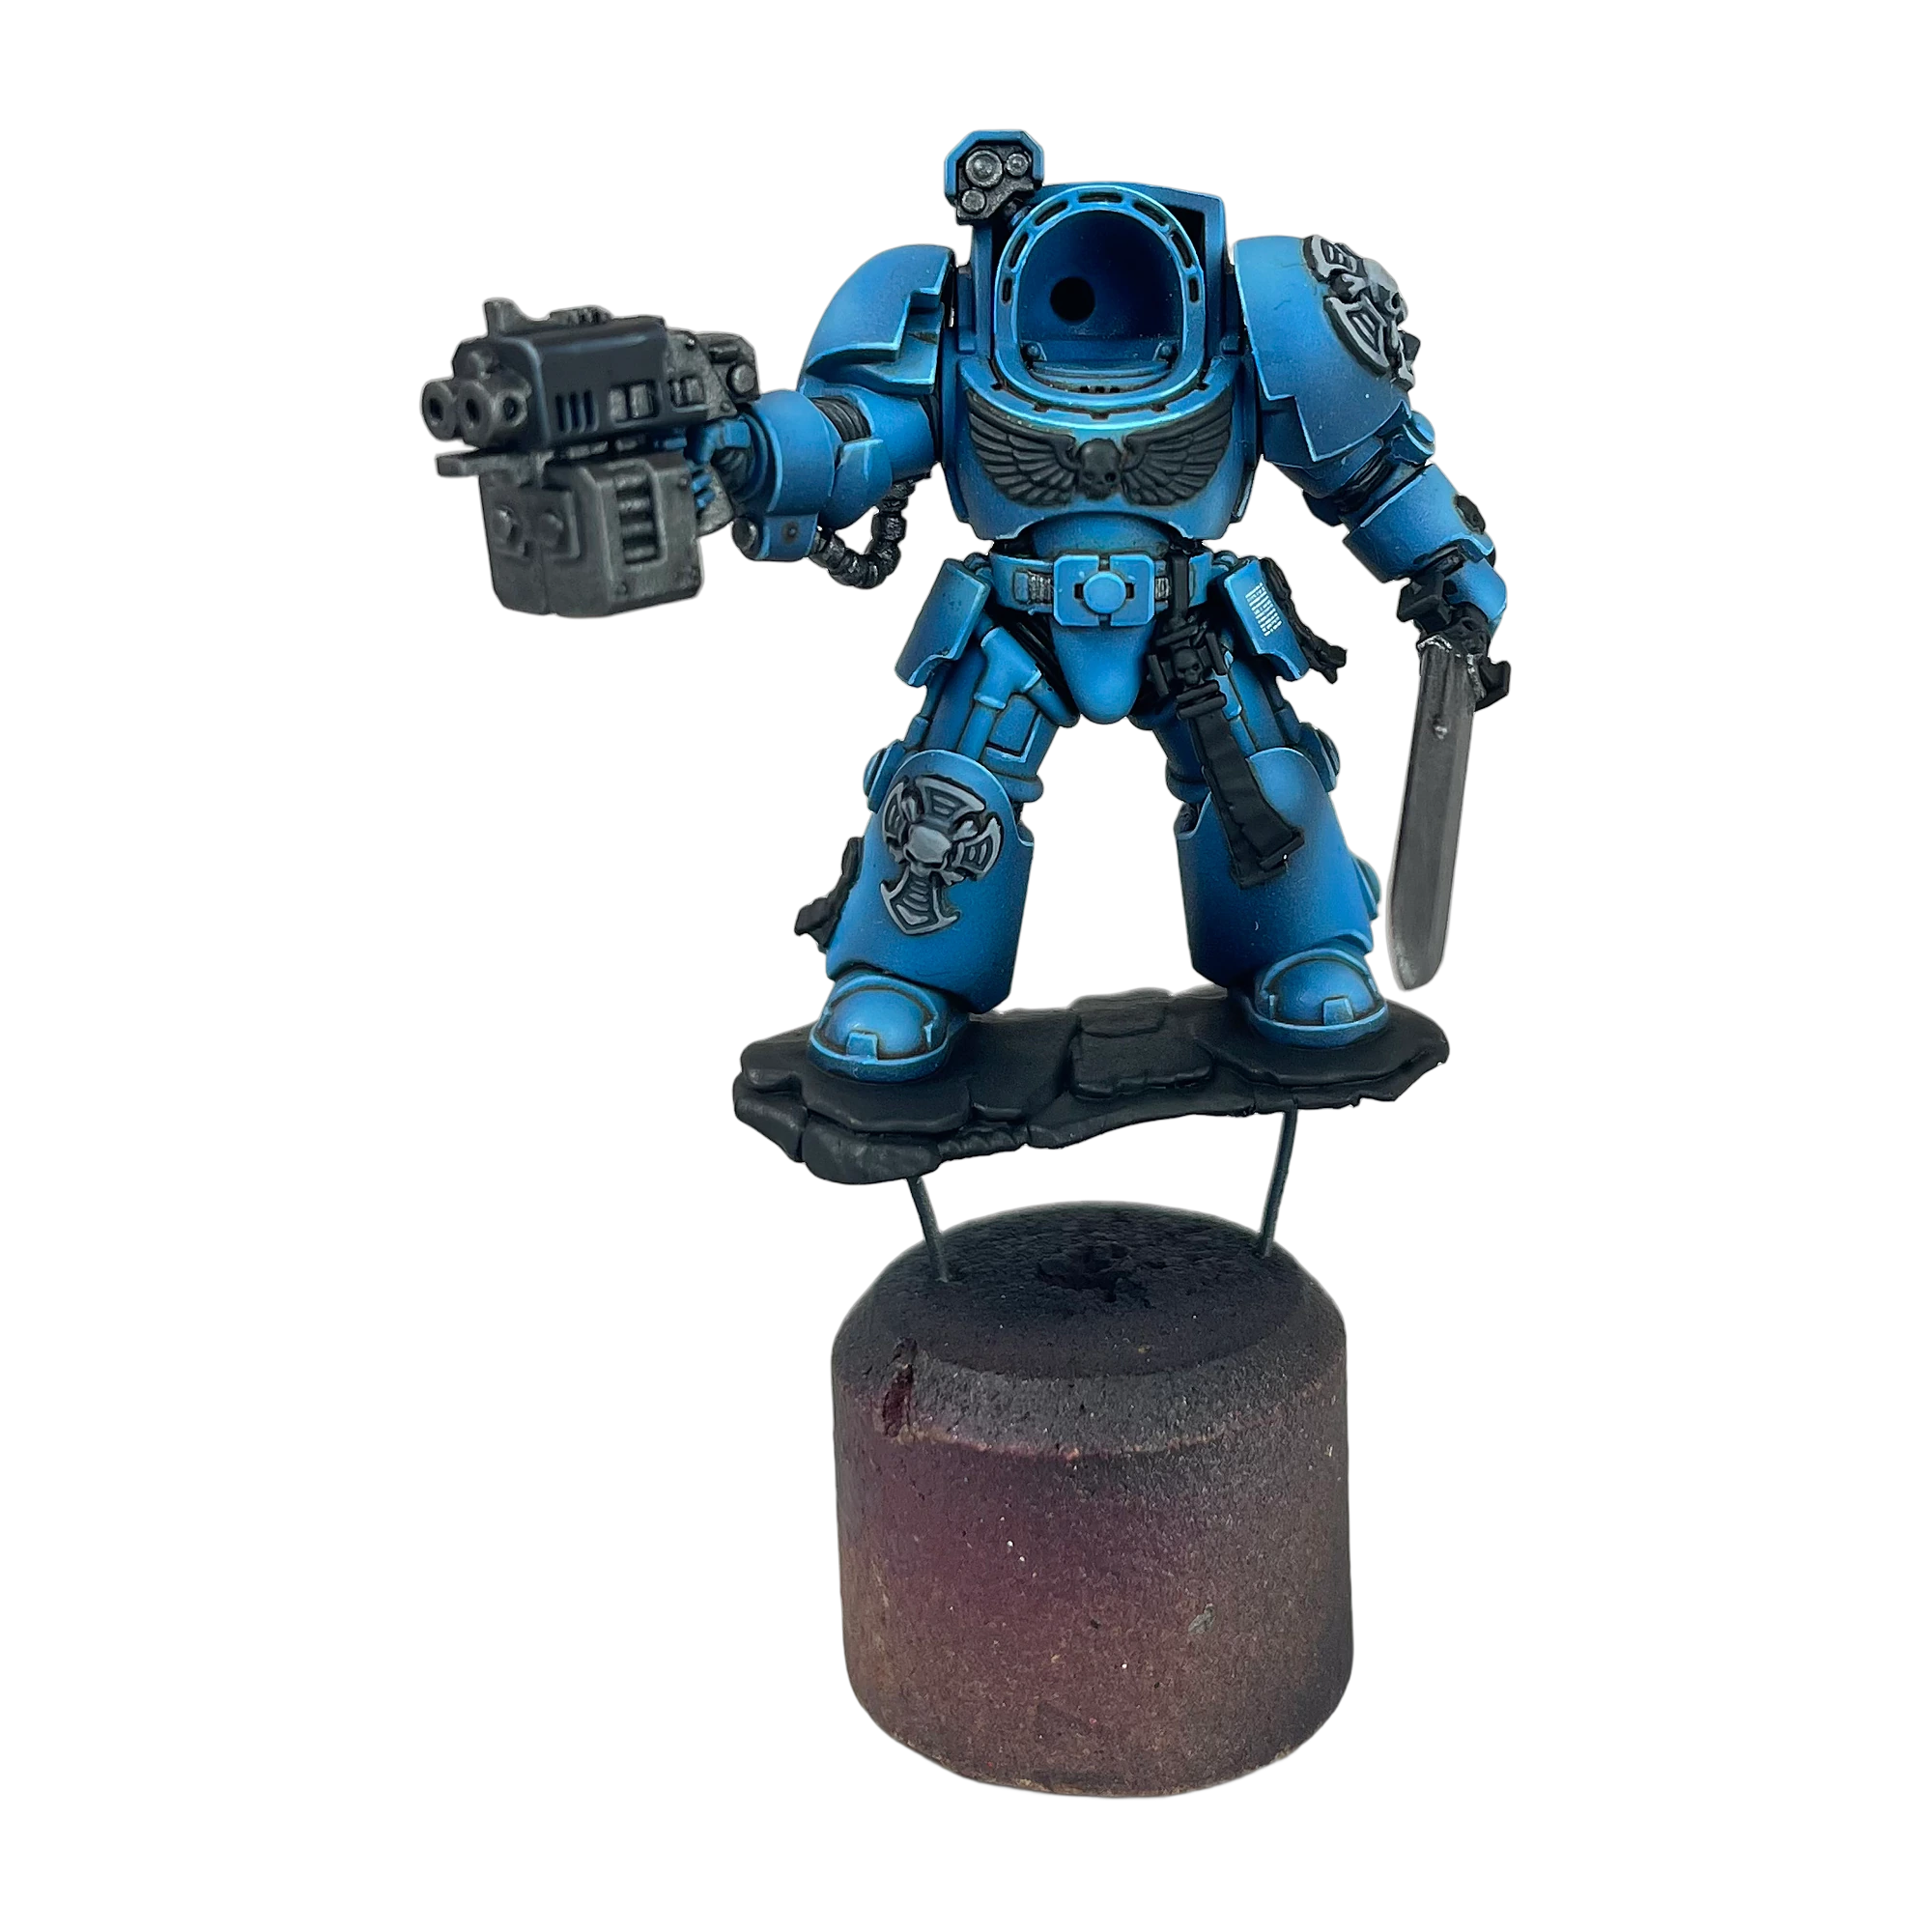
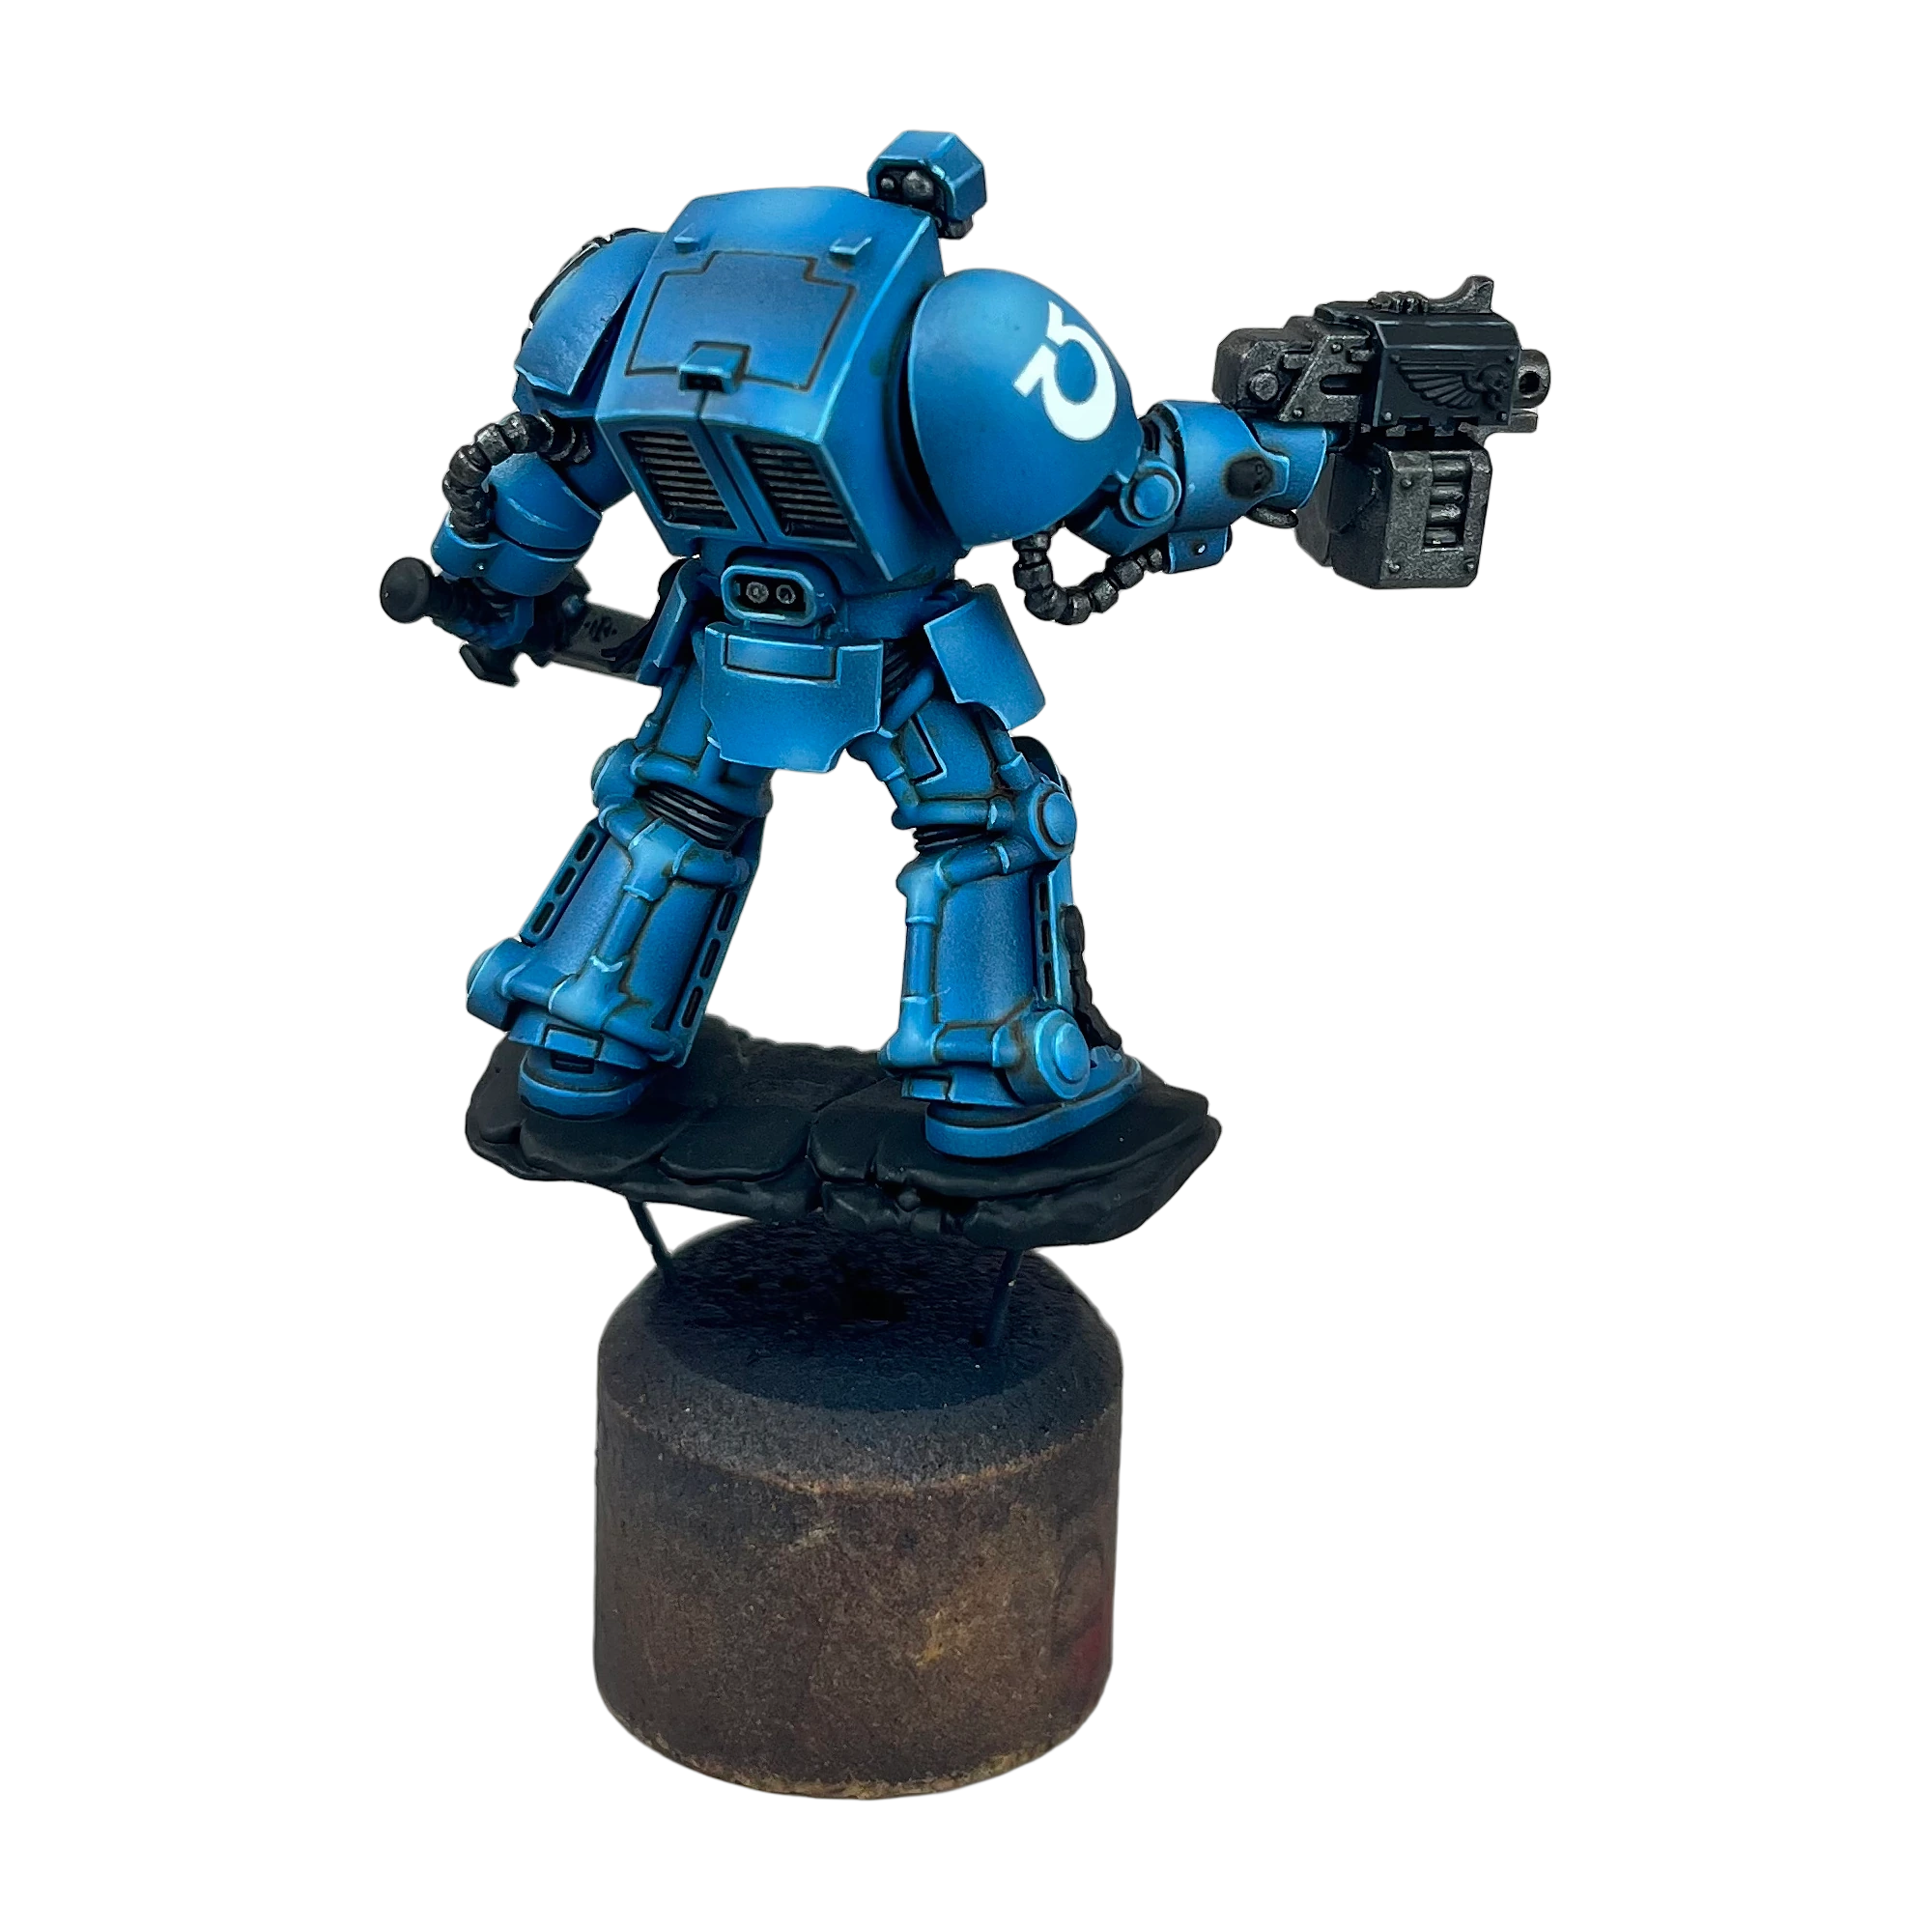
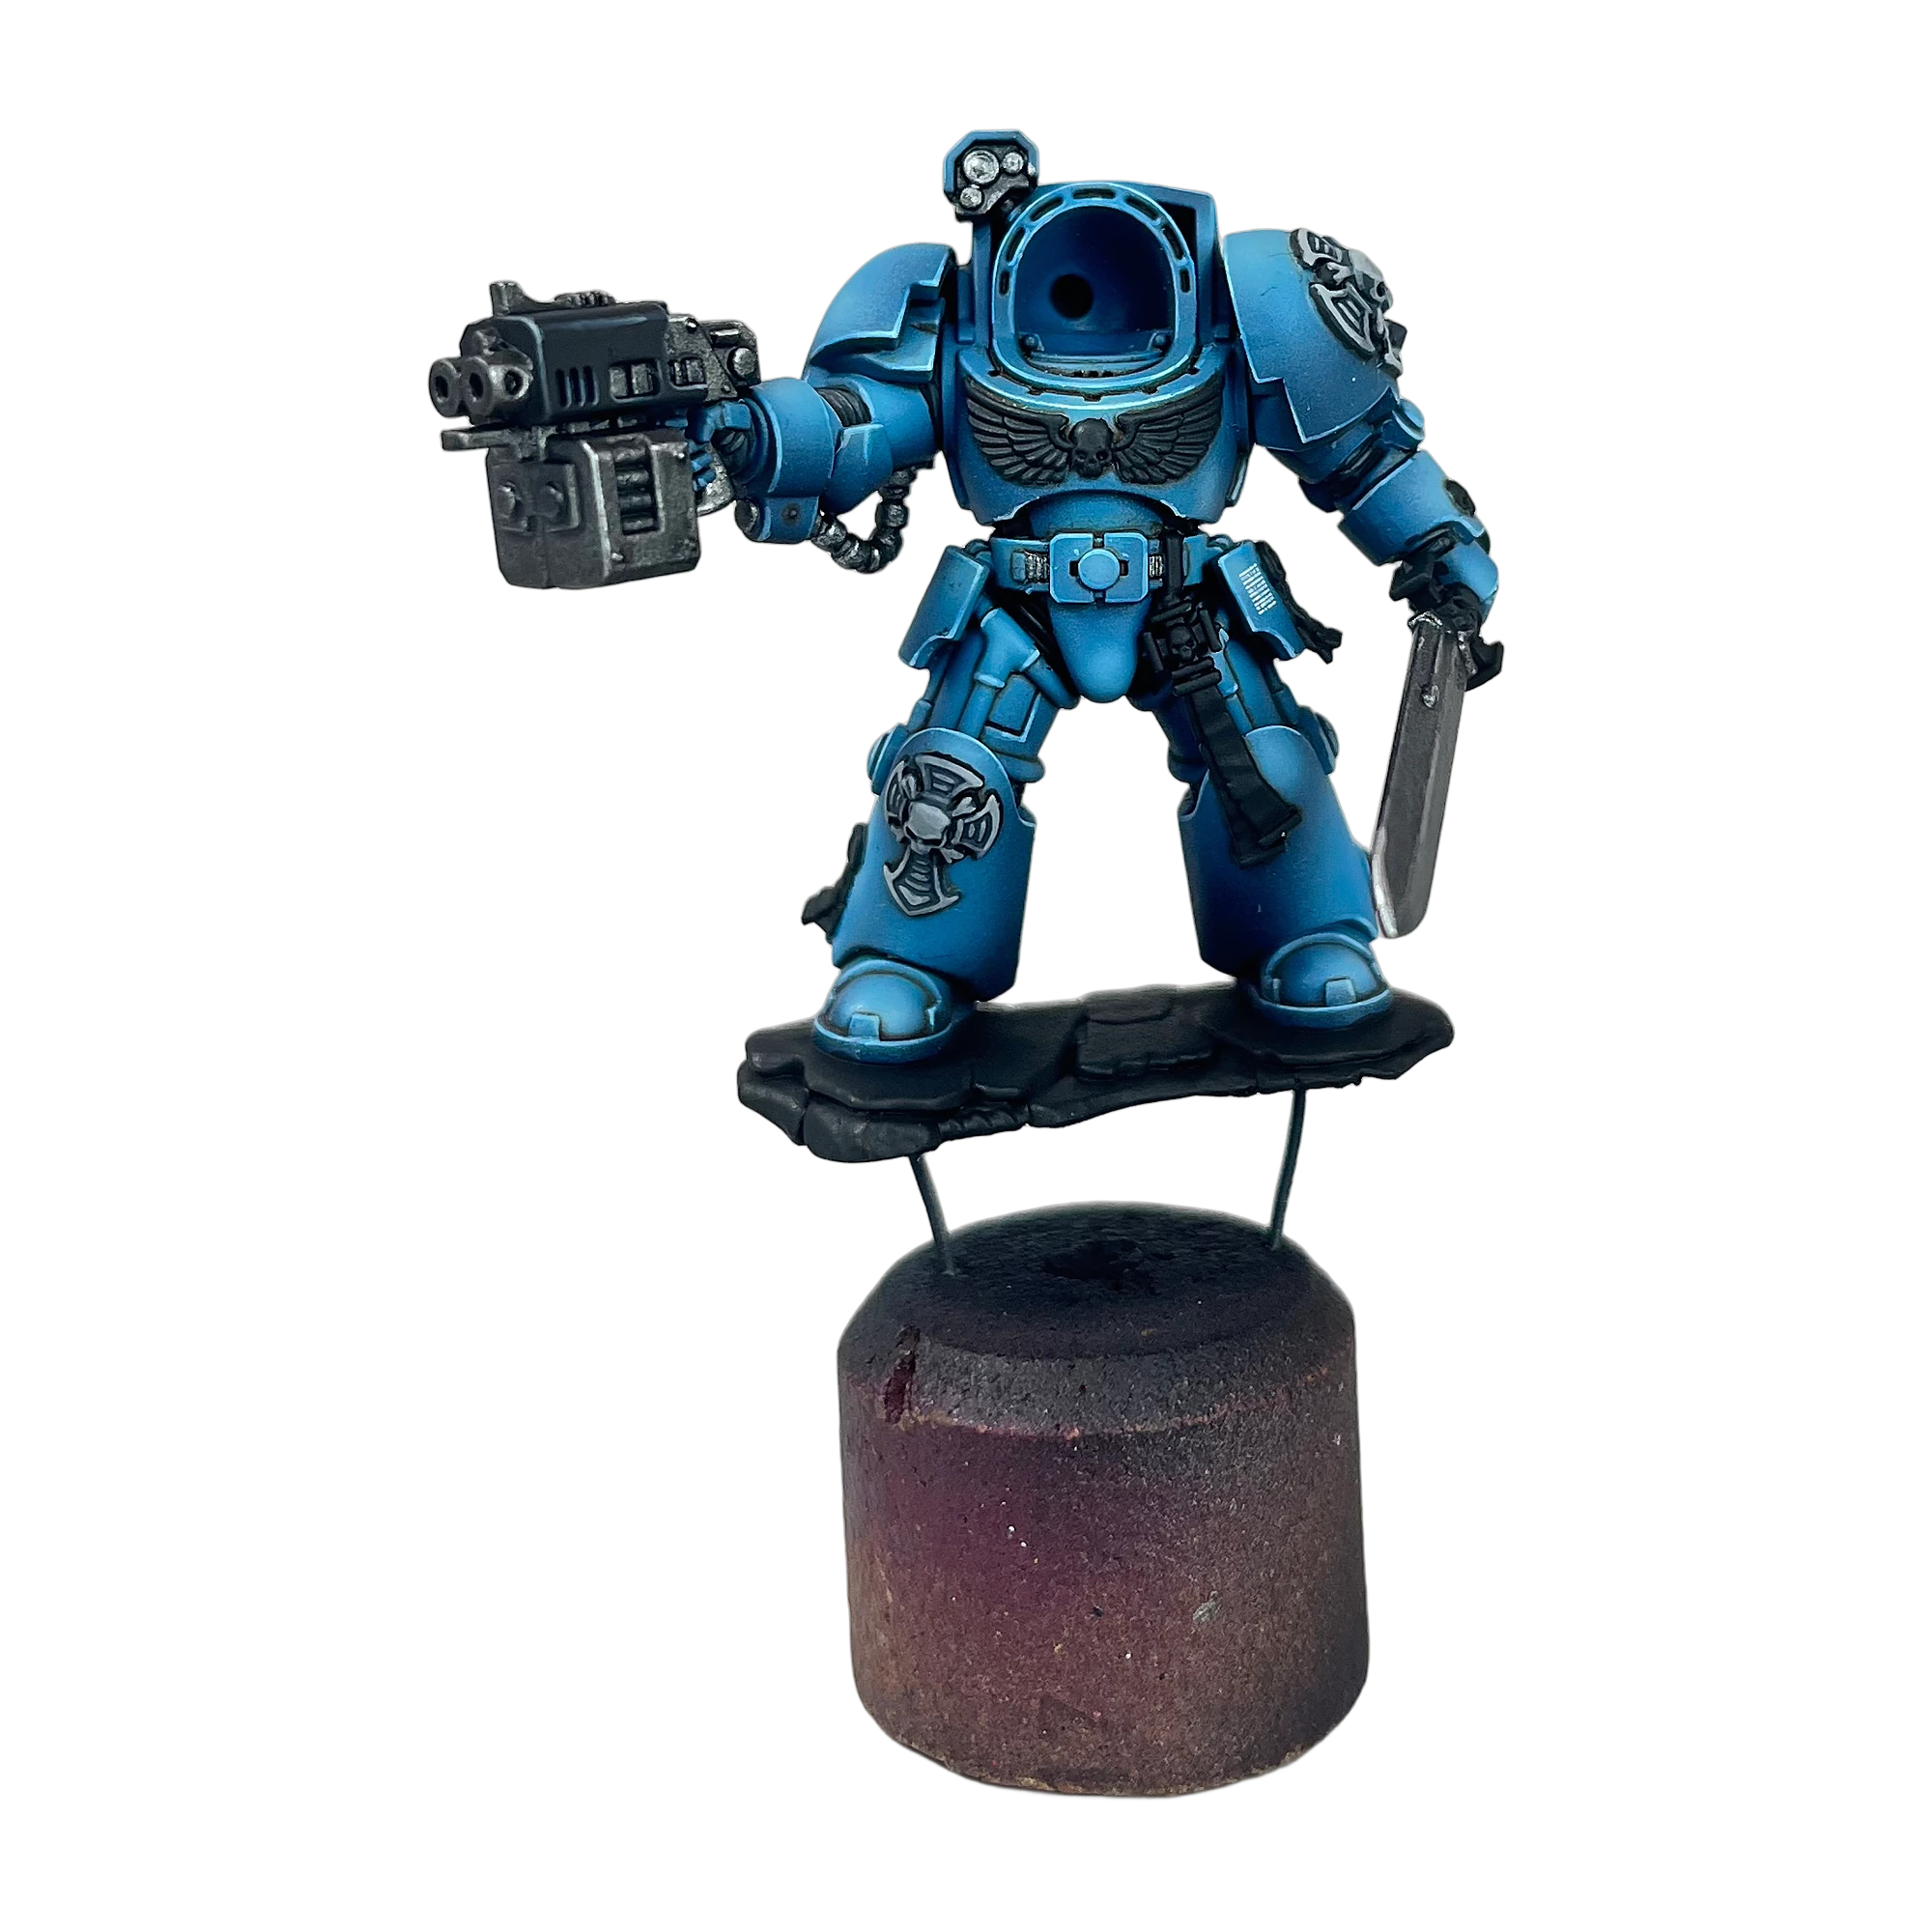
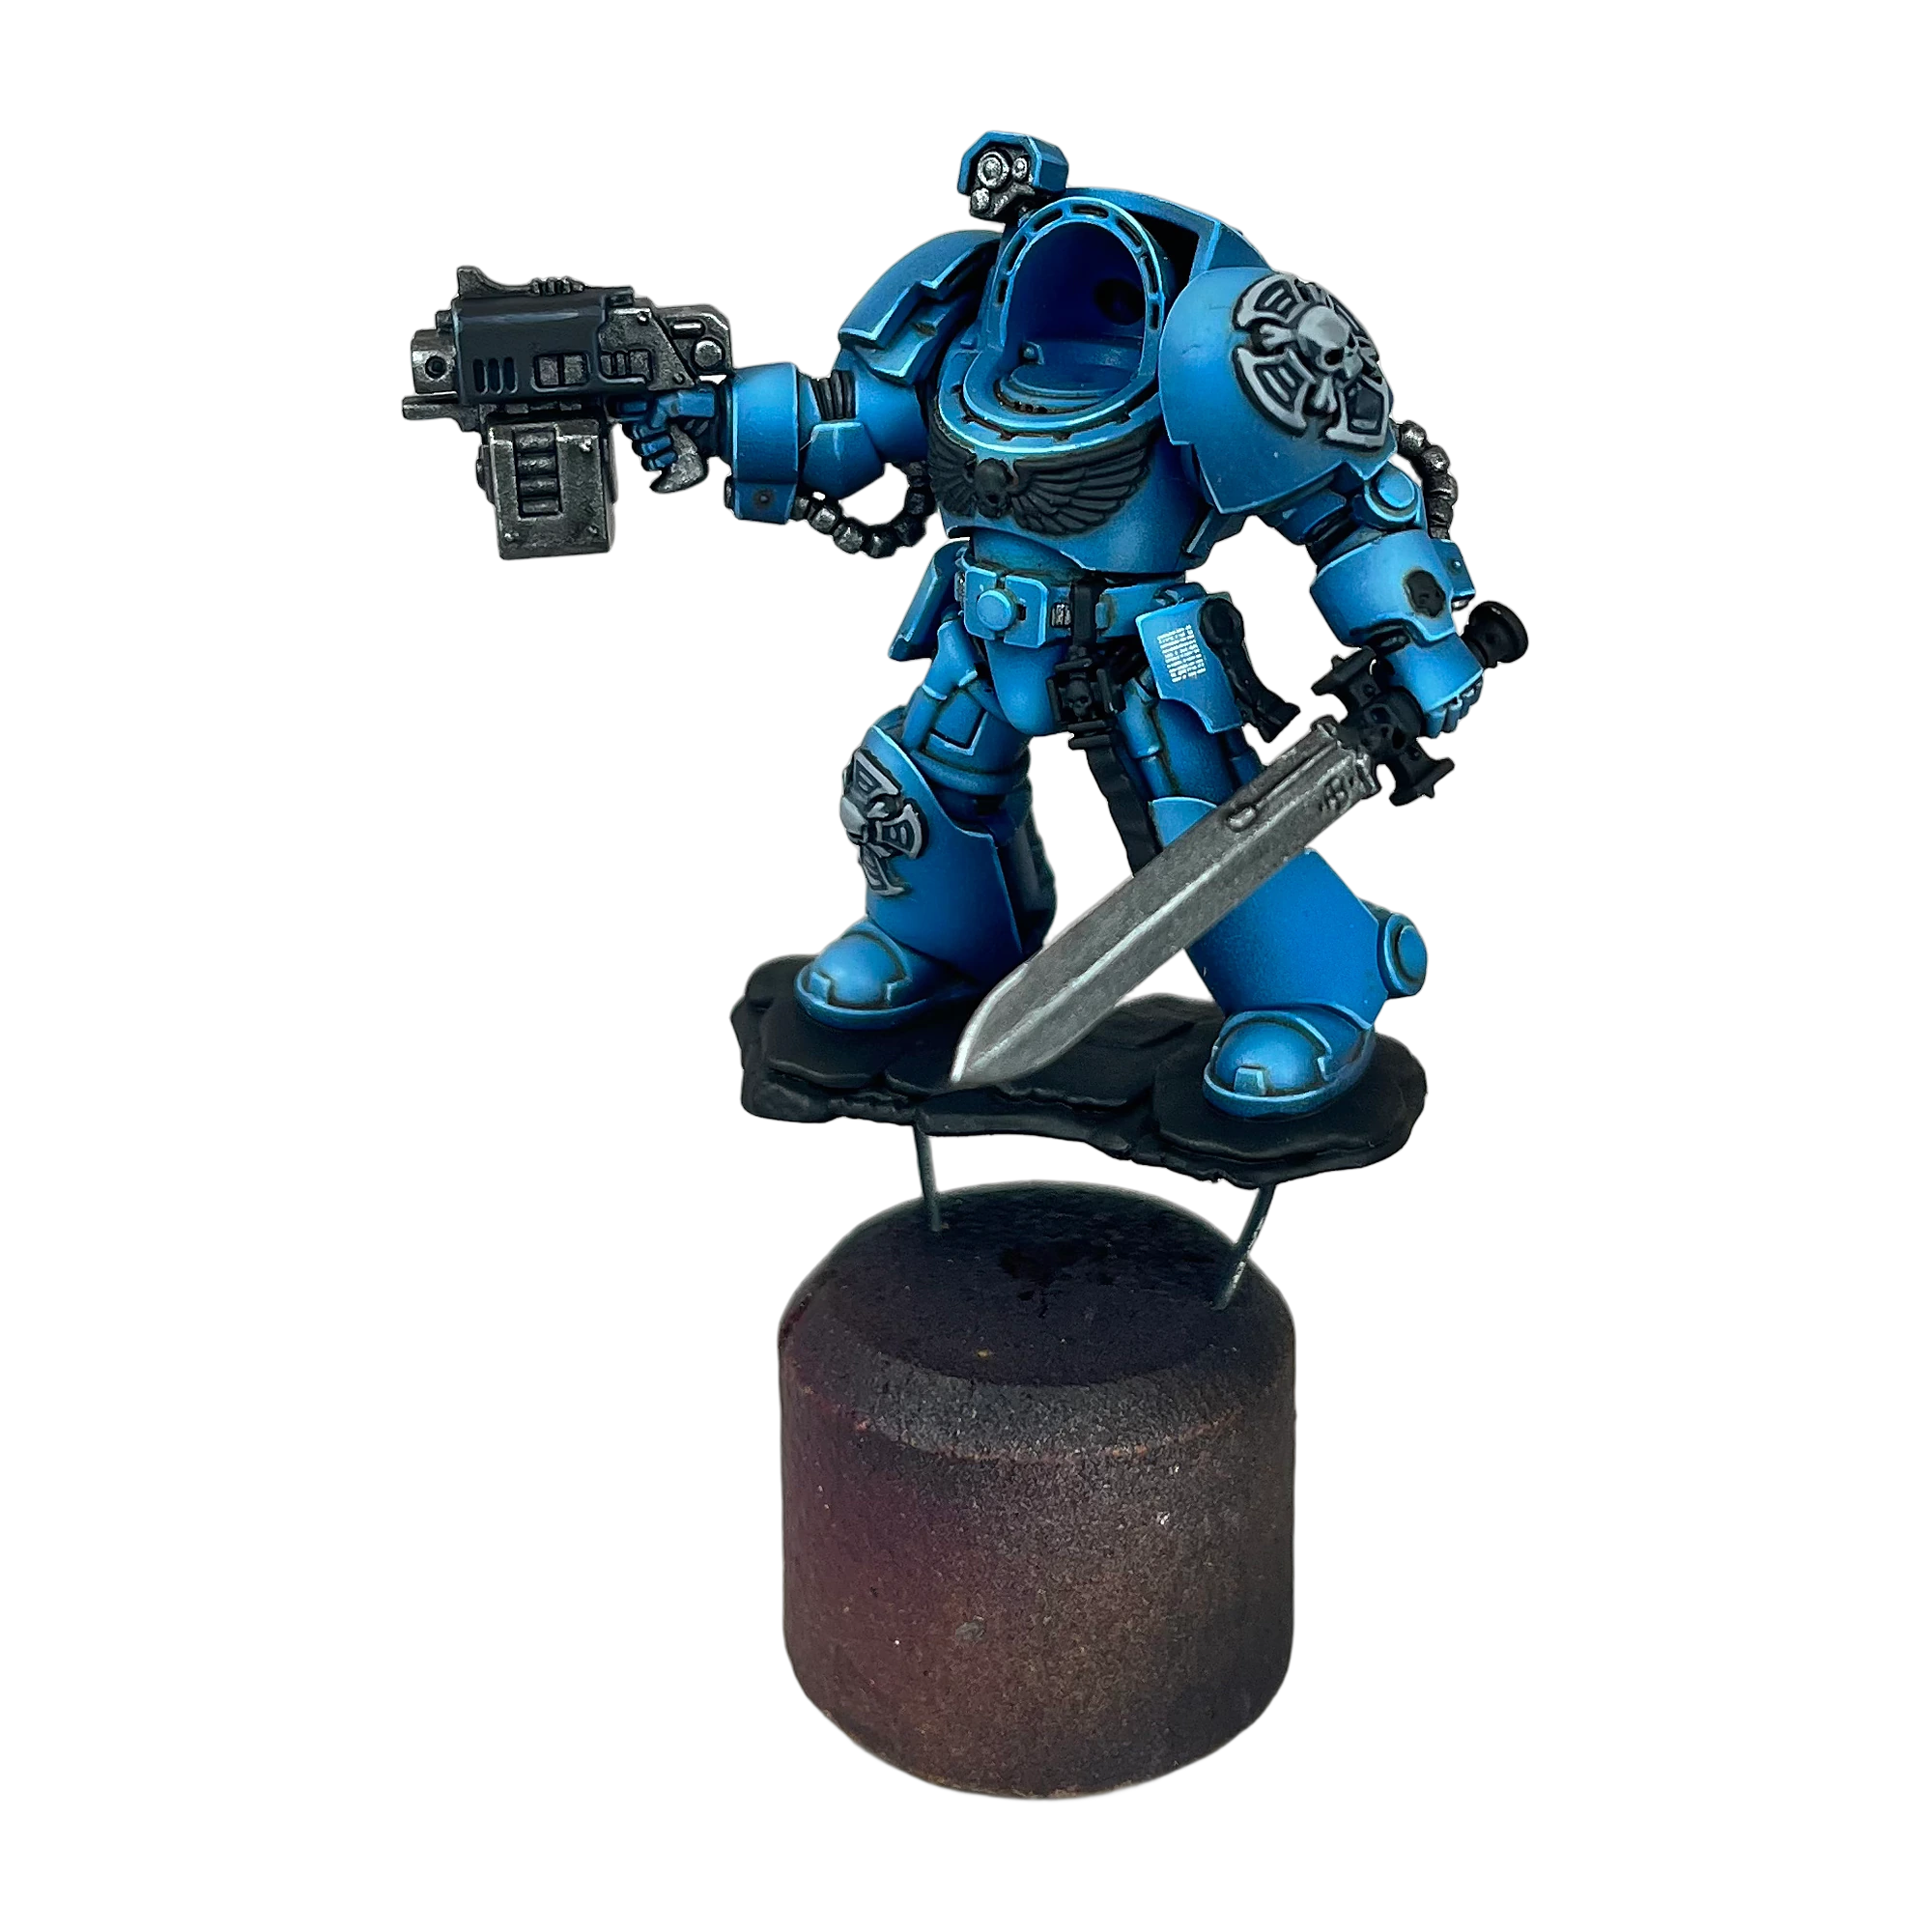
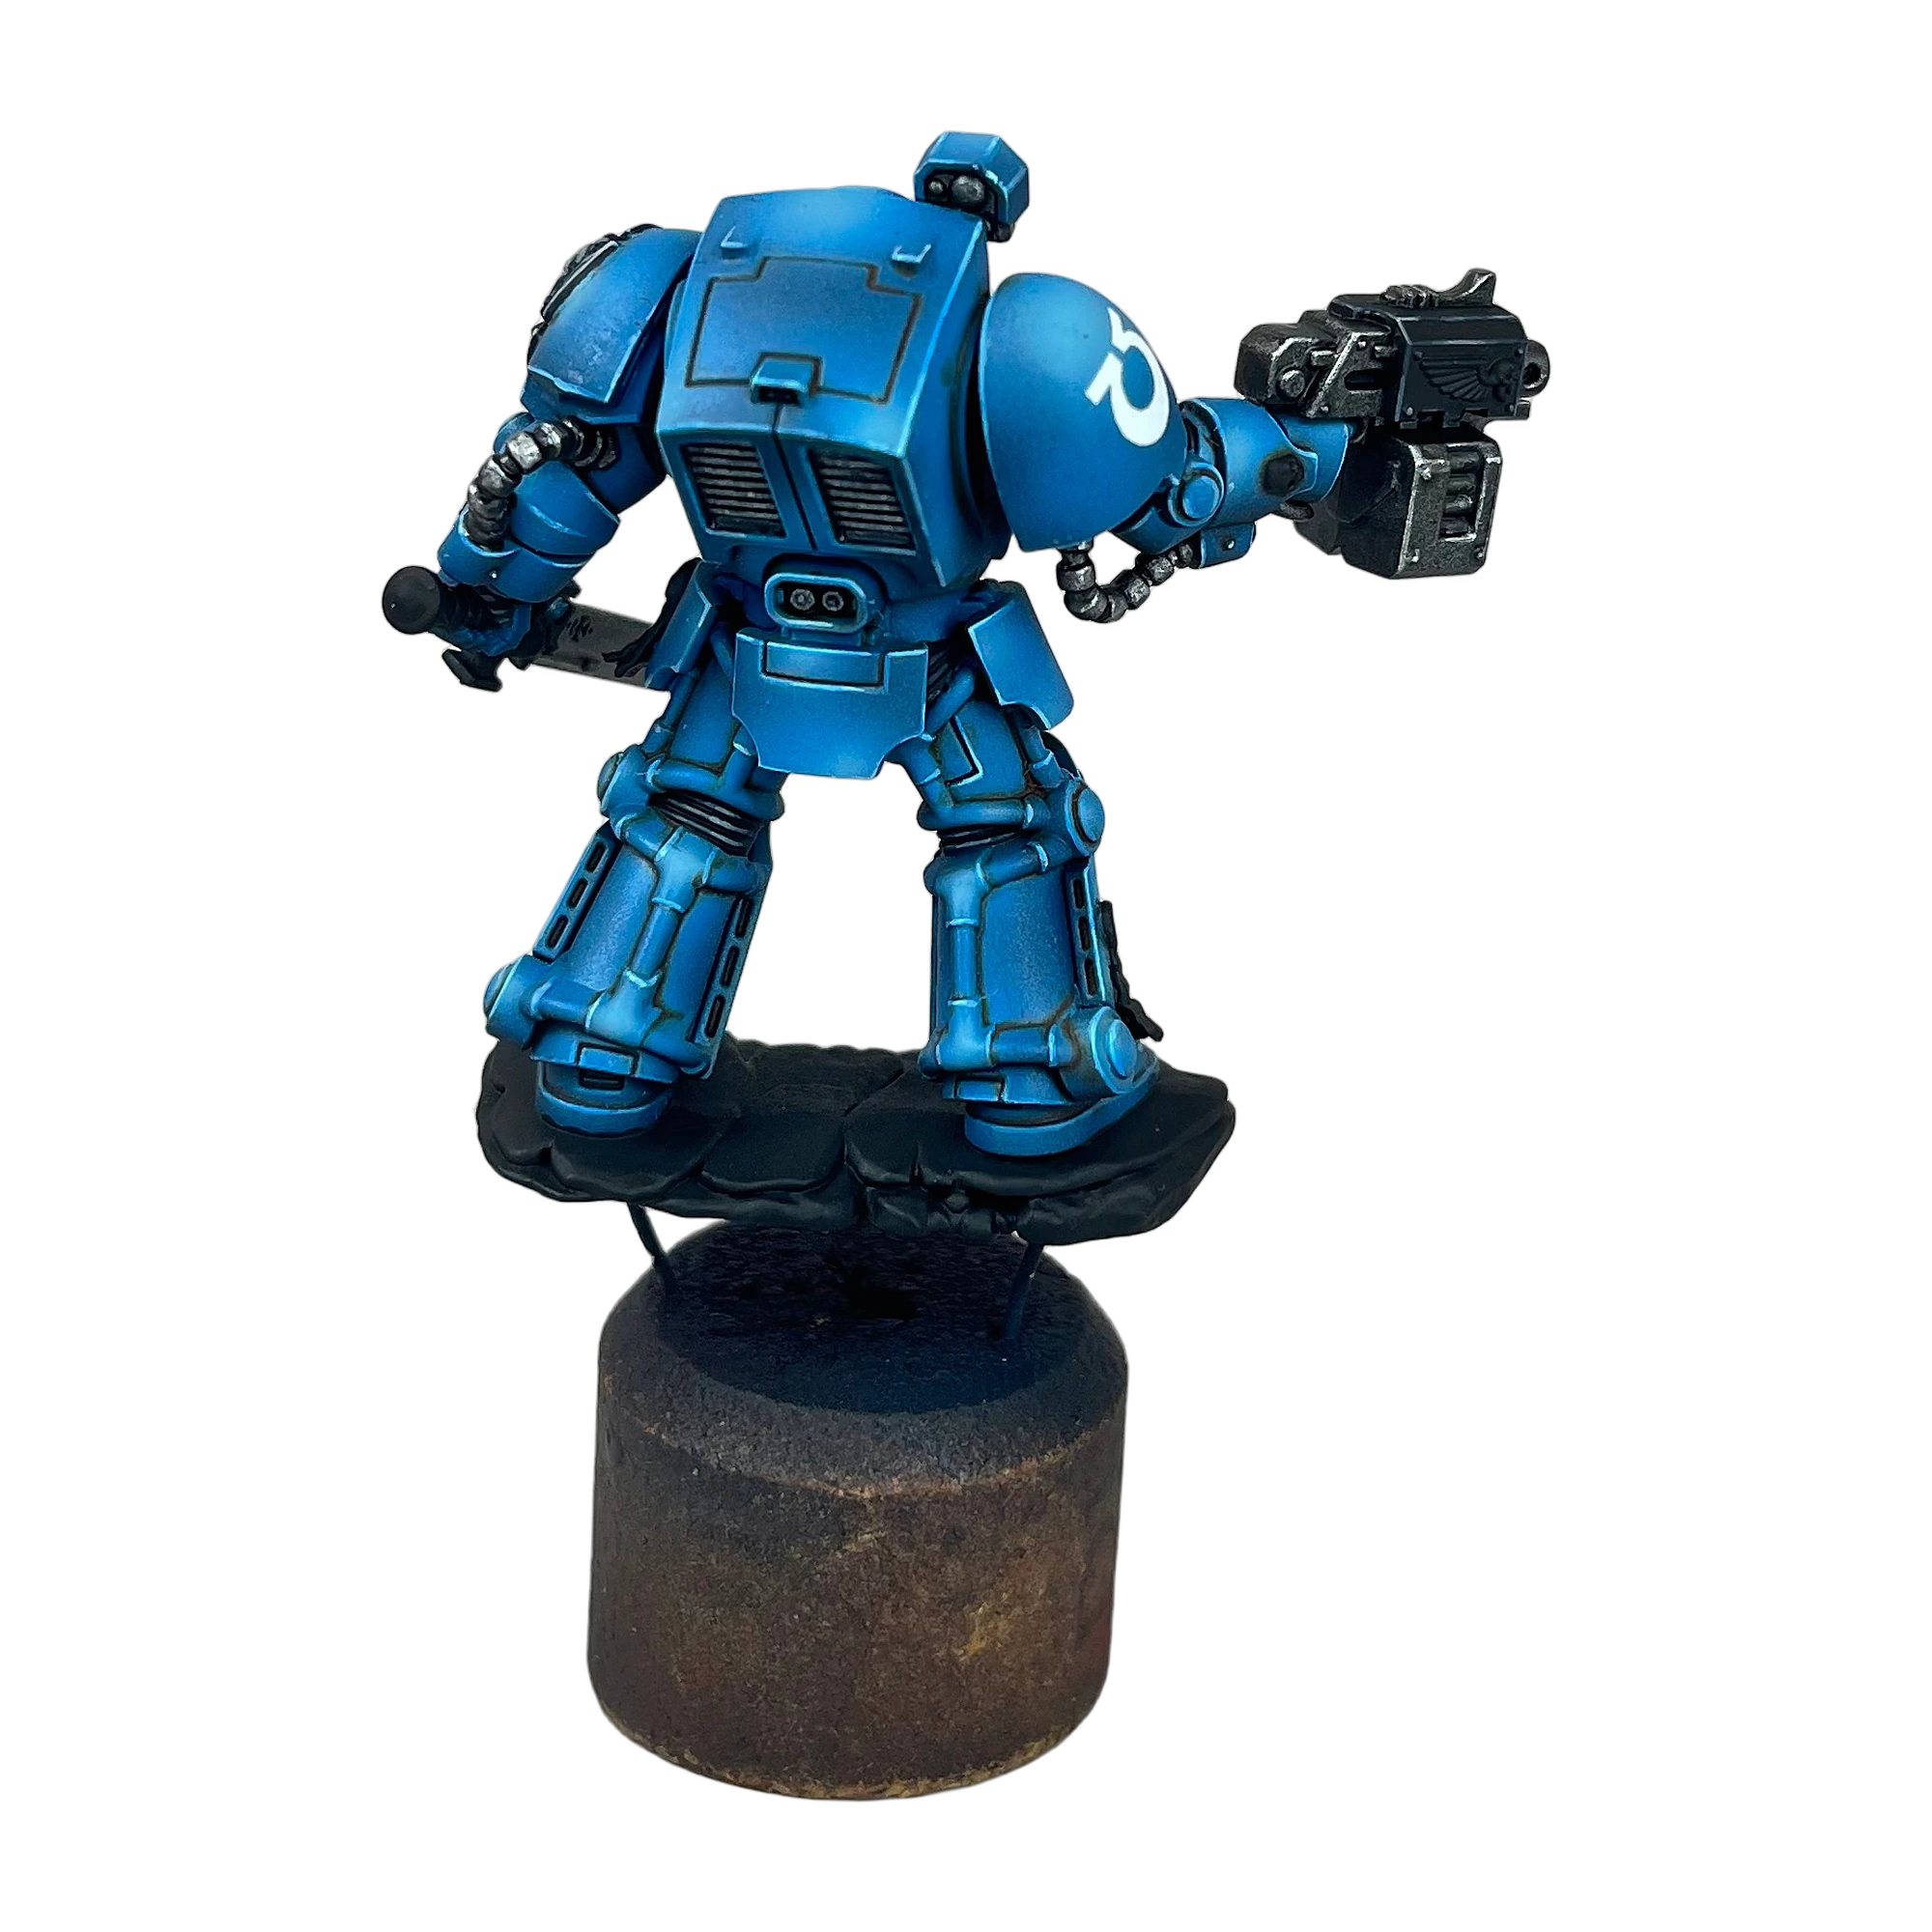
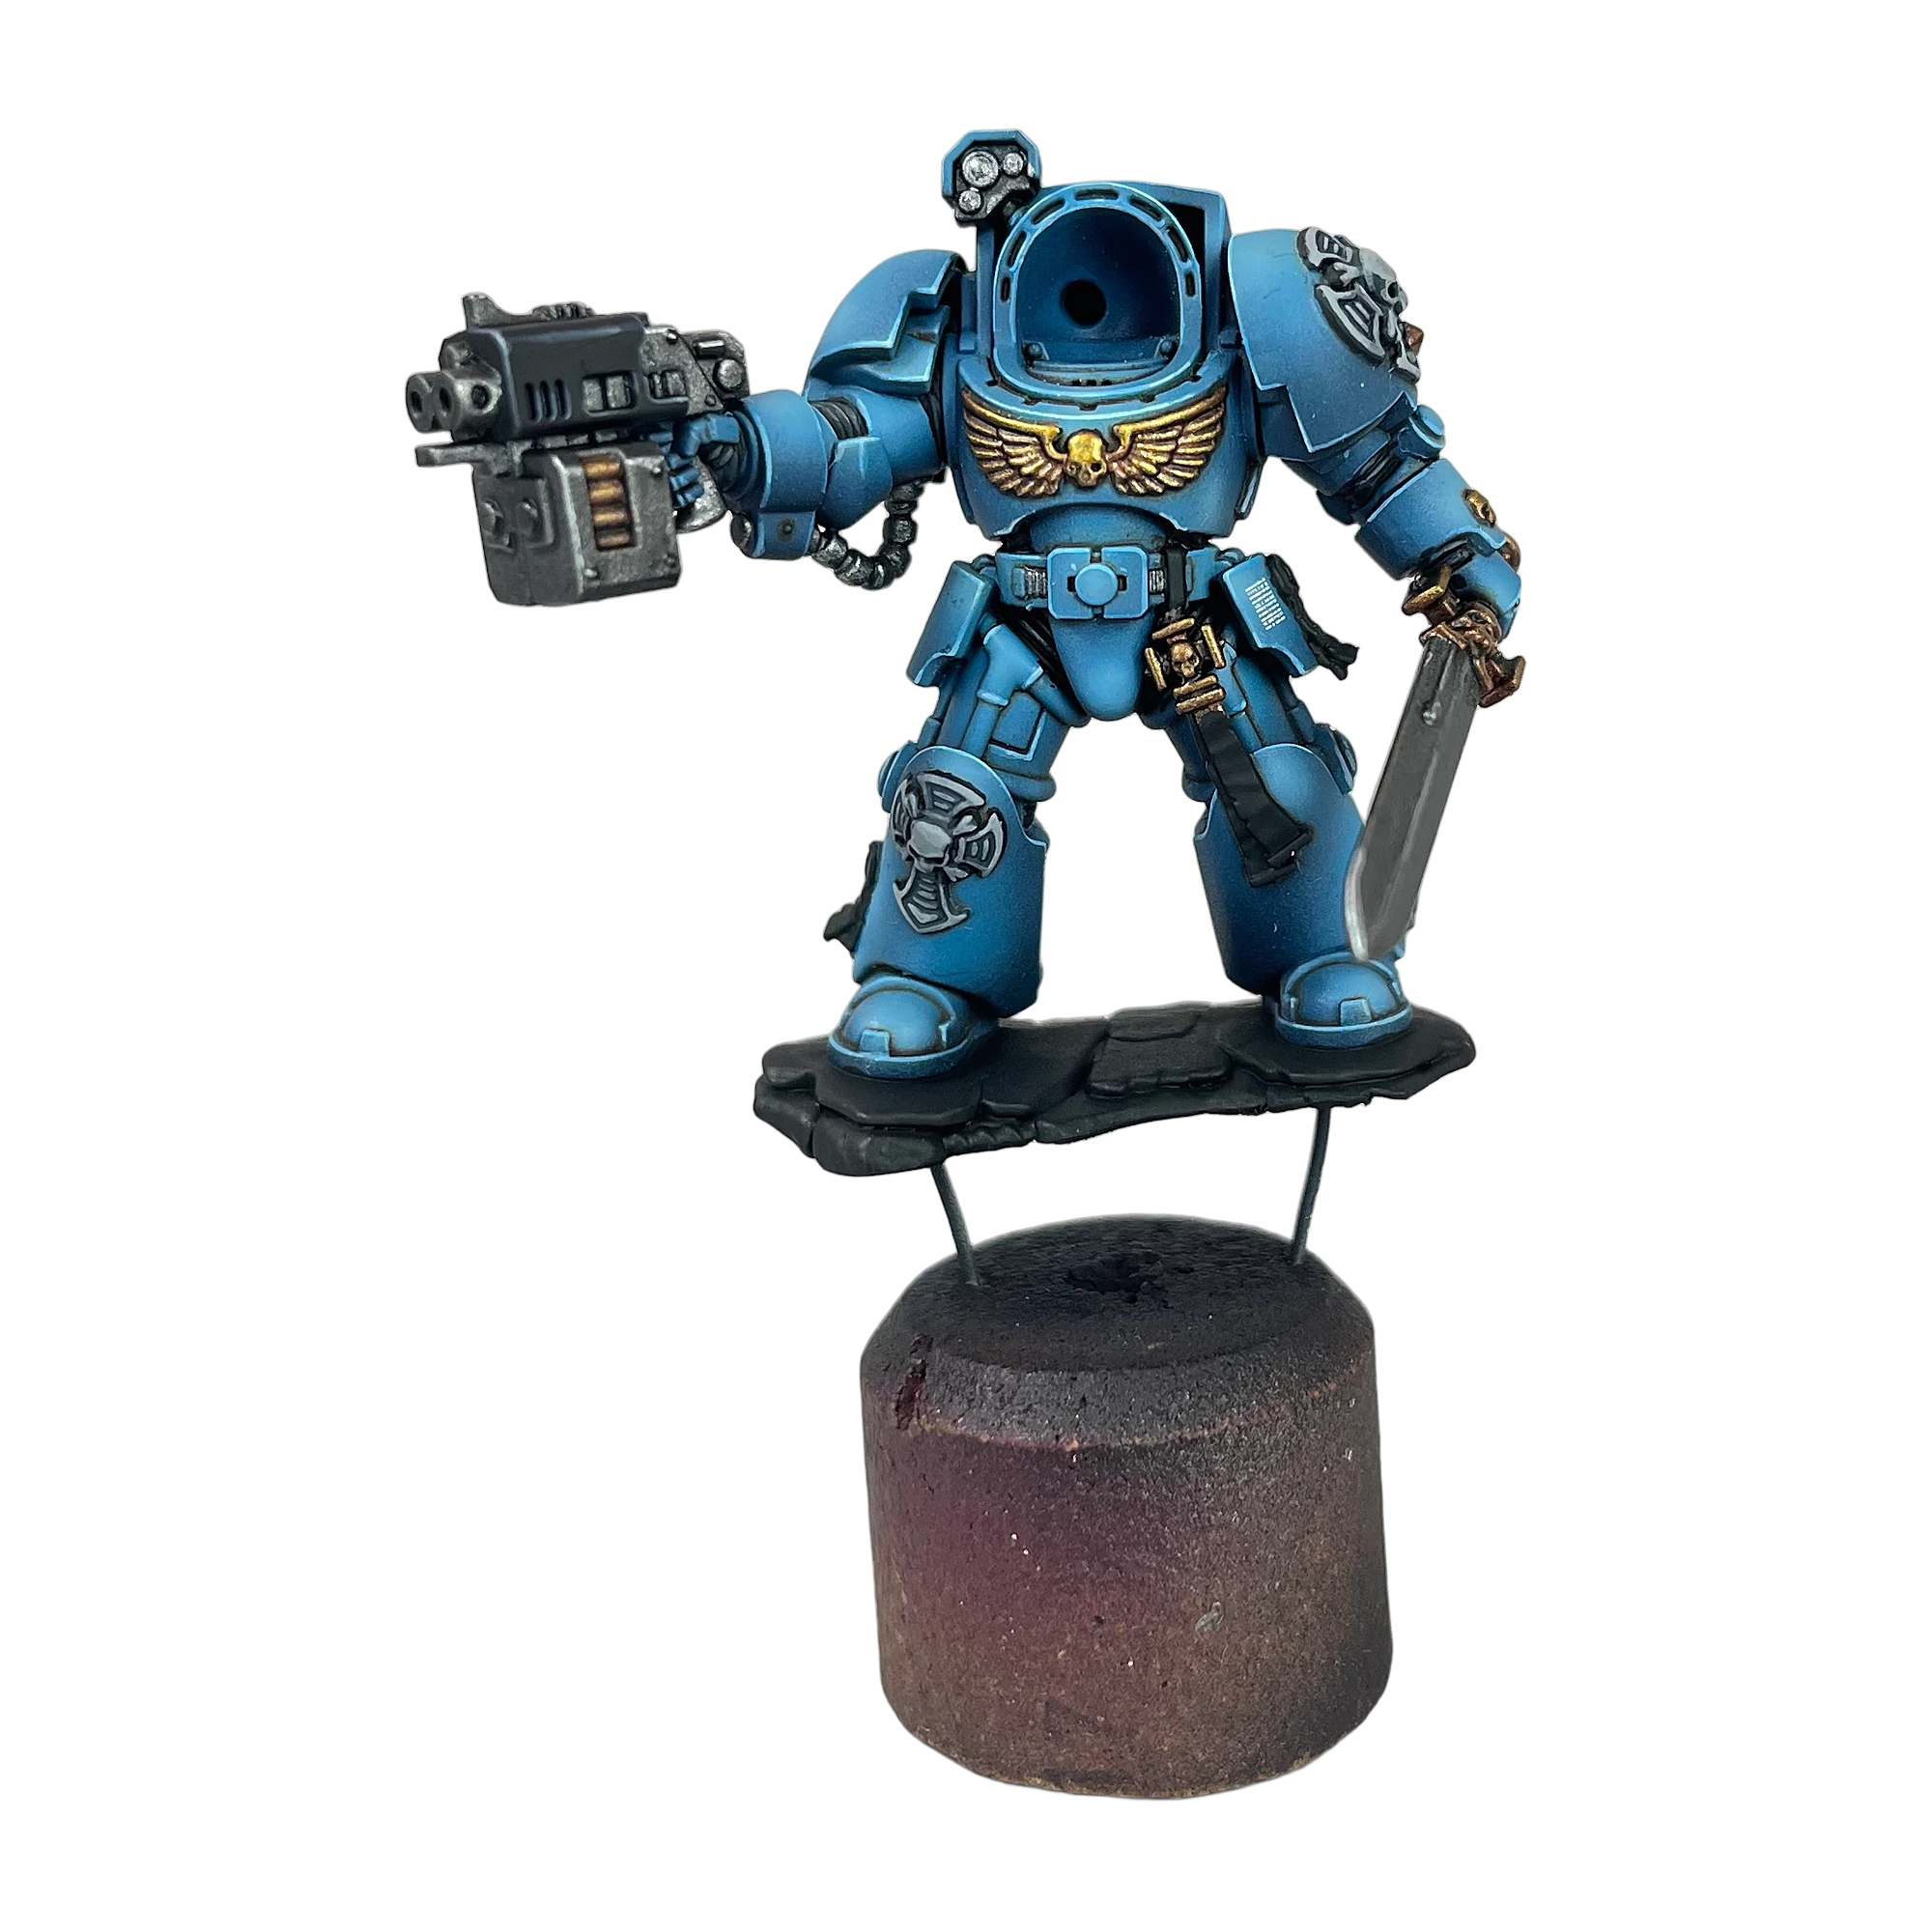
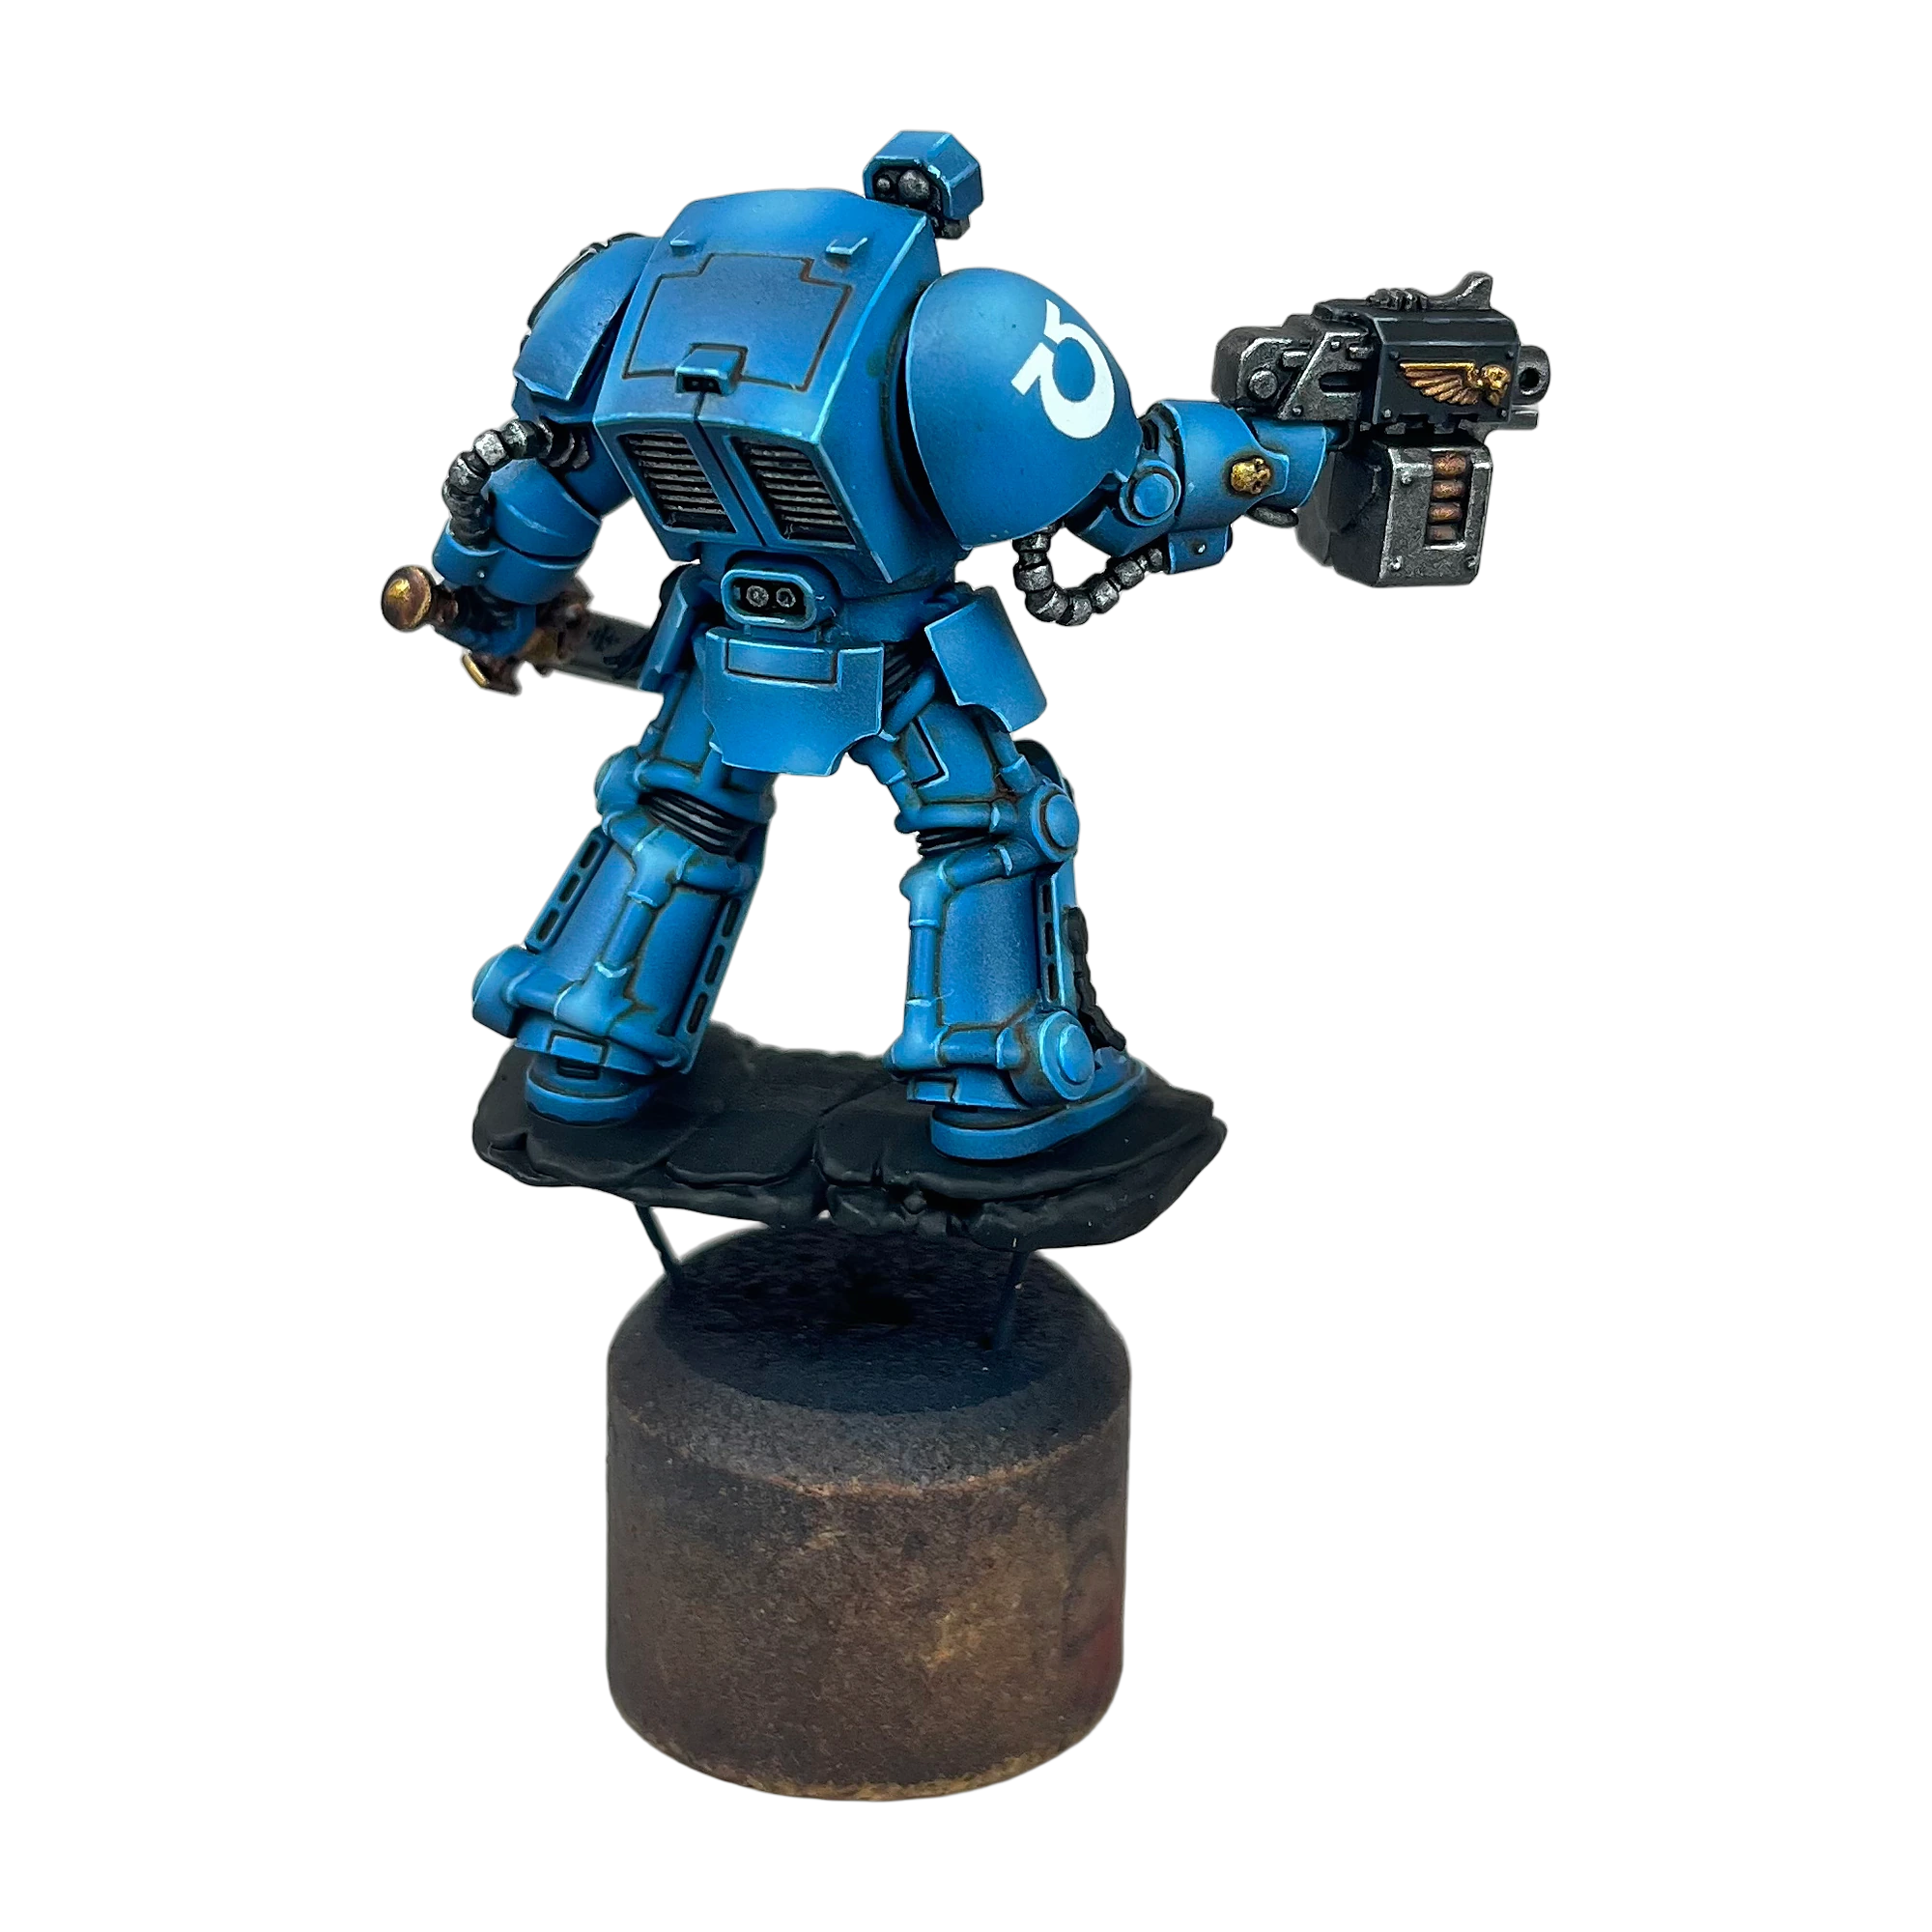
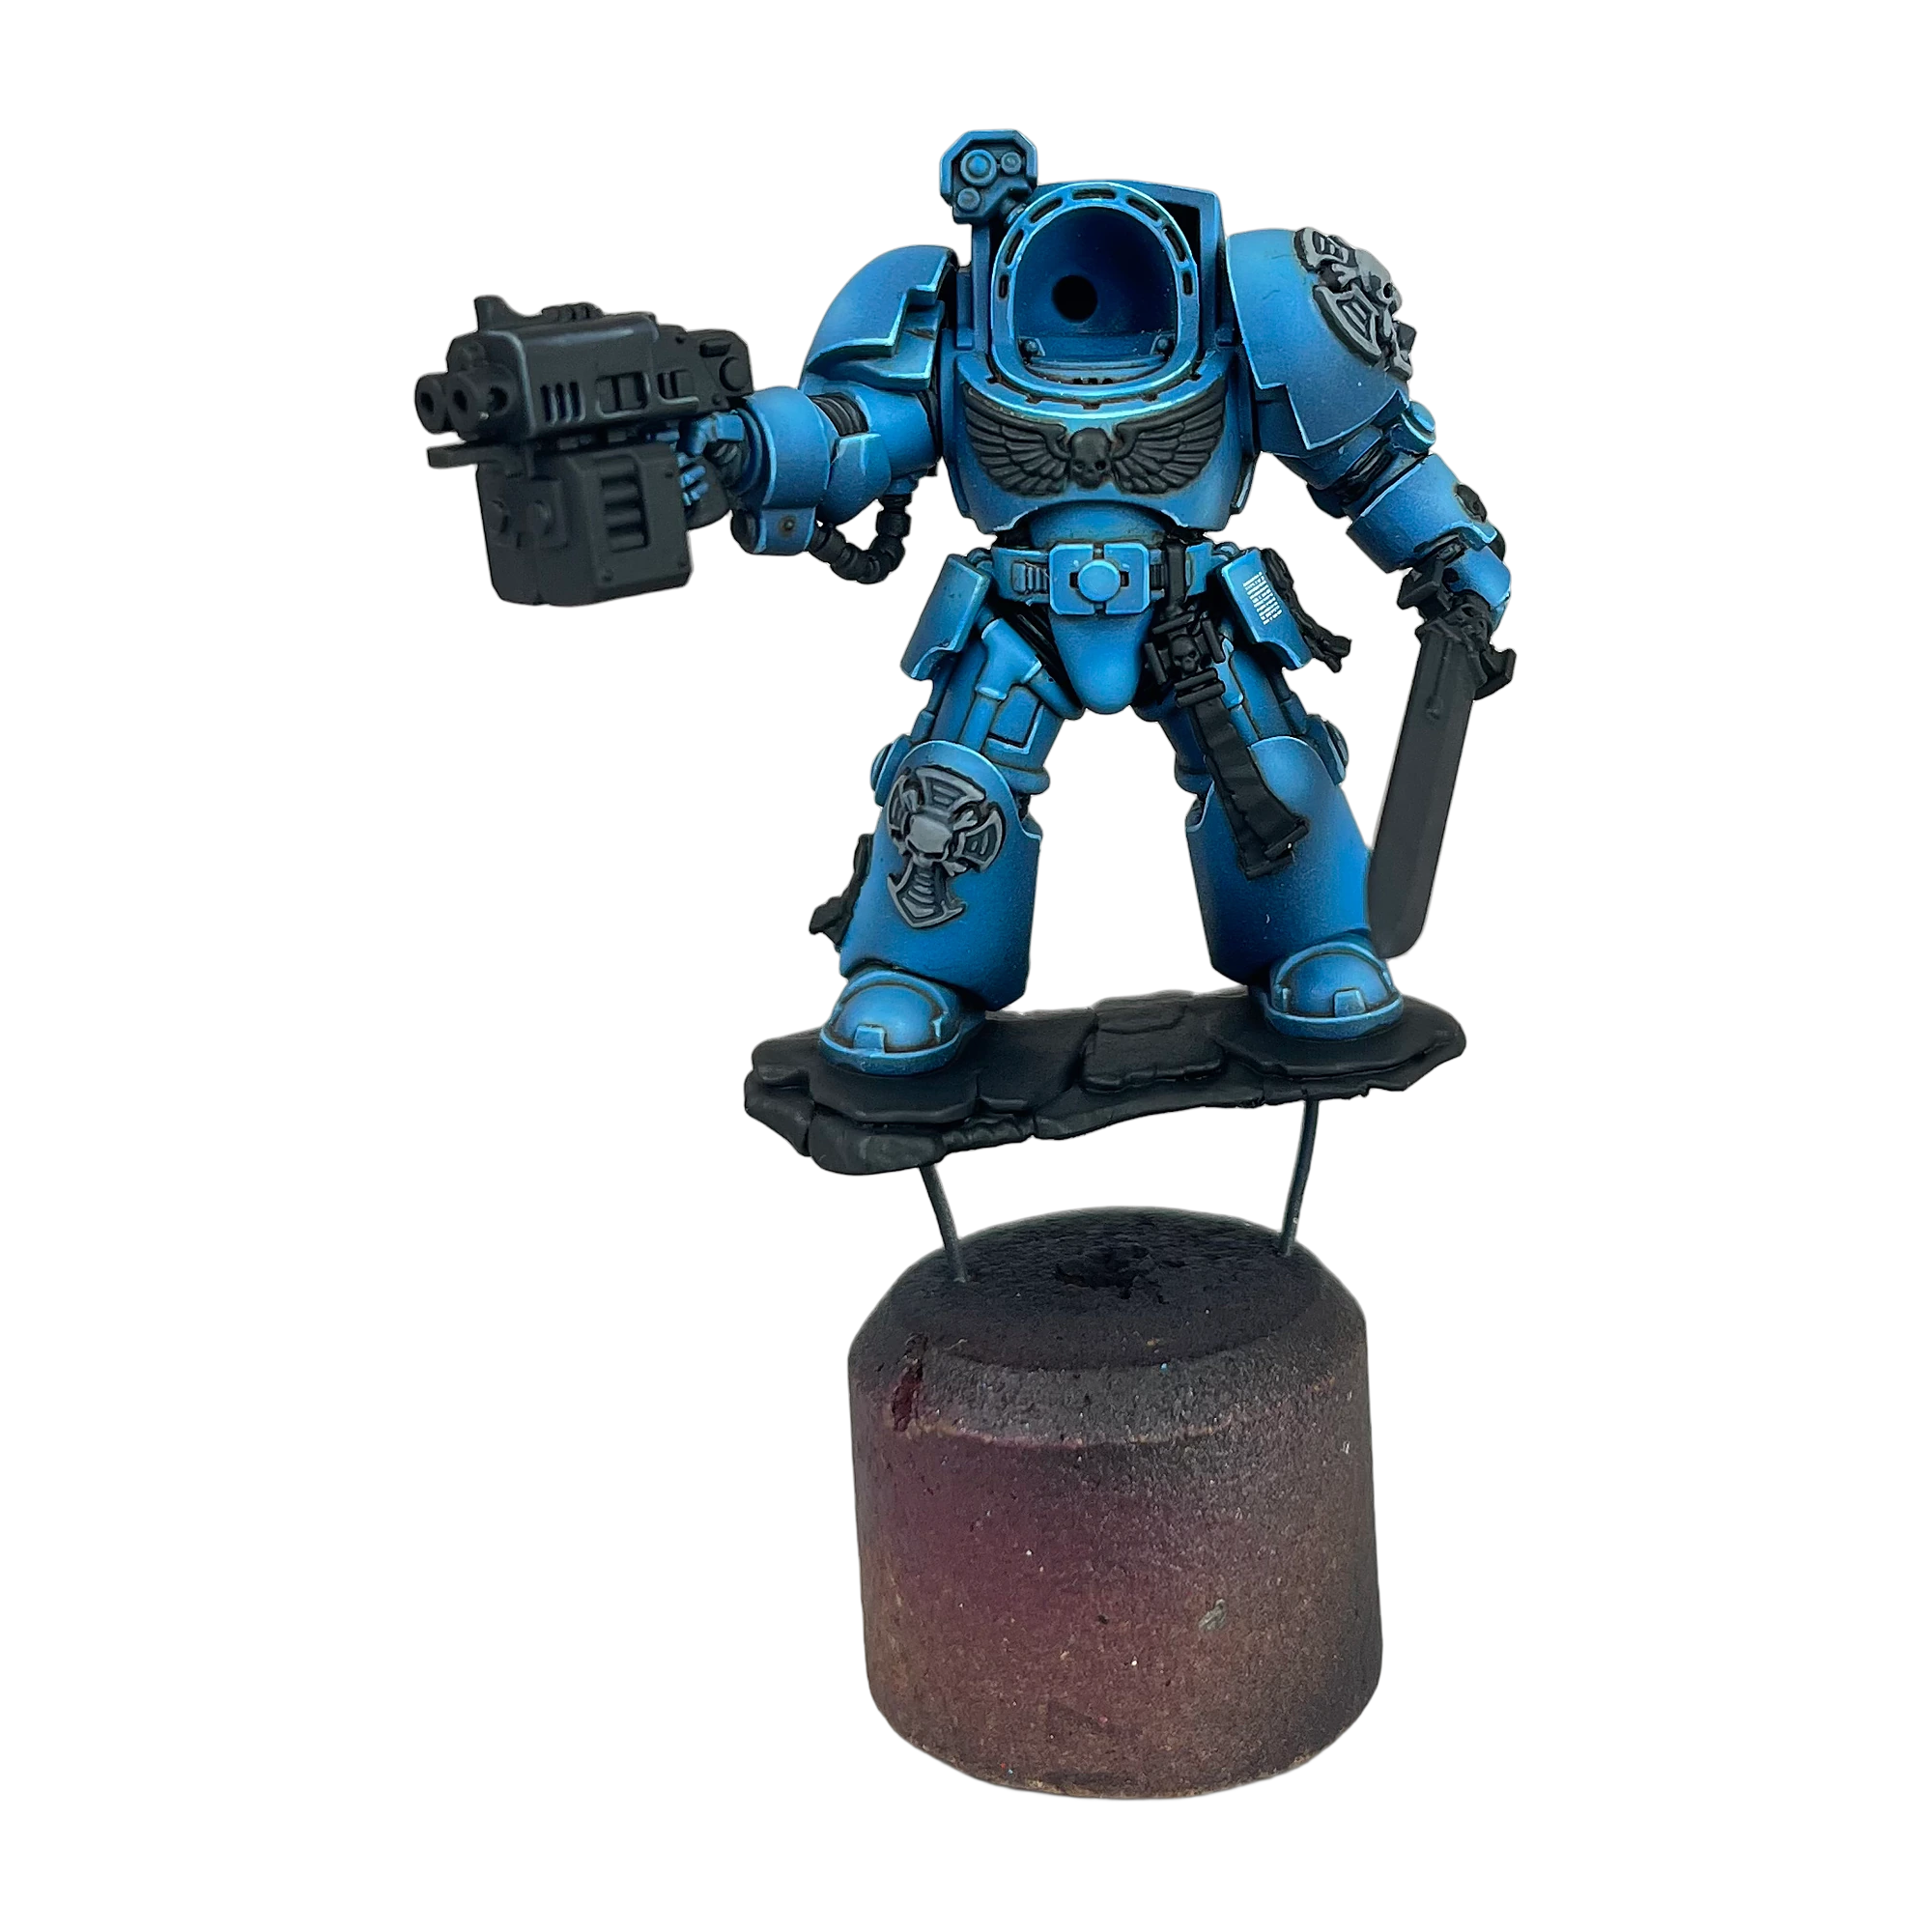
Intermediate Showcase: The Ceramic Chassis Complete
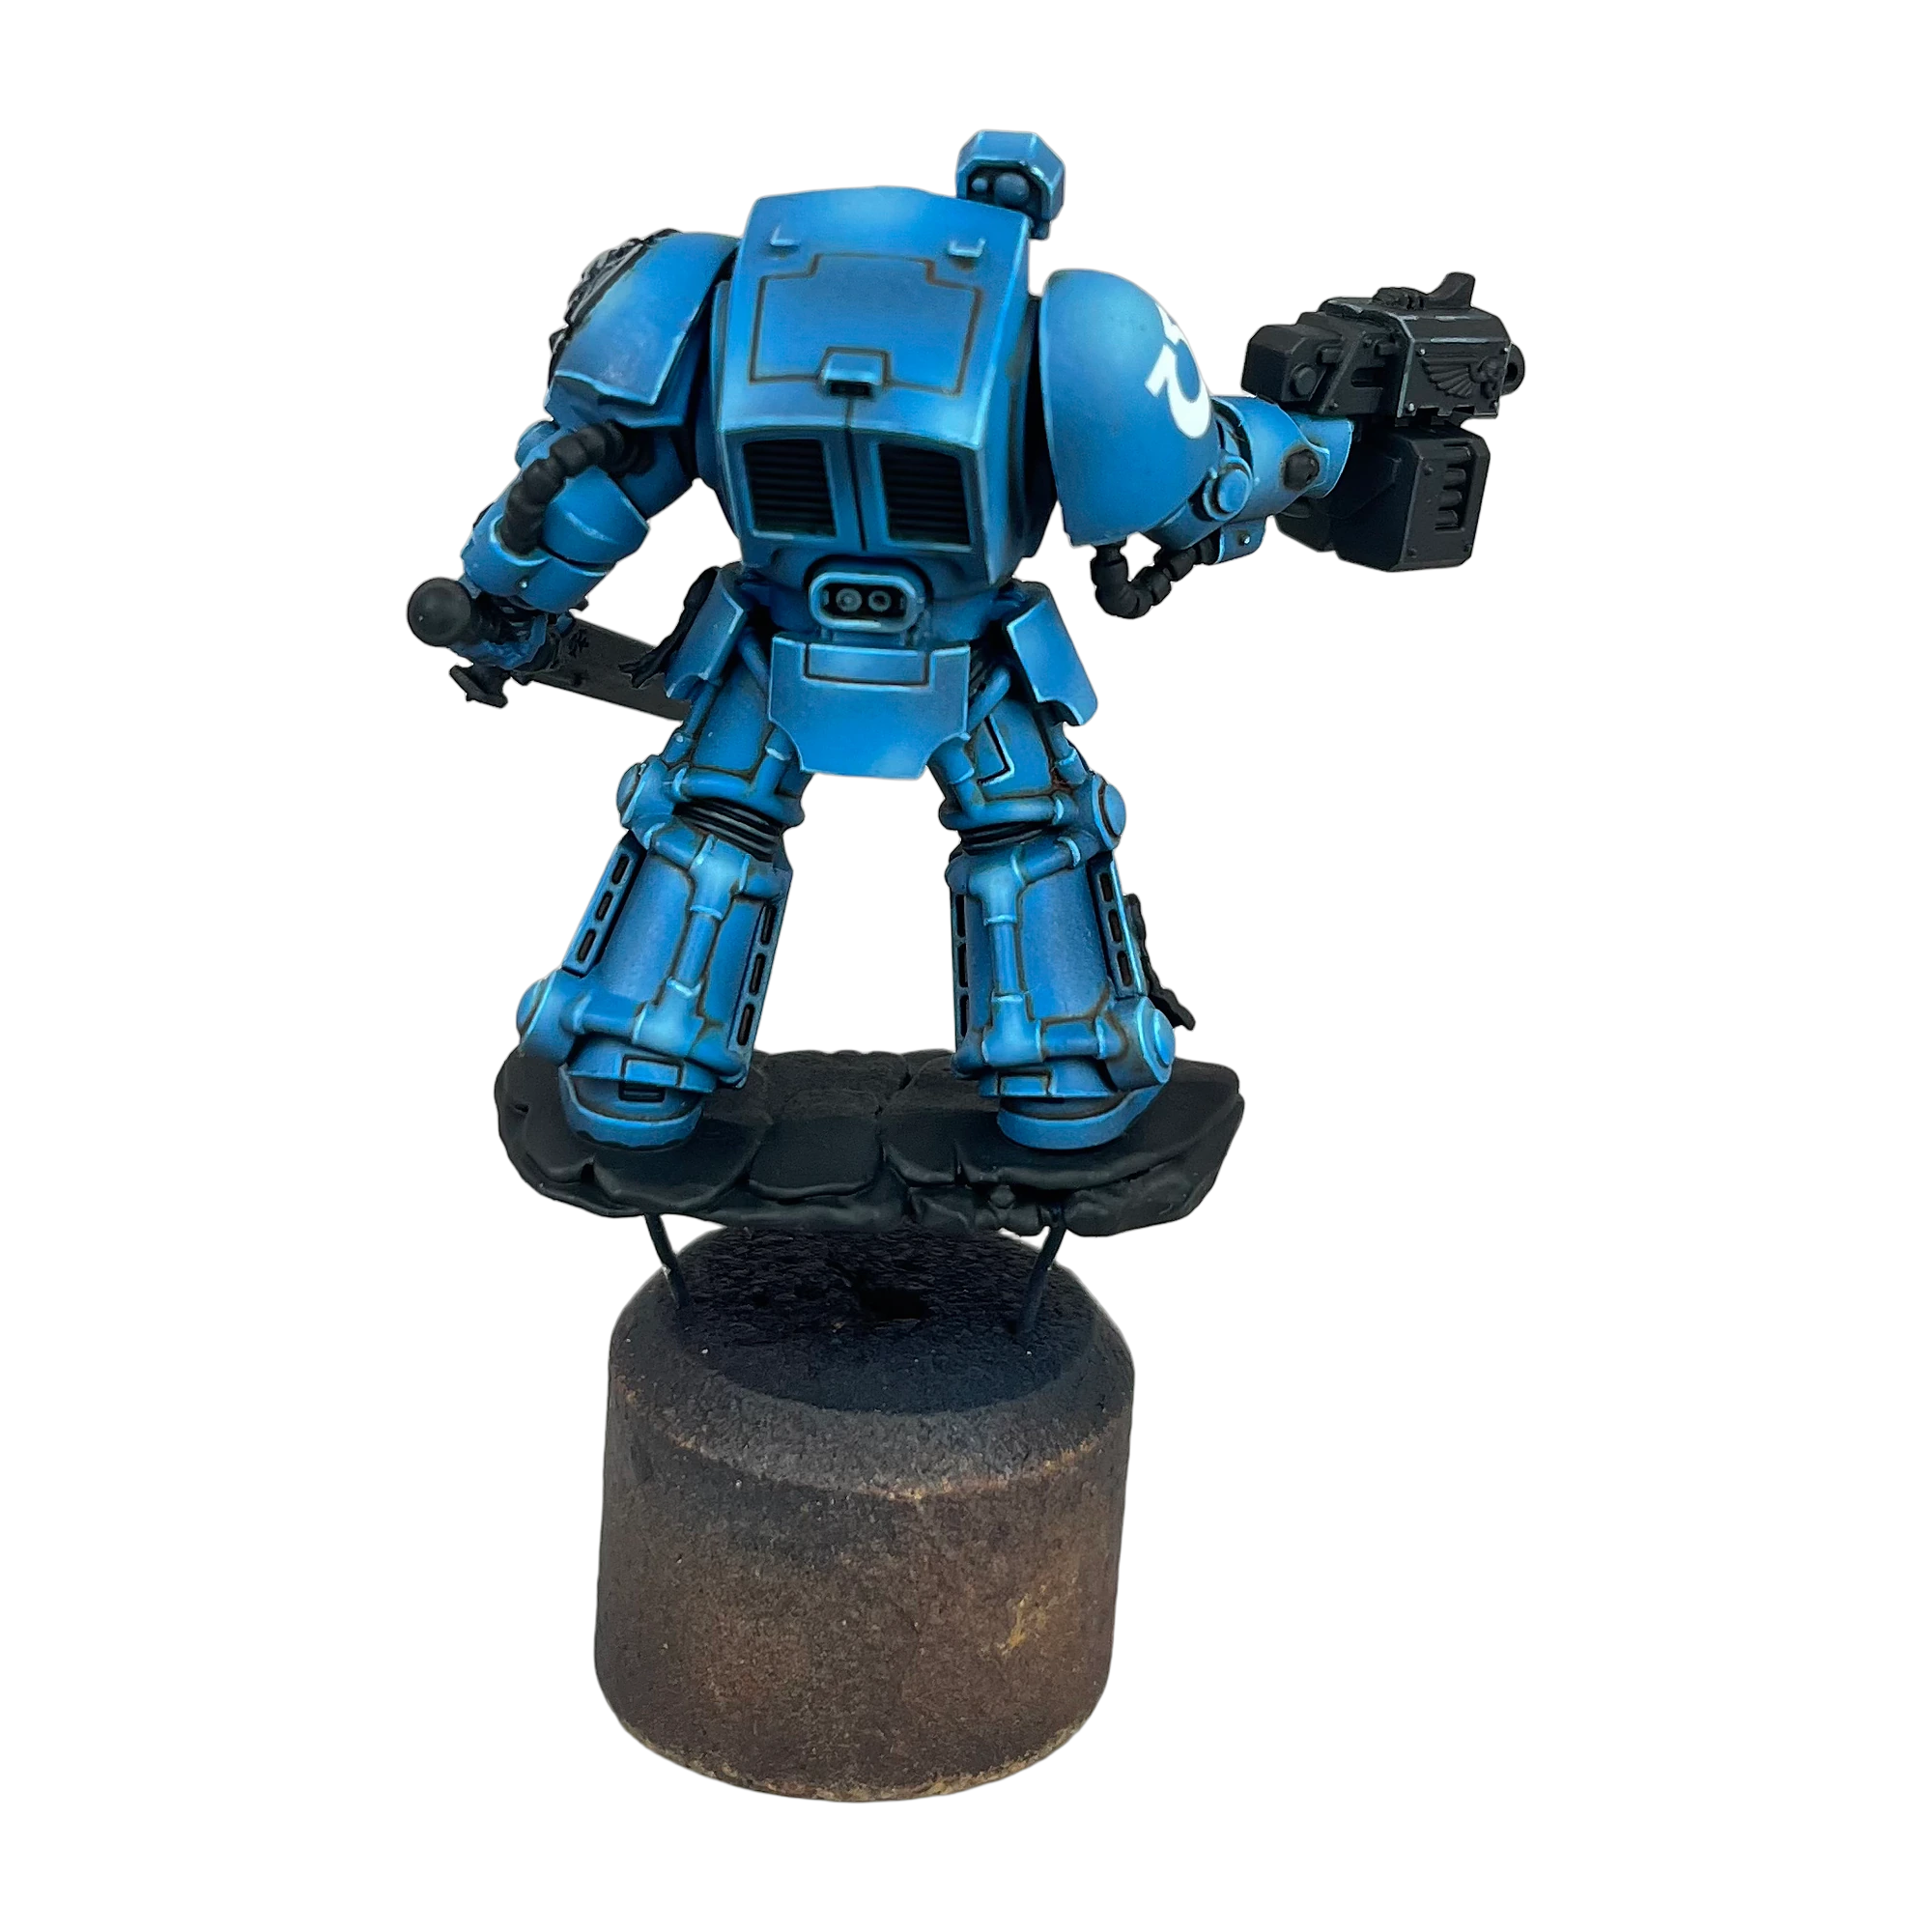
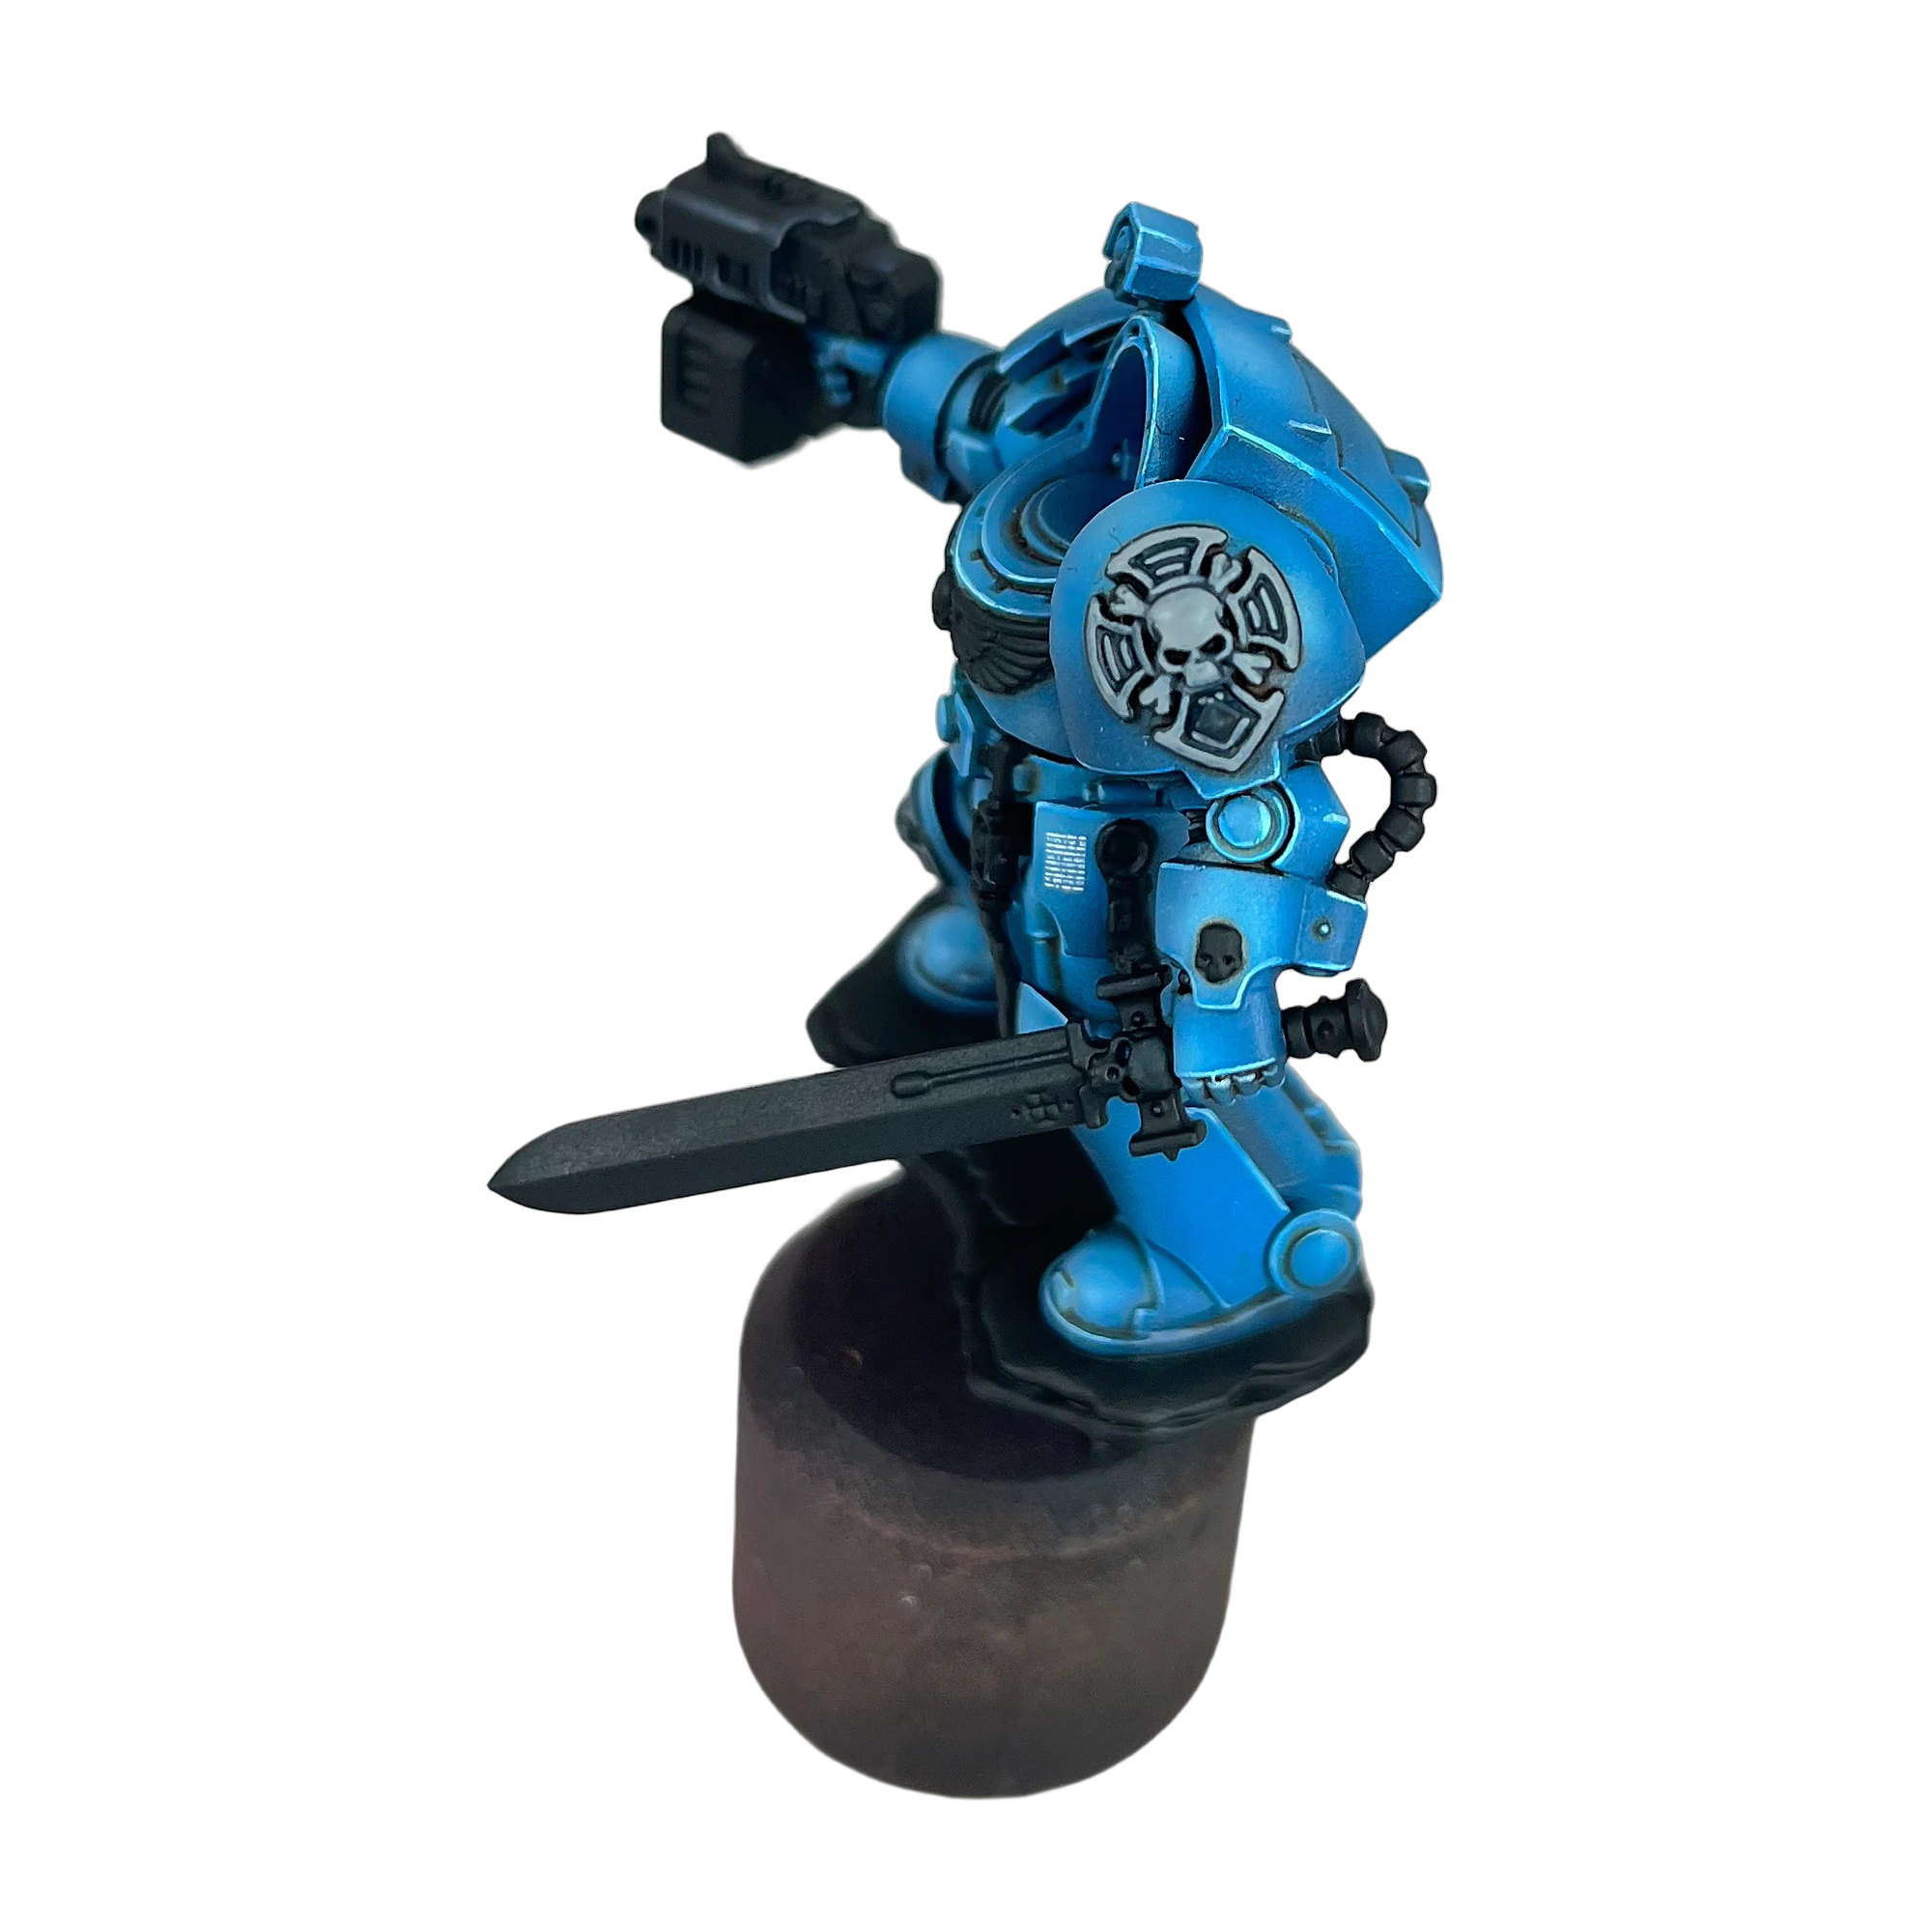
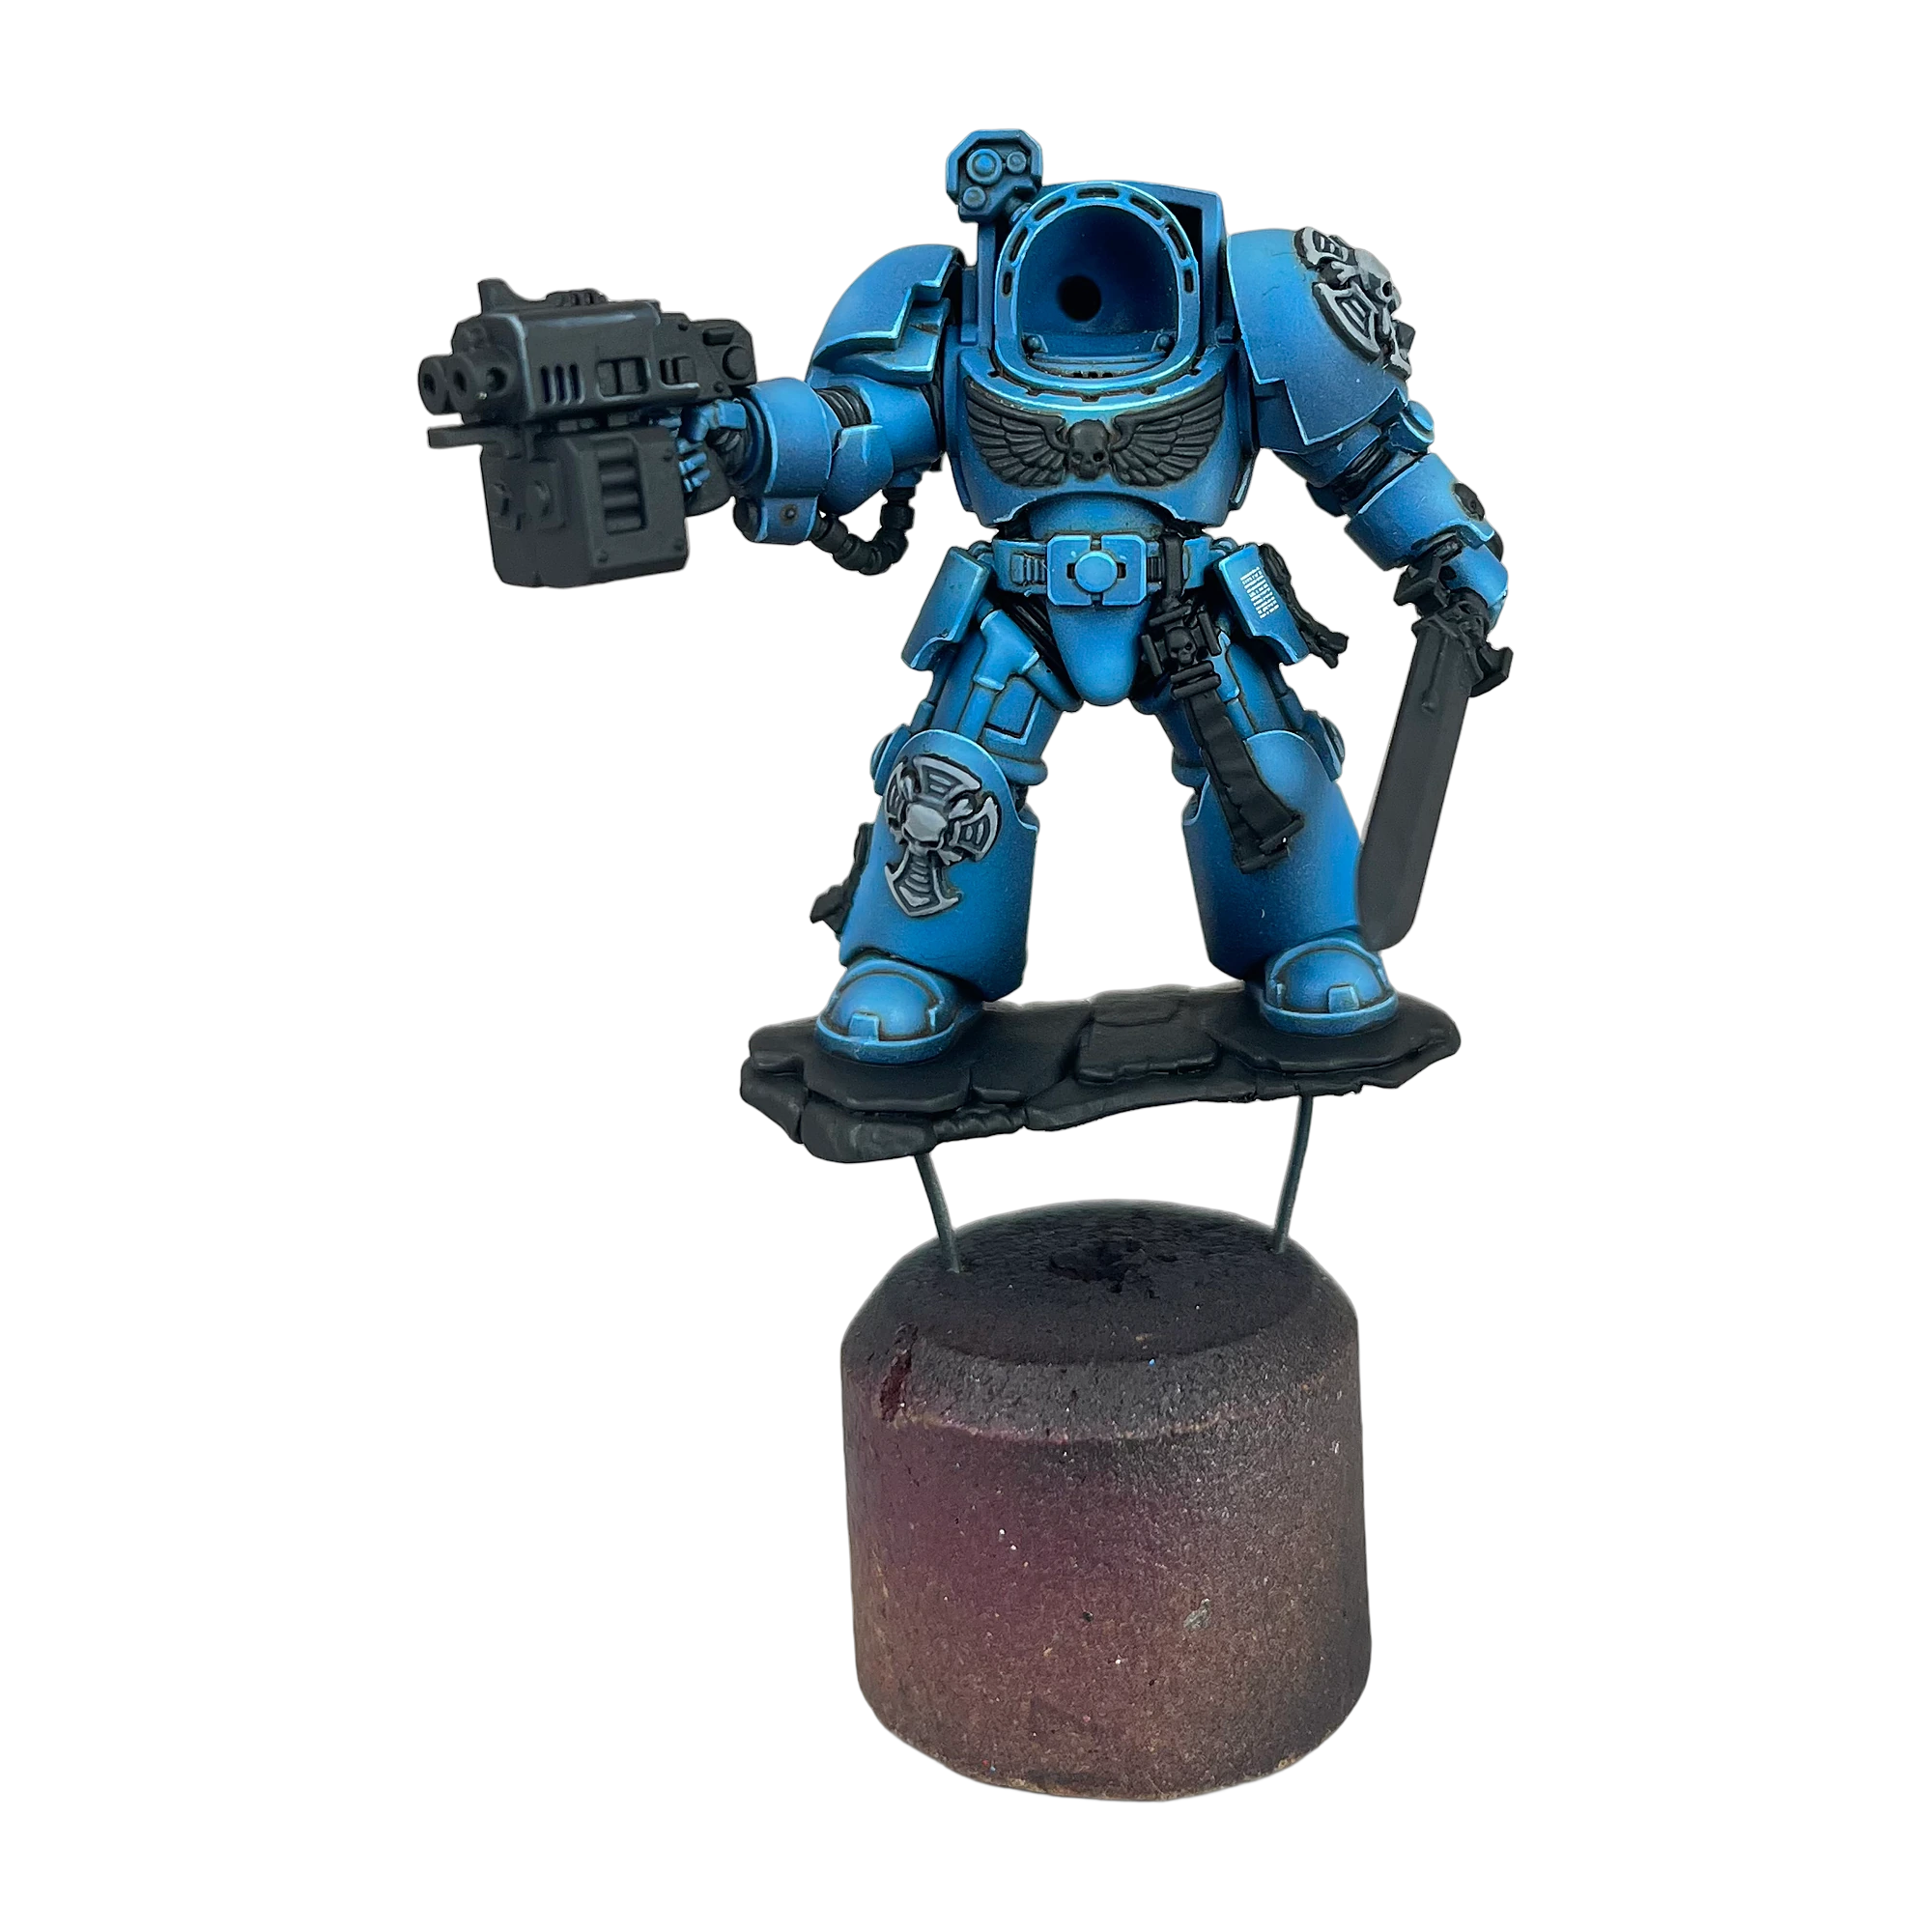
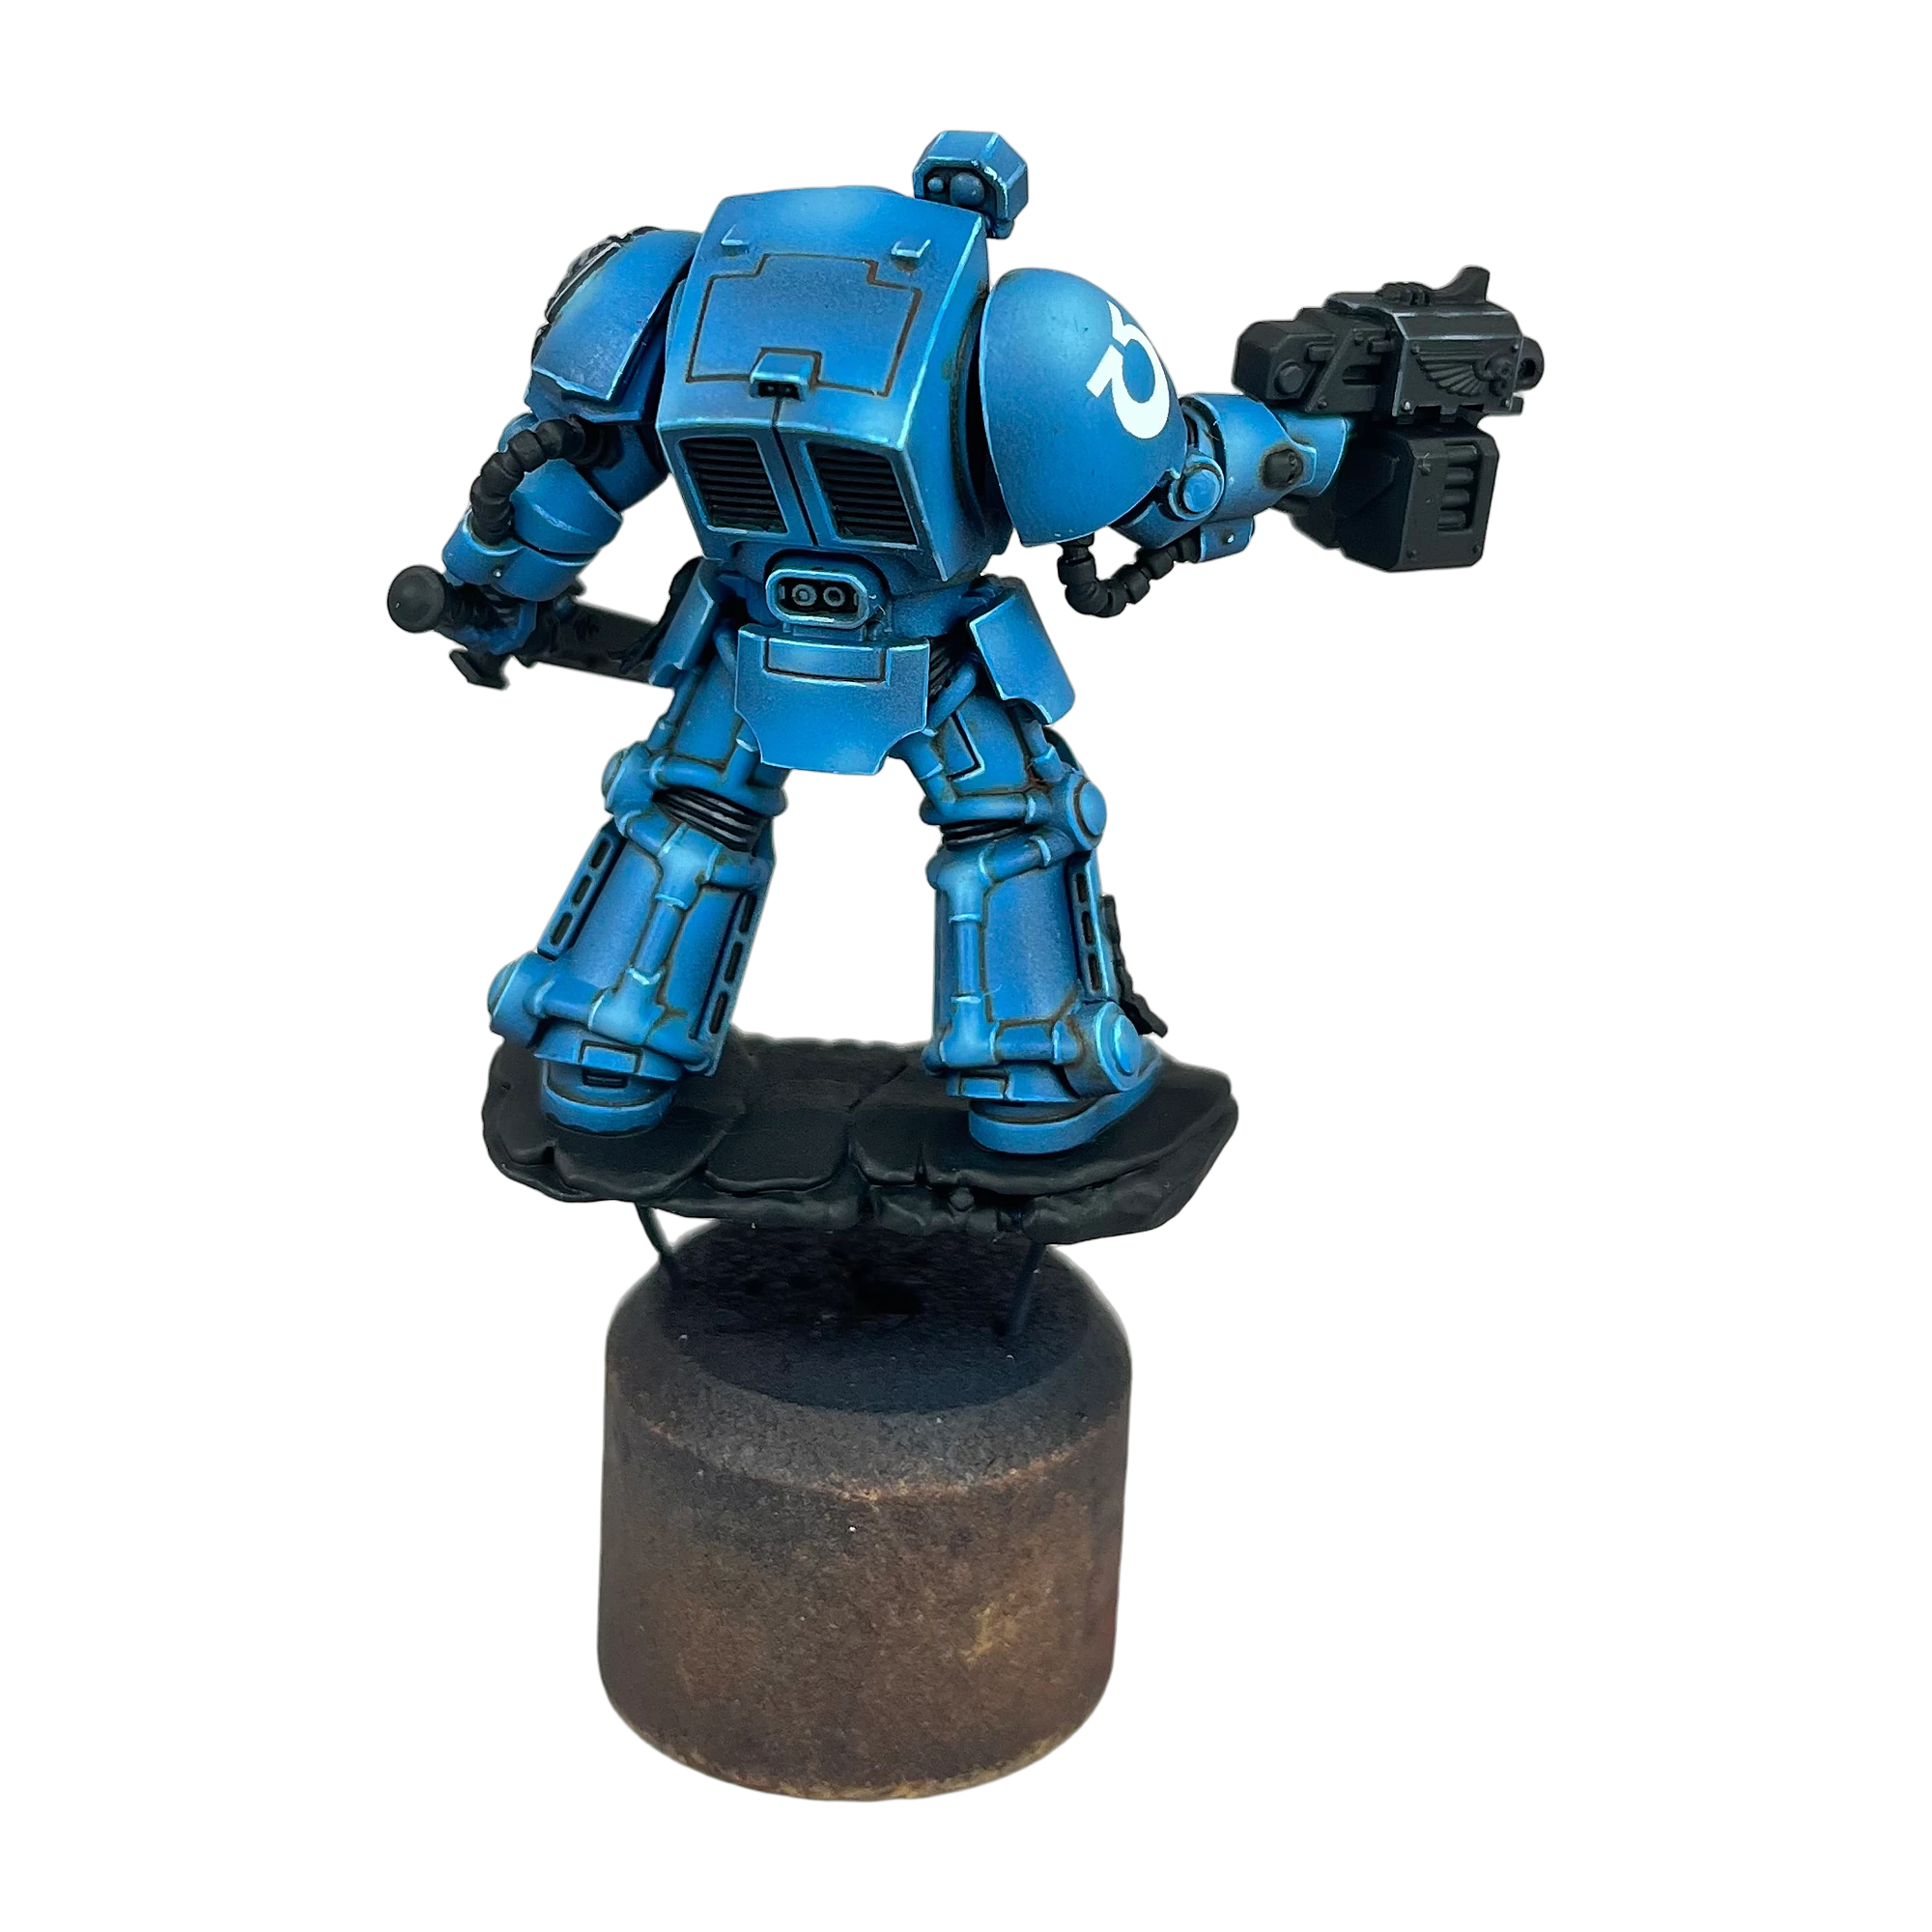
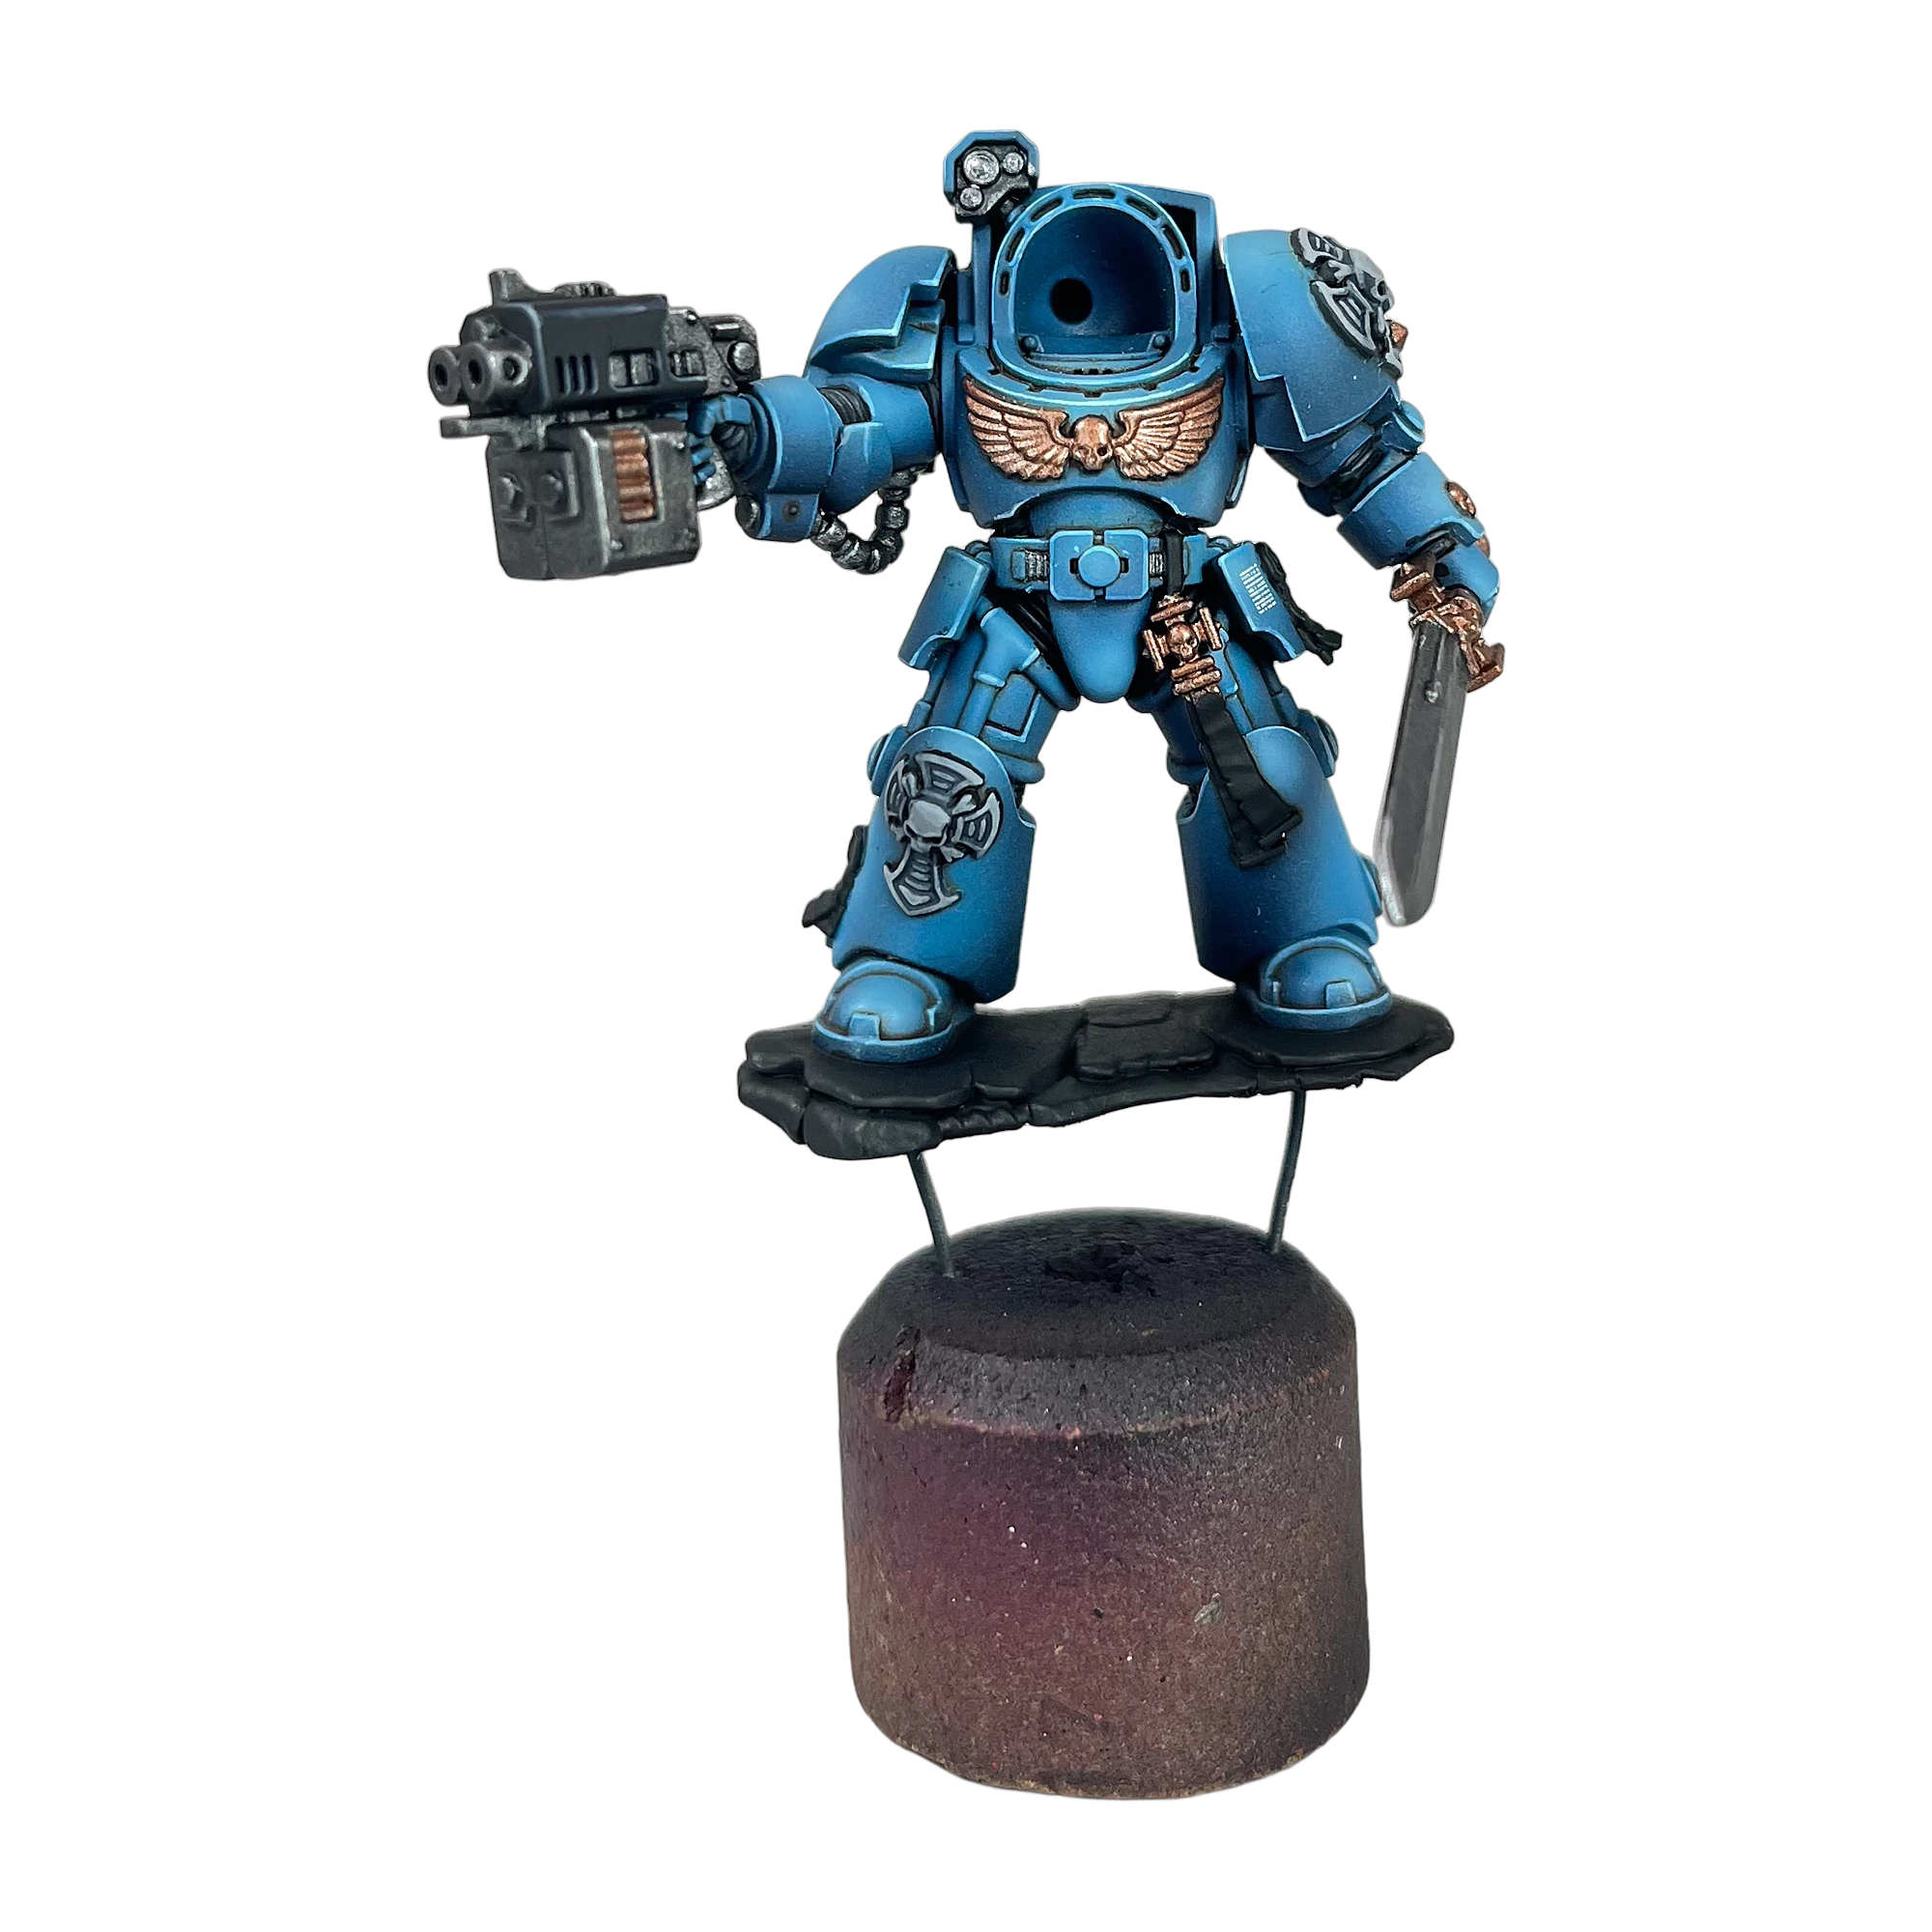
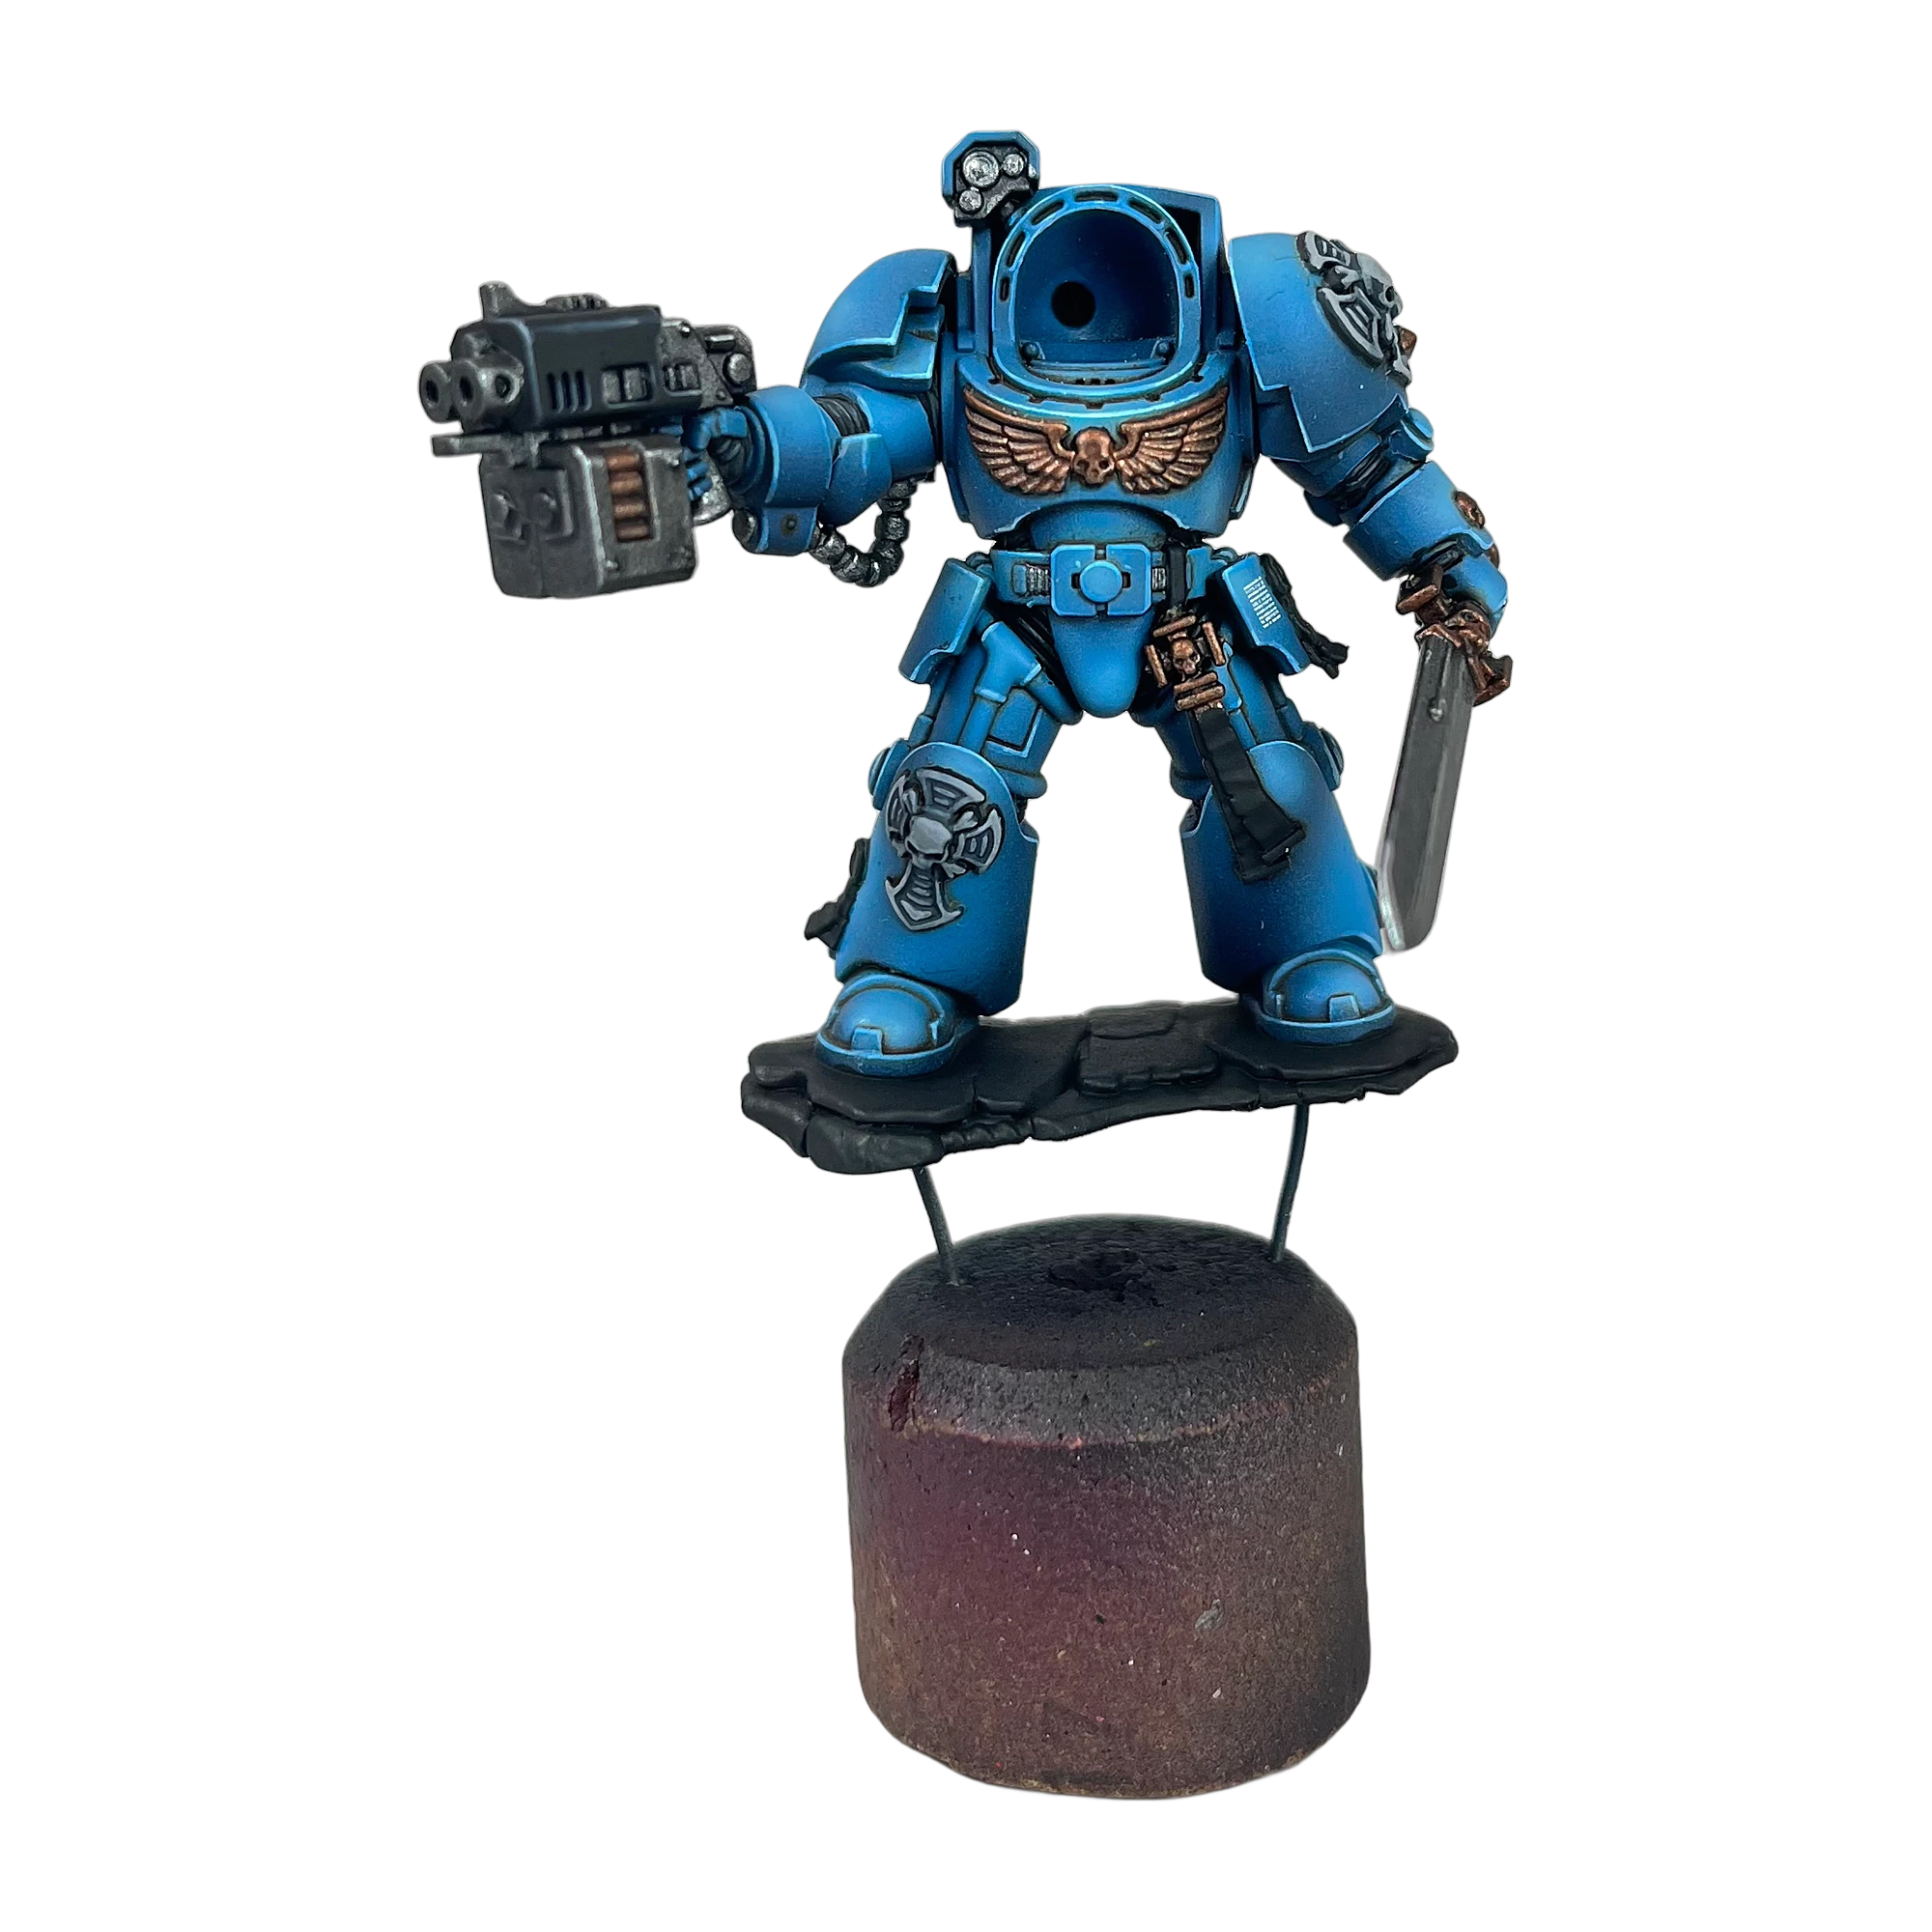
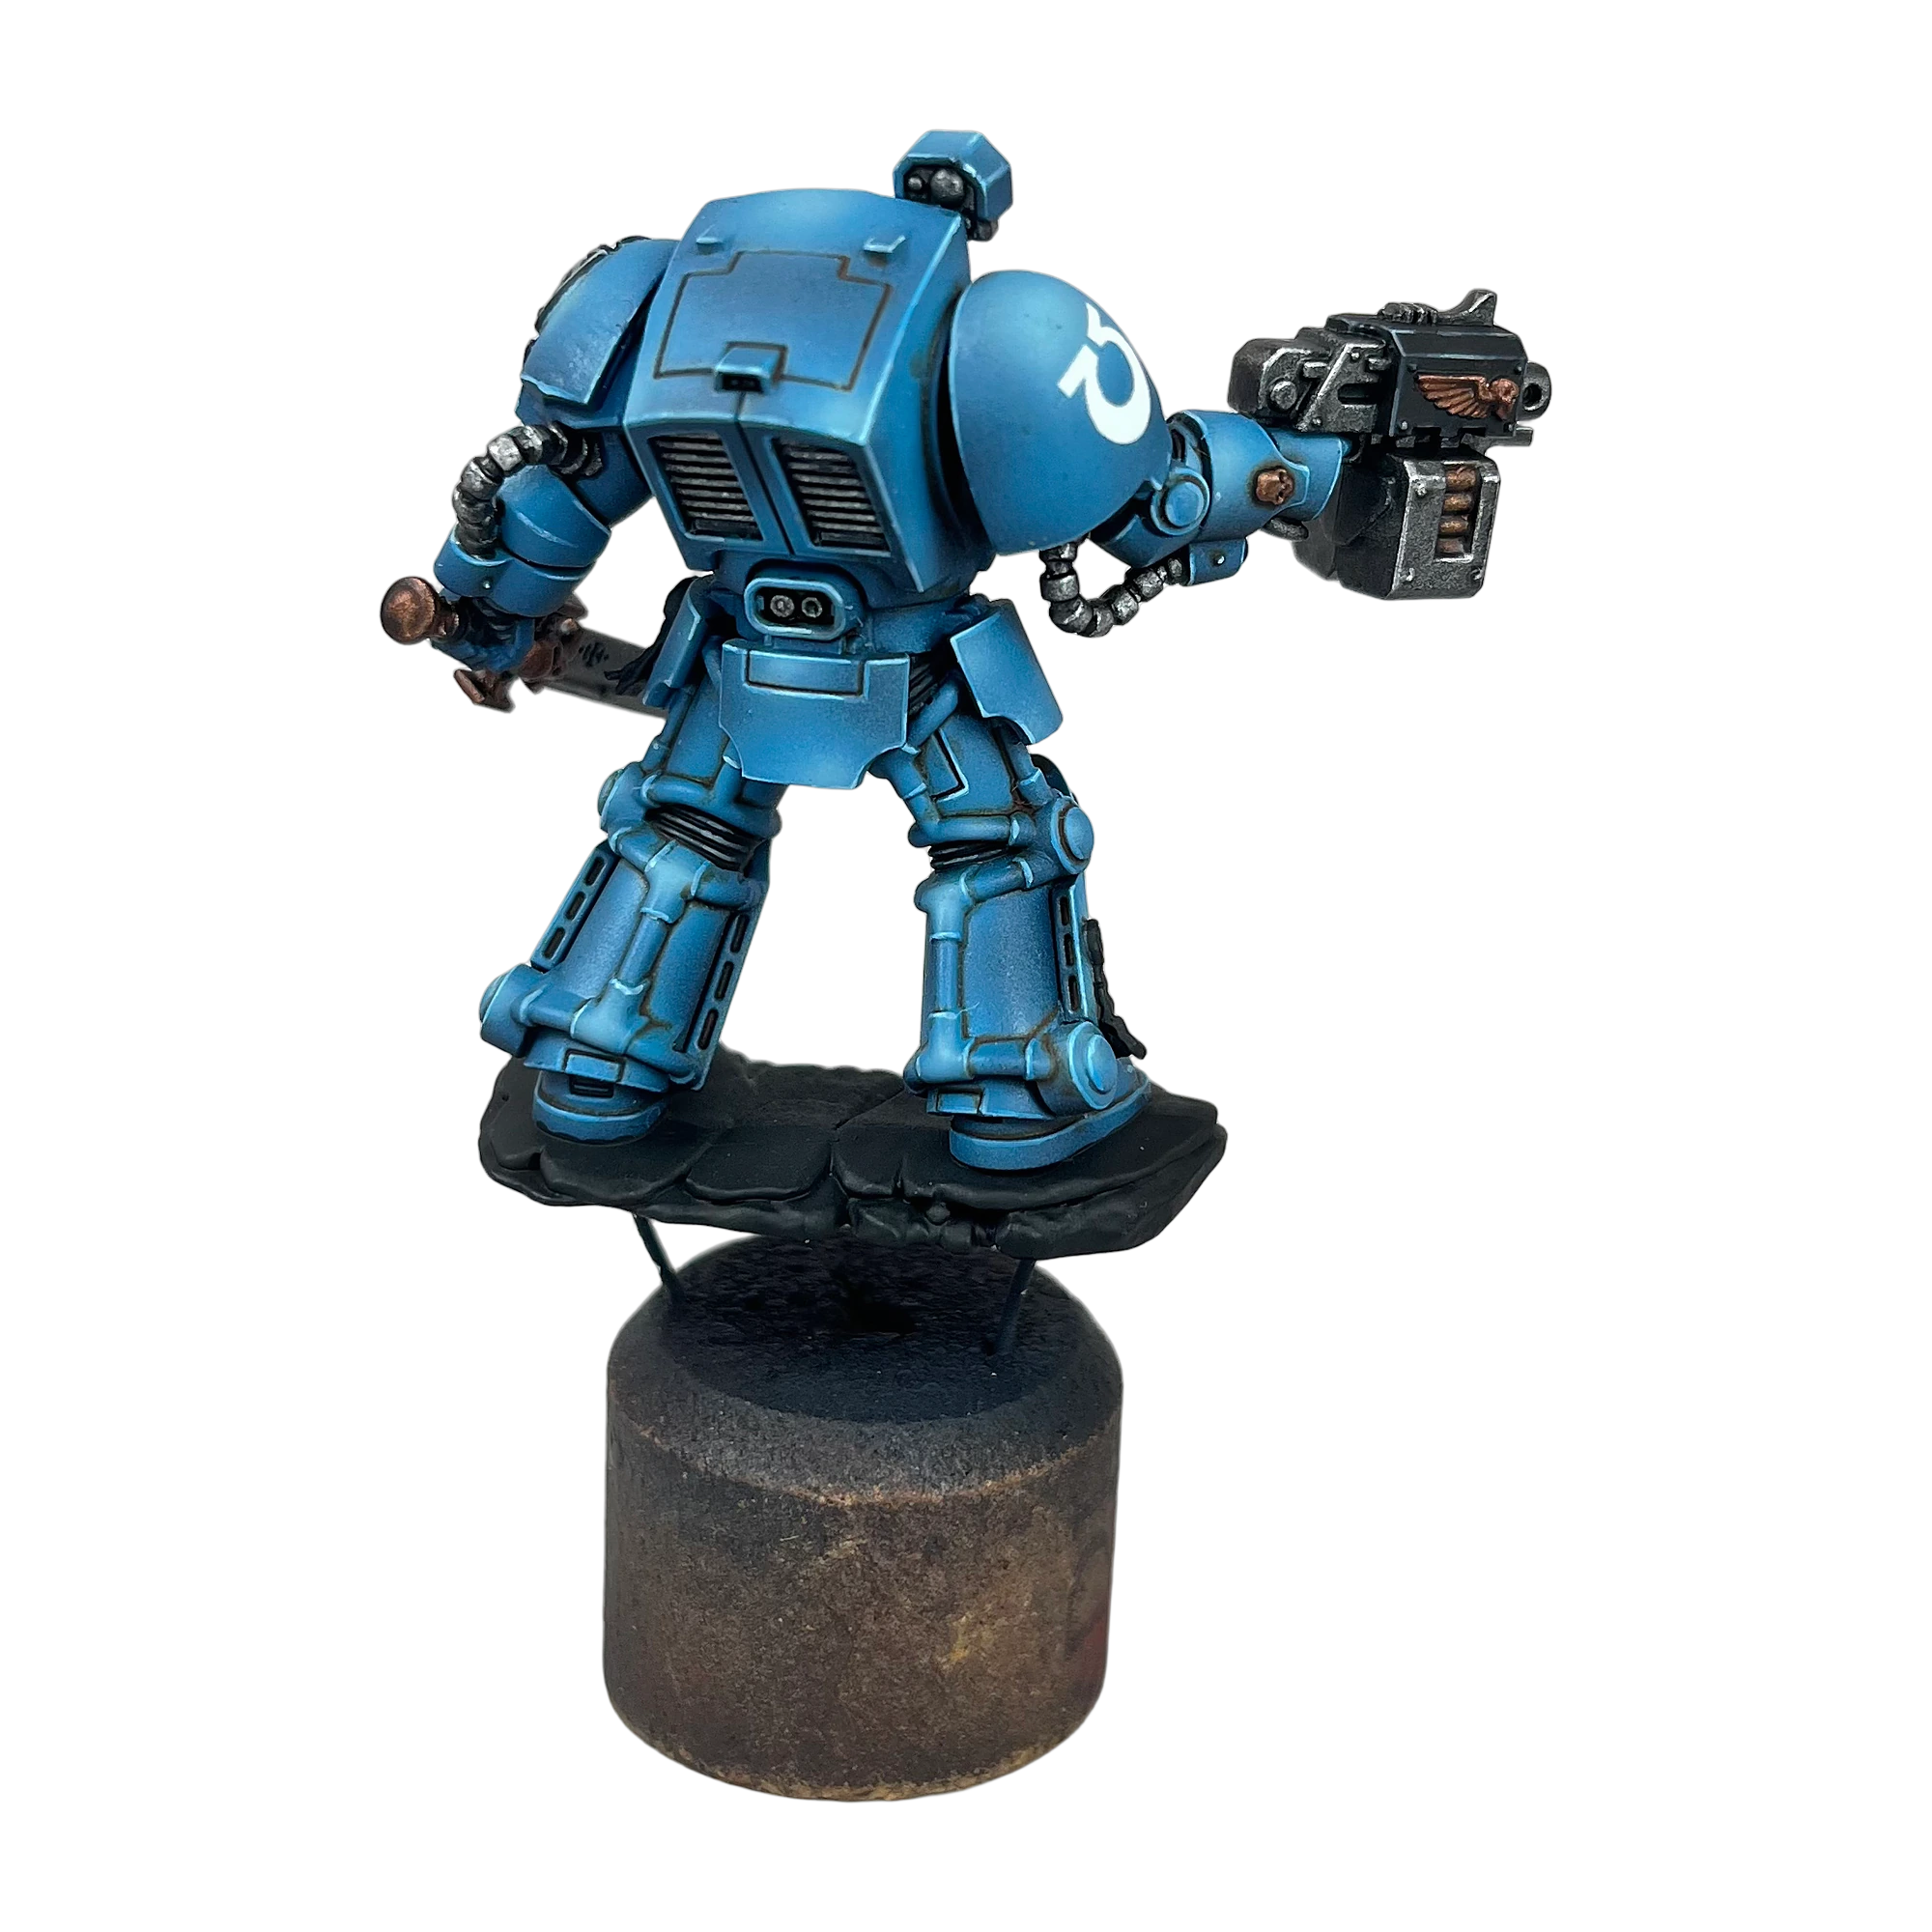
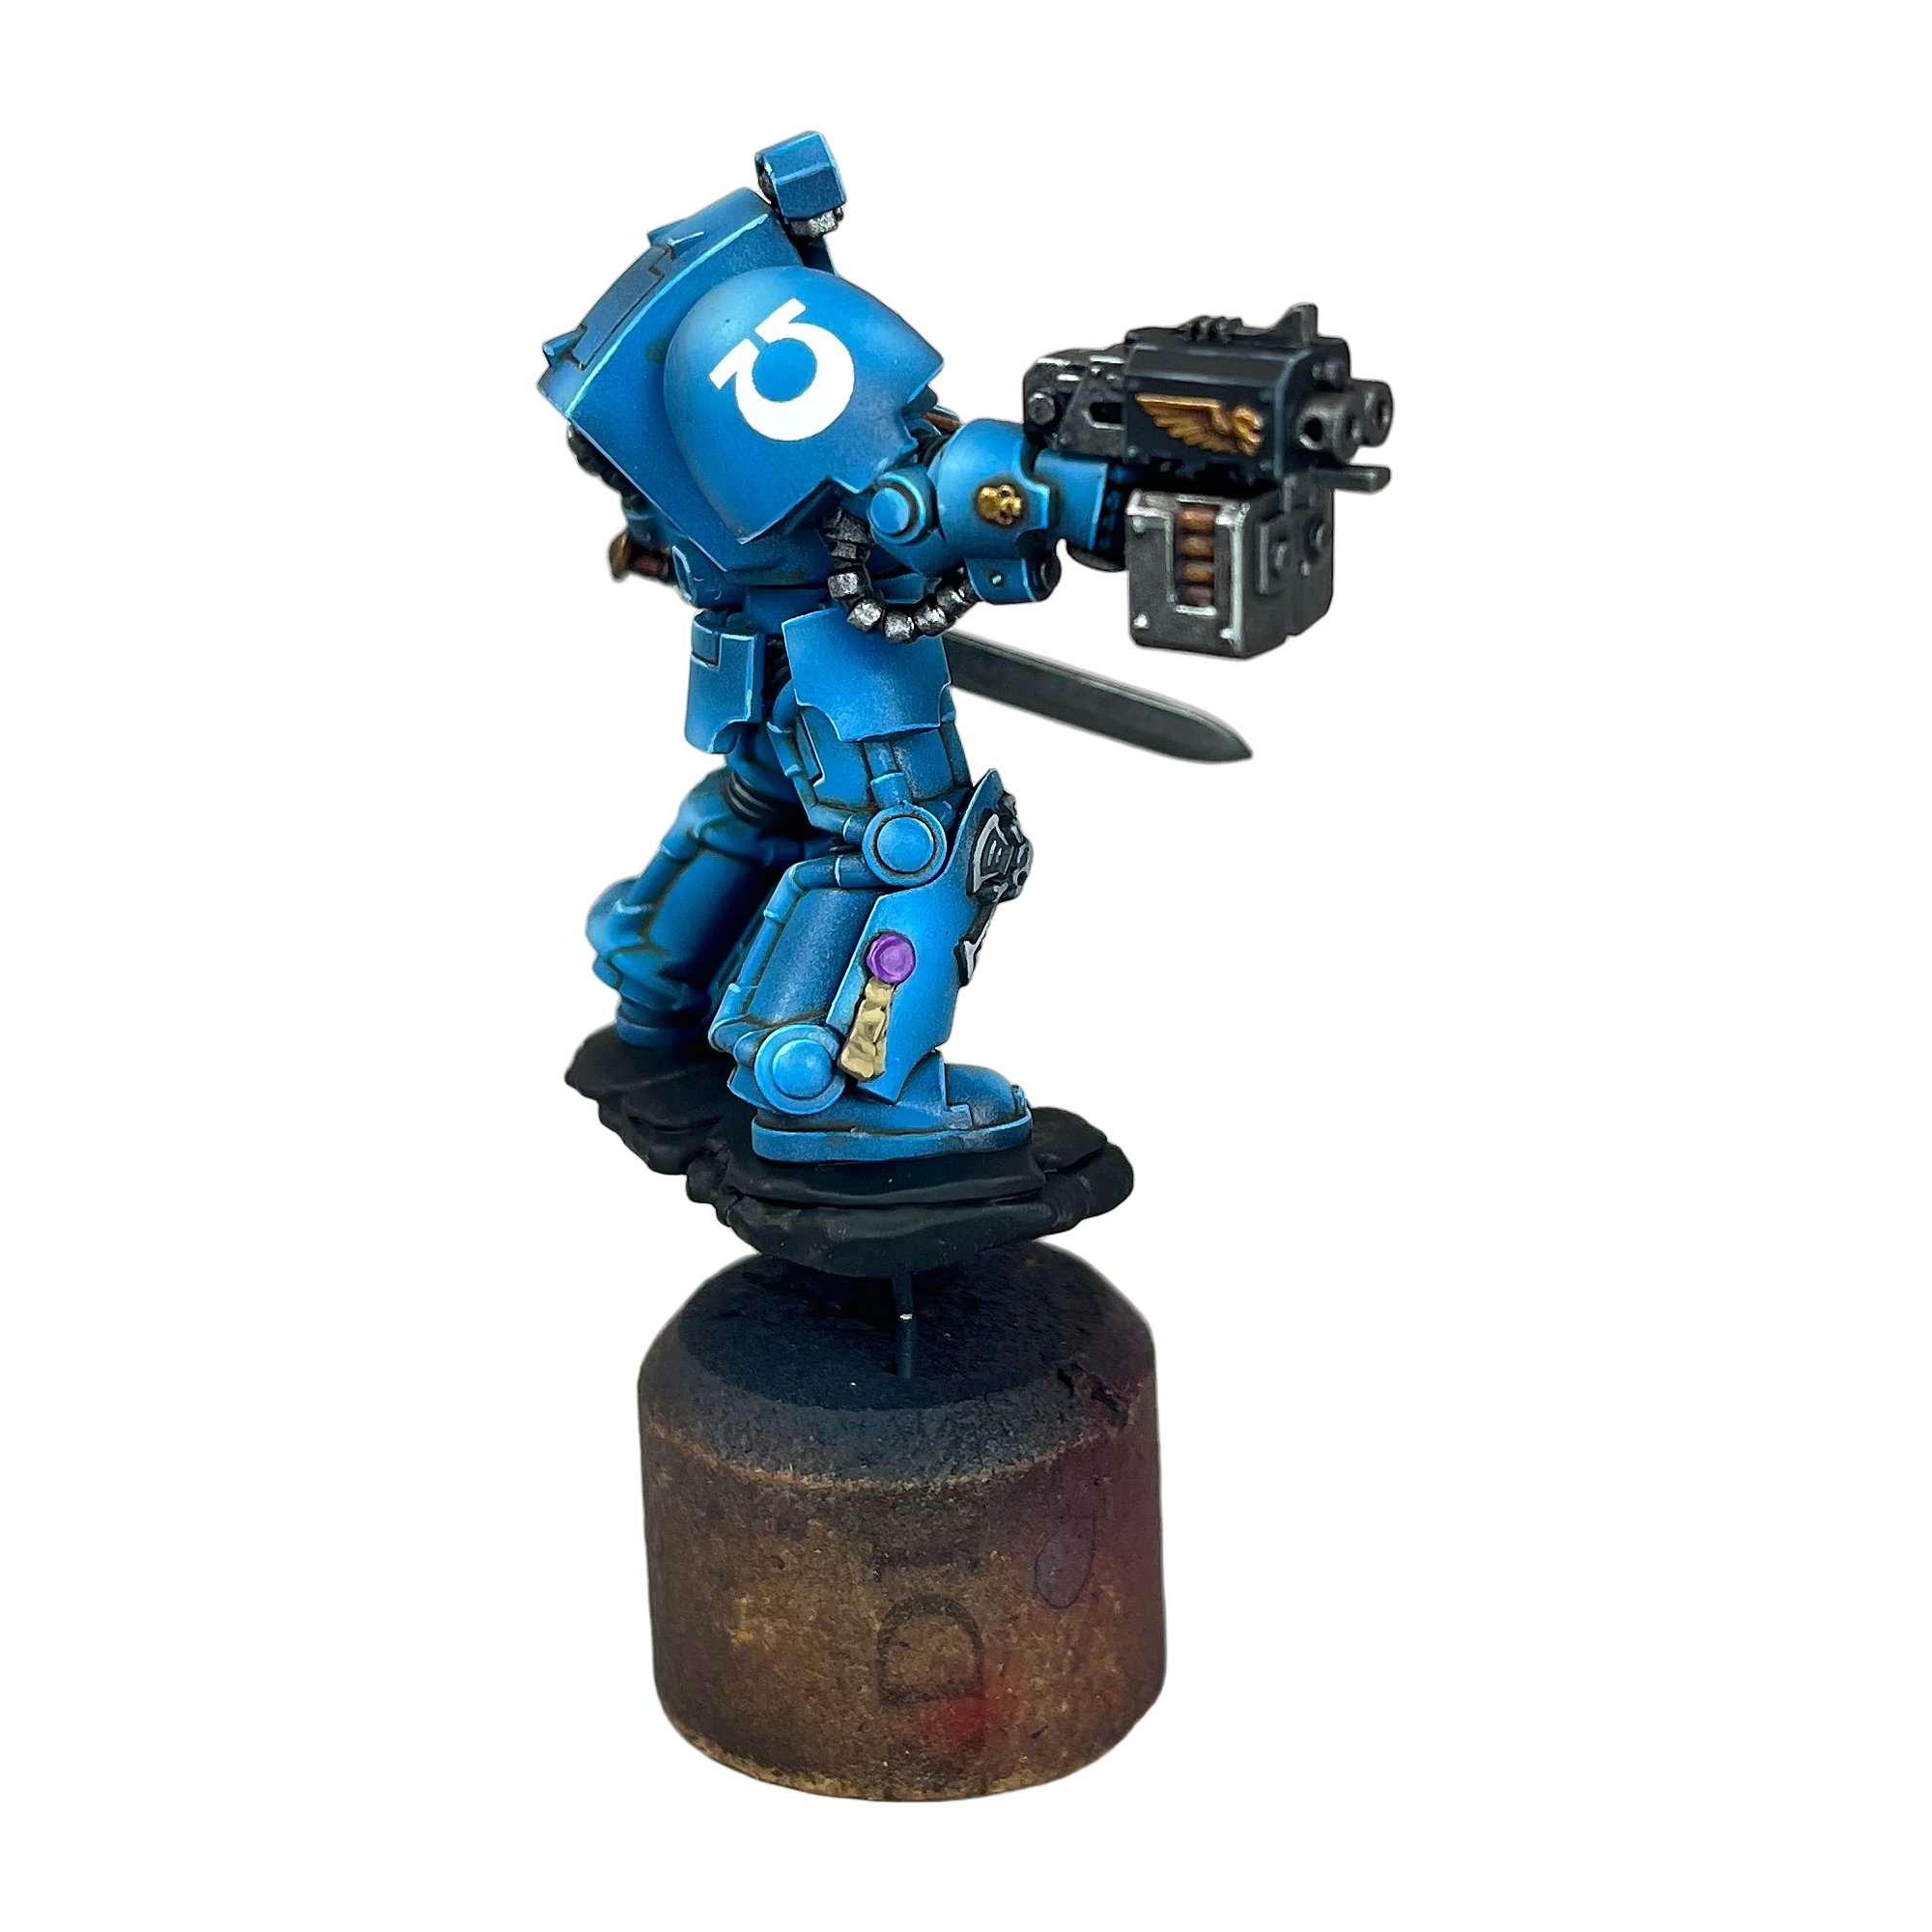
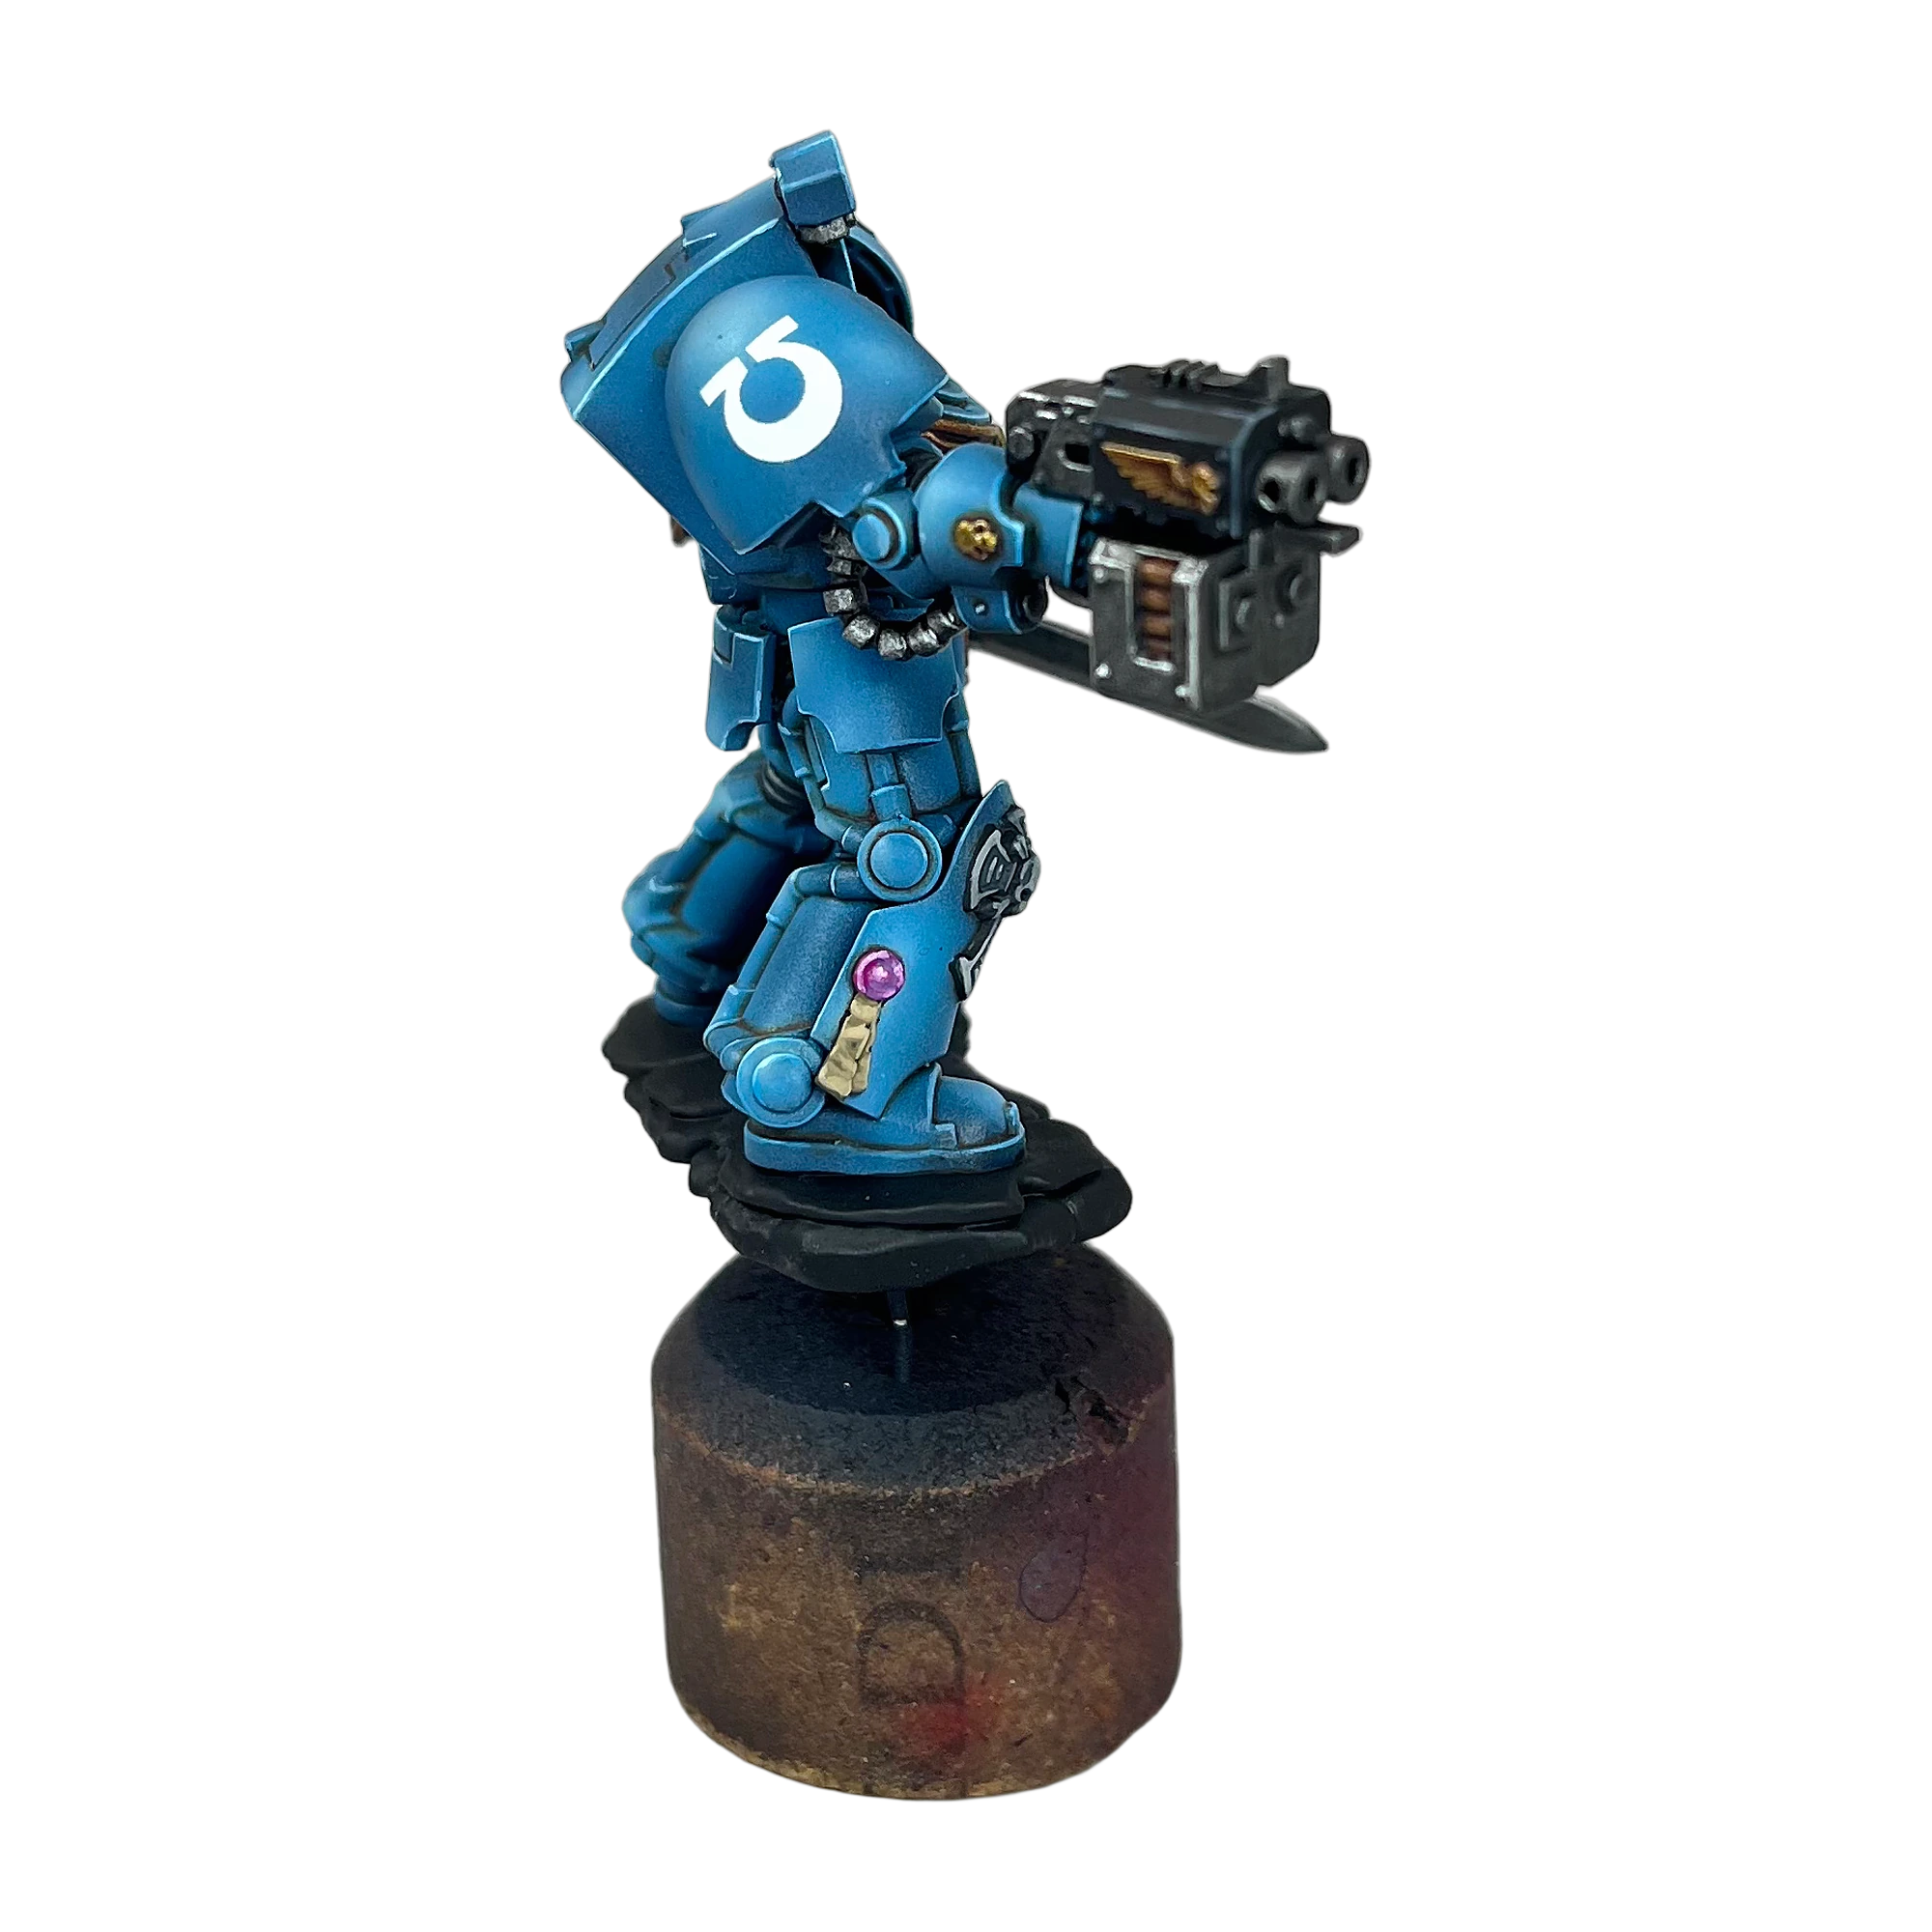
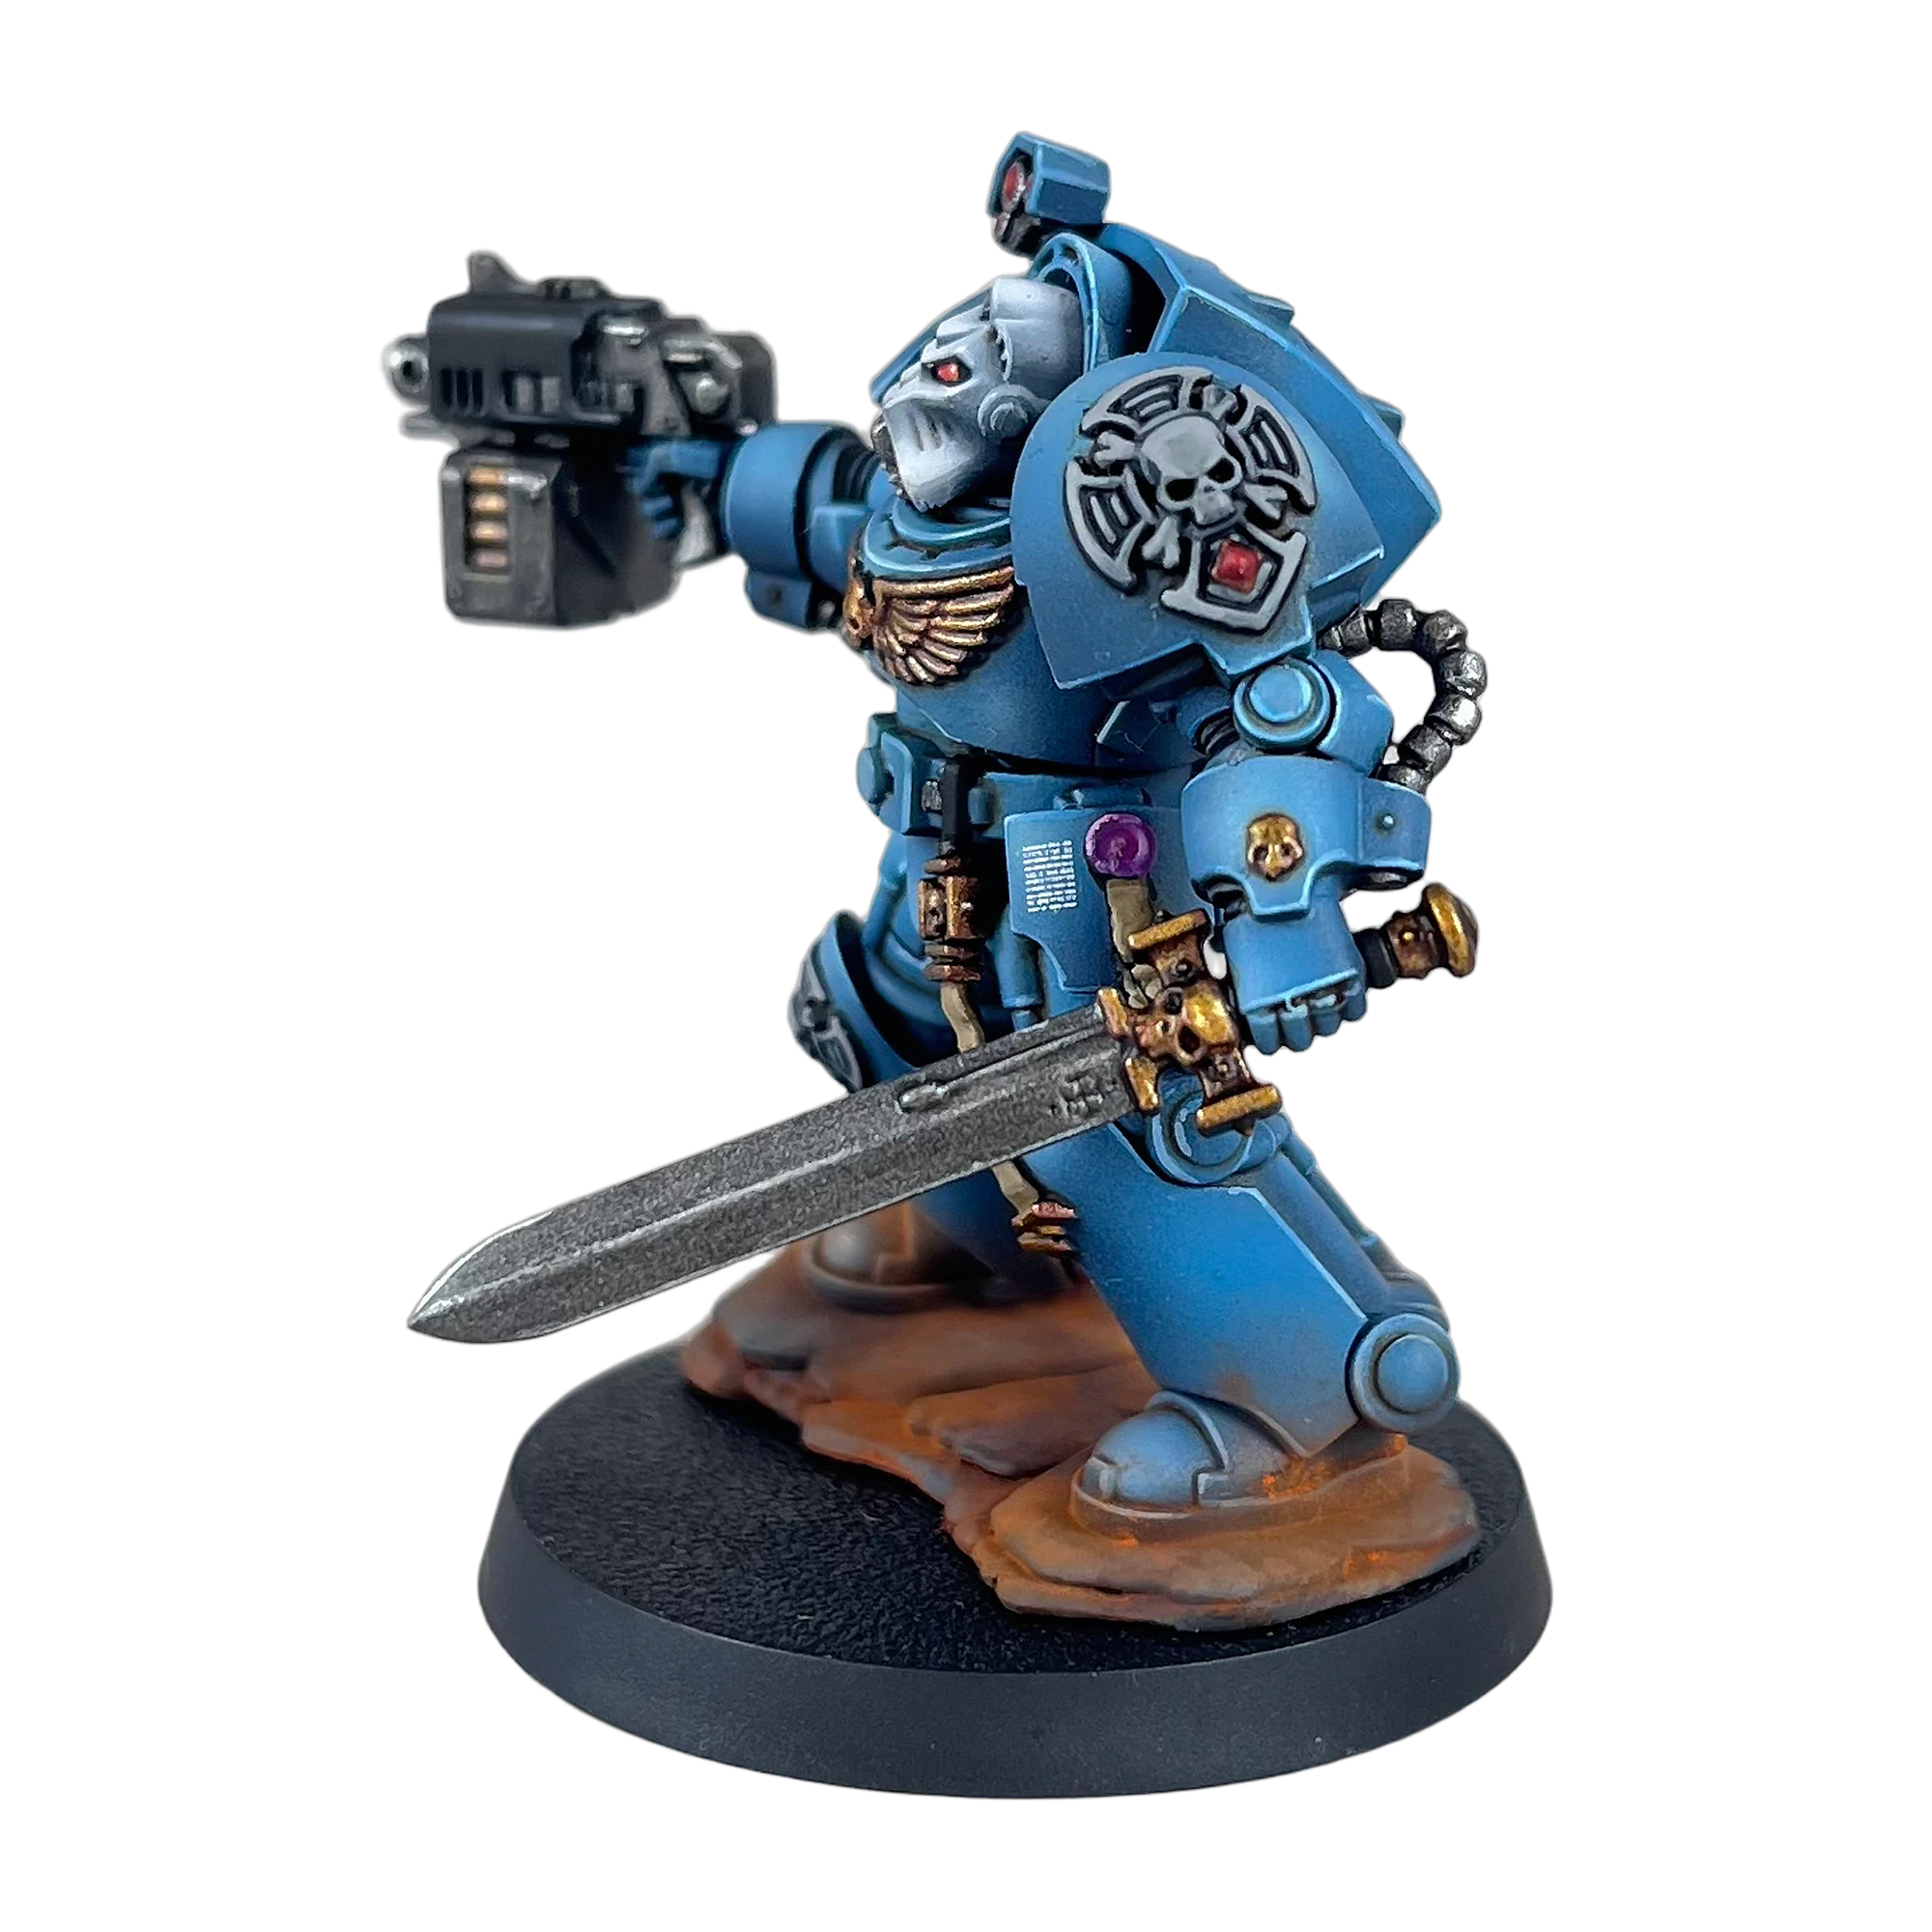
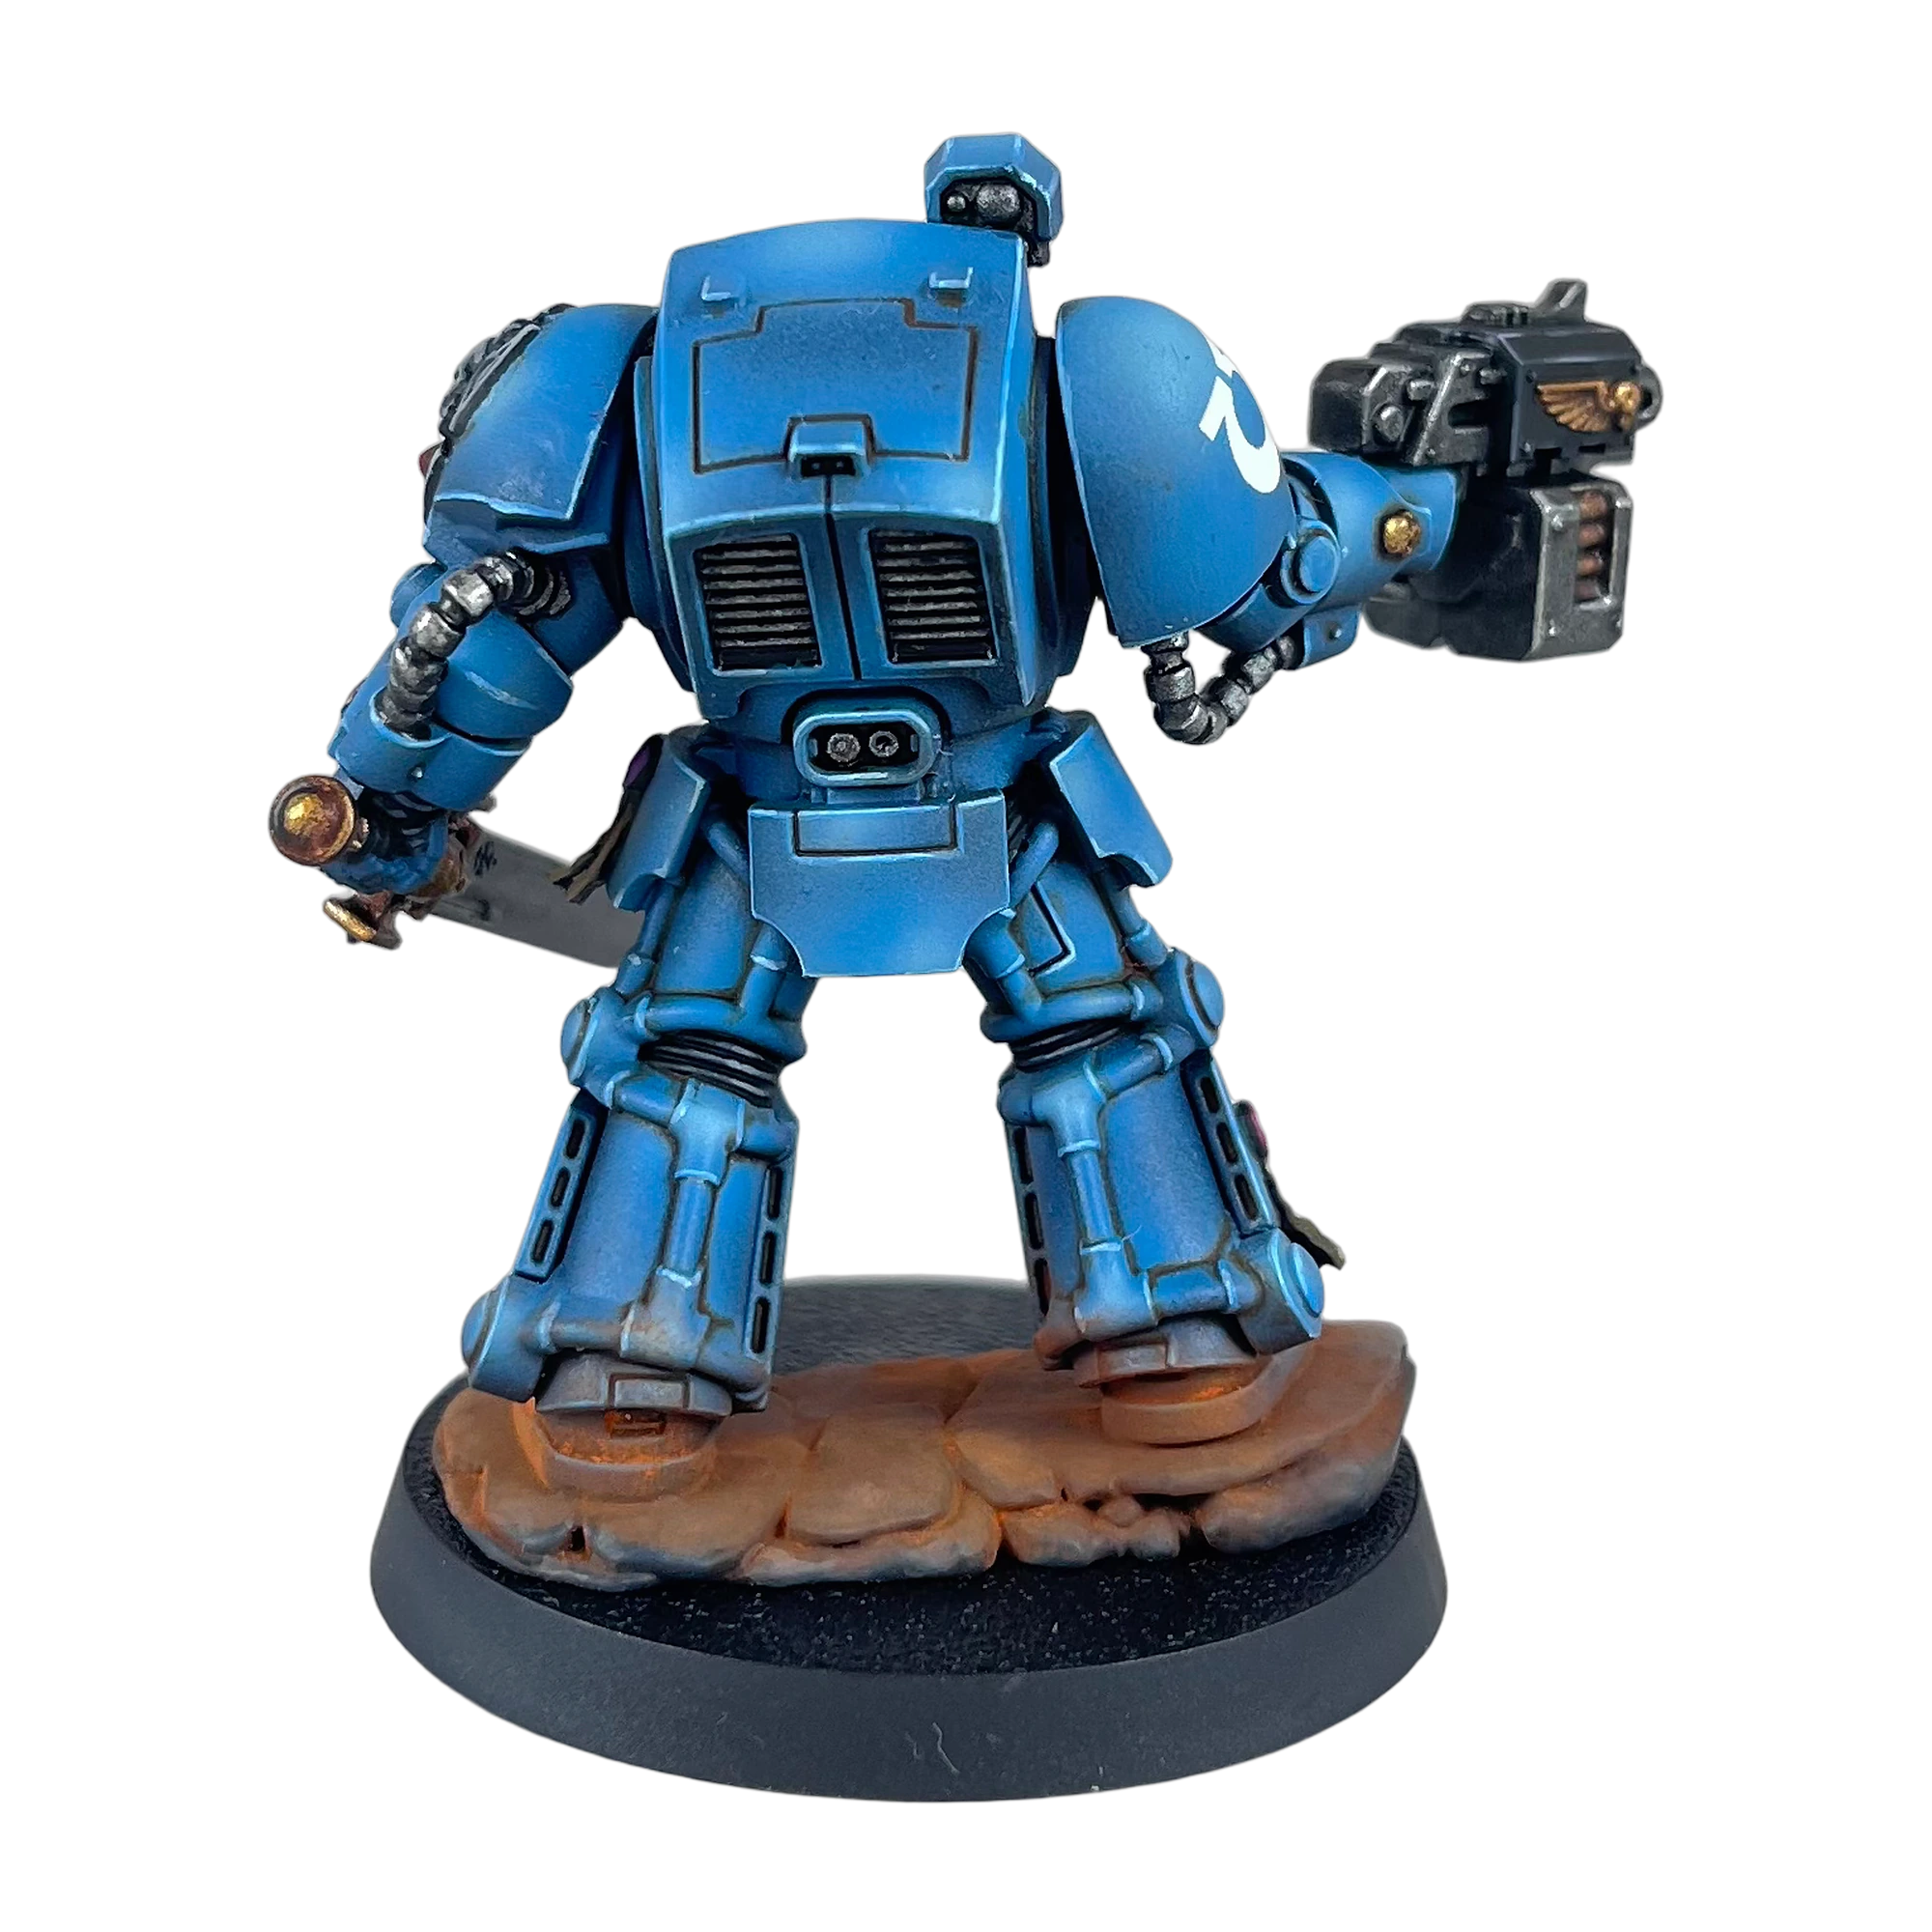
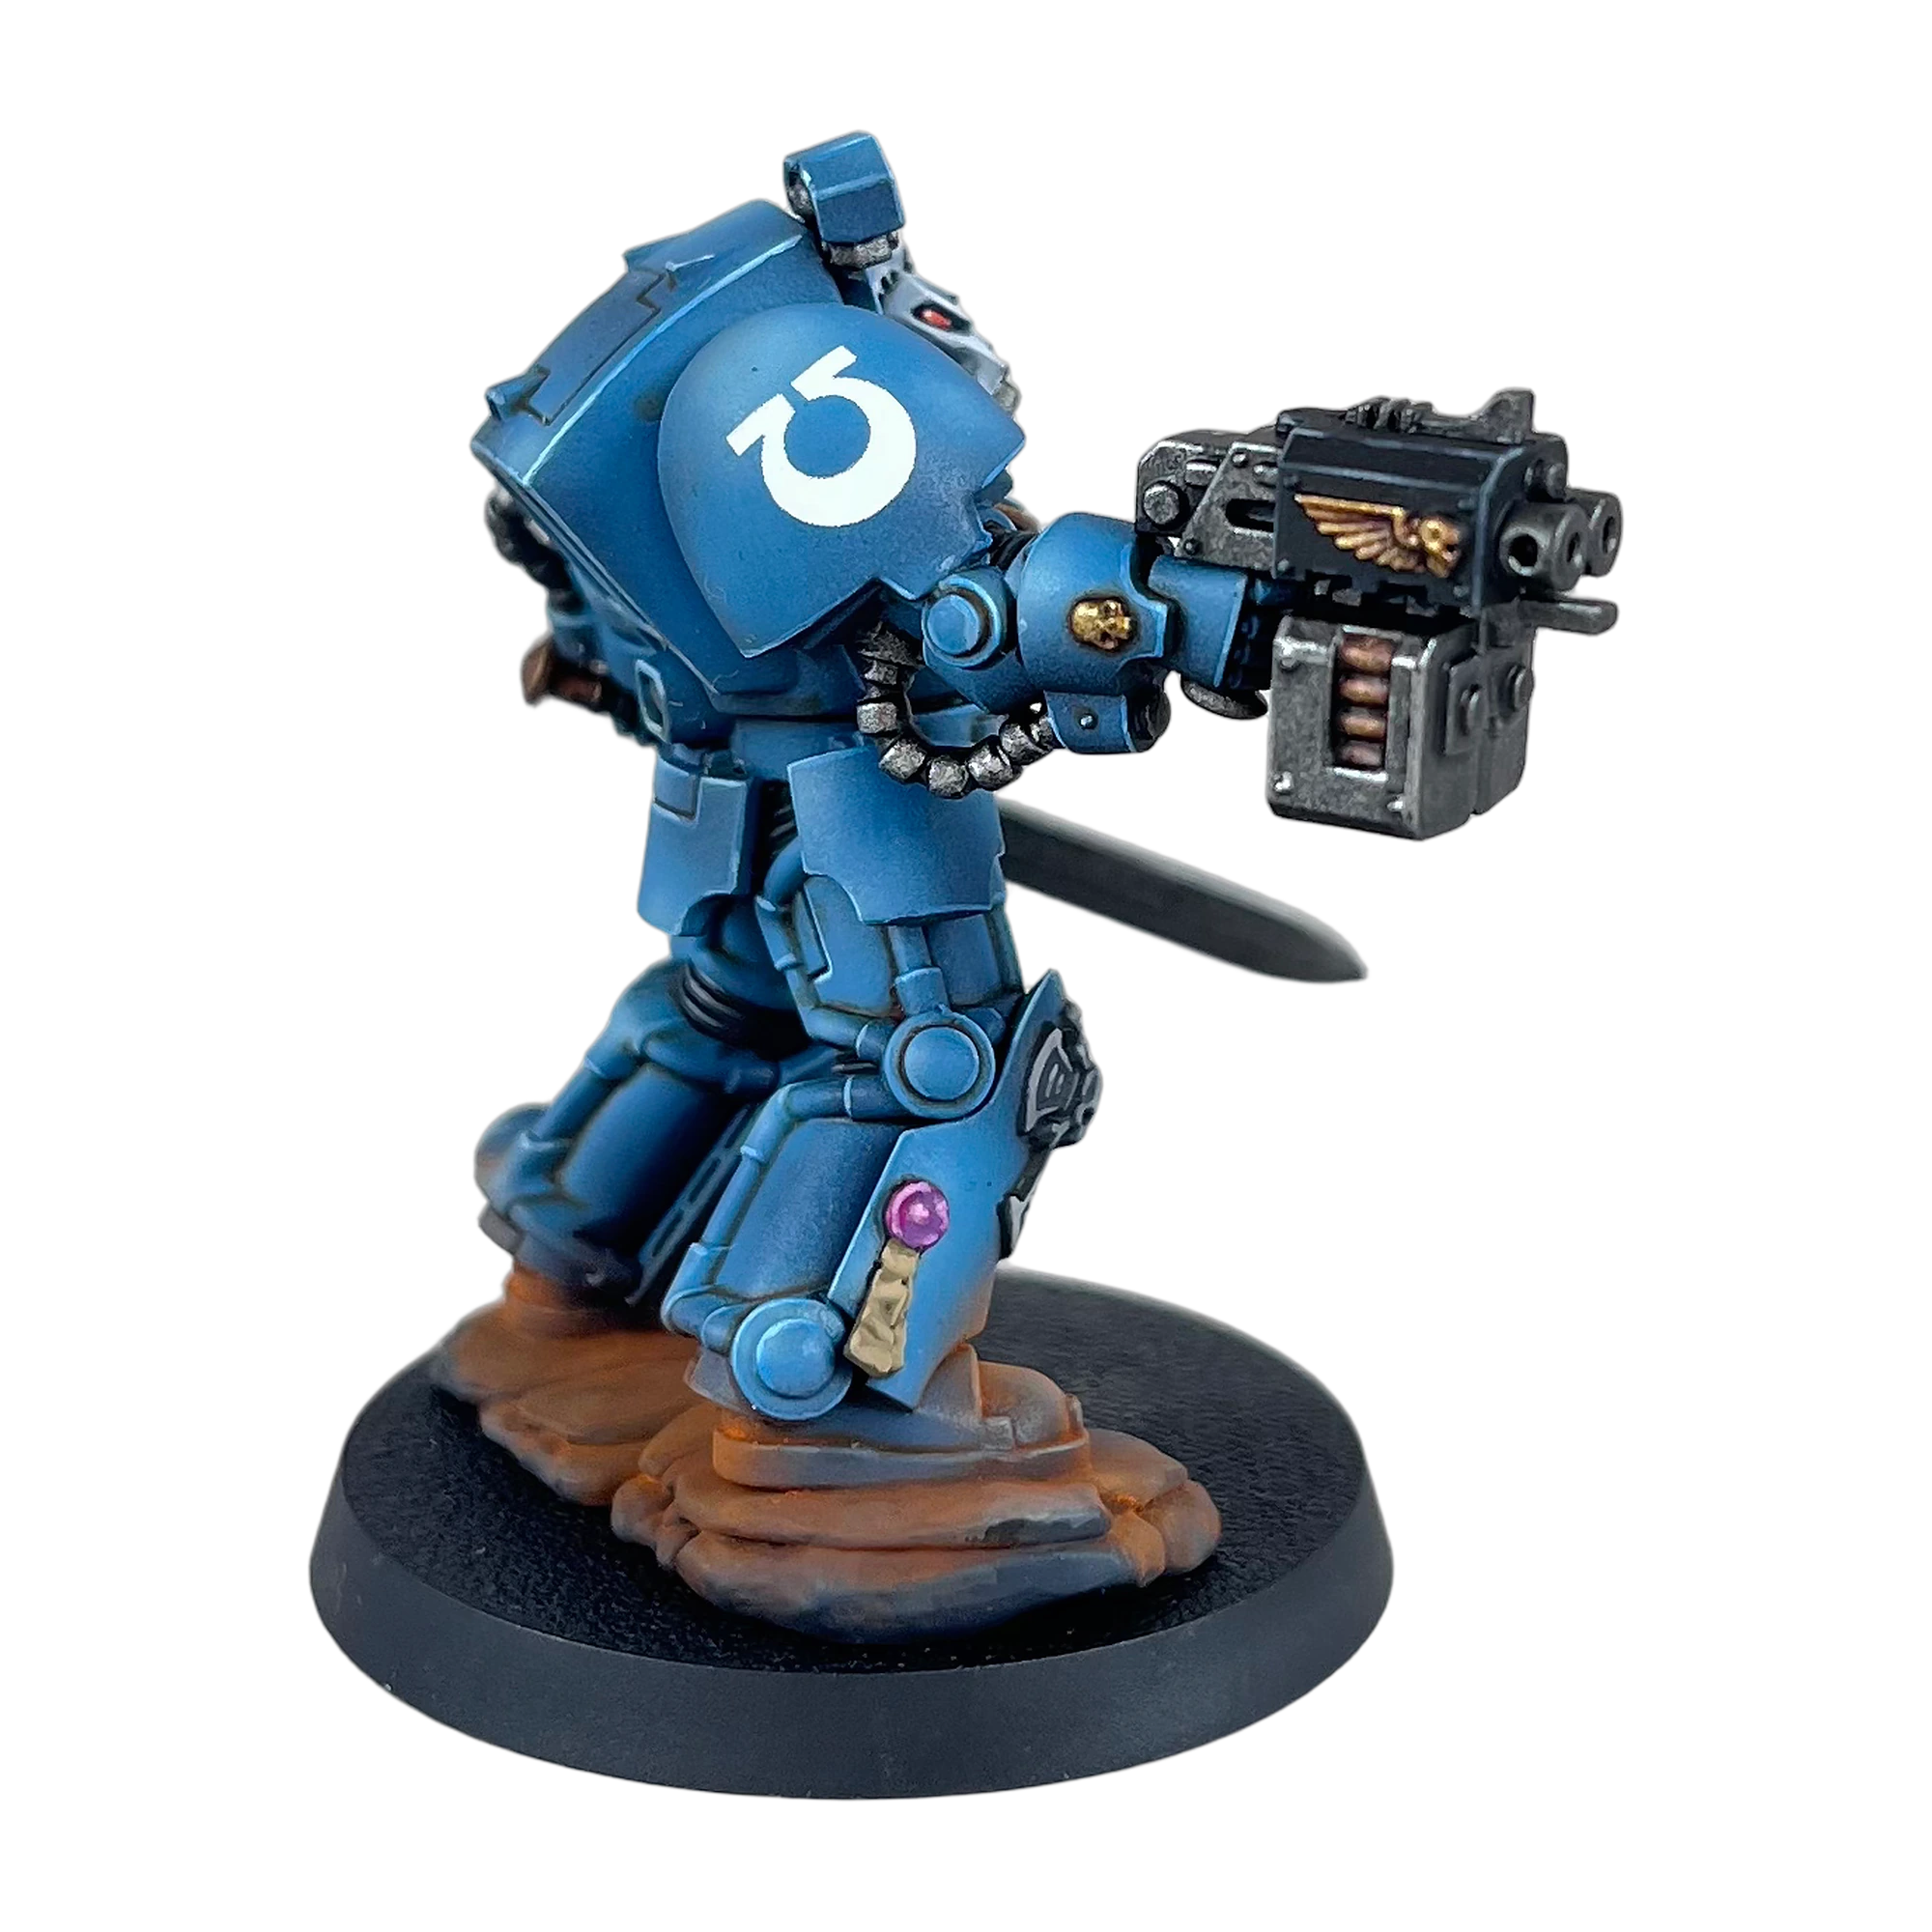
At this milestone, the blue power armor is fully sculpted and protected. Notice how the combination of volumetric glazing, capillary oil lining, and crisp dual-edge highlighting creates a miniature that reads clearly from 3 feet away while standing up to high-resolution macro photography.
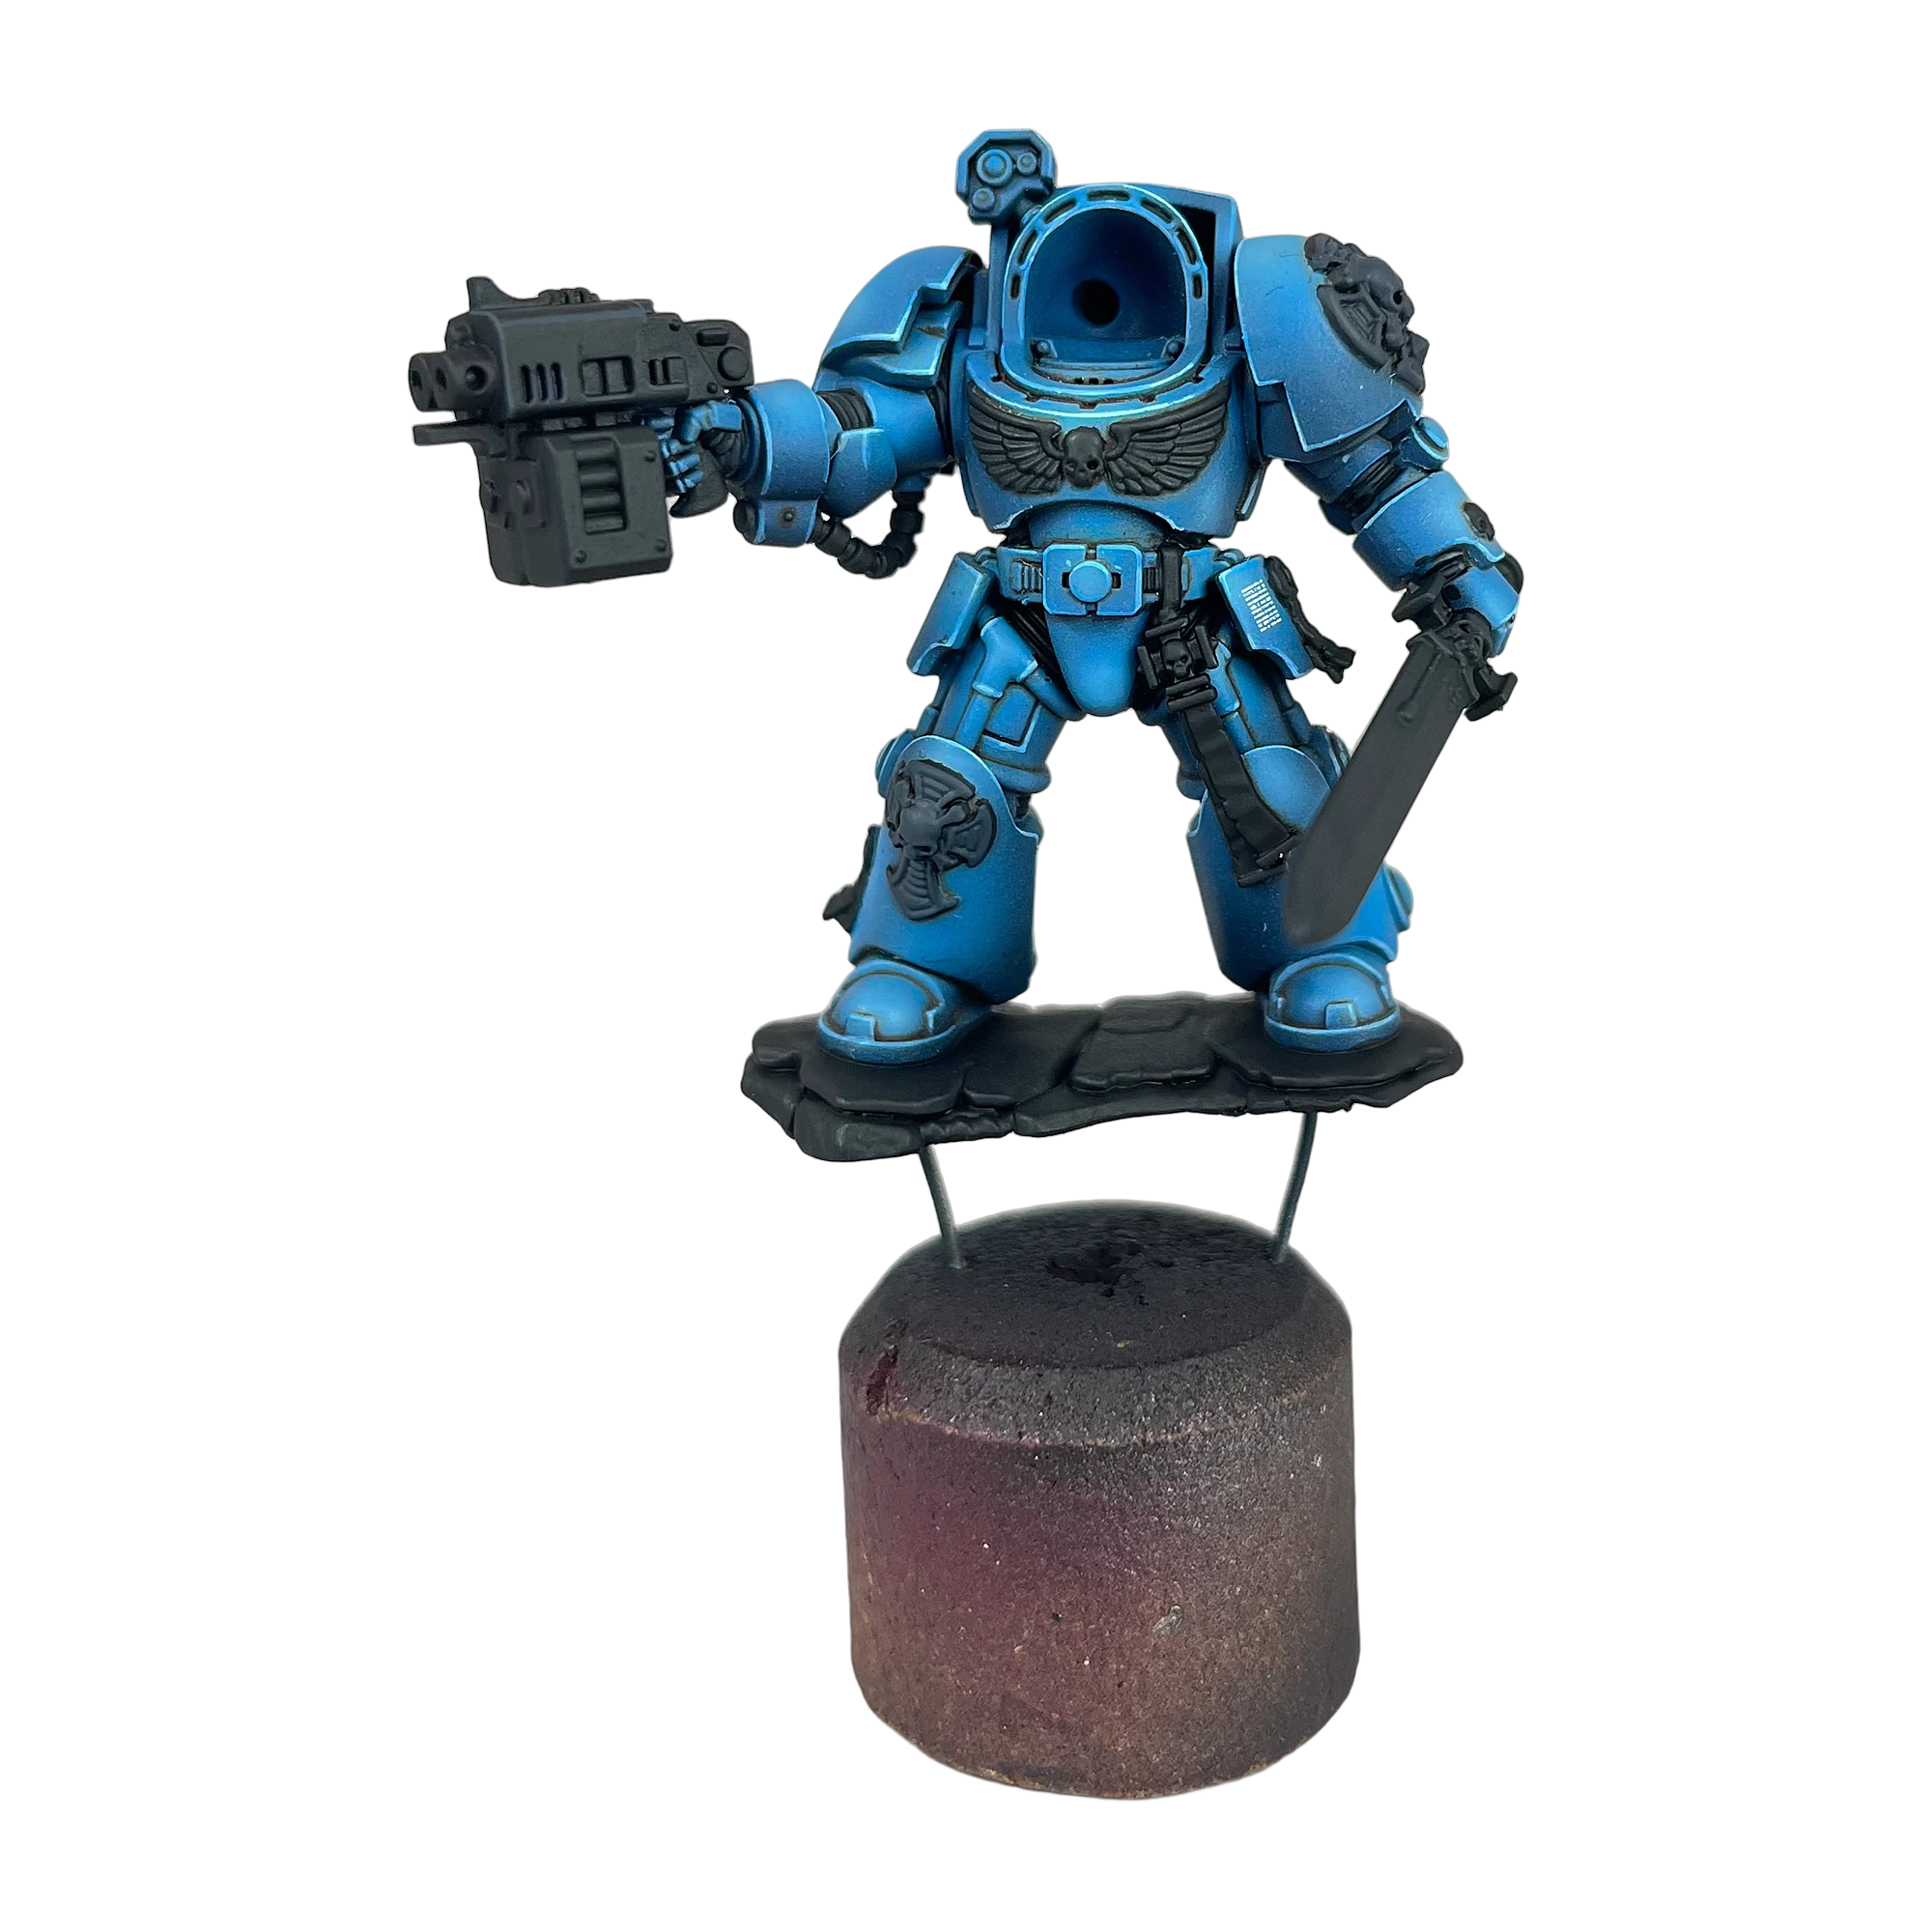
7. Phase 5: Crux Terminatus, Black Casings & Munitorum Steel
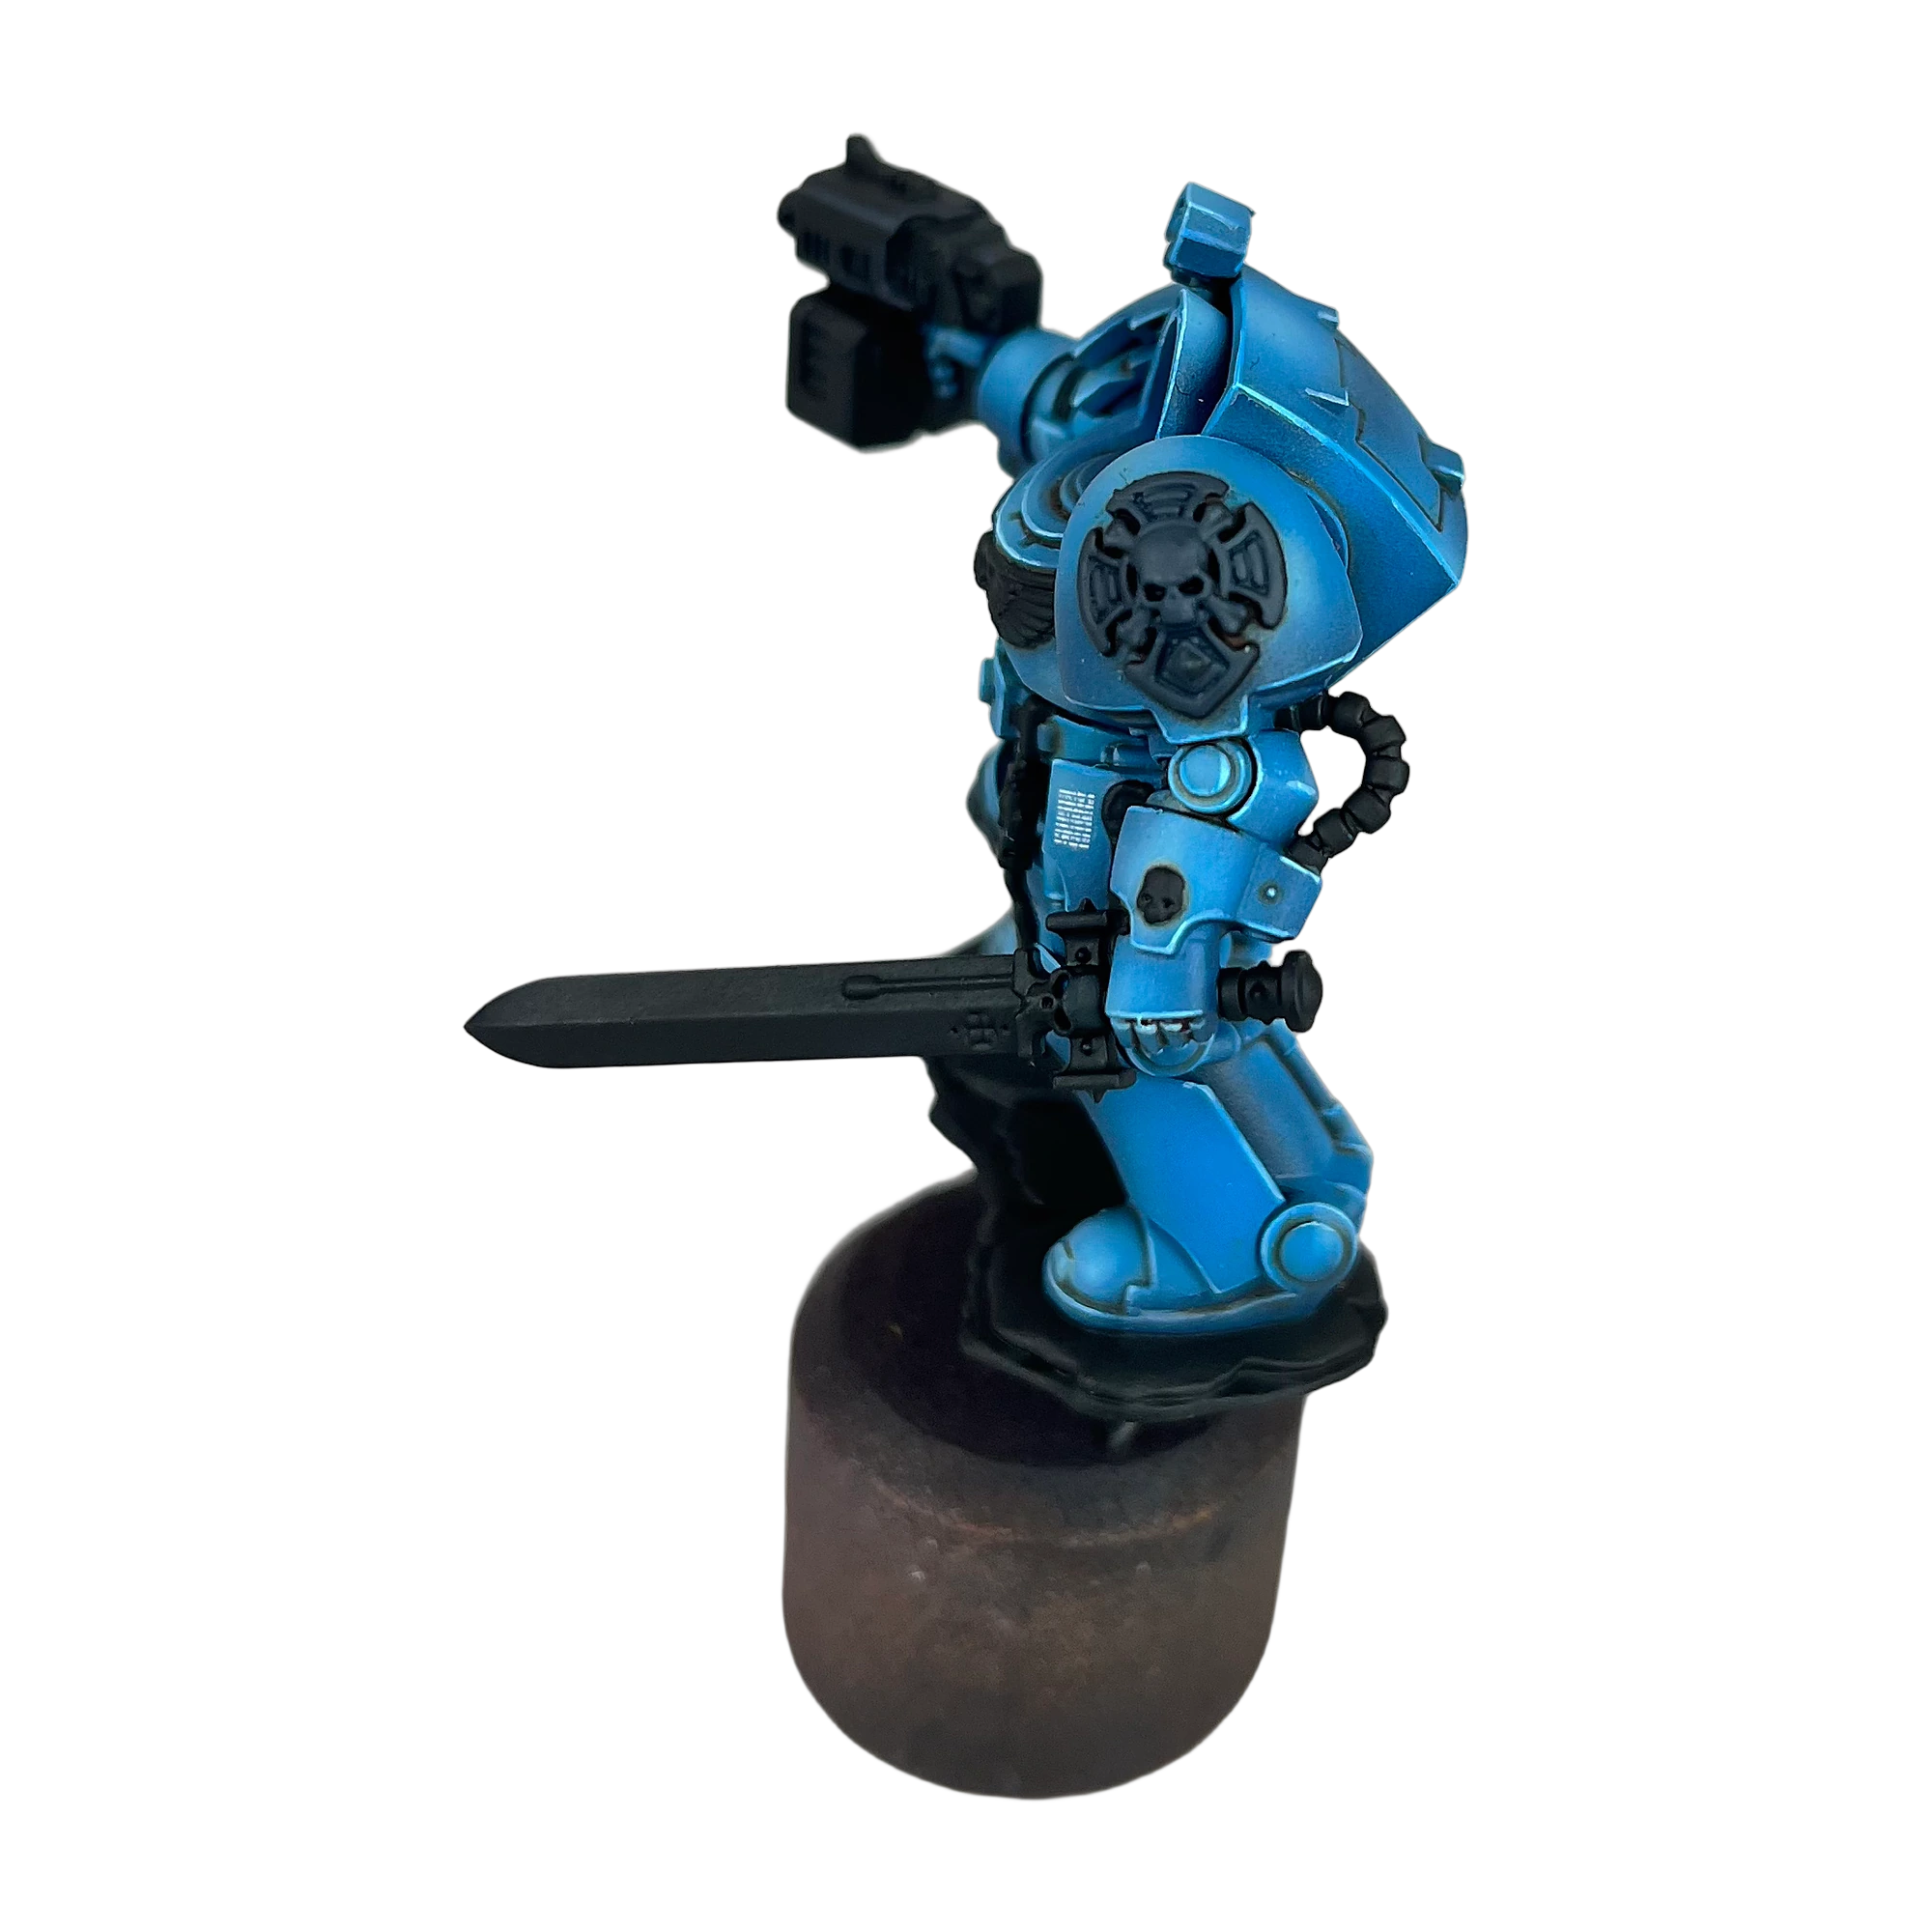
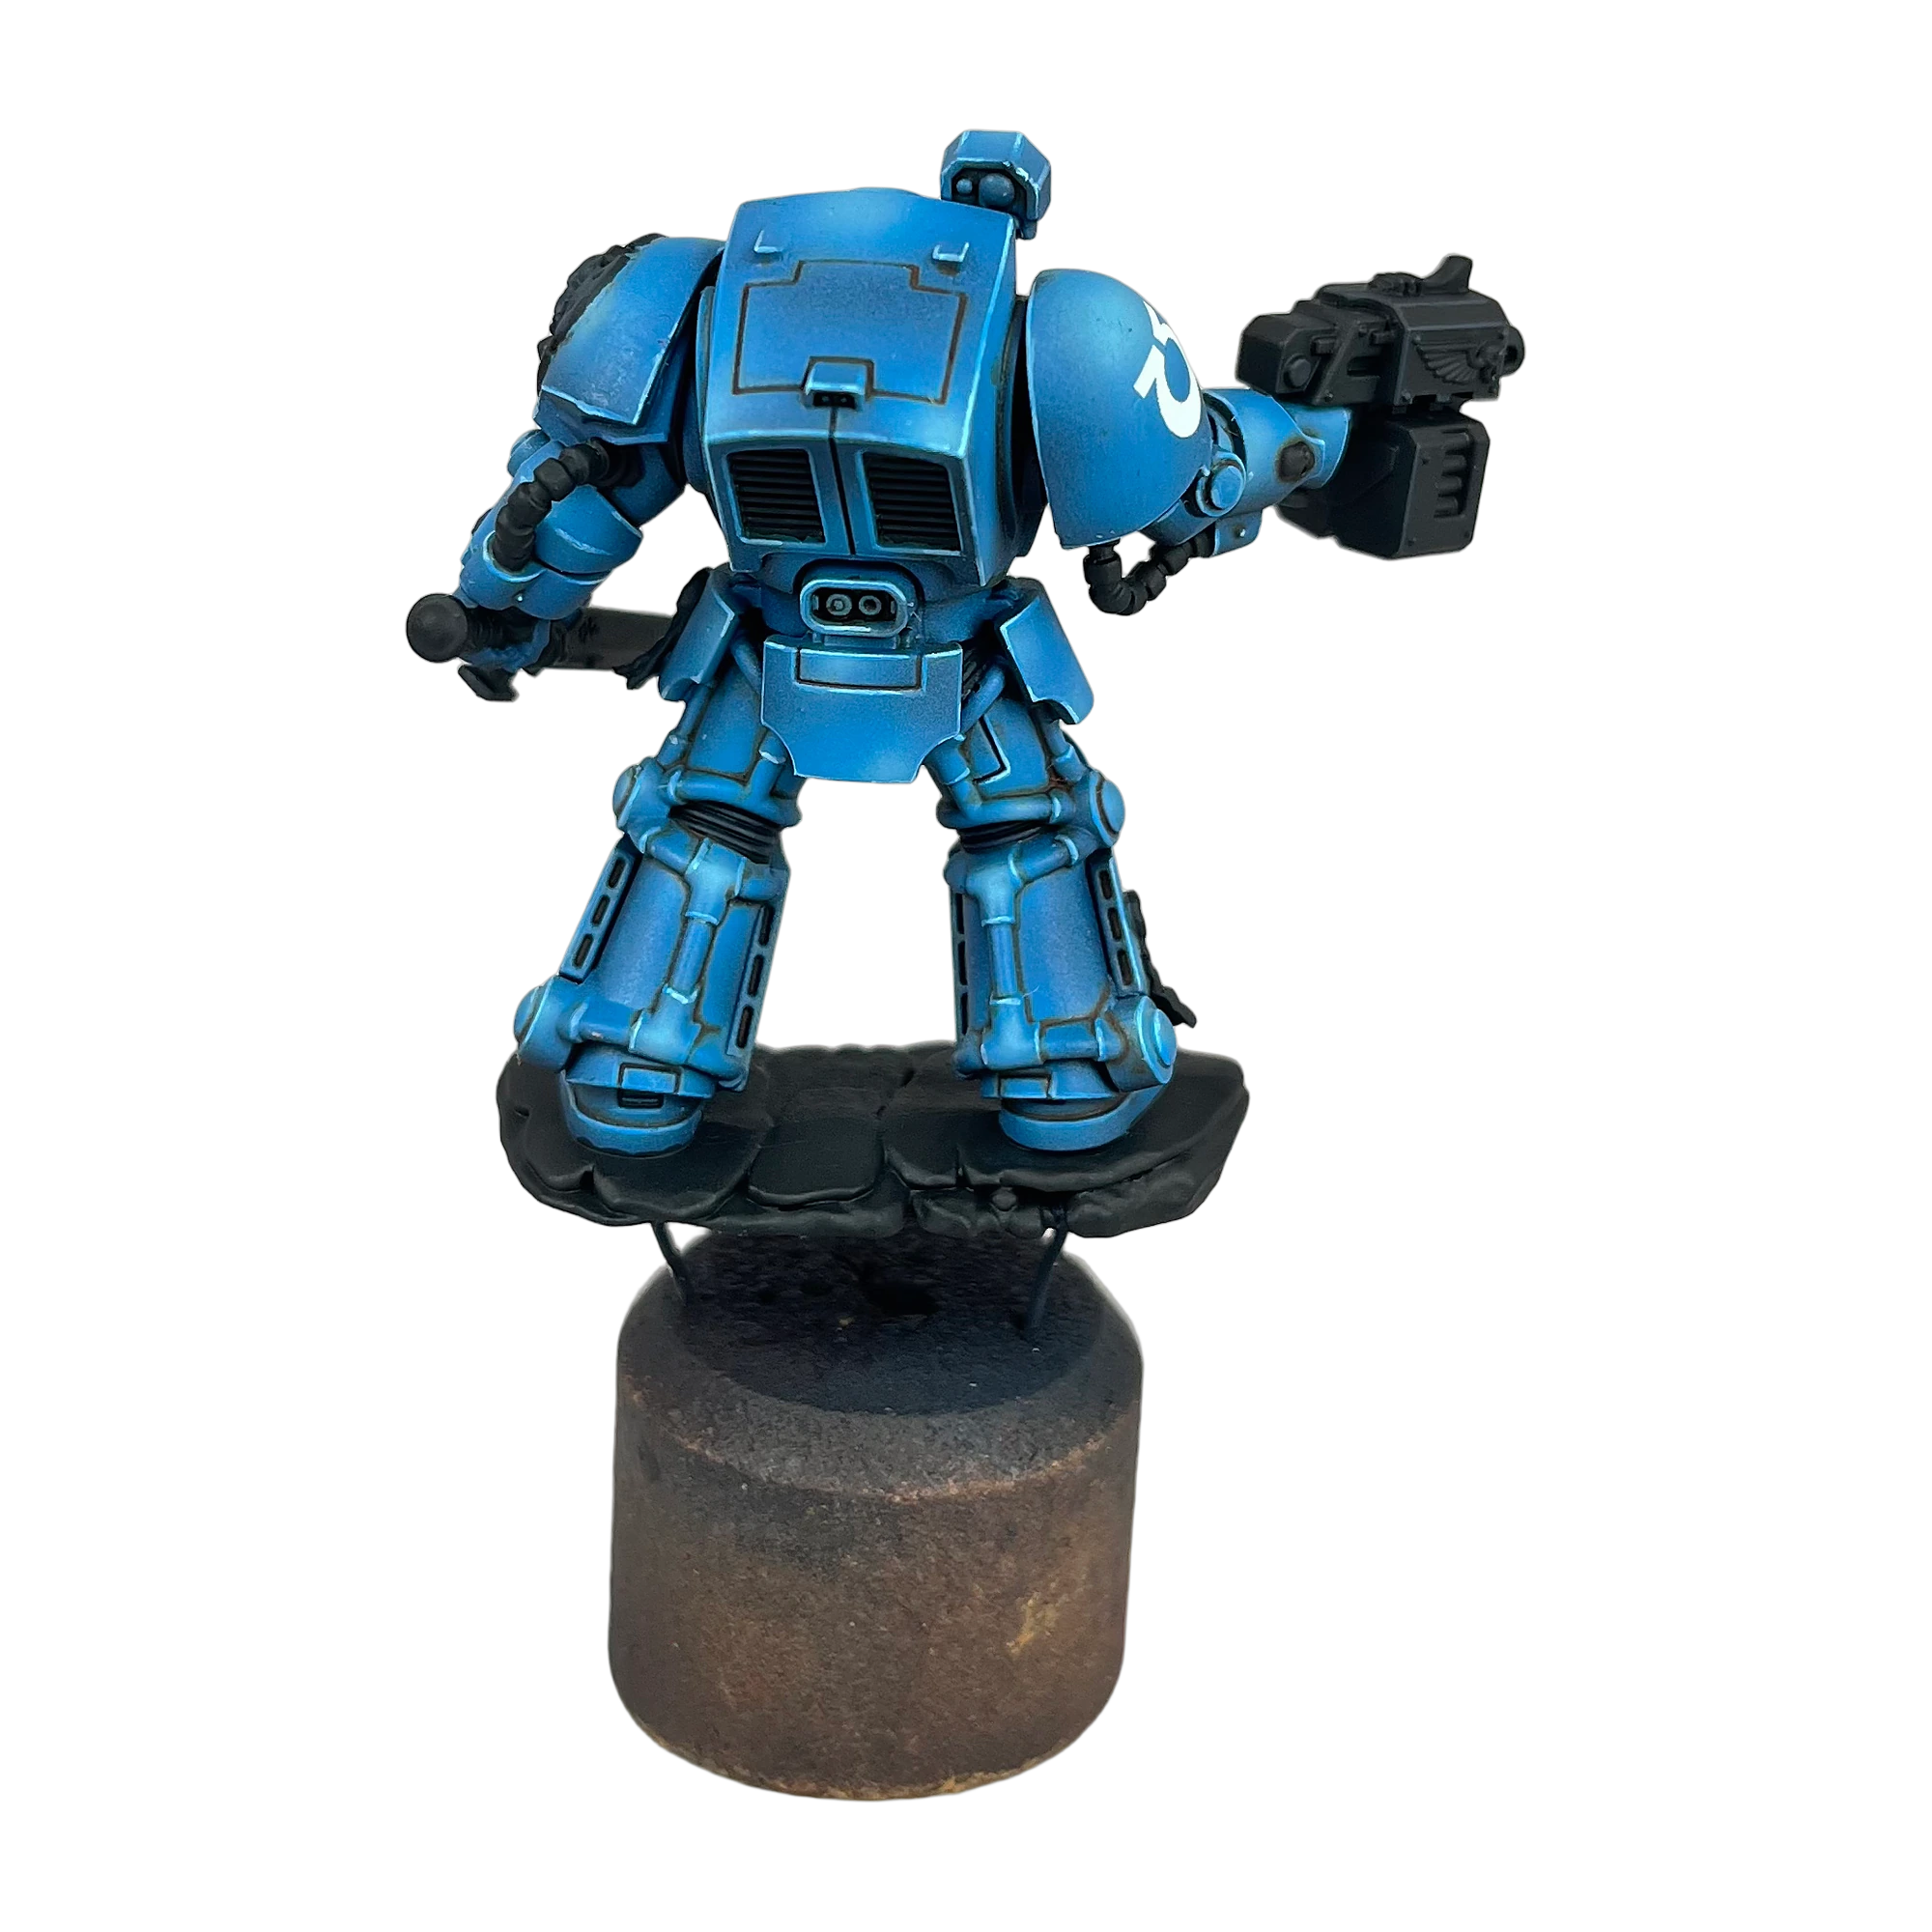
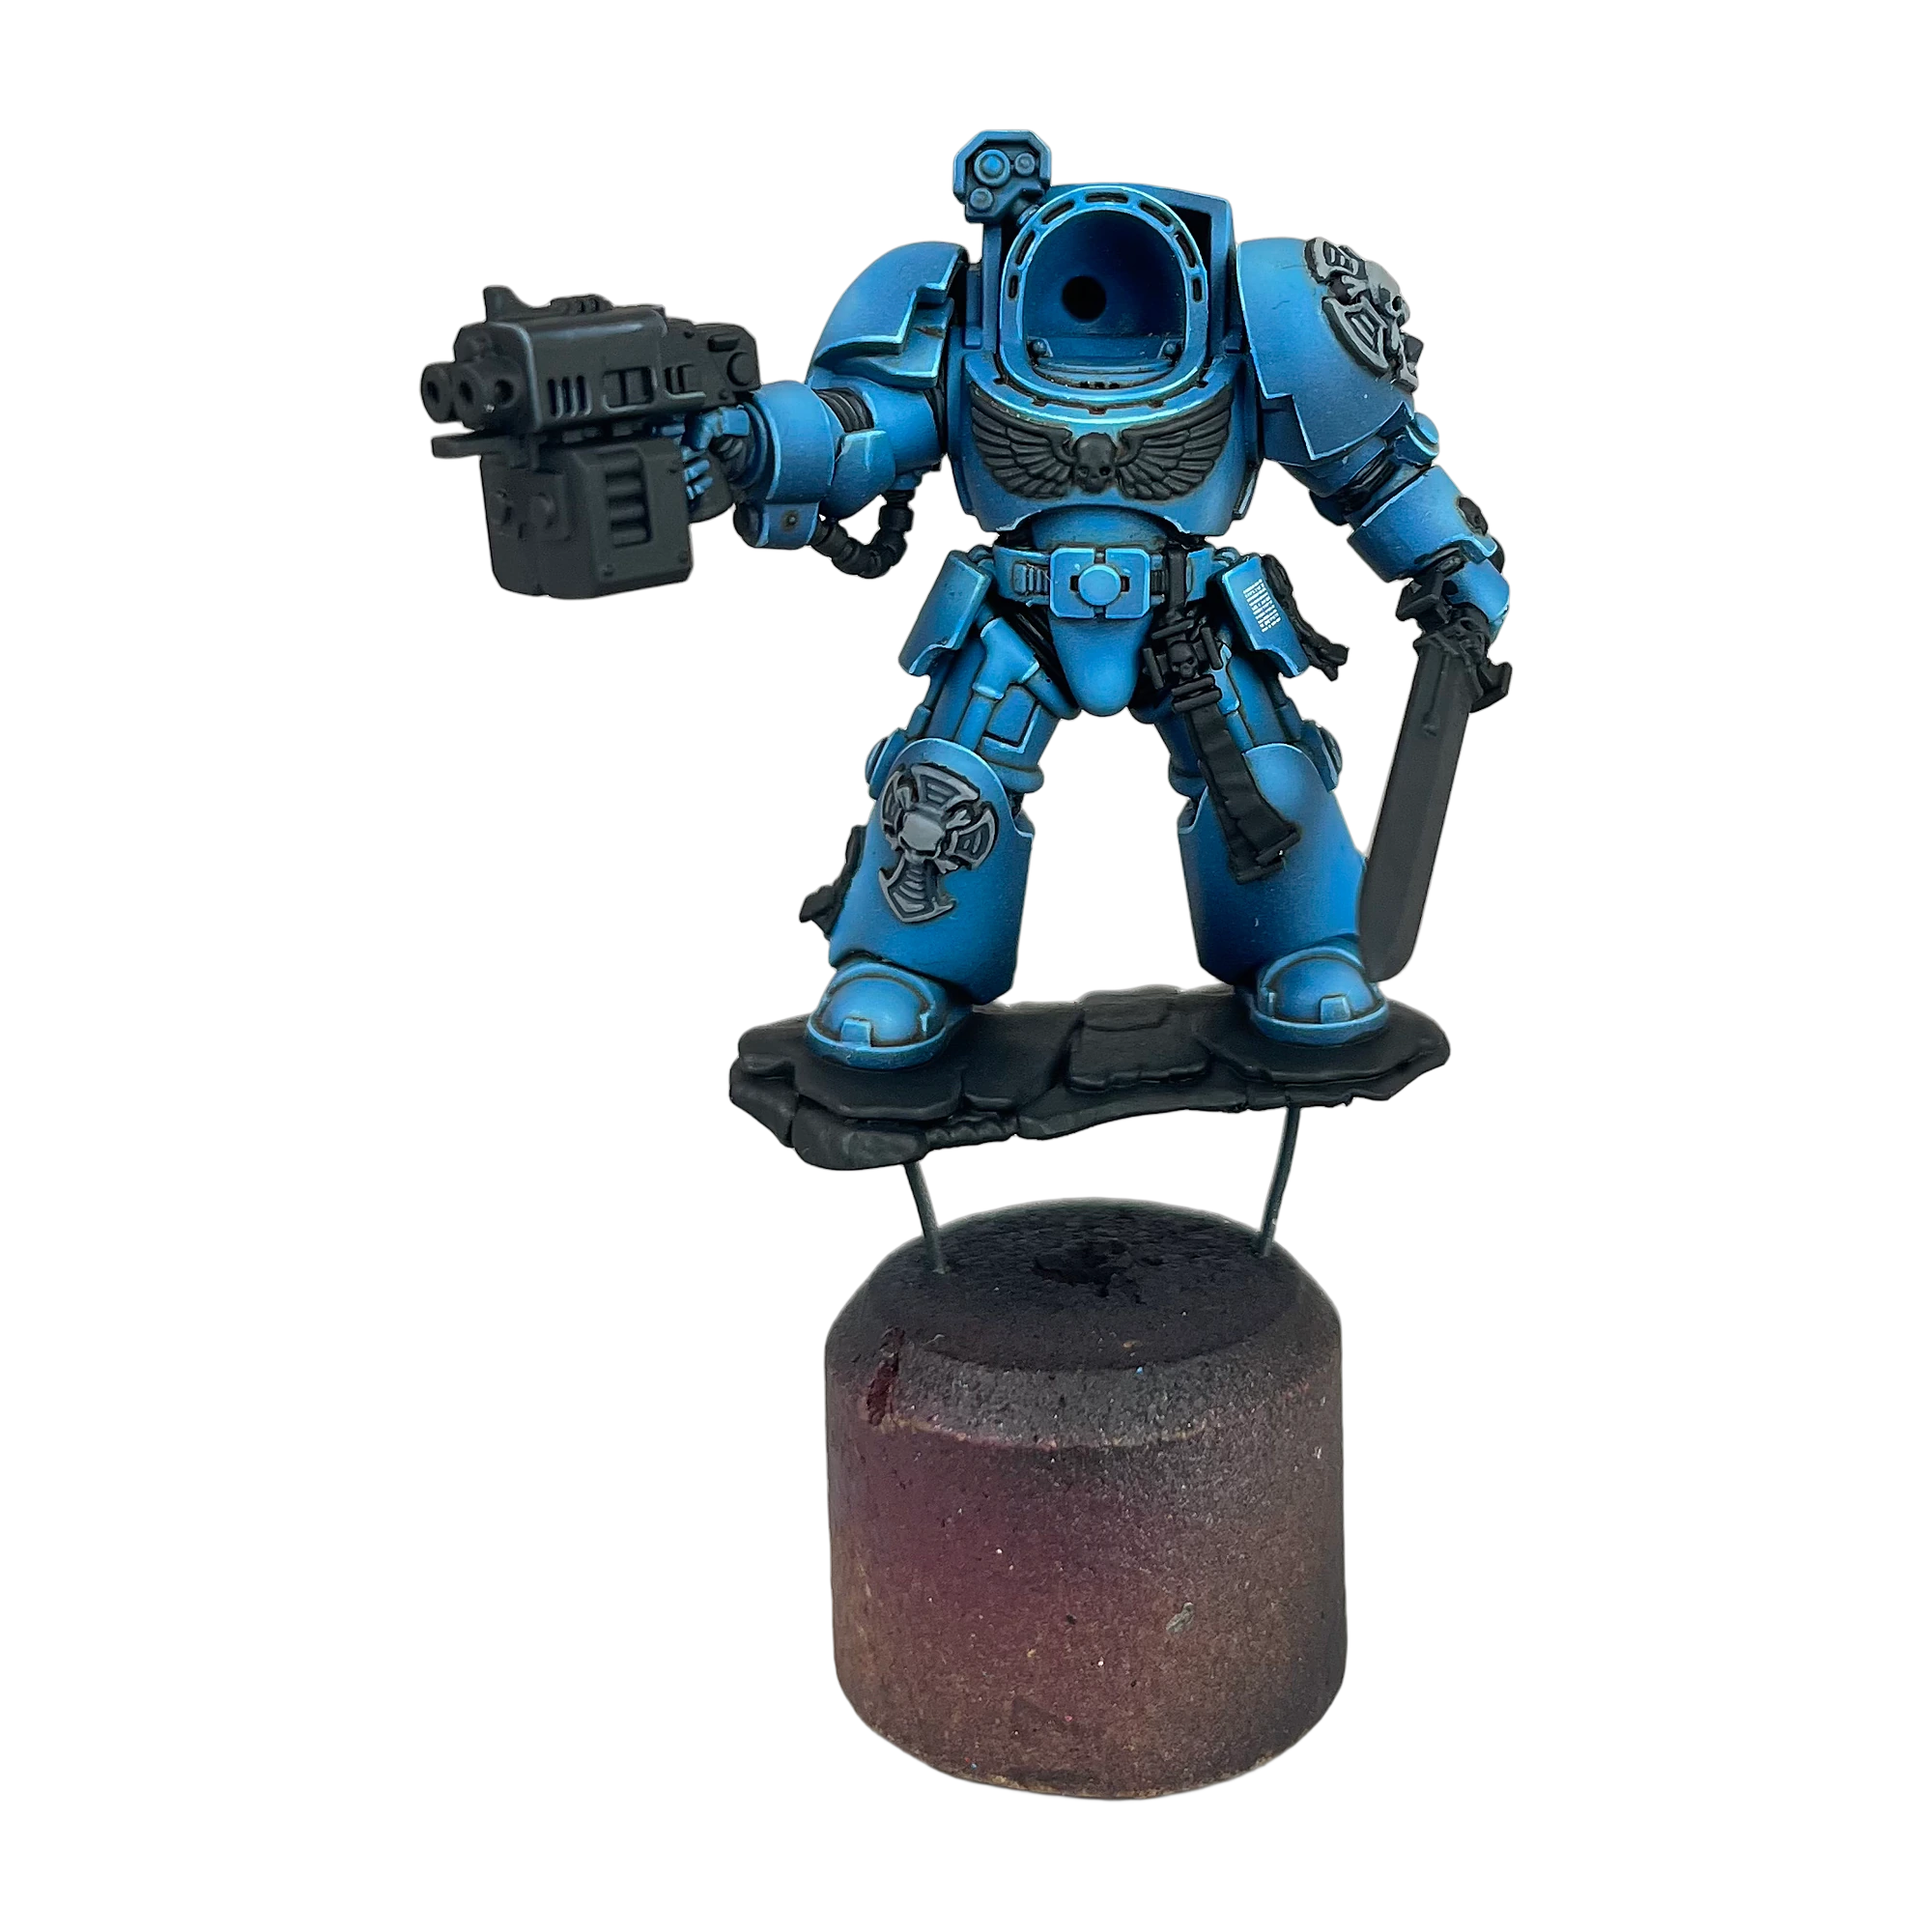
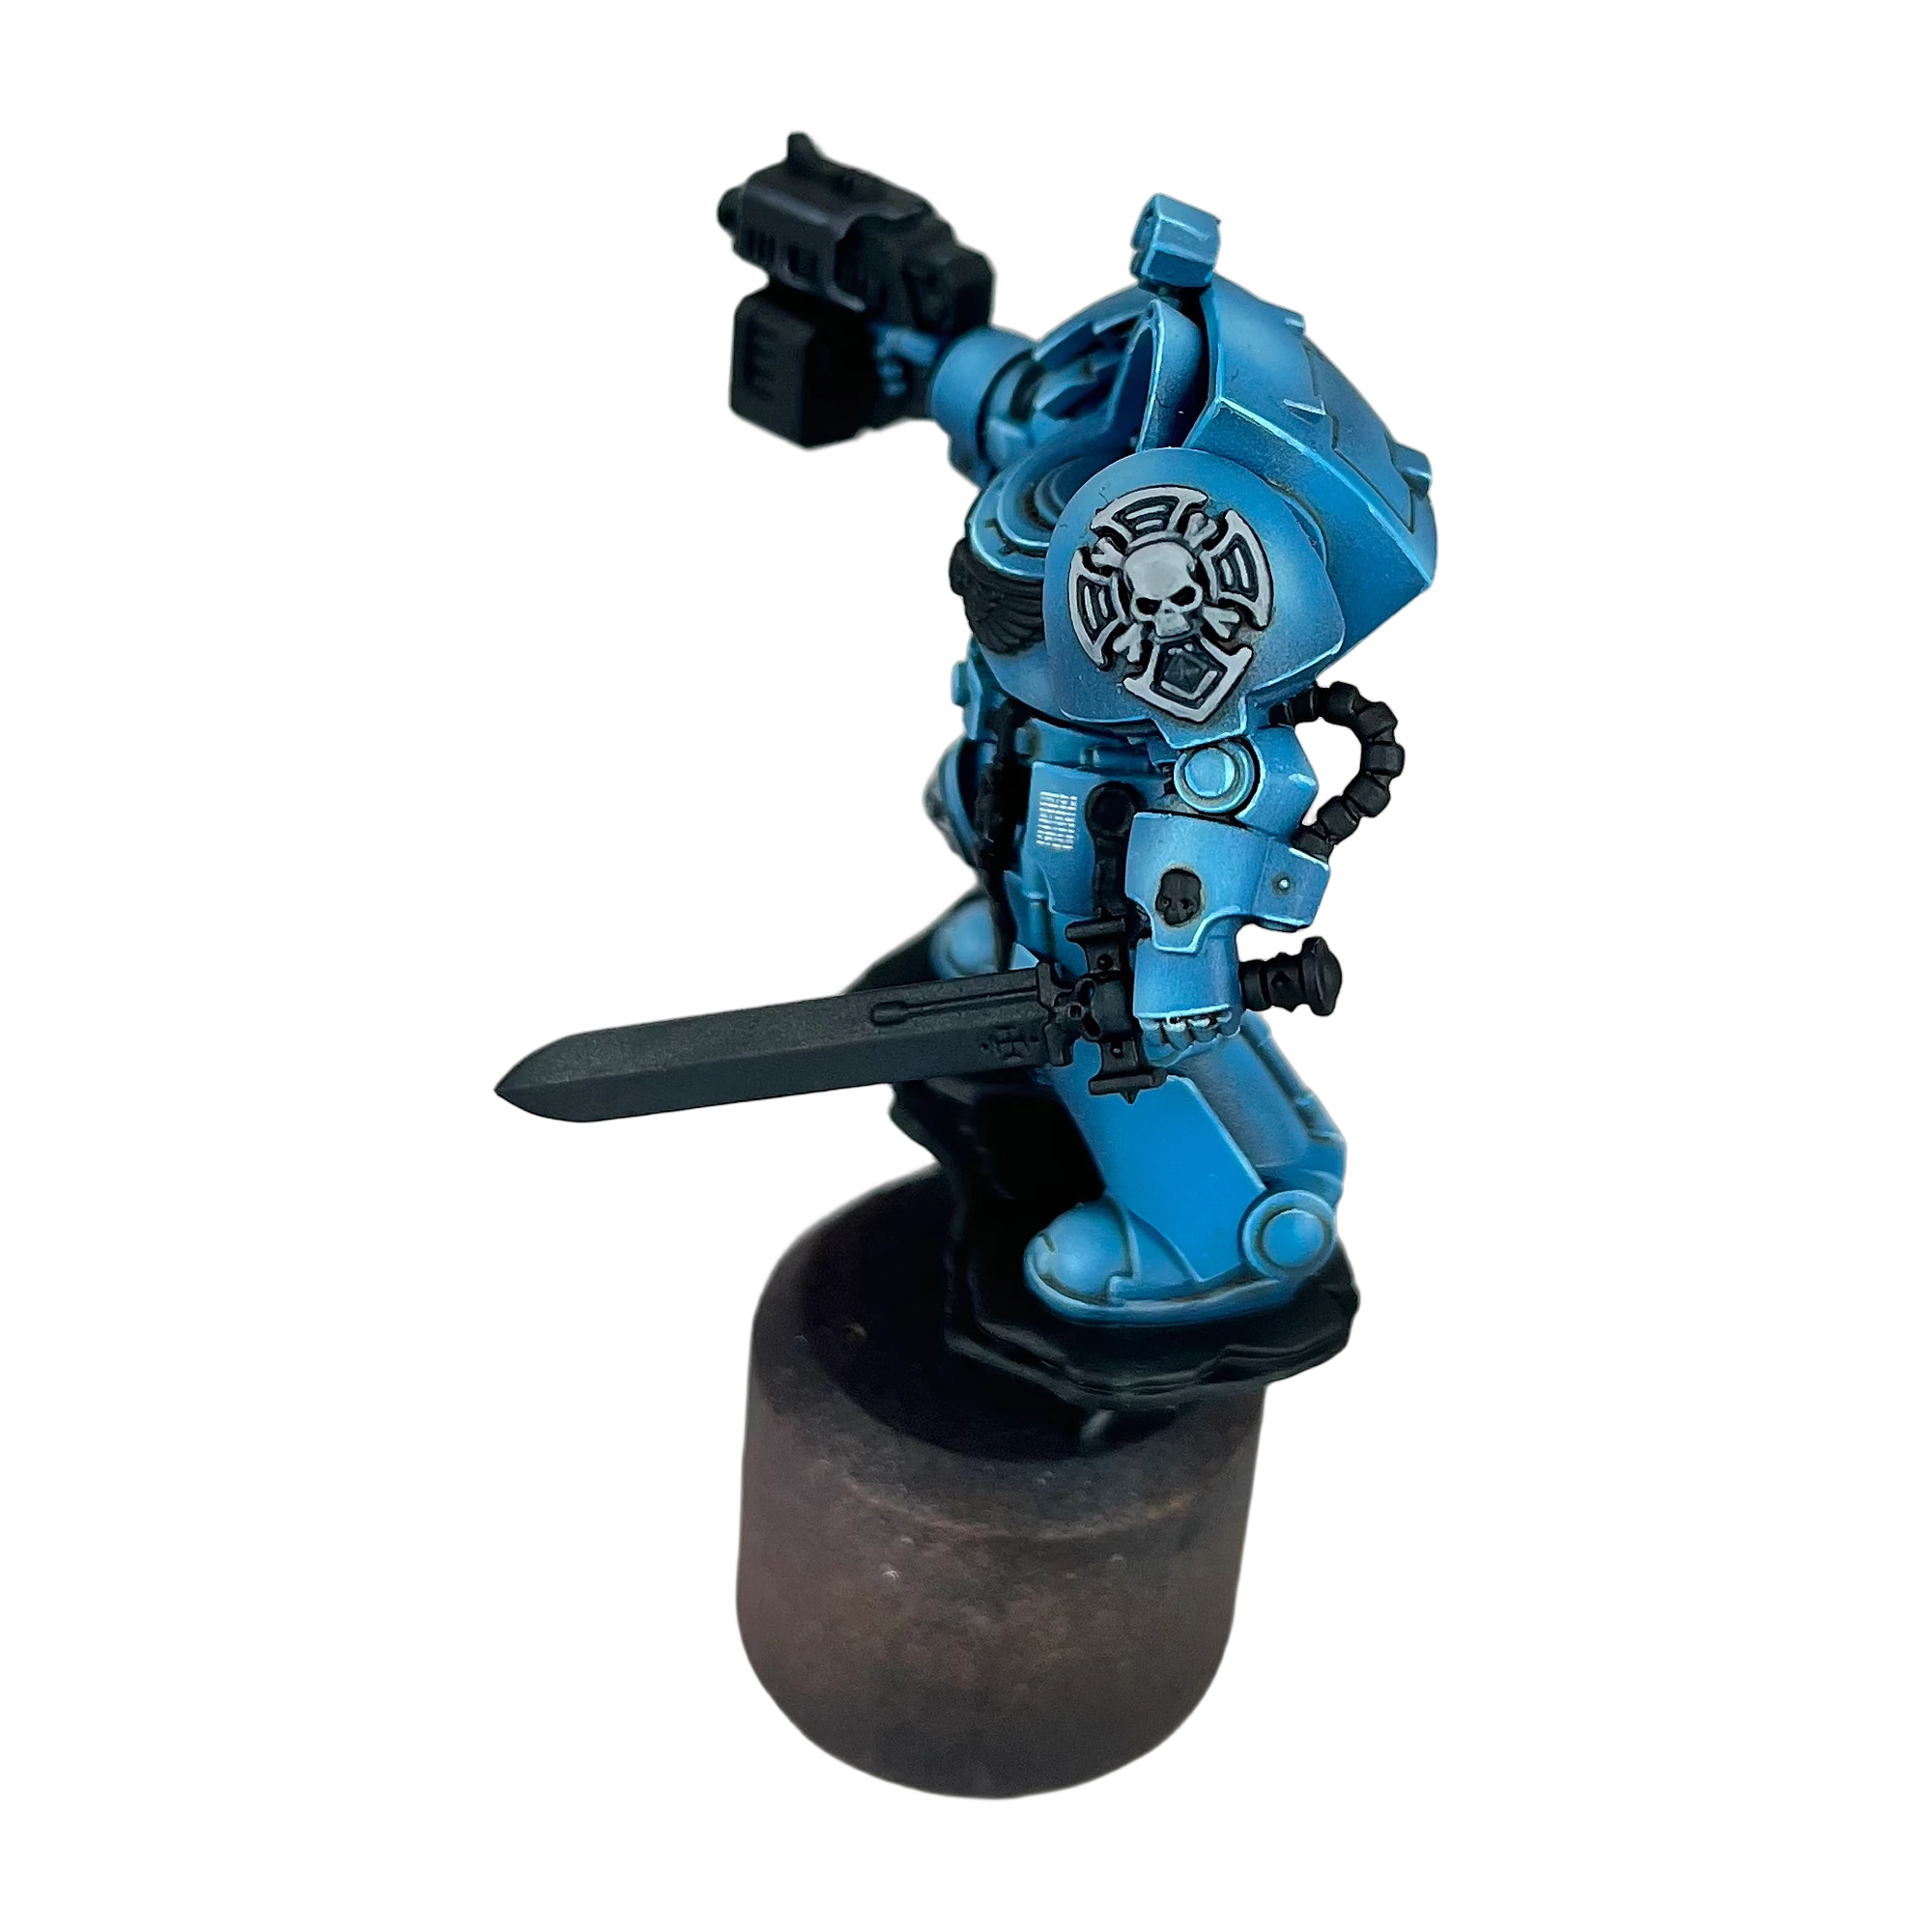
Steps 11–13: The Crux Terminatus & Weapon Casings (The Three-Grey Method)
Black weapon casings and stone-carved Crux Terminatus emblems must never be painted with stark black and white; this creates a jarring, unconvincing contrast. Instead, we use a controlled three-grey progression:
- Basecoat & Primary Line (Step 11): Block in the storm bolter casing, ammo feed, and pauldron Crux skull with Vallejo Dark Grey. Run a fine line along casing edges. (Figures 23, 24)
- Secondary Edge Highlight (Step 12): Using Vallejo Cold Grey, highlight all raised edges, skull contours, and weapon bevels. (Figures 25, 26, 27)
- Tertiary Vertex Glint (Step 13): Place pinpoint dots of Vallejo Stonewall Grey at corners, muzzle rims, and the tips of the Crux cross. (Figures 28, 29, 30)
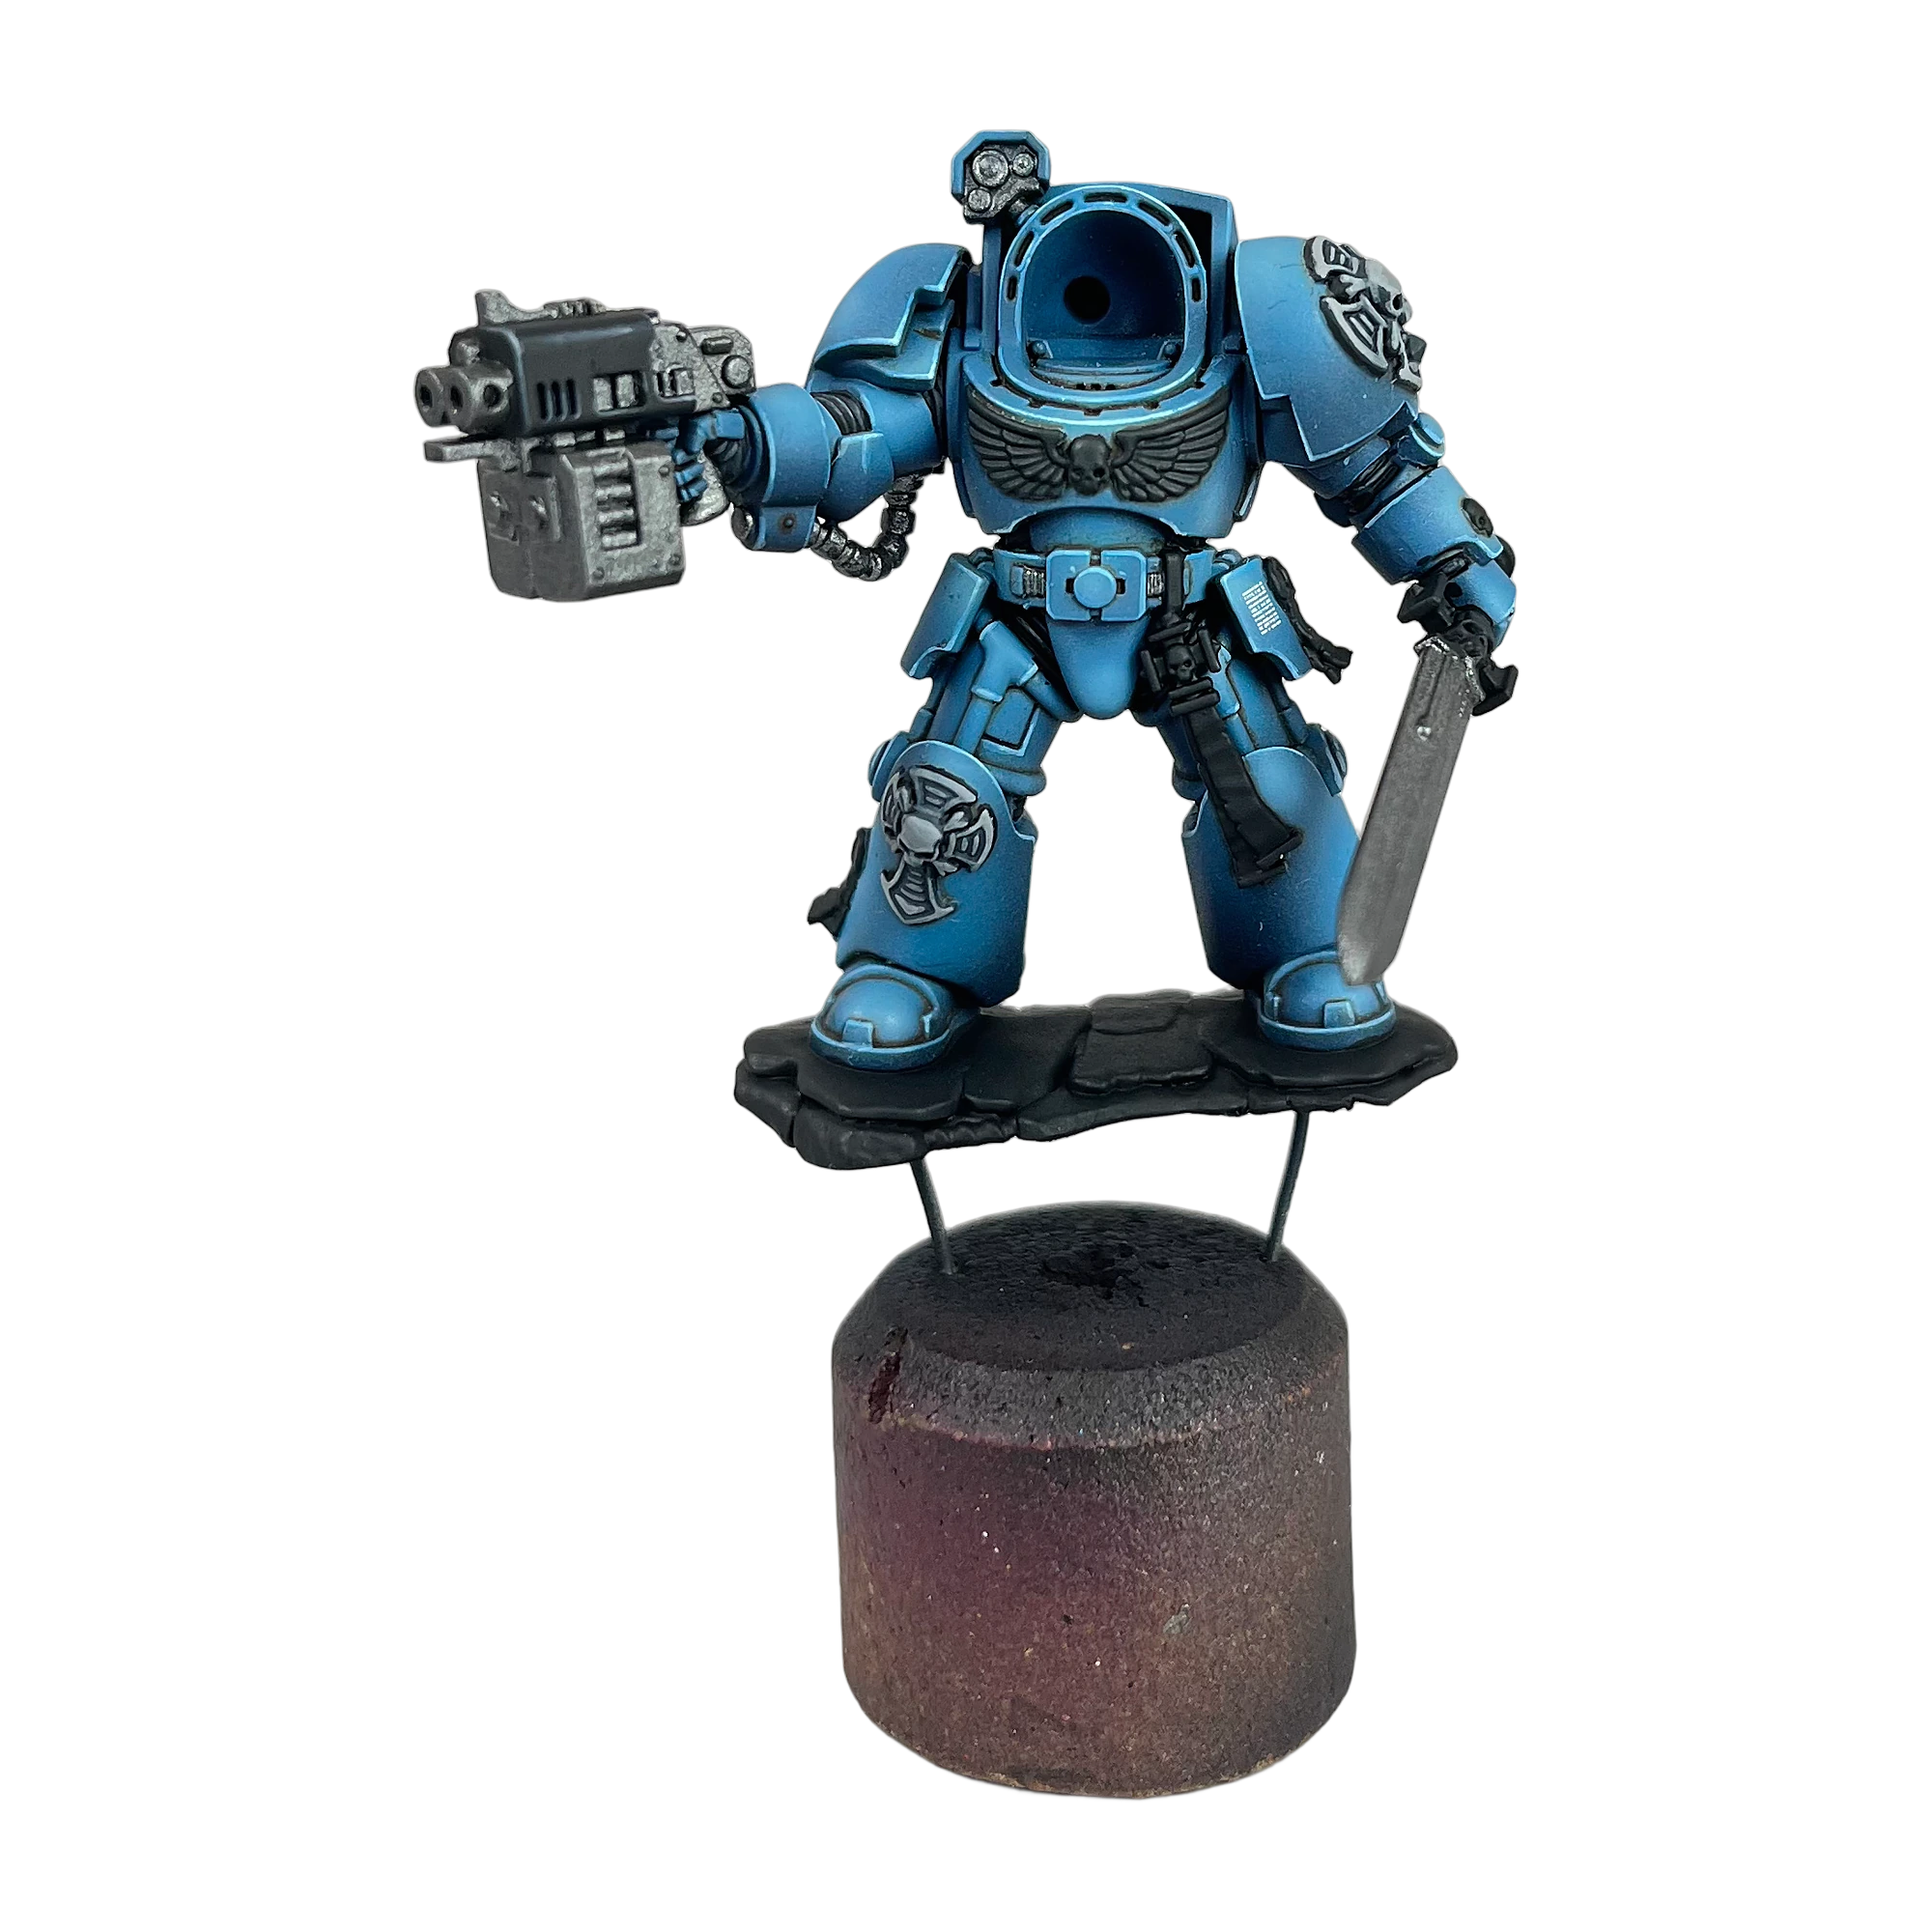
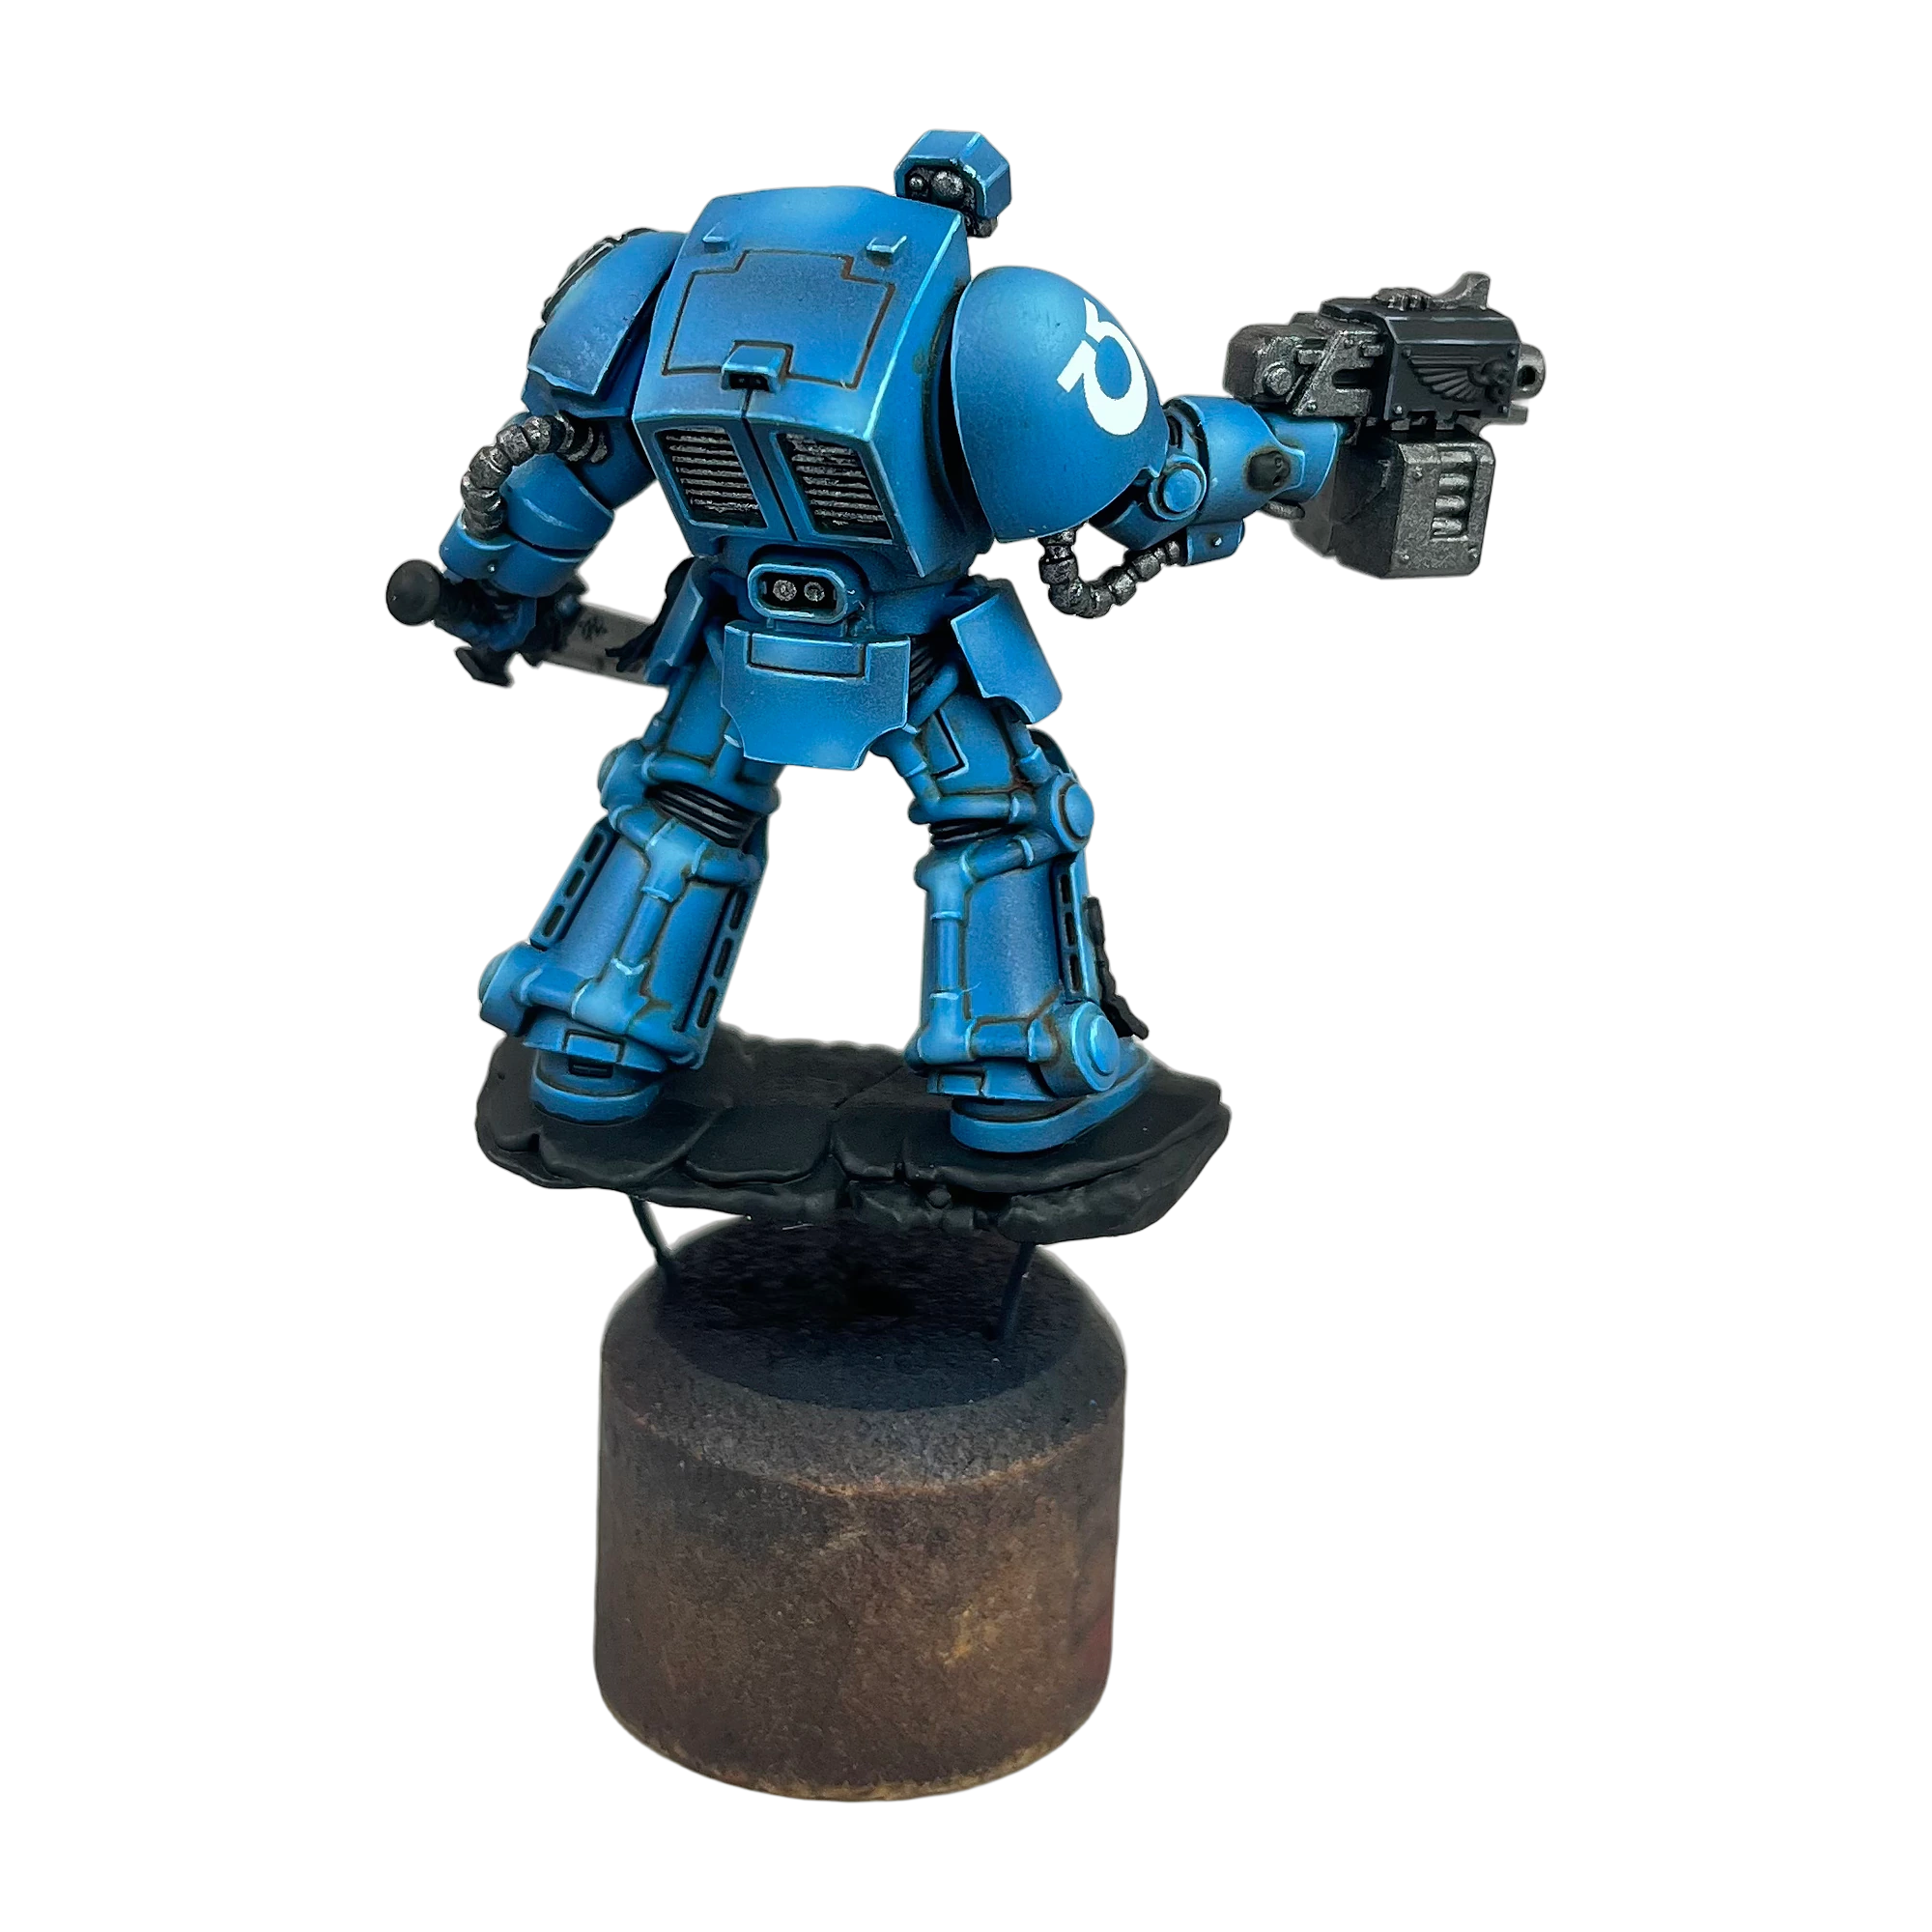
Steps 14–16: True Metallic Munitorum Steel
- Basecoat (Step 14): Paint all mechanical armatures, barrel muzzles, vents, and hydraulic cables with Citadel Iron Warriors. Its heavy pigment density covers in a single coat. (Figures 31, 32)
- Wash (Step 15): Wash all metallic areas thoroughly with Citadel Nuln Oil to recess-shade pistons and barrel perforations. (Figures 33, 34)
- Edge Highlighting (Step 16): Pick out metallic edges with Citadel Leadbelcher, followed by extreme edge points of Citadel Runefang Steel to simulate polished, battle-worn steel. (Figures 35, 36, 37)
8. Phase 6: Relics of Ultramar — Burnished Gold & Purity Seals
Step 17: Ceremonial Auric Gold
Gold trim on Ultramarines signifies ancient veteran status. To achieve a deep, regal finish without gaudy yellow flake:
- Basecoat: Apply Citadel Balthasar Gold over the chest aquila, belt buckle, and honor badges. Balthasar Gold provides an opaque, warm copper undertone.
- Wash: Flood the gold details with Citadel Agrax Earthshade, creating warm, natural shading between the eagle feathers.
- Layer & Highlight: Apply two thin layers of Citadel Retributor Armour across raised feather ribs and filigree edges, leaving the dark Agrax Earthshade visible in the recessed crevices.
Step 18: Liturgical Purity Seals & Vellum Scrolls
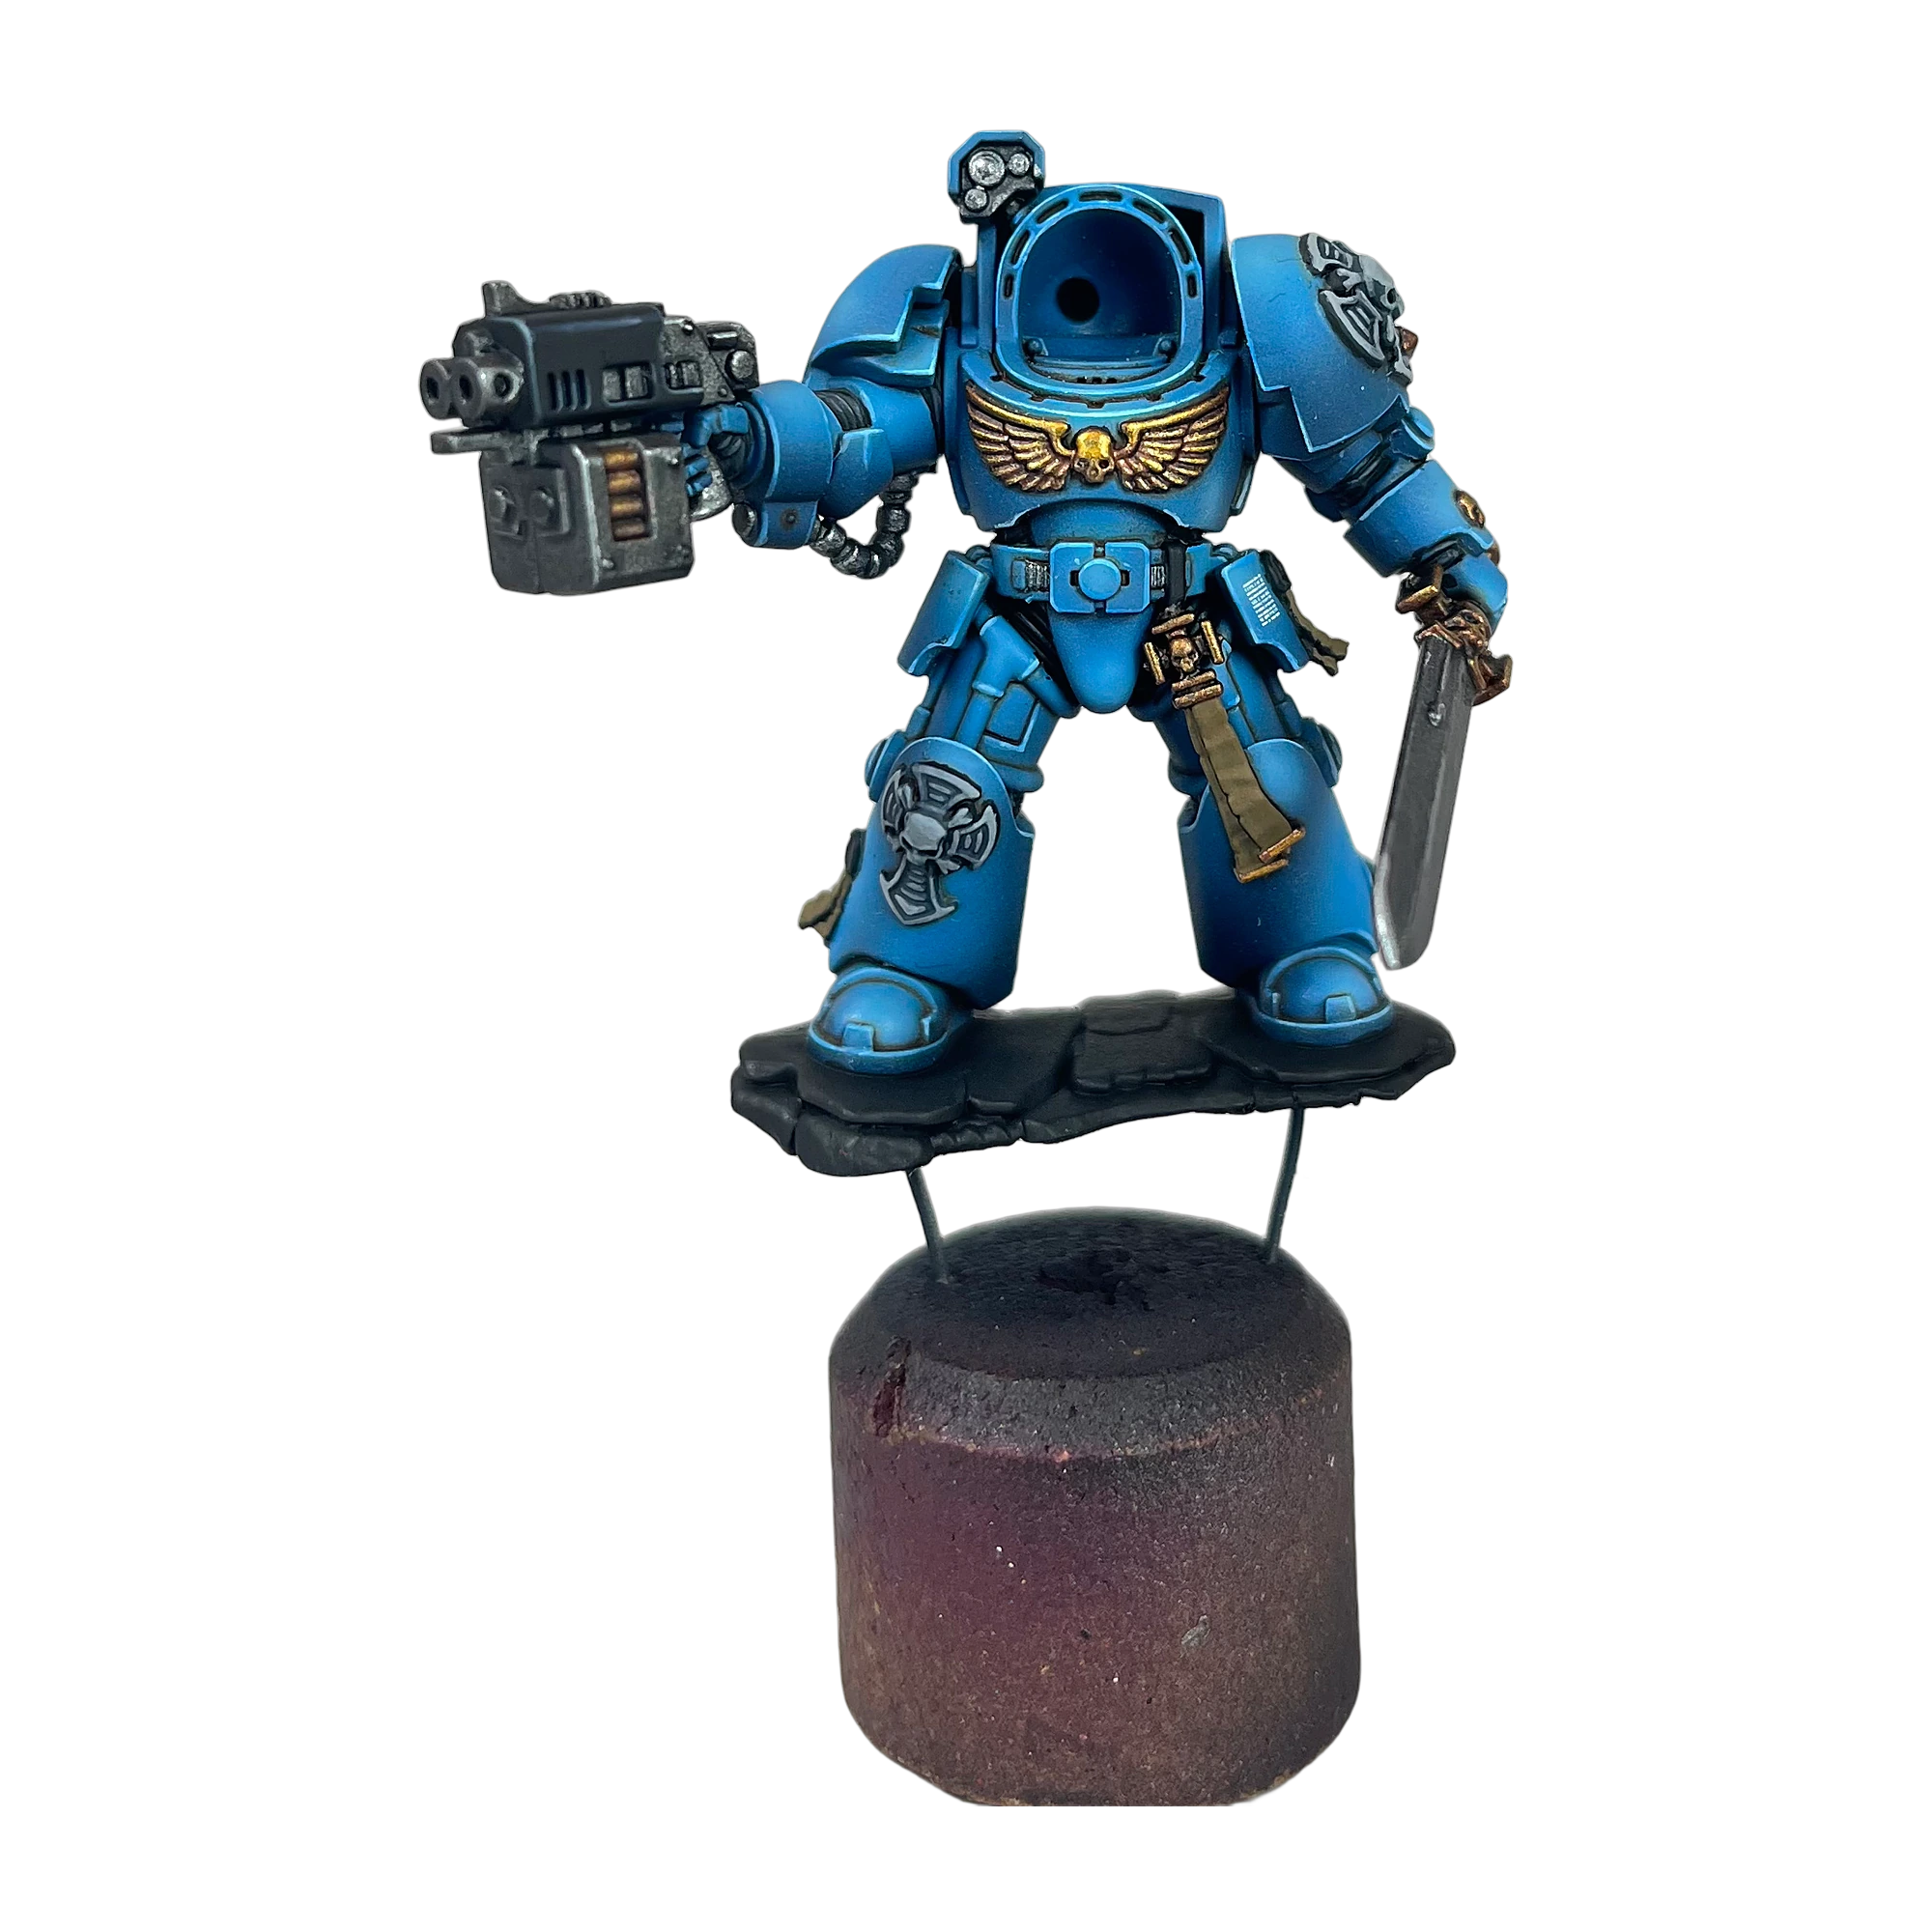
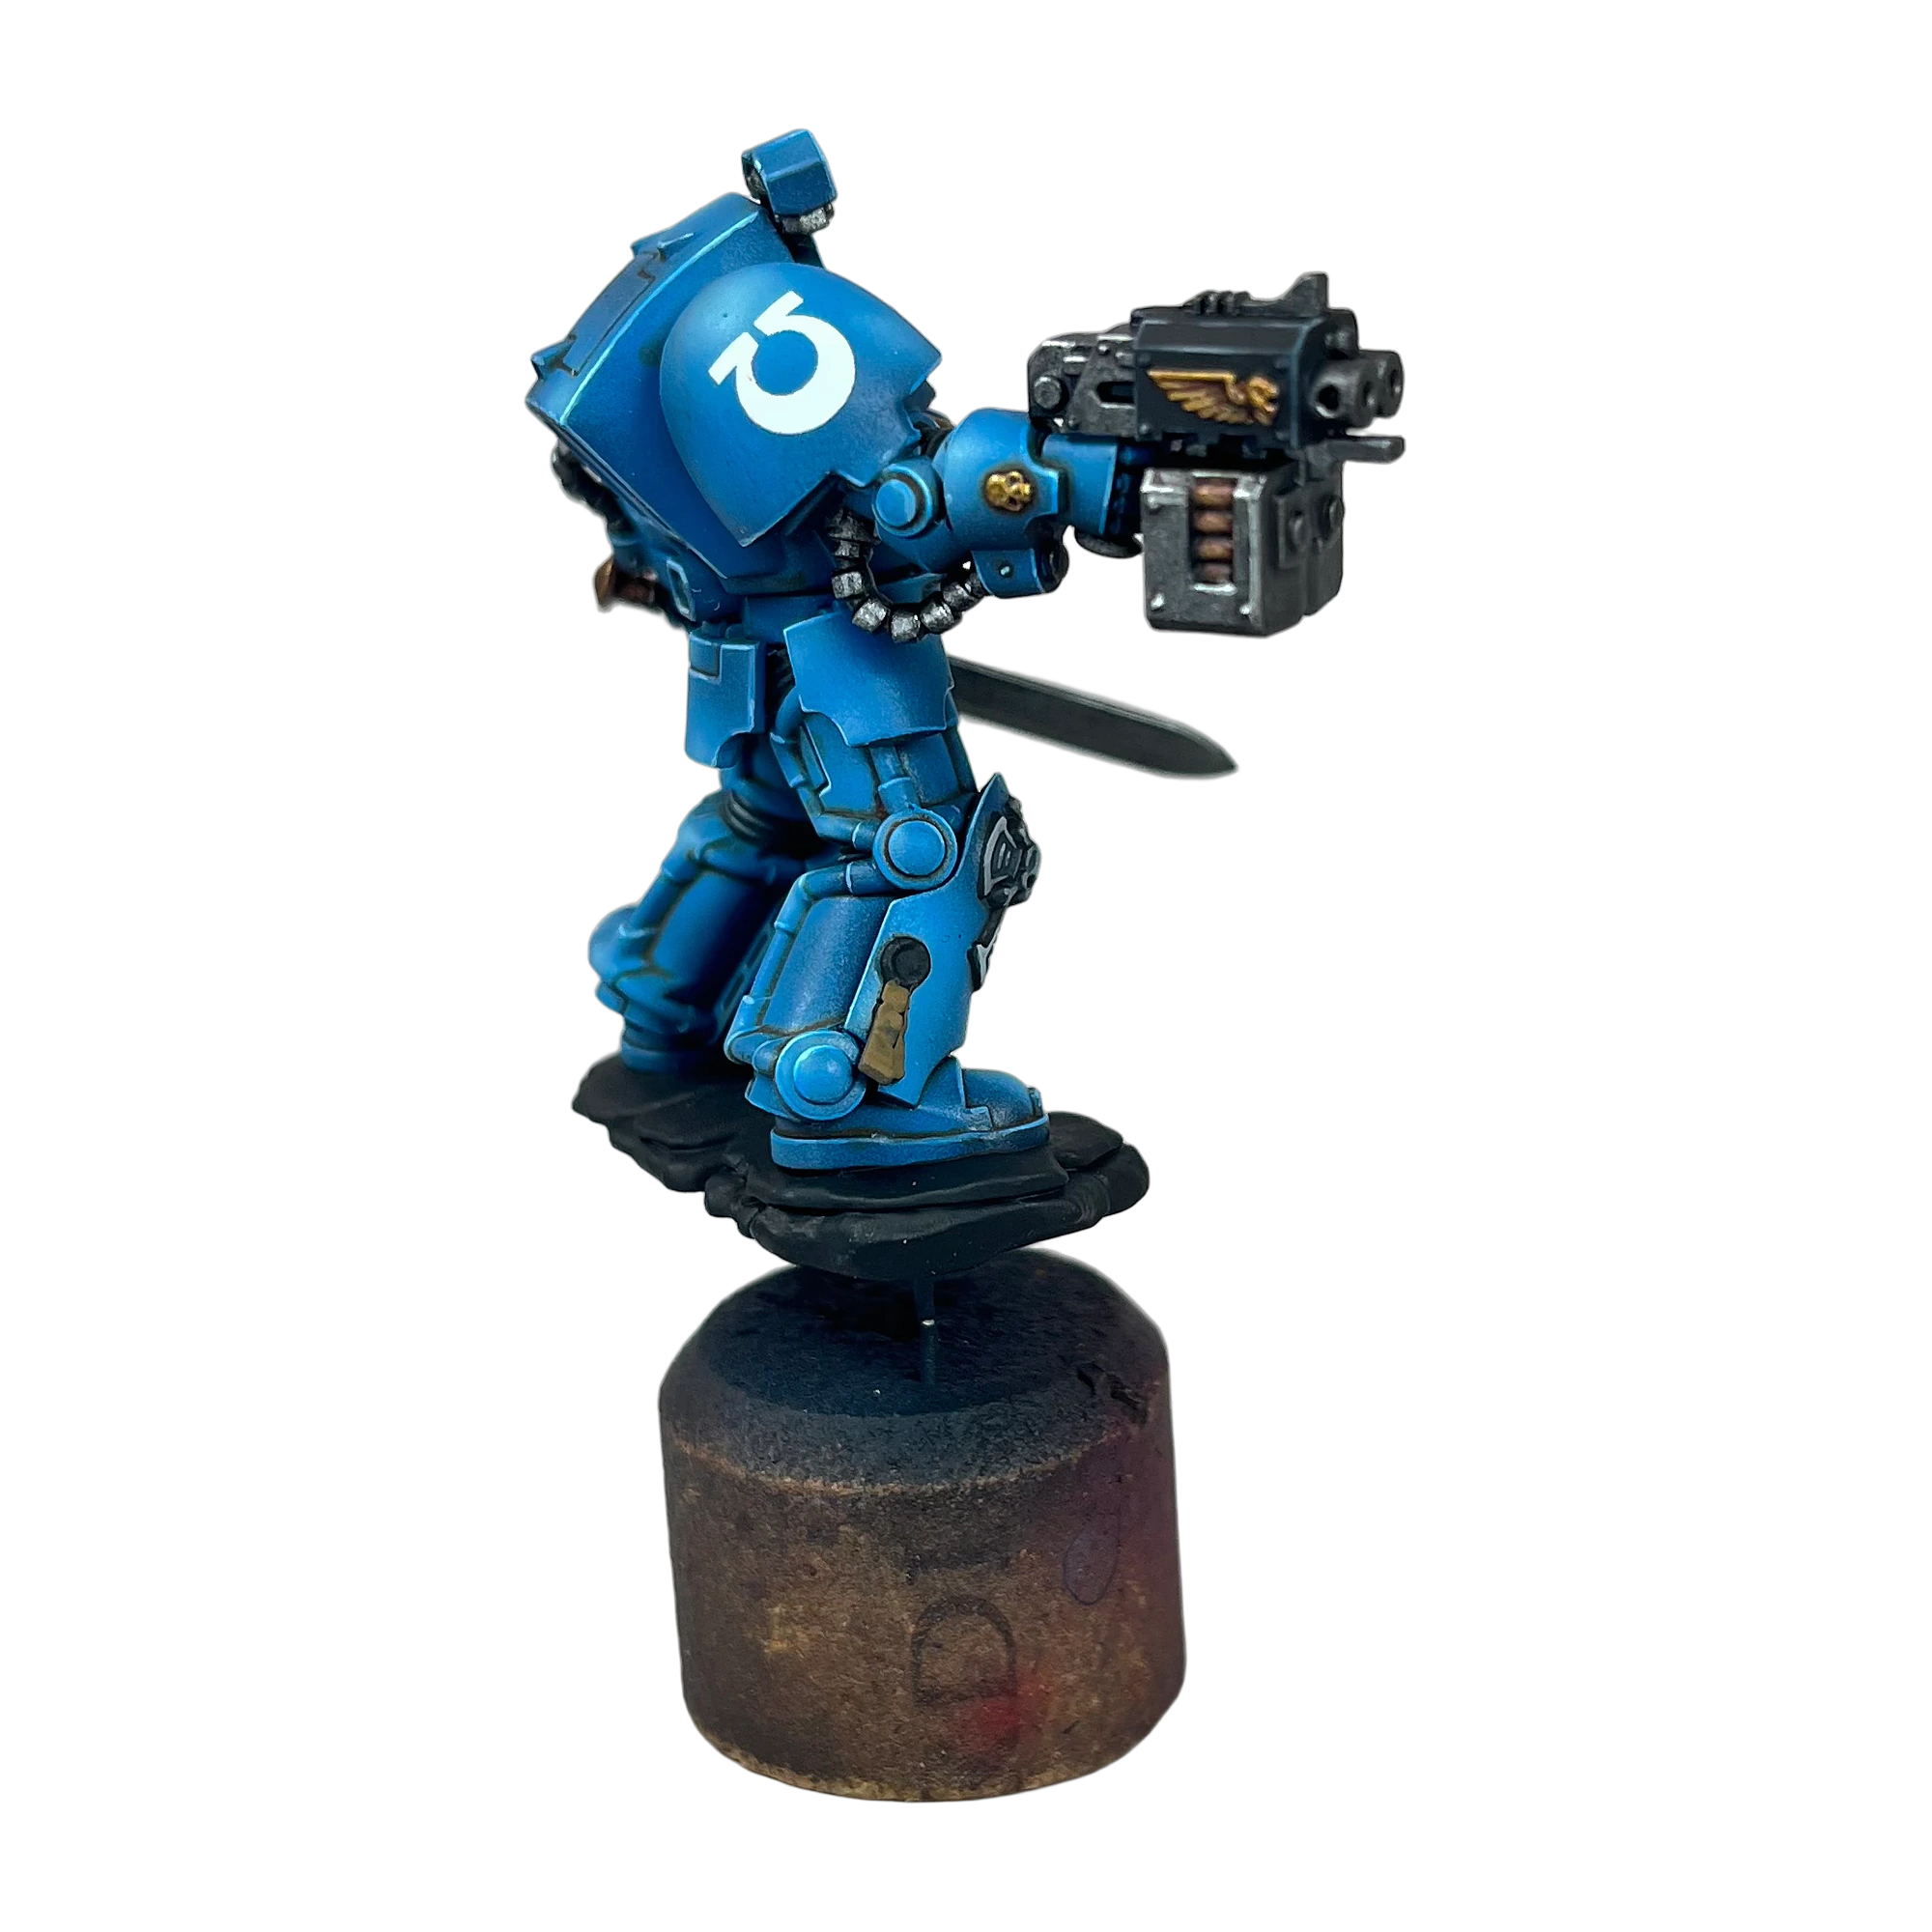
- Parchment Vellum: Basecoat all purity seal ribbons with Vallejo Earth. Highlight sequentially with Vallejo Khaki, feathering towards the scroll ends. Using a sharp #00 brush and thinned Dark Grey, paint microscopic horizontal broken lines to represent sacred Imperial scripture.
- Sealing Wax: Basecoat the wax stamps in Vallejo Purple. Layer the upper dome with Vallejo Warlord Purple, and place a single pinpoint highlight of Citadel Fulgrim Pink at the top edge to simulate glossy sealing wax.
9. Phase 7: The Veteran’s Crown — White Helmet Mastery & Ruby Lenses
First Company Veterans in Terminator armor bear pure white helmets—a classic hallmark of Ultramarines heraldry that terrifies painters due to chalky, clumping white pigments. Here is the studio’s exact recipe for silky-smooth white ceramite.
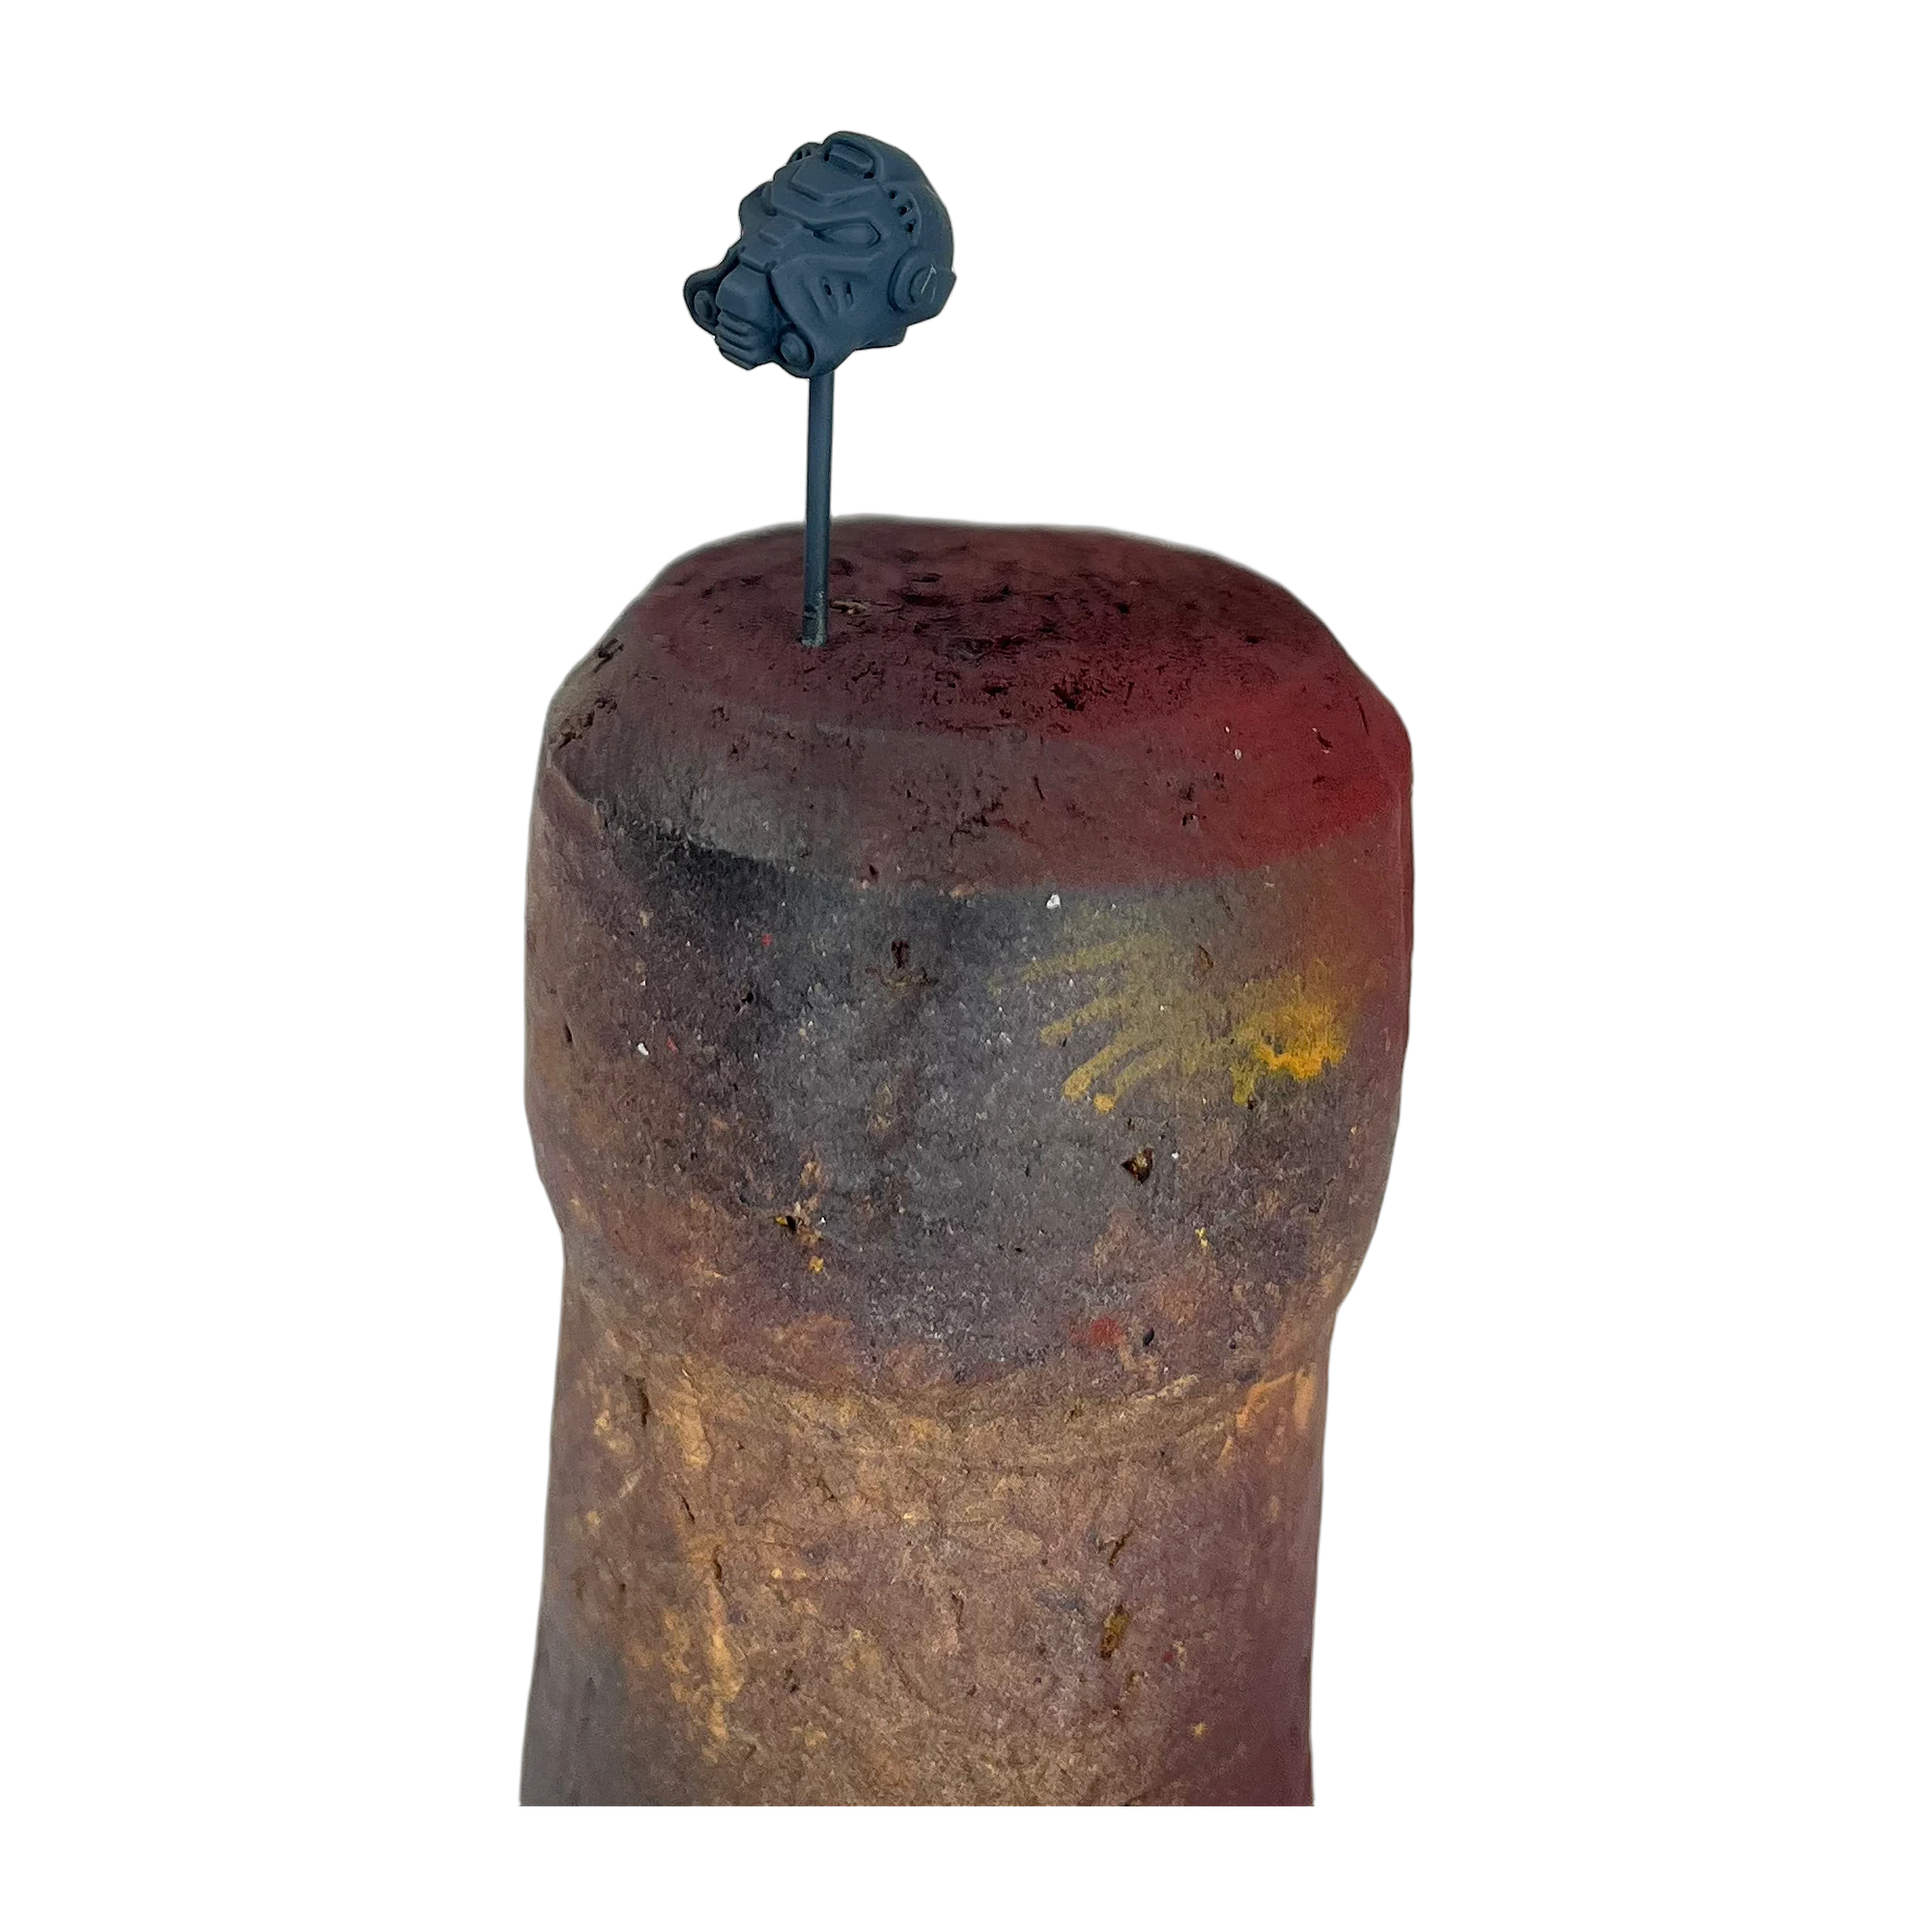
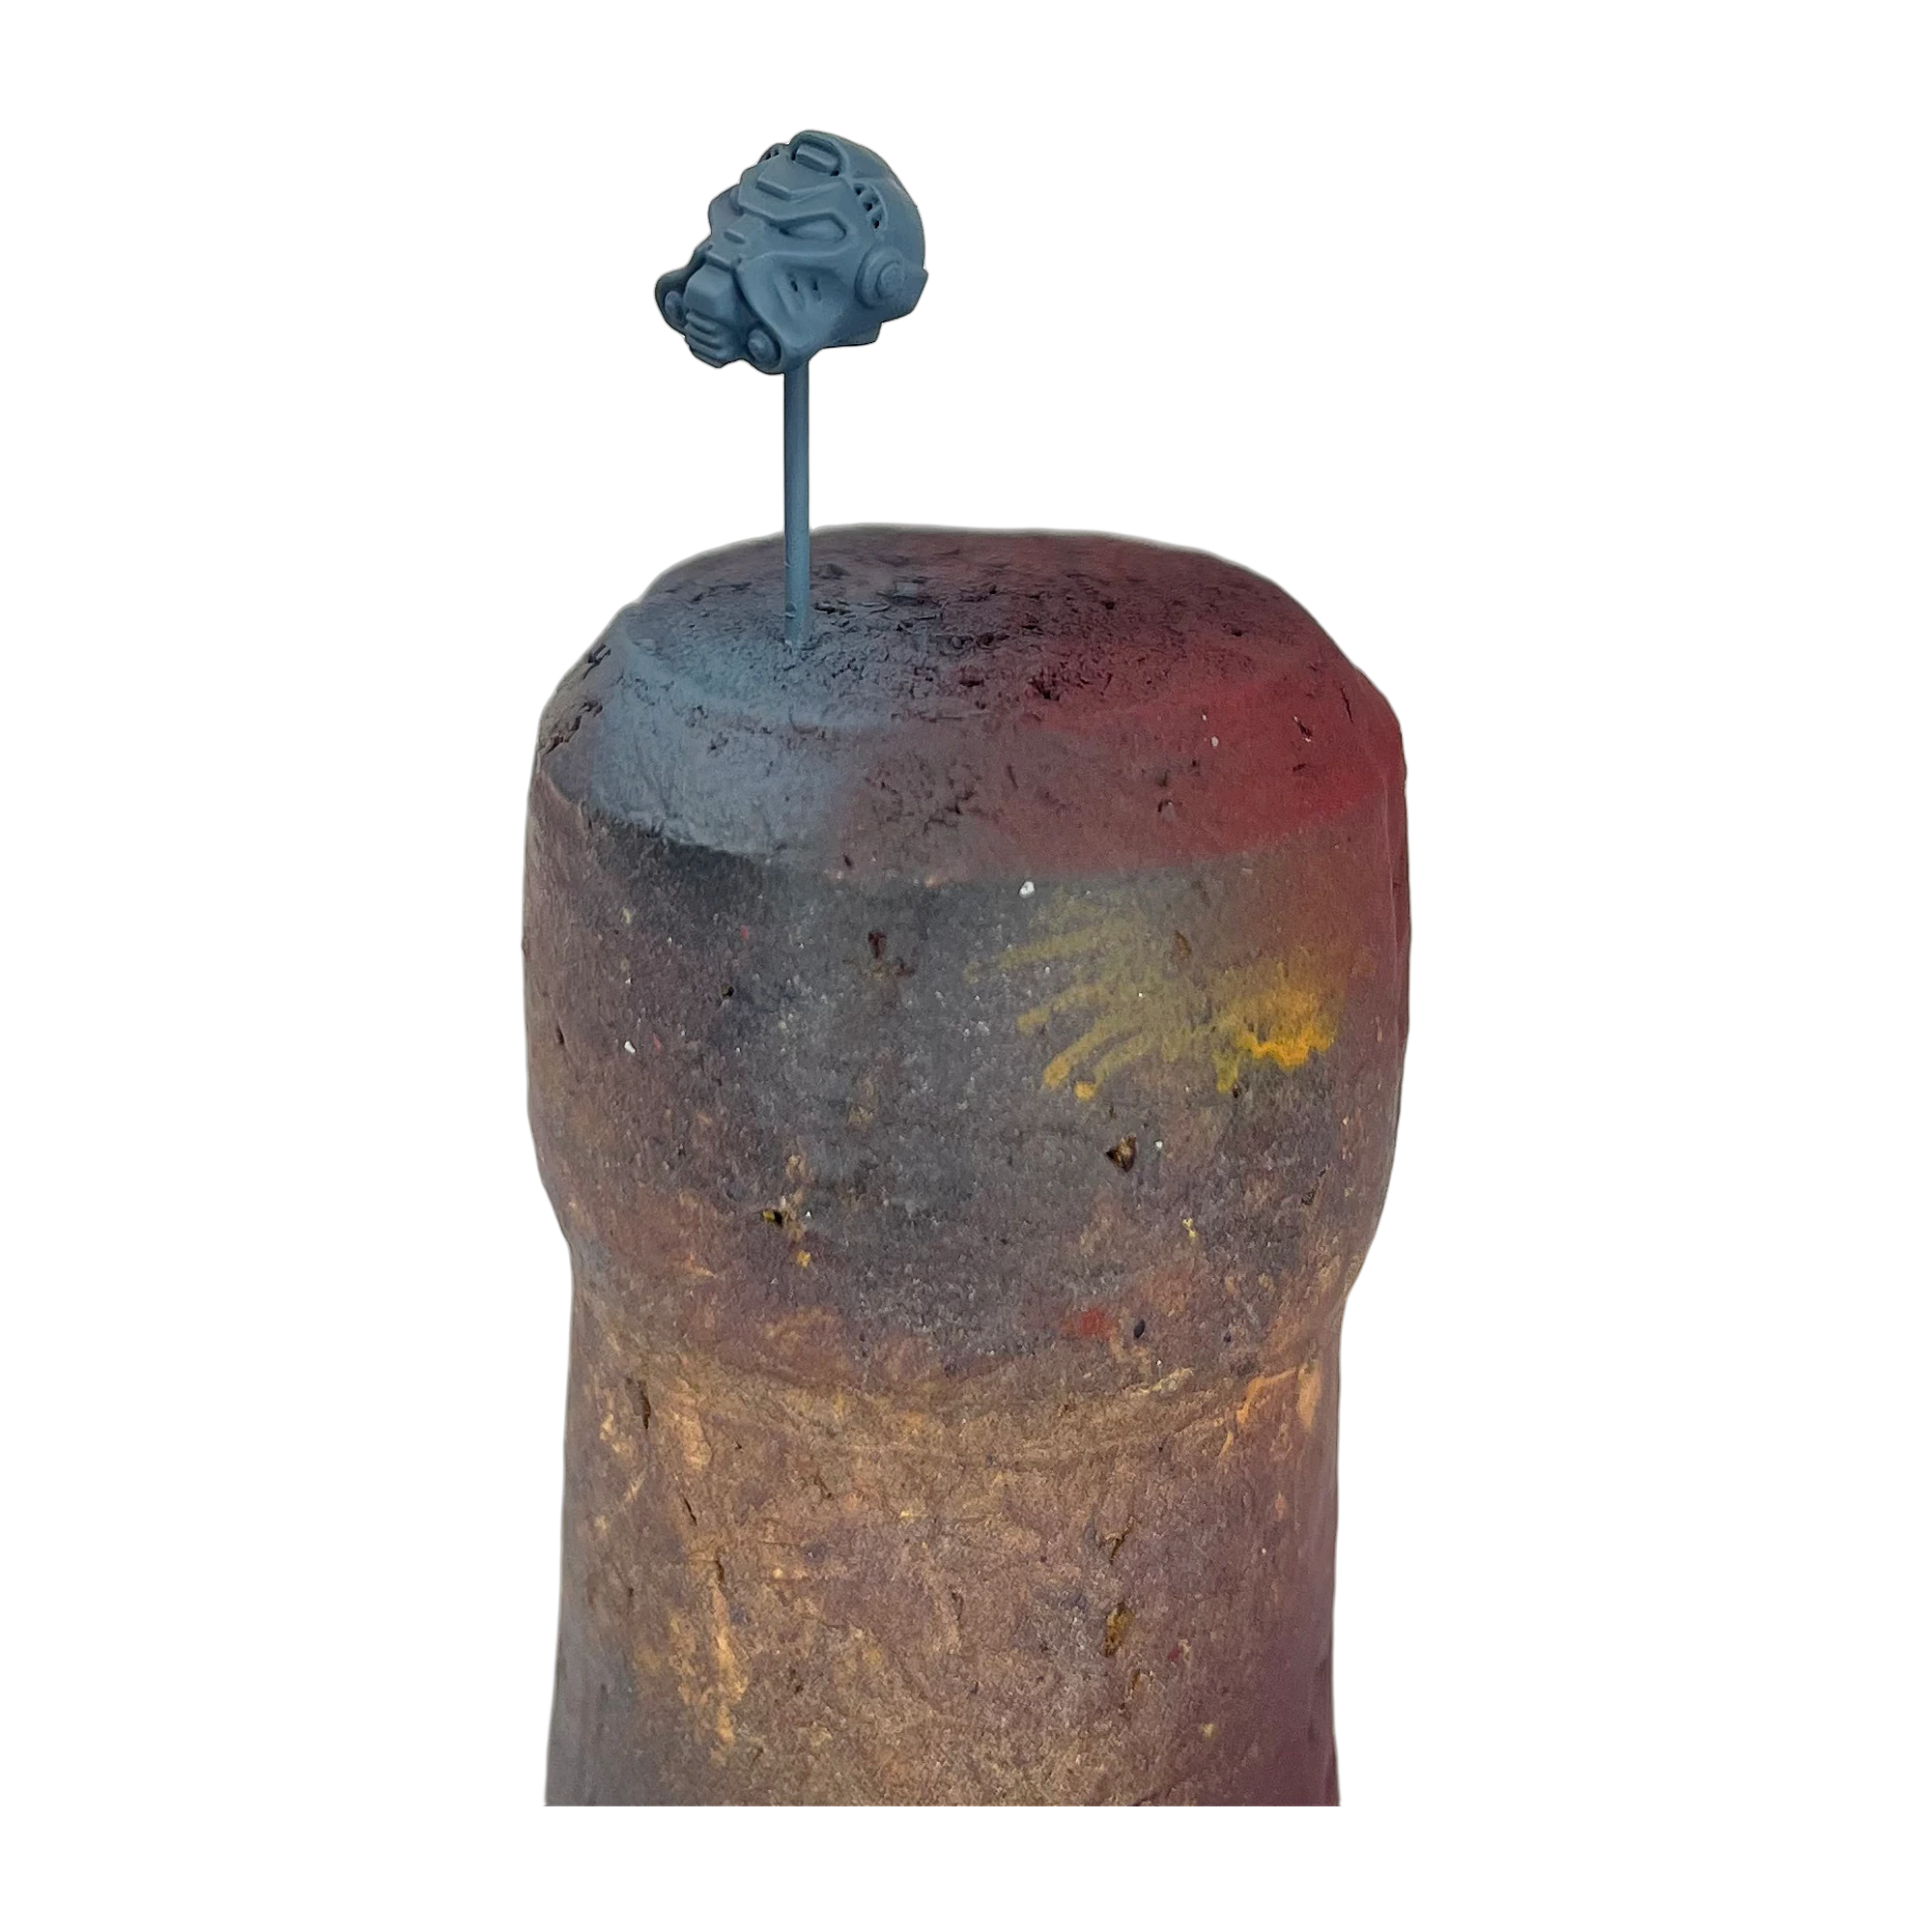
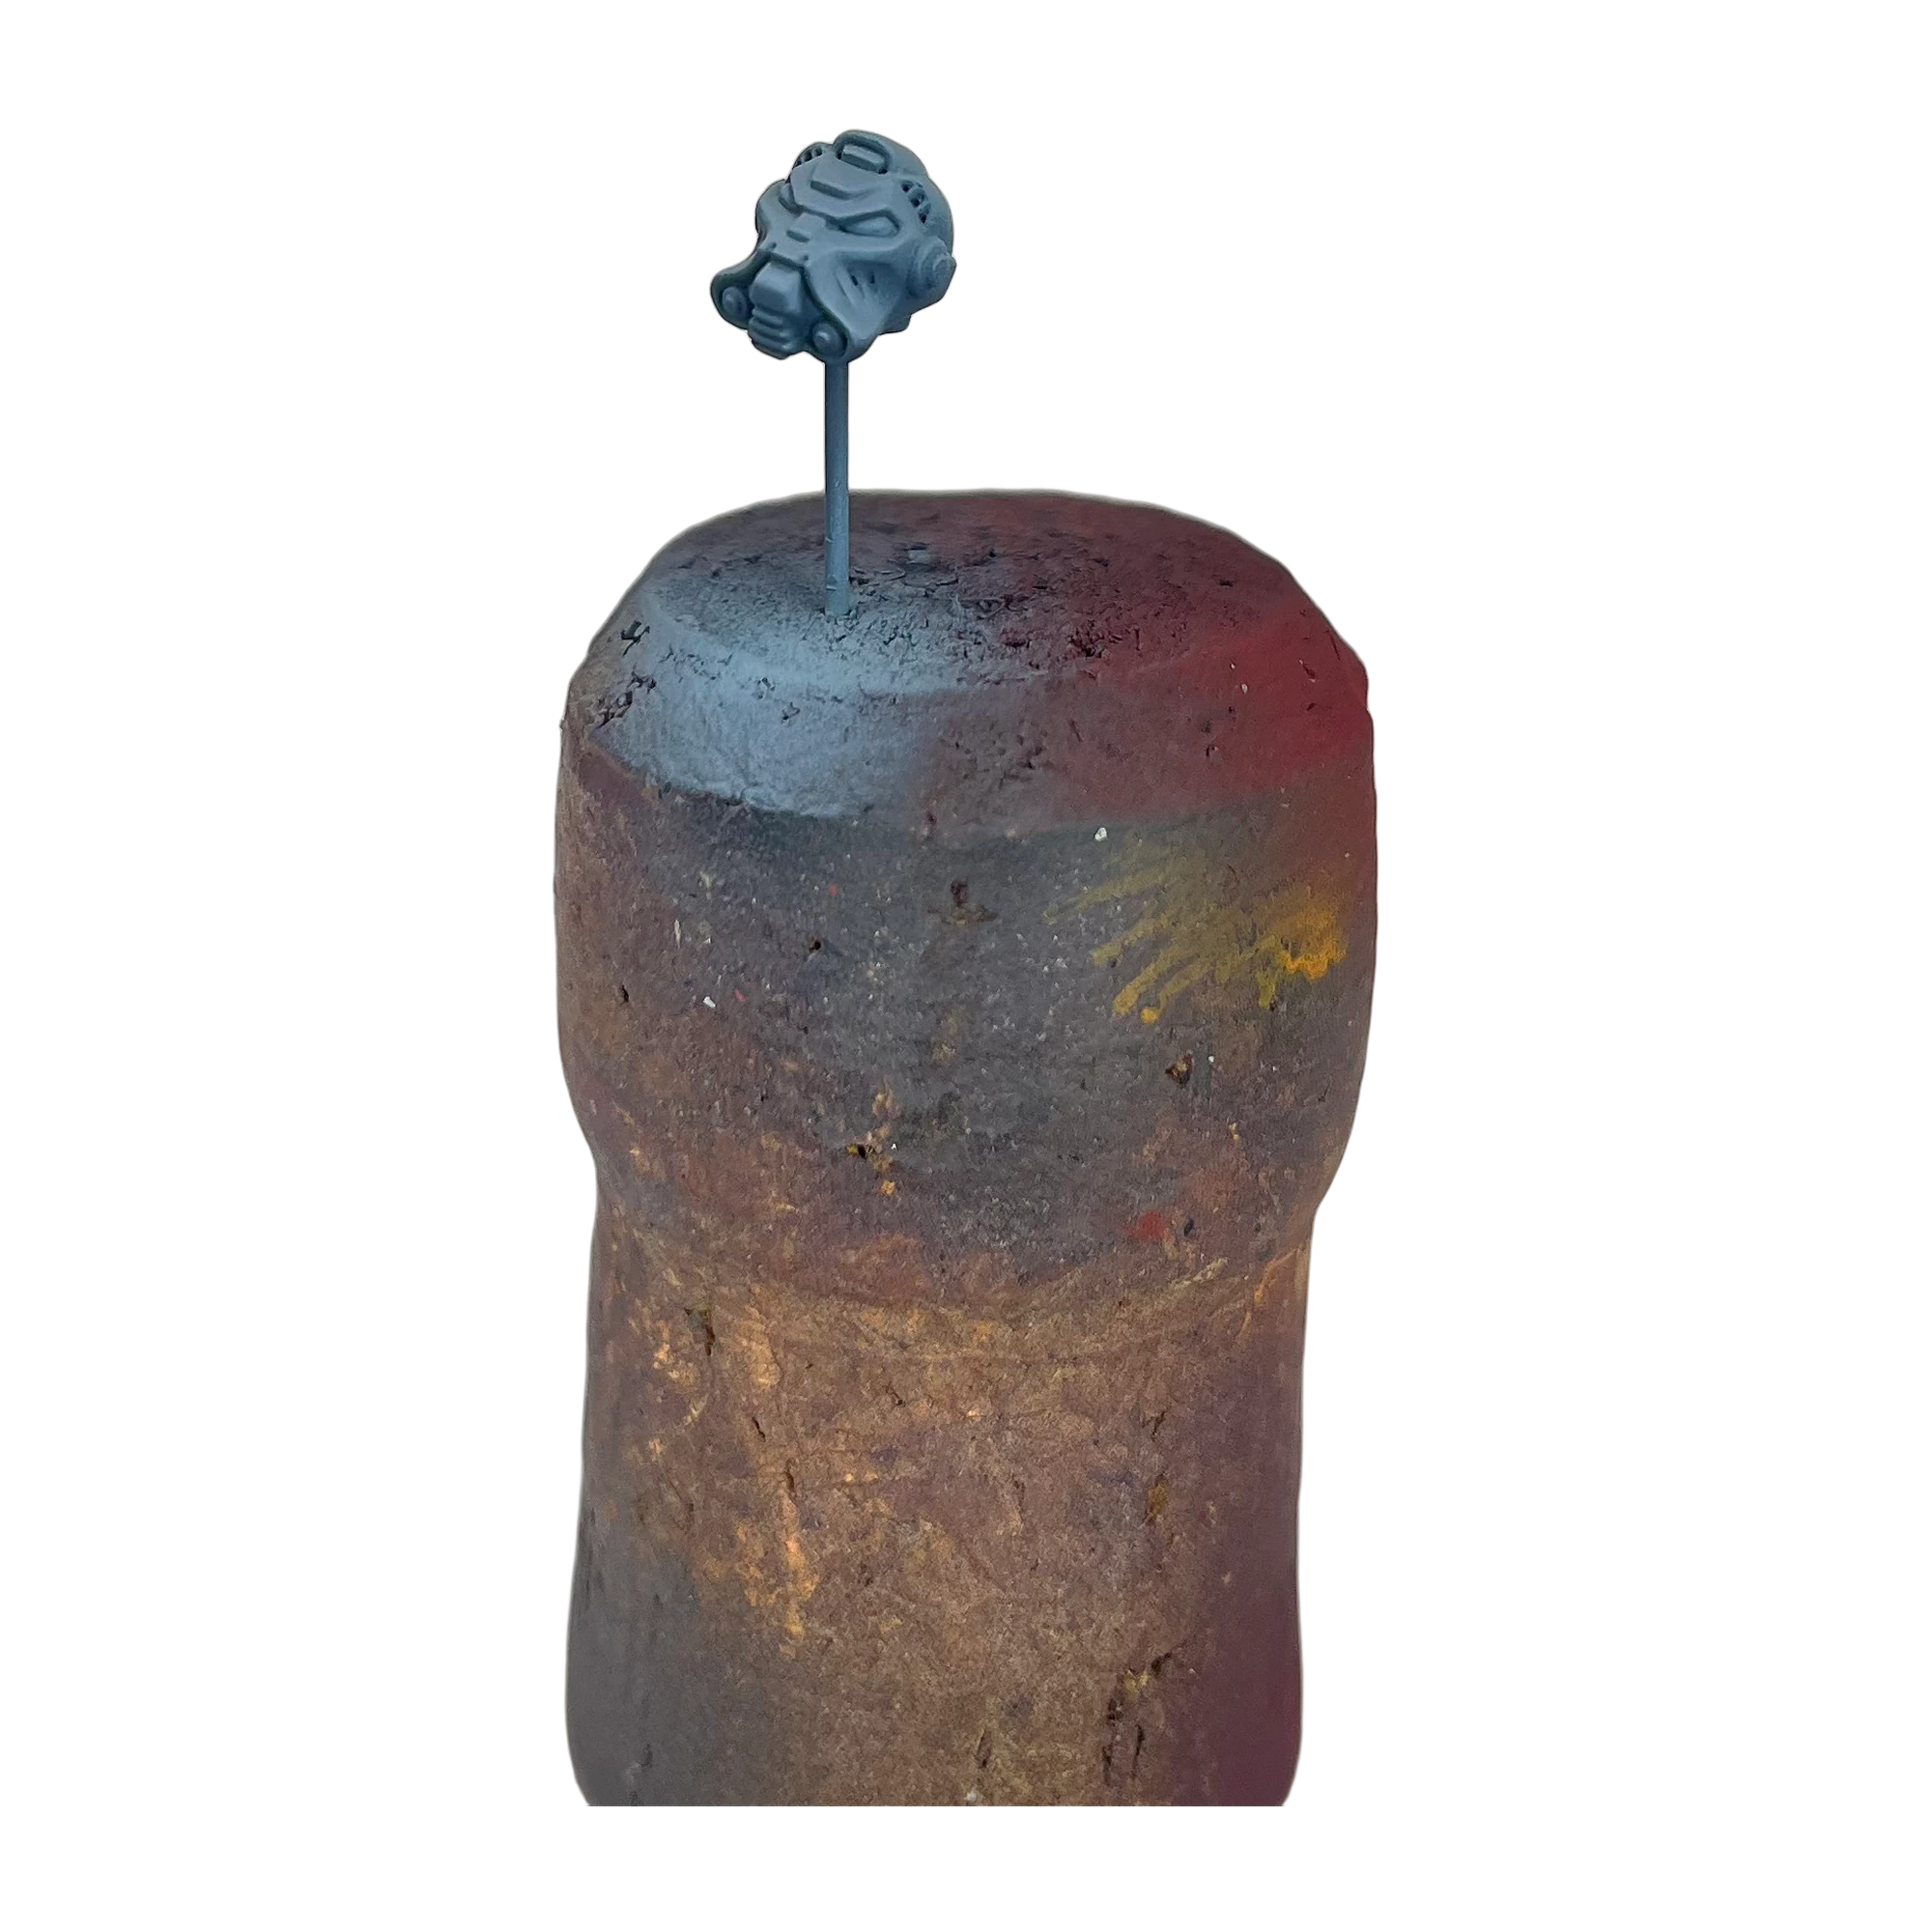
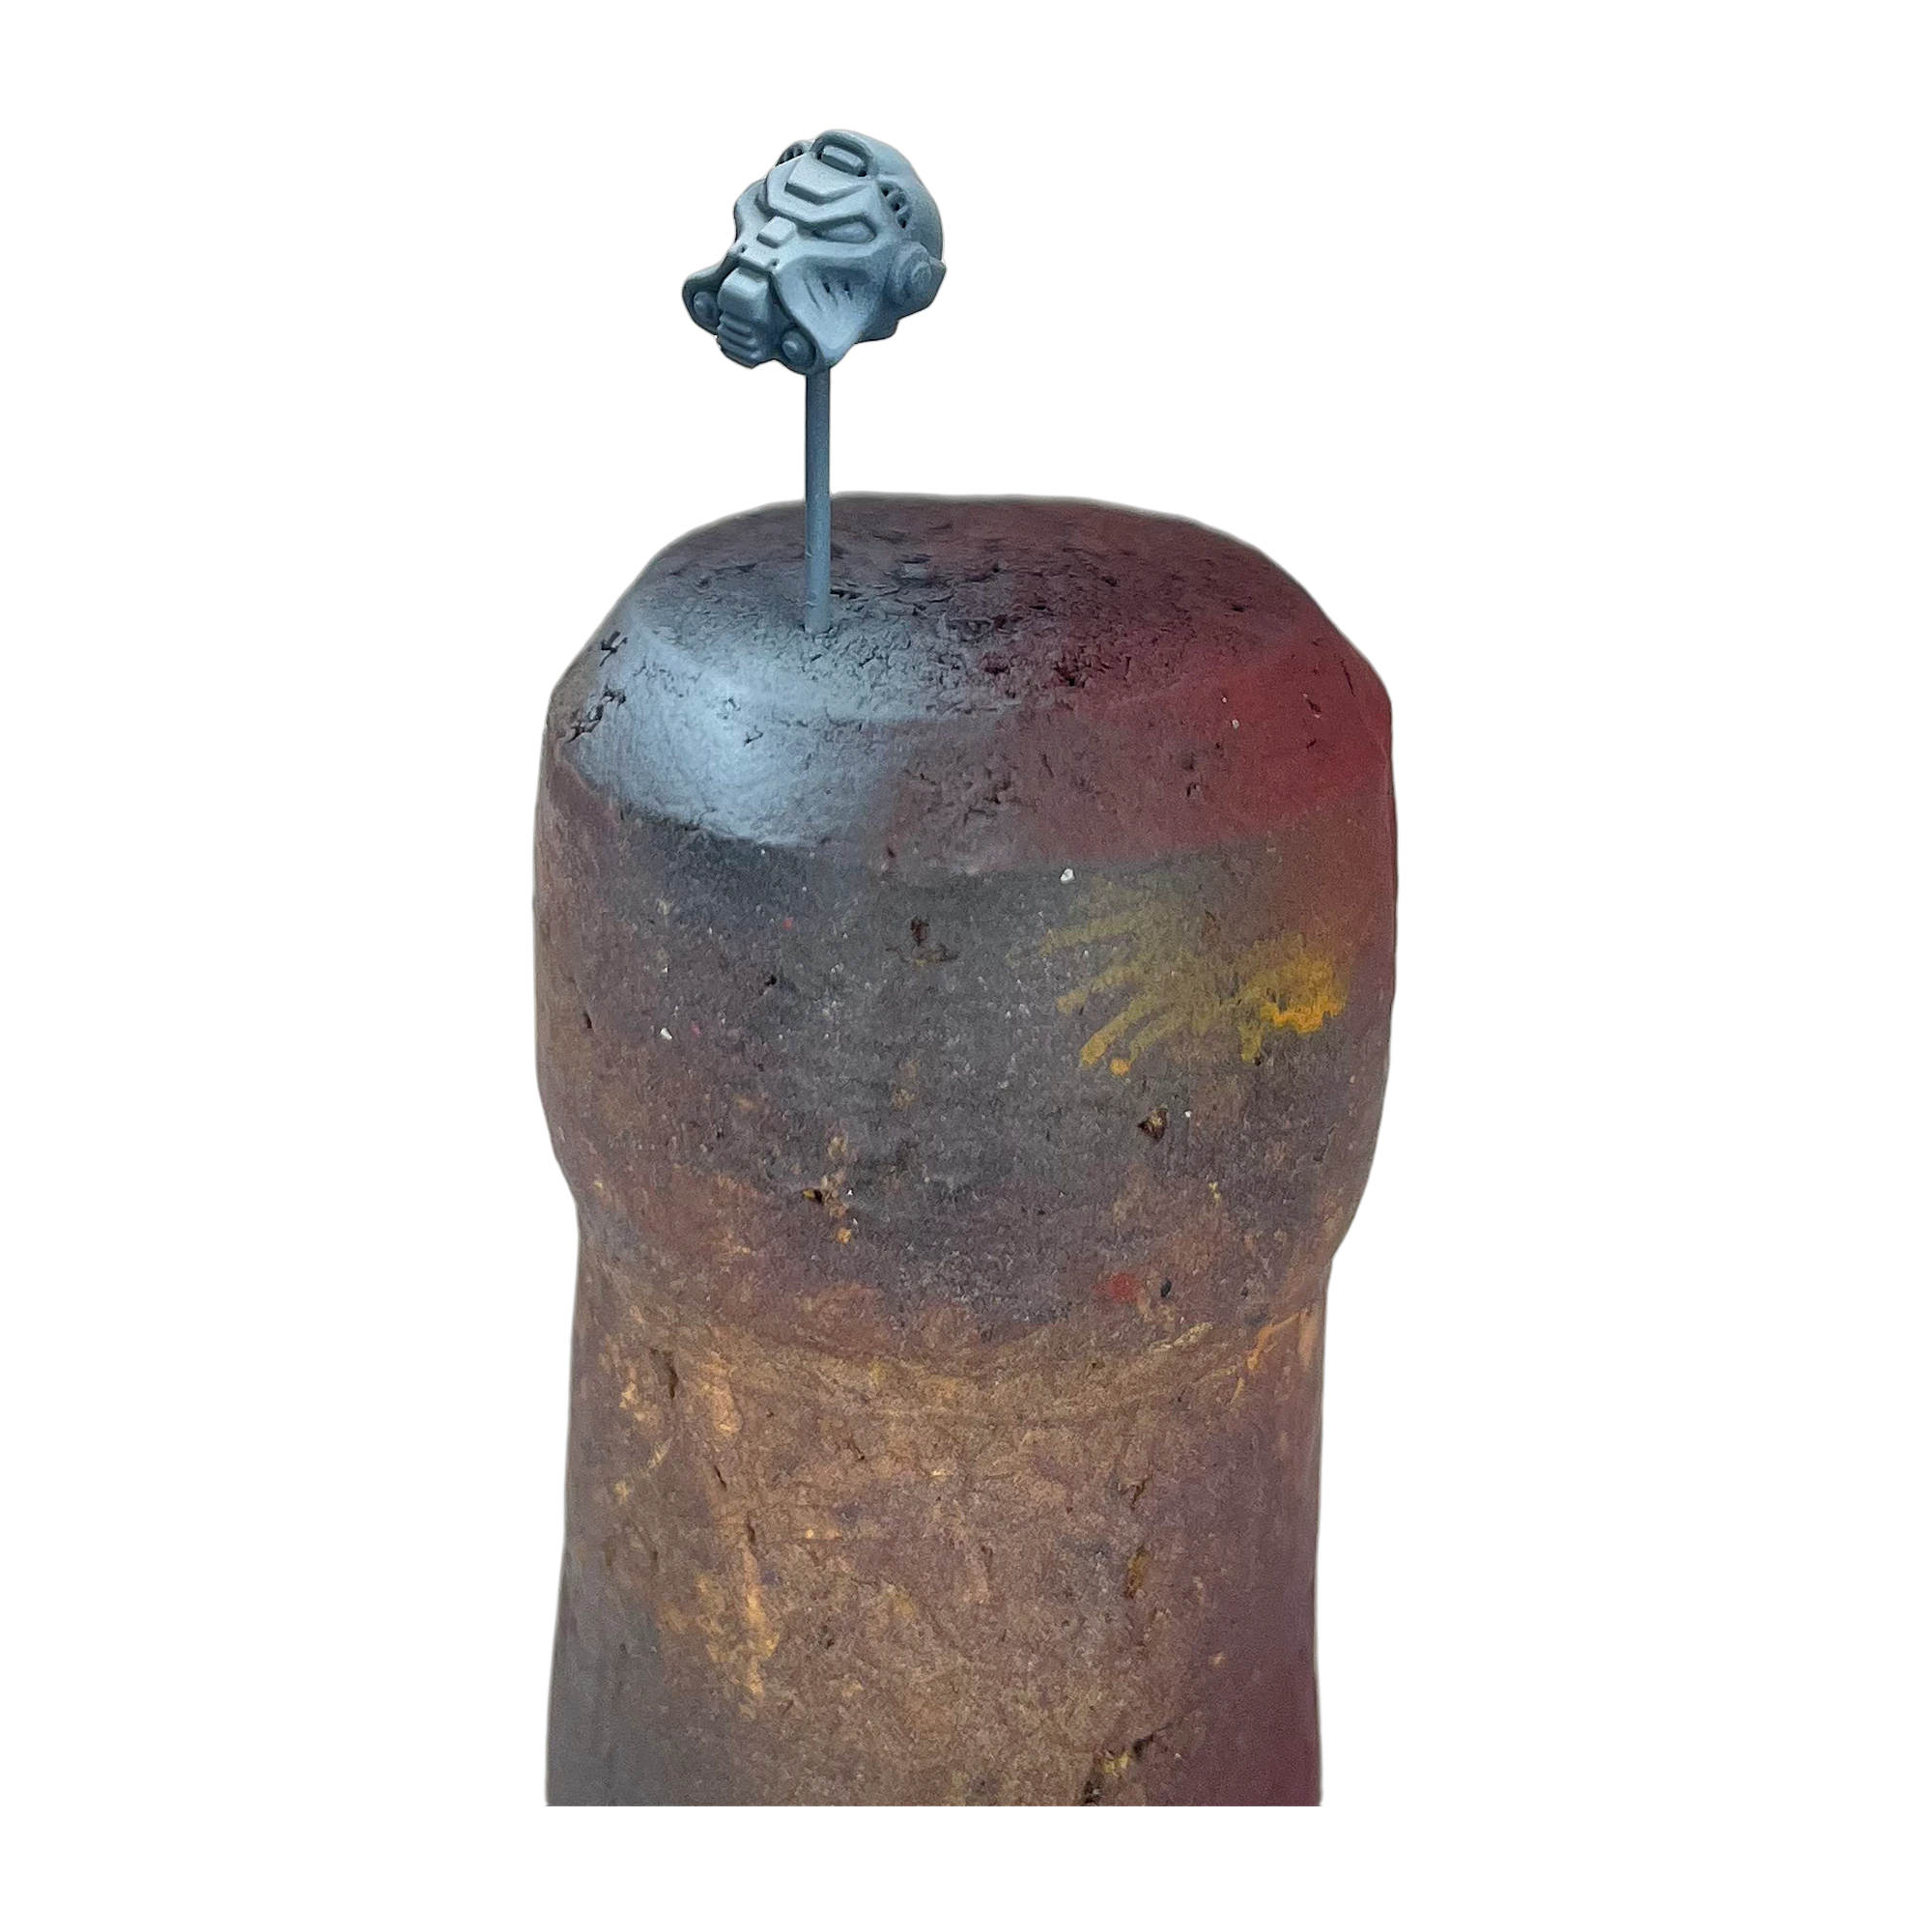
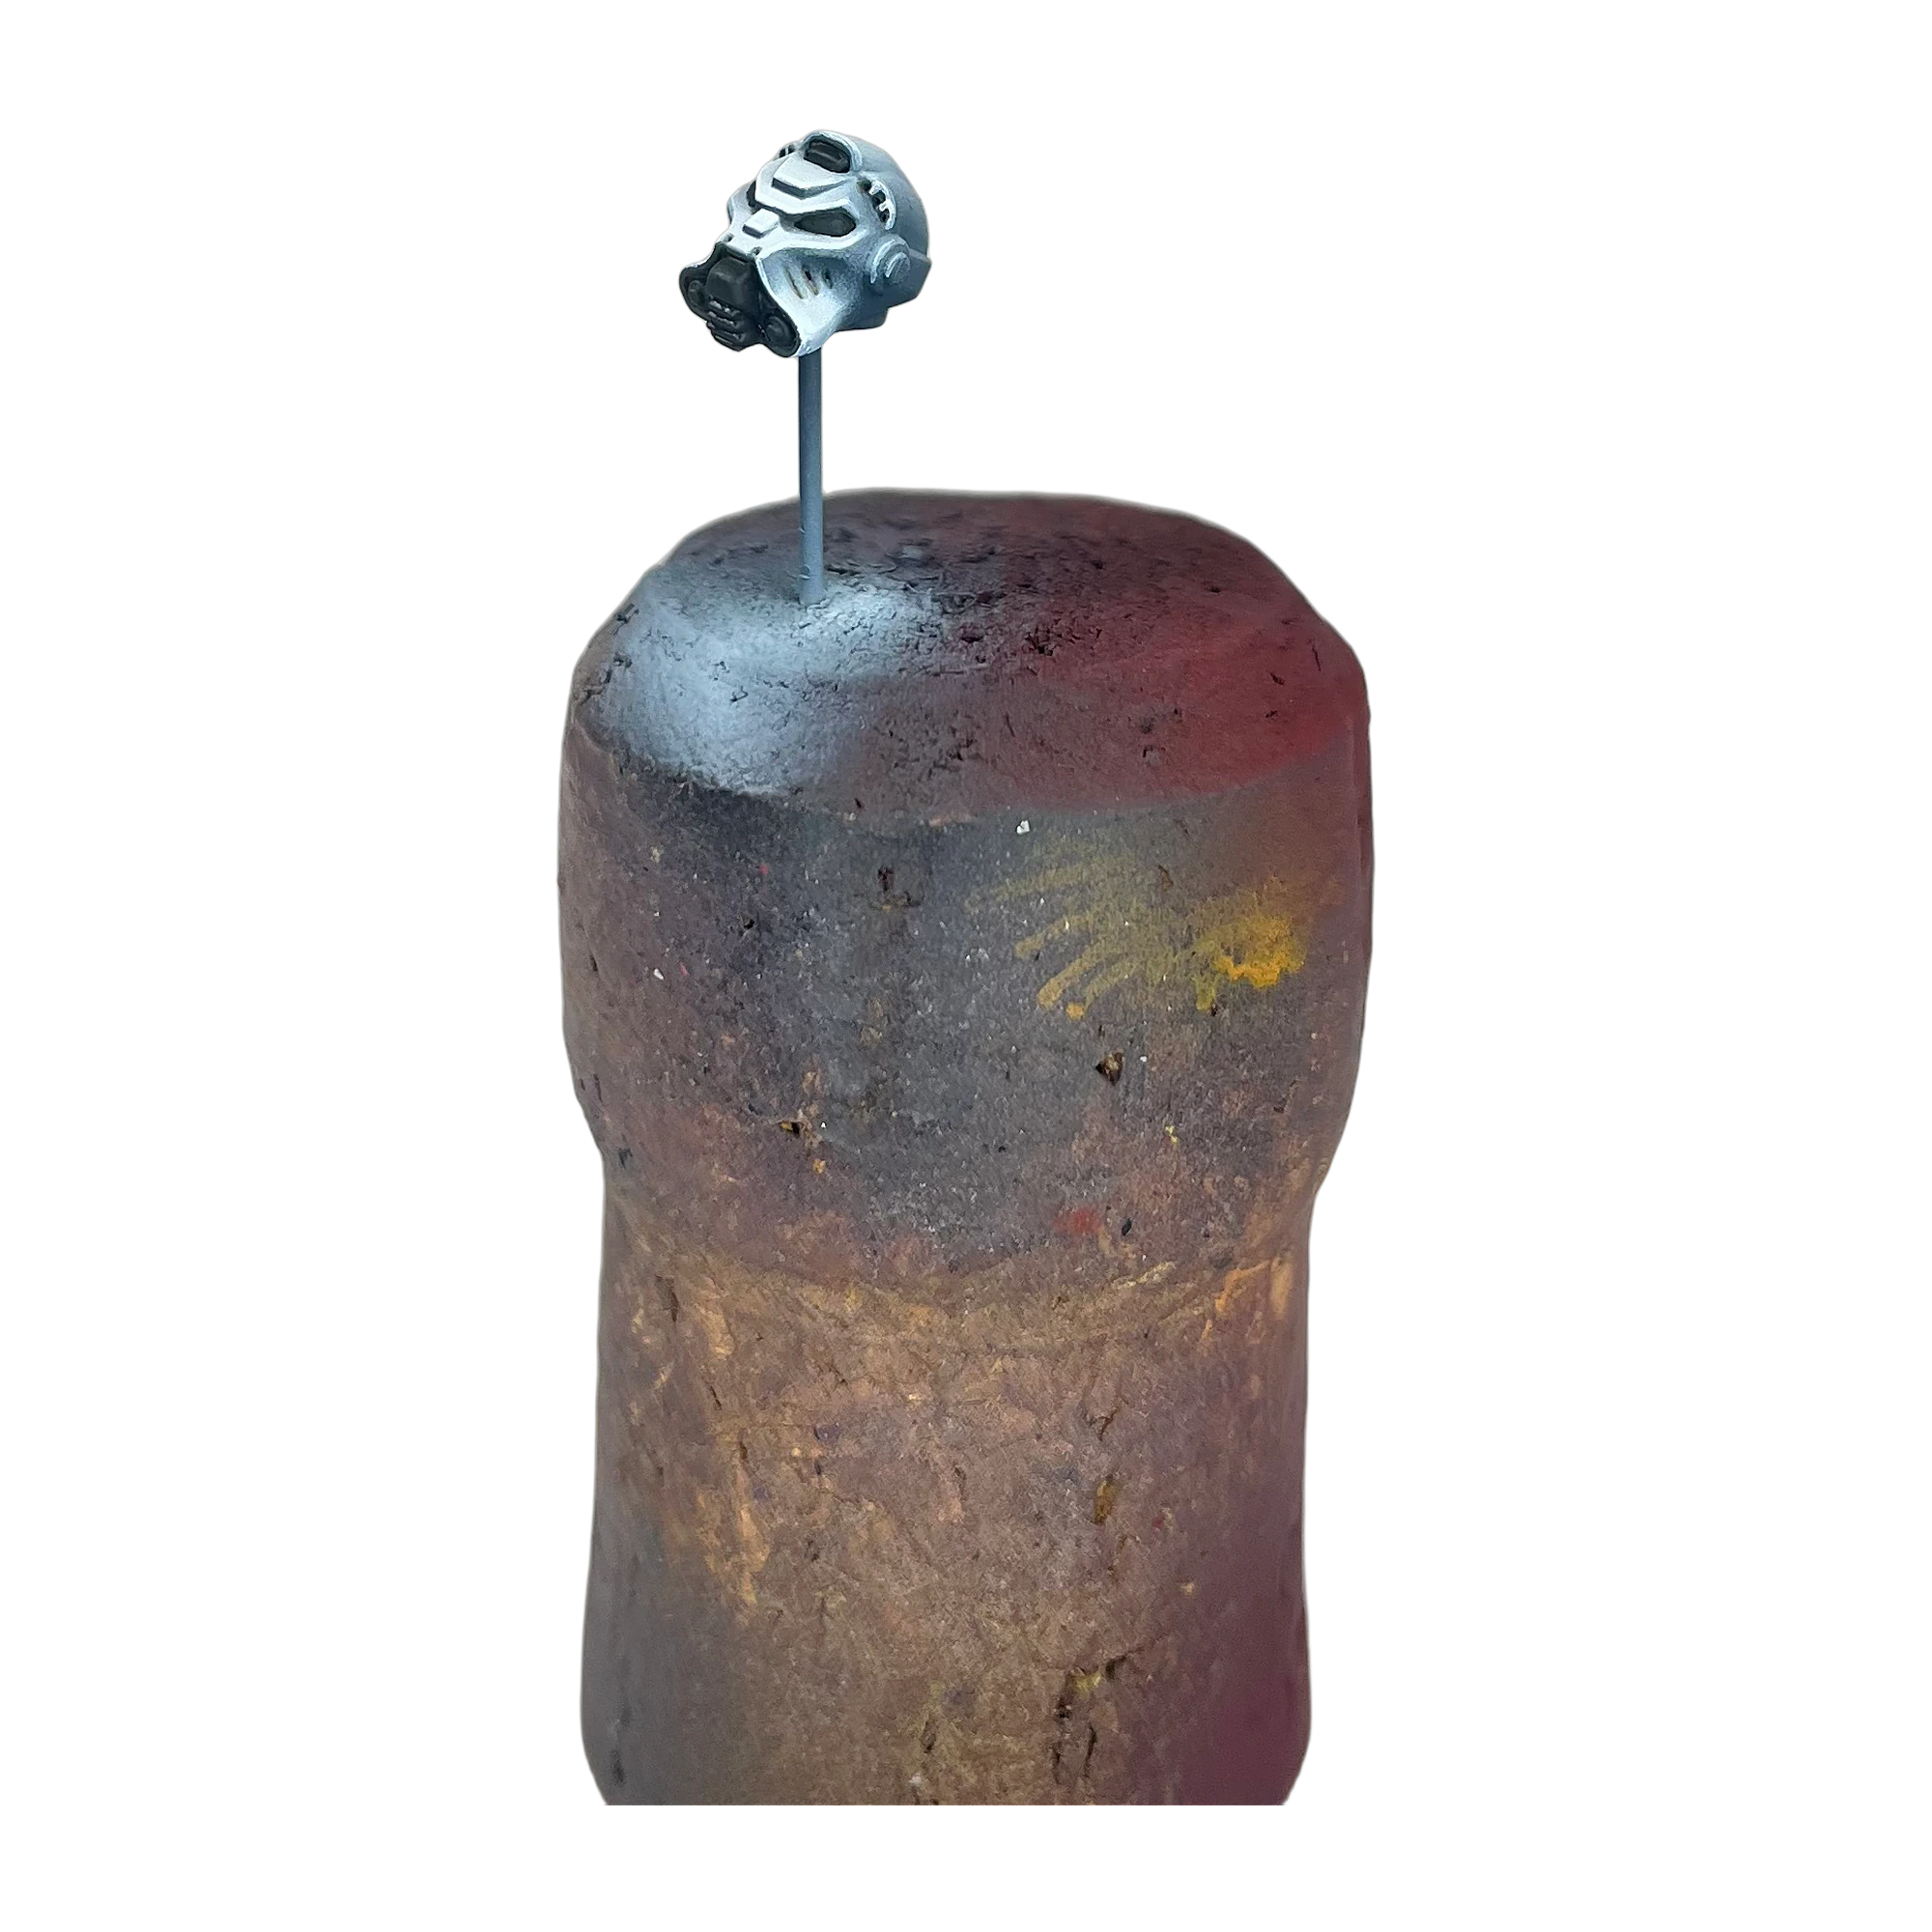
Step 19: The 5-Tier White Value Ramp
Never paint white starting with white. Build the volume from dark grey upward:
- Foundation (Layer 1): Basecoat the entire helmet in Vallejo Dark Grey. (Figure 50)
- First Transition (Layer 2): Layer the faceplate and dome with Vallejo Cold Grey, leaving Dark Grey in the cheek recesses and brow line. (Figure 51)
- Midtone Light (Layer 3): Layer Vallejo Stonewall Grey across the upper 50% of the brow, snout, and crown. (Figure 52)
- Sub-White Glaze (Layer 4): Apply Vallejo Wolf Grey over all forward-facing surfaces. (Figure 53)
- Pure Specular White (Layer 5): Using Vallejo White, run razor-thin edge highlights along the brow rim, cheek flanges, and snout corners. Paint mechanical helmet tubes in Iron Warriors/Nuln Oil. (Figure 54)
Molten Ruby Optic Lenses
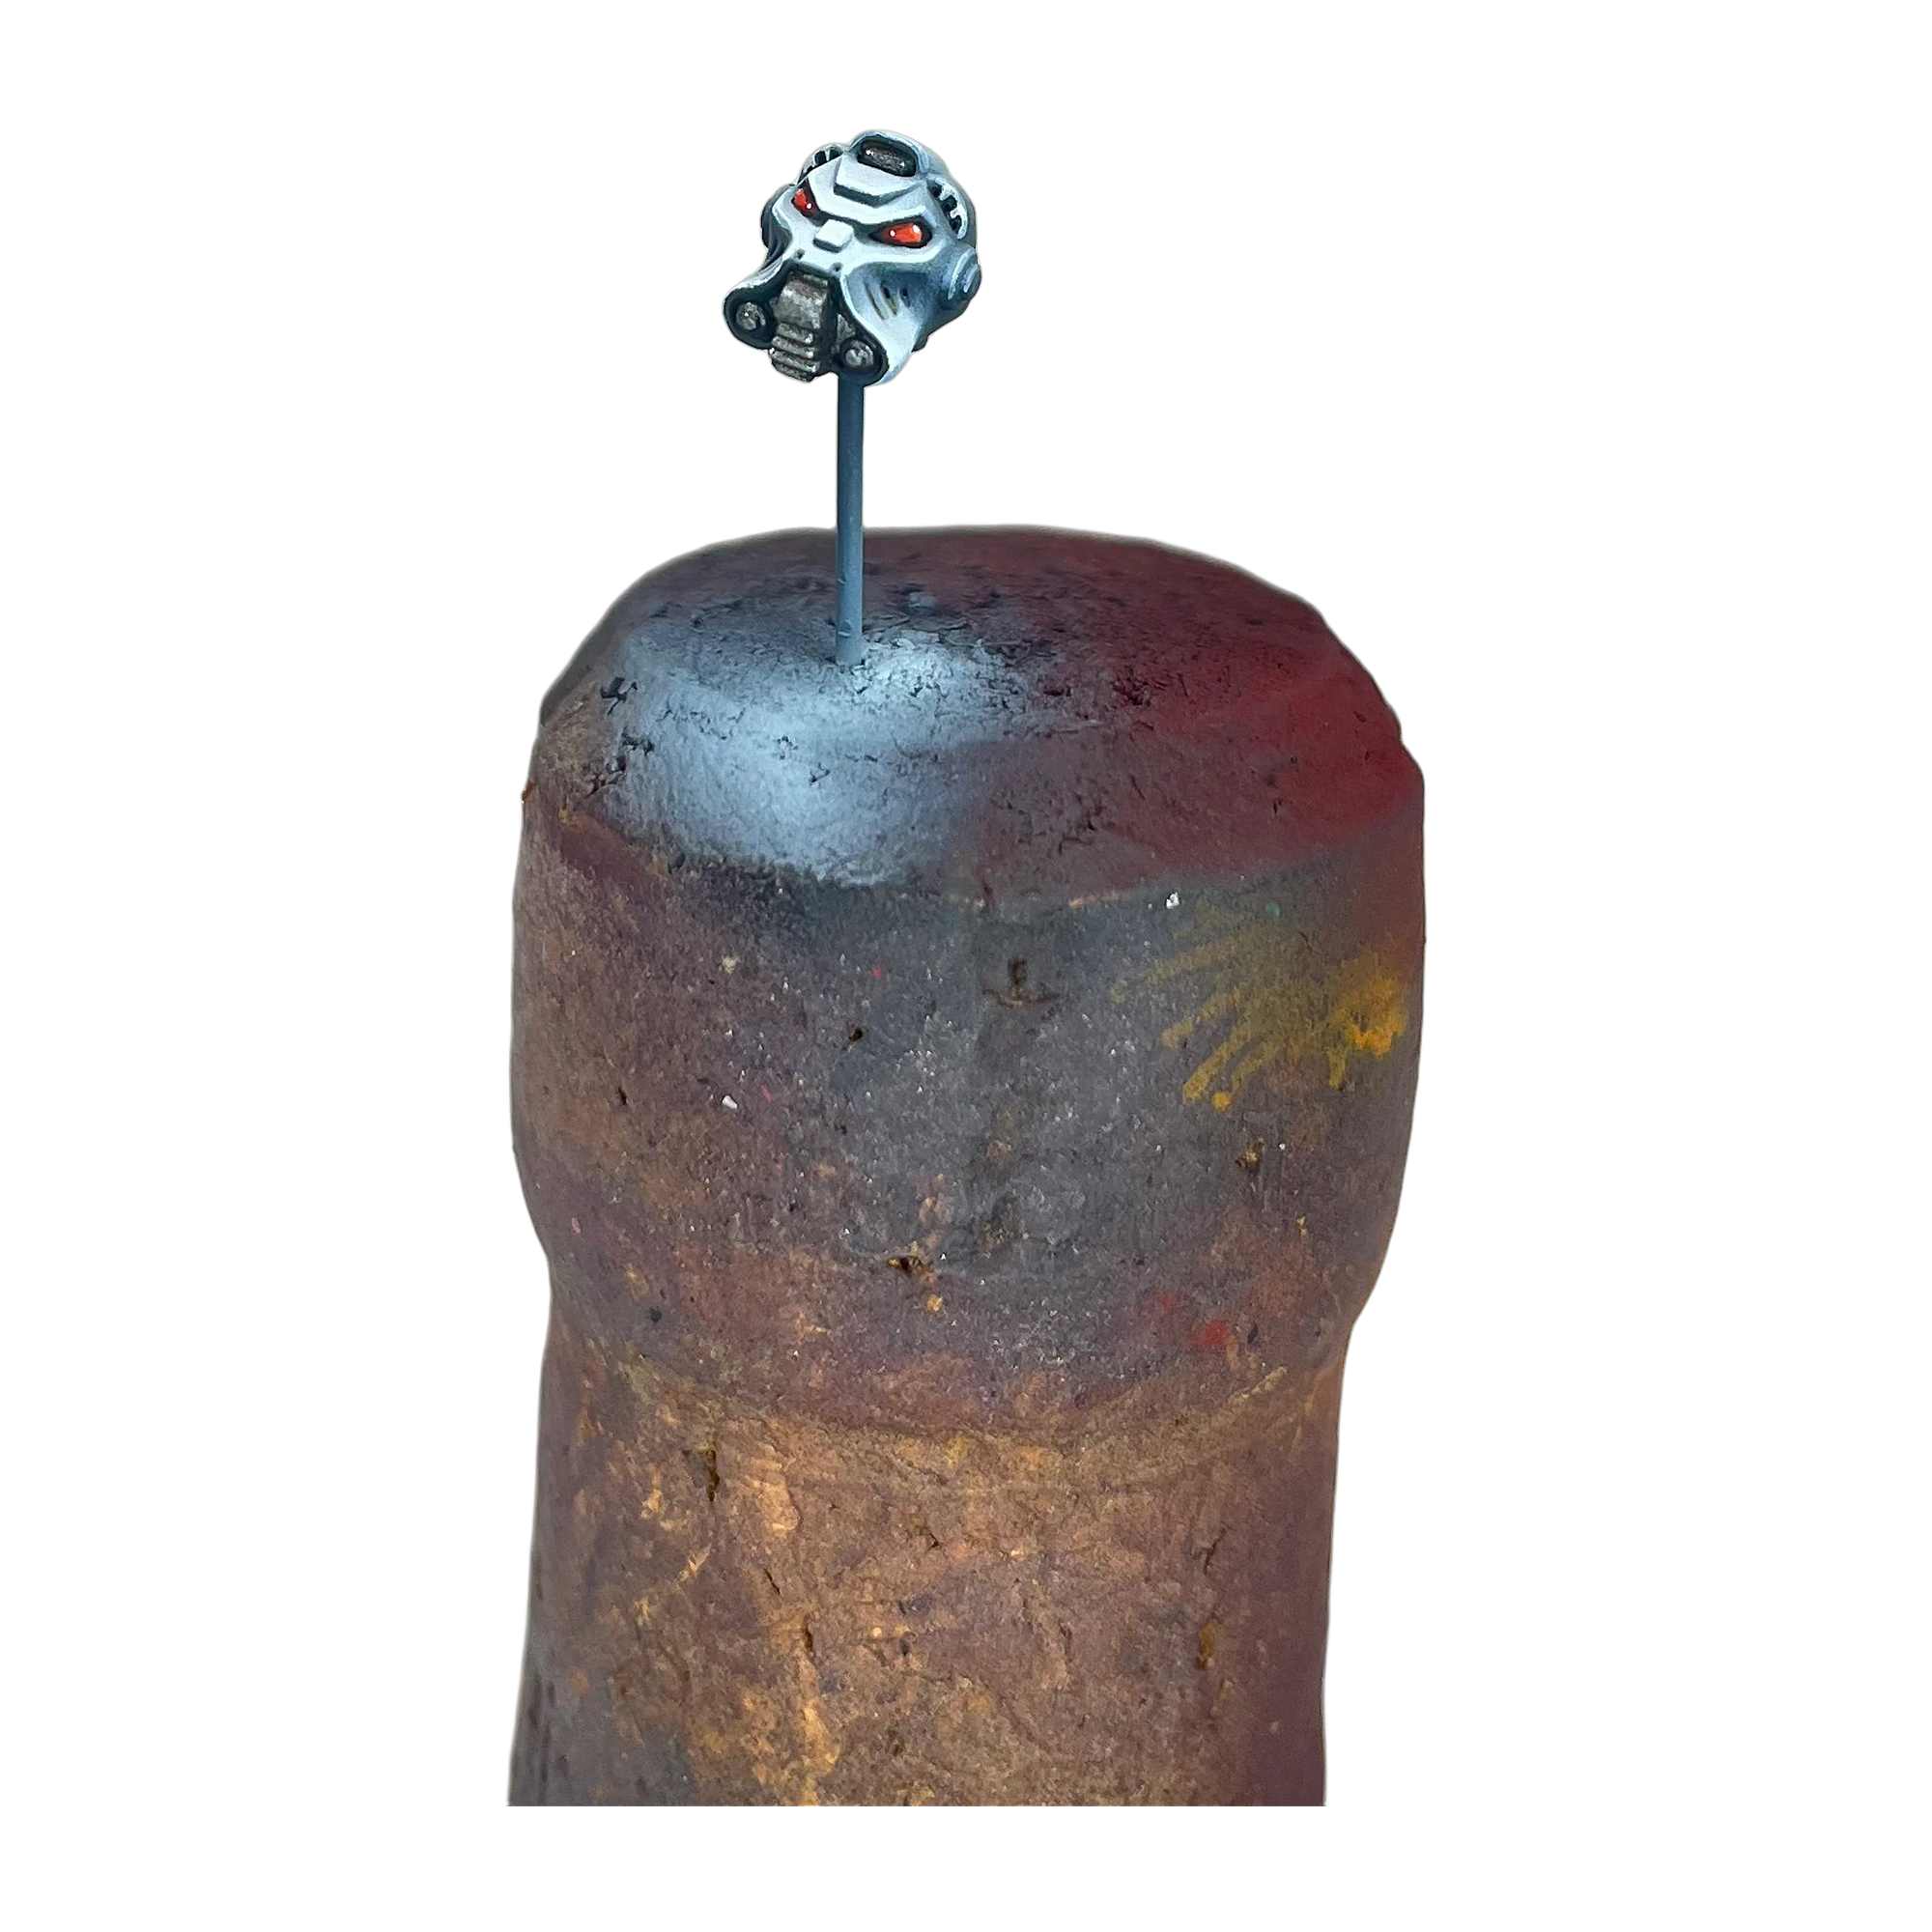
The tactical sensor lenses provide the primary chromatic focal point of the miniature’s head:
- Basecoat the entire lens in Citadel Mephiston Red.
- Paint the lower-front two-thirds in Citadel Evil Sunz Scarlet.
- Paint a crescent line along the bottom front edge in Citadel Jokaero Orange.
- Place a microscopic specular dot of Vallejo White at the extreme upper-rear corner of each lens to simulate light refracting through bulletproof gemstone optics. (Figure 55)
10. Phase 8: Final Assembly & Studio Showcase
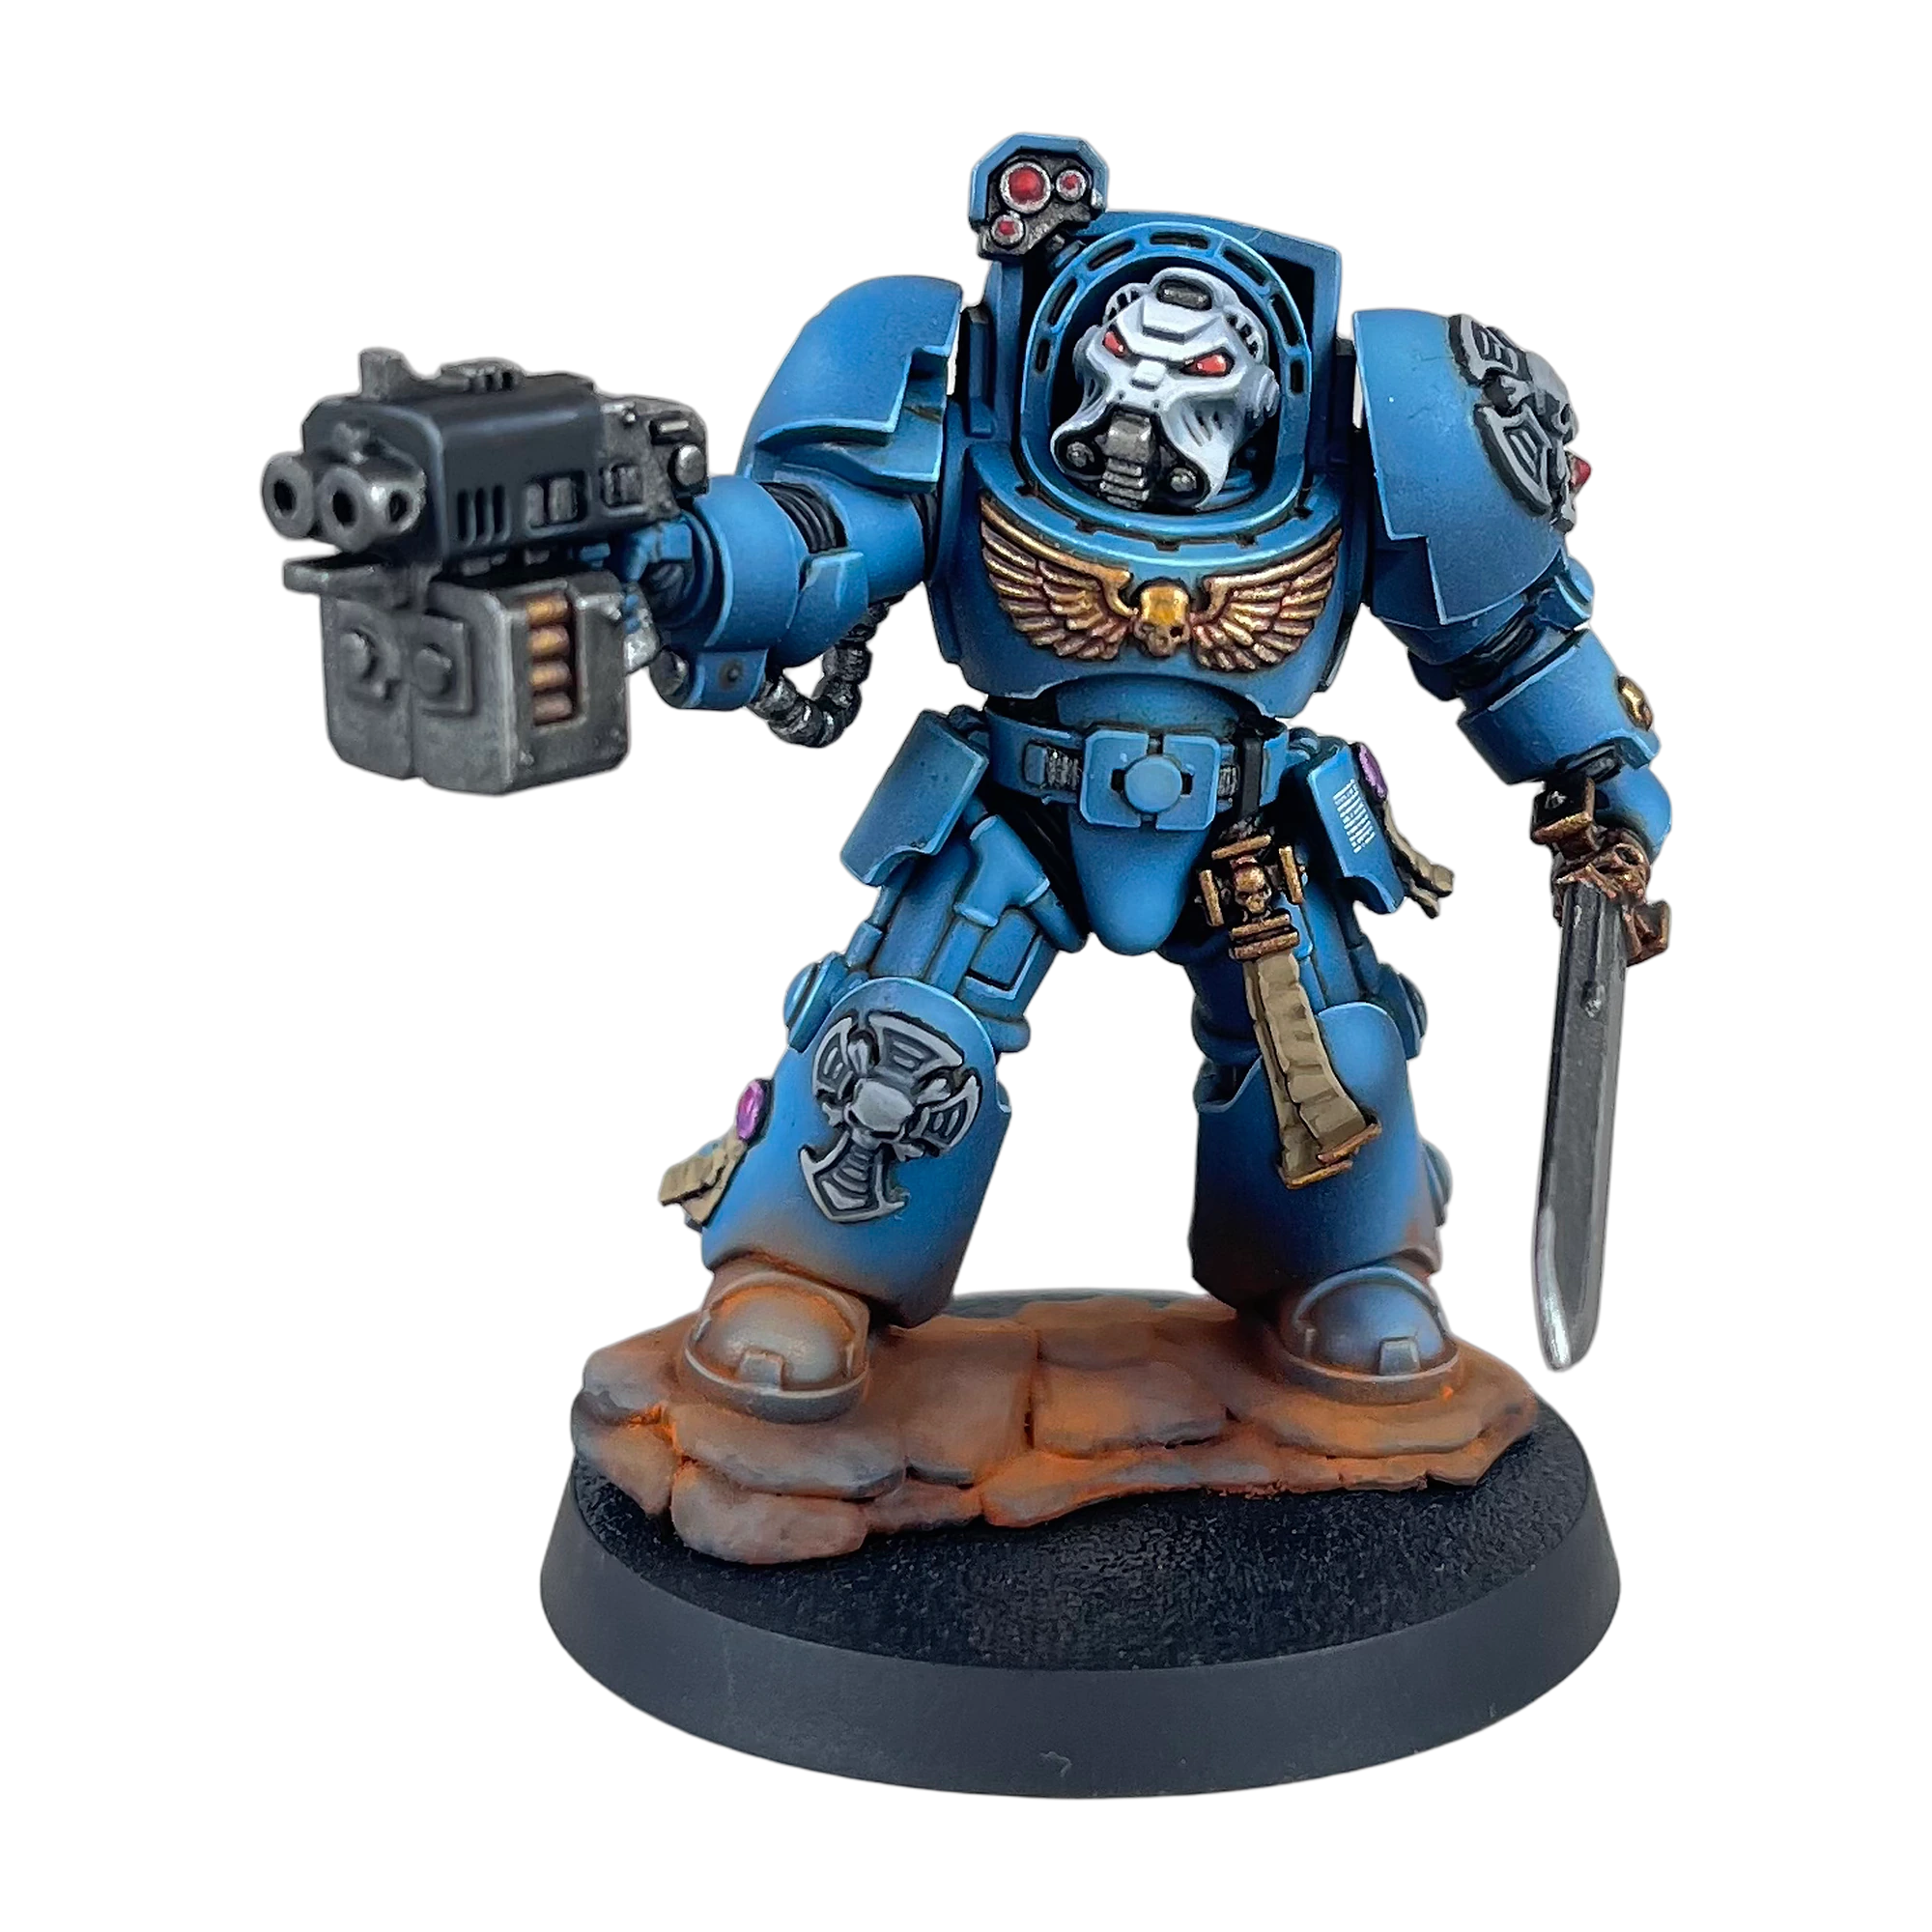
With all sub-assemblies completed and inspected, join the helmet into the armored cowl using a small drop of cyanoacrylate (super glue). Mount the miniature securely onto its gaming base.
Dimensions: 2000×2000 px Master WebP (RGBA)
Fill Ratio: 87% Tabletop Safe Framing
Varnish Seal: Vallejo Satin Varnish (Artisanal Satin Luster)
Base Compatibility: 40mm Round Scenic Base (Grimrod Studio Catalog)
360-Degree Studio Showcase
Mount Your Veterans on Authentic Artisanal Bases
Every hero of the First Company deserves a display-worthy foundation. Hand-cast in durable polyurethane resin and hand-painted in our Polish studio:


11. Recommended Scenic Base Pairing
To complete the presentation of a heavy First Company Terminator, Grimrod Studio recommends mounting the miniature on our hand-painted, resin-cast 40mm Round Scenic Bases:
- [CiSt] Cobblestone City (40mm): Perfect for urban warfare and gothic cathedral plazas.
- [FoRu] Industrial Ruin (40mm): Features cracked rebar, technical diamond-plate steel, and crumbled ferrocrete.
- [TeAn] Ruined Temple (40mm): Carved basalt flags and ancient masonry fitting for the Ultramarines’ Greco-Roman heritage.
Explore the full collection of 23 hand-painted biomes in the Grimrod Studio Armoury.
Legal Disclaimer & Nominative Fair Use
This painting guide is an independent technical tutorial published by Grimrod Studio for hobbyists and miniature collectors. Miniatures, models, and Chapter heraldry depicted are the intellectual property of Games Workshop Limited. Warhammer 40,000, Space Marine, Terminator, Ultramarines, and Citadel are registered trademarks of Games Workshop Limited. All trademarks are referenced strictly under Nominative Fair Use to identify model type and hobby compatibility. Grimrod Studio is an independent studio and is not affiliated with, authorized, or endorsed by Games Workshop Limited.